1. Install VS Code IDE
- Open the vs code software → select extensions on the left menu → search keywords: fx-devtools → click install to install
2. Login tenant & new project command
-
Open the vs code command panel: Ctrl+Shift+P (Windows) or Cmd+Shift+P (macOS), enter the command: Fx: Login devtool, enter the tenant's mobile phone number and password, and click Login, the lower right corner will prompt login success or login error message
-
In the command window, enter: Fx: Create And Sync Project (create and synchronize all custom development content bound to the tenant to the IDE) command, enter the project name and select the project storage directory, VS Code will automatically open the newly created project
-
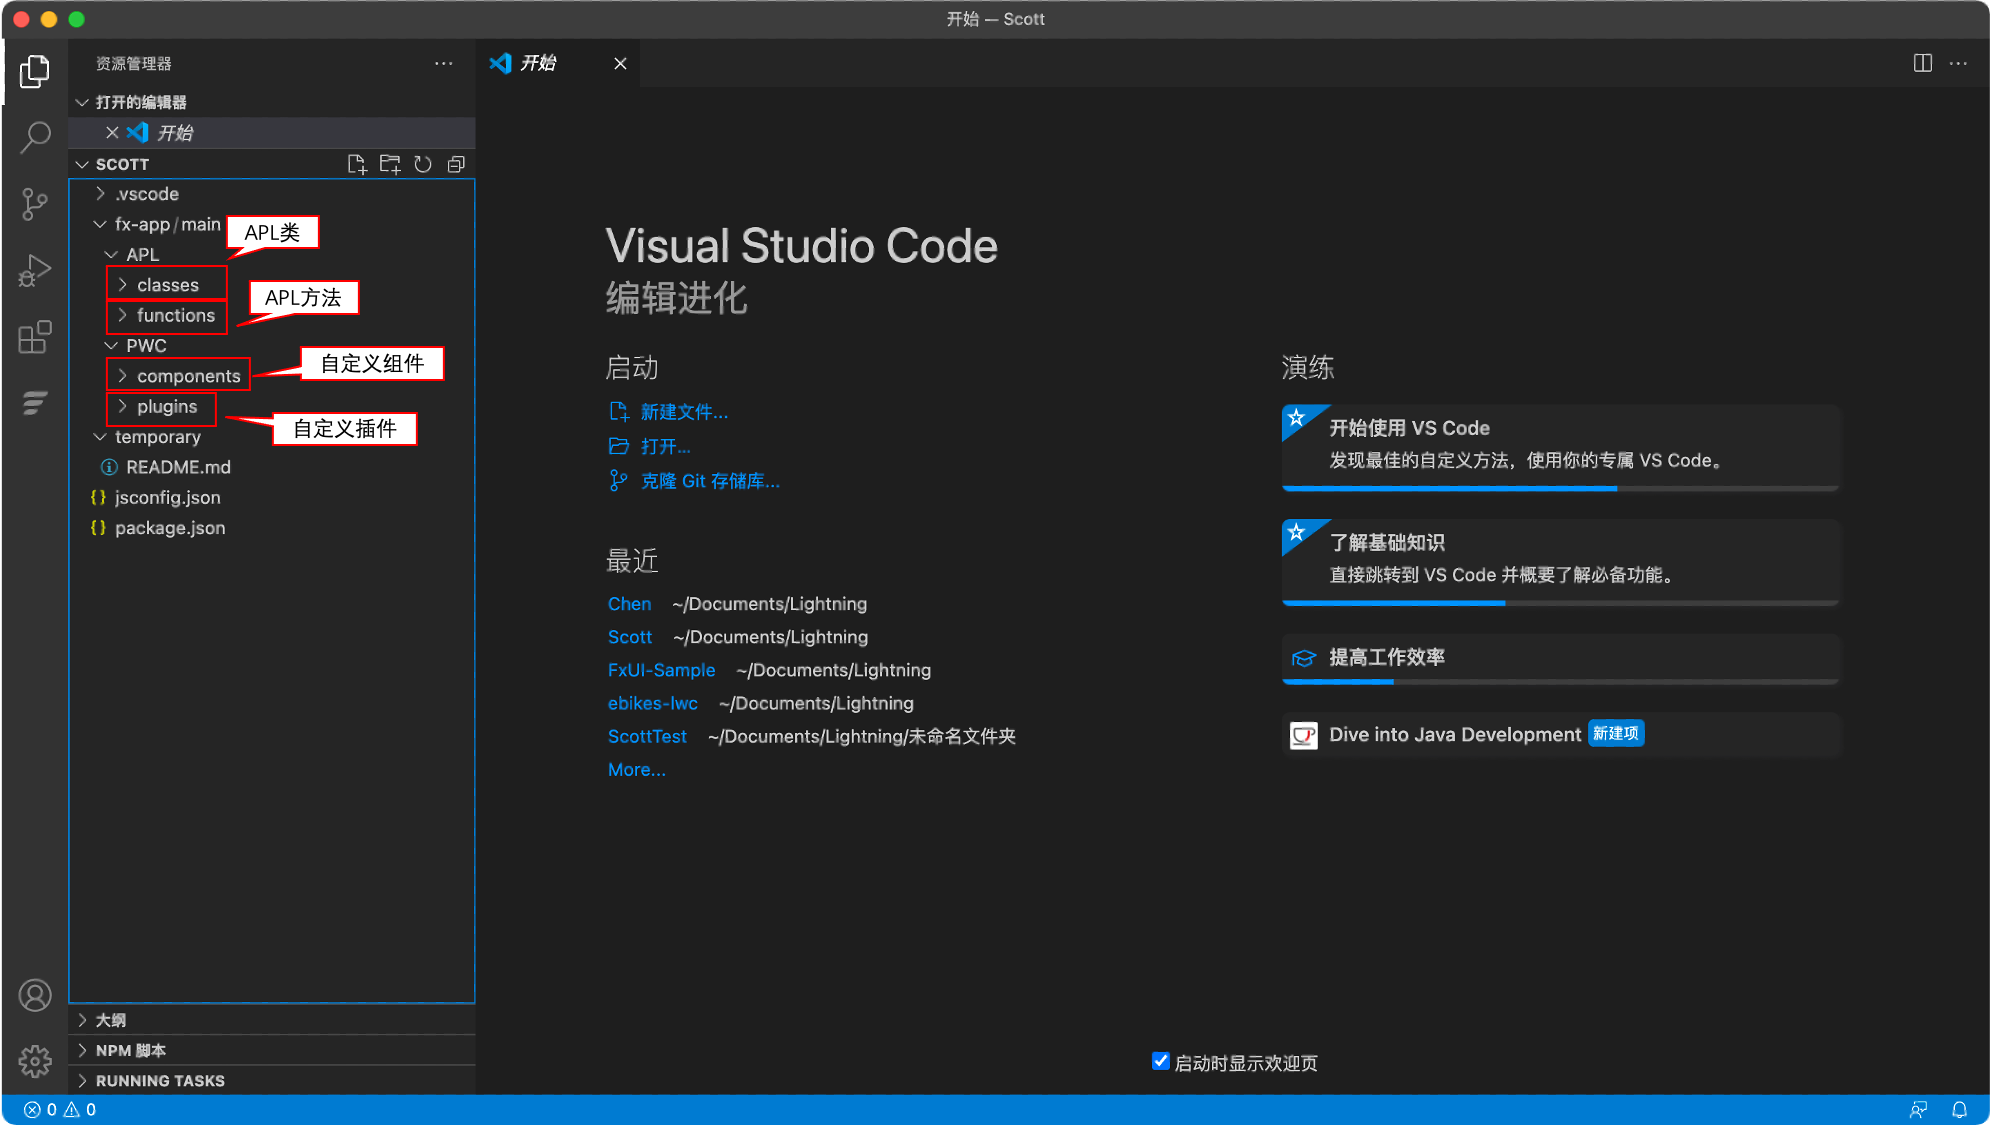
The project directory structure is shown in the figure below:
In the command window, enter: Fx: Create And Sync Project (create and synchronize all custom development content bound to the tenant to the IDE) command, enter the project name and select the project storage directory, VScode will automatically open the newly created project
The project directory structure is shown in the following figure:
3. Code-related operations
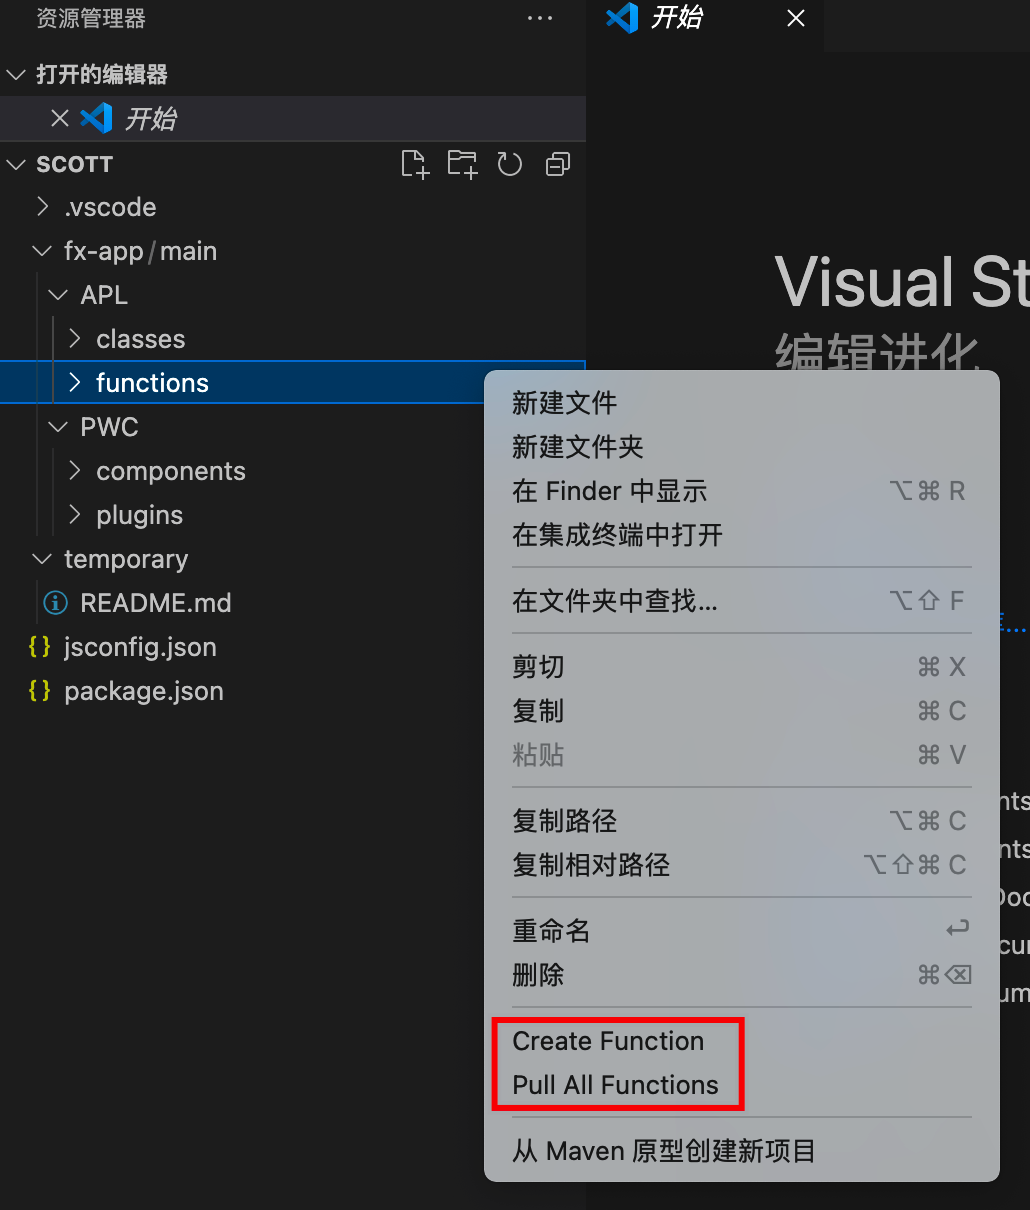
** Right-click the root directory of the APL class, APL method, custom component, and custom plug-in, and you can choose to execute the command corresponding to the directory:**
- Create Class: Create an APL class in the IDE
- Pull All Classes: Synchronize all APL classes in the online environment to the IDE
- Create Function: Create an APL method in the IDE
- Pull All Functions: Synchronize the content of all APL methods in the online environment to the IDE
- Create Component: Create custom components in the IDE
- Pull All Components: Synchronize all custom components in the online environment to the IDE
- Create Plugin: Create custom plugins in the IDE
- Pull All Plugins: Synchronize the content of all custom plug-ins in the online environment to the IDE
Note that all types of code created in the IDE must be created by command
Right-click the mouse on a single APL class, APL method file, single custom component, and custom plug-in directory, and you can choose to execute the command corresponding to the file:
- Pull Class: Synchronize the latest online version of the current APL class to the IDE
- Push Class: Synchronize the content of the current APL class from the IDE to the online environment
- Pull Function: Synchronize the latest online version of the current APL method to the IDE
- Push Function: Synchronize the current APL method from the IDE to the online environment
- Show Details: View details of APL classes or APL methods
- Pull Component: Synchronize the latest online version of the current custom component to the IDE
- Push Component: Synchronize the current custom component from the IDE to the online environment
- Pull Plugin: Synchronize the latest online version of the current custom plugin to the IDE
- Push Plugin: Synchronize the current custom plugin from the IDE to the online environment
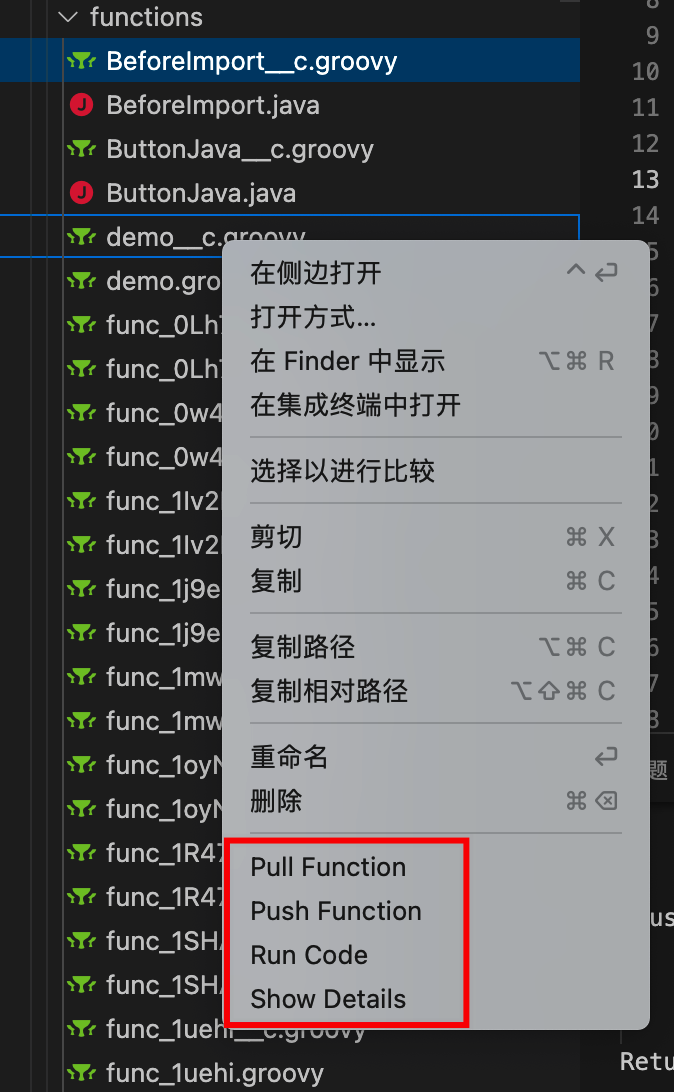
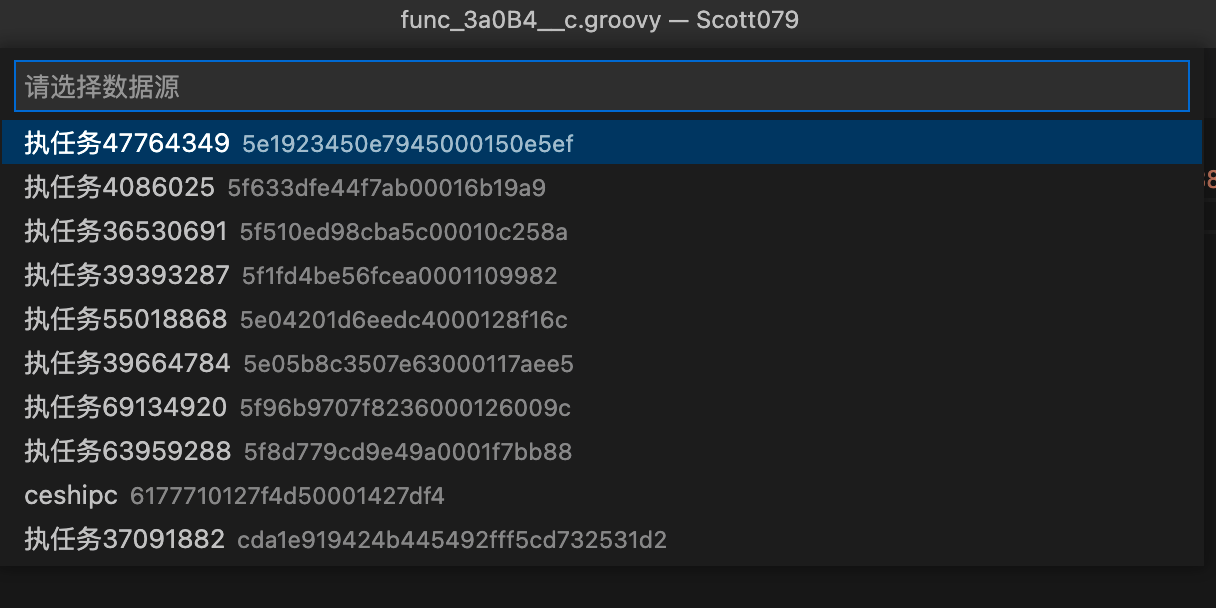
- Run Code: You can select the online data test generation in the IDE, and the running results will be displayed in the output window of VS code (this command will not deploy the APL code to the online environment)