
1. Access Web Plug-in
ShareCRM online customer service will automatically generate a piece of code when adding a webpage plug-in, and the enterprise can embed the code in front of its own webpage label, and then open the entrance for customer consultation on the website. At the same time, it also supports you to perform some personalized configurations on the web consultation portal and chat box, such as the icon of the workbench, button name, button style and window theme color. After adjusting the personalized configuration information, you can view the page effect in real time in the preview window on the right.
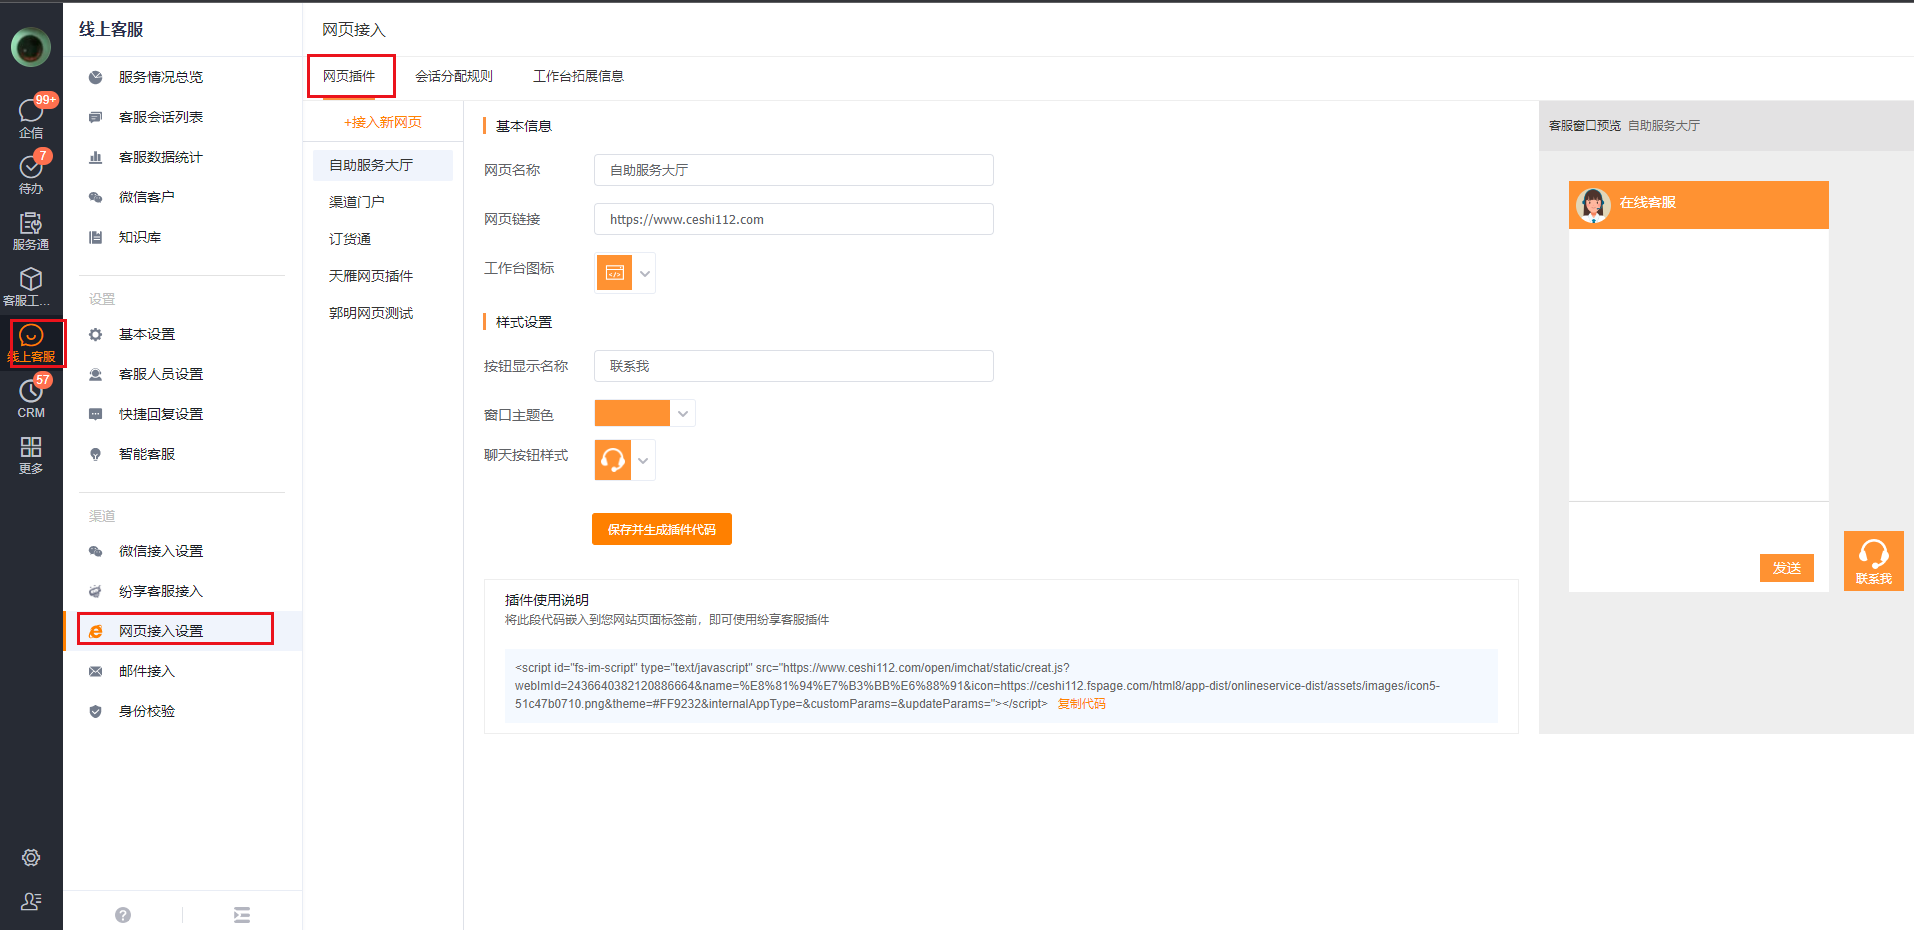
The key capabilities of the web channel are as follows:
- Customize the plug-in style, adapt to the style of the account's web page, and support real-time preview.
- Automatically generate plug-in code, copy and paste to embed in specified webpage.
- The customer service plug-in embedded in the web page supports regular functions such as text, emoticons, pictures, and attachments.
- Each enterprise supports simultaneous access to multiple web pages.
- The customer service plug-in is compatible with both web and mobile terminals.
- Compatible with two modes of unidentified tourists and accounts with identity, example of scenes:
- Unidentified tourists: Initiate online consultation when the web page visitor is not logged in; such as the official website;
- Accounts with identity: After the website visitor logs in, initiate an online consultation, and the login account has been mapped to the interface data of the Funshare system; for example, in an online mall, the logged-in user corresponds to the account data in the ShareCRM system.
The effect of web plug-in access is as follows
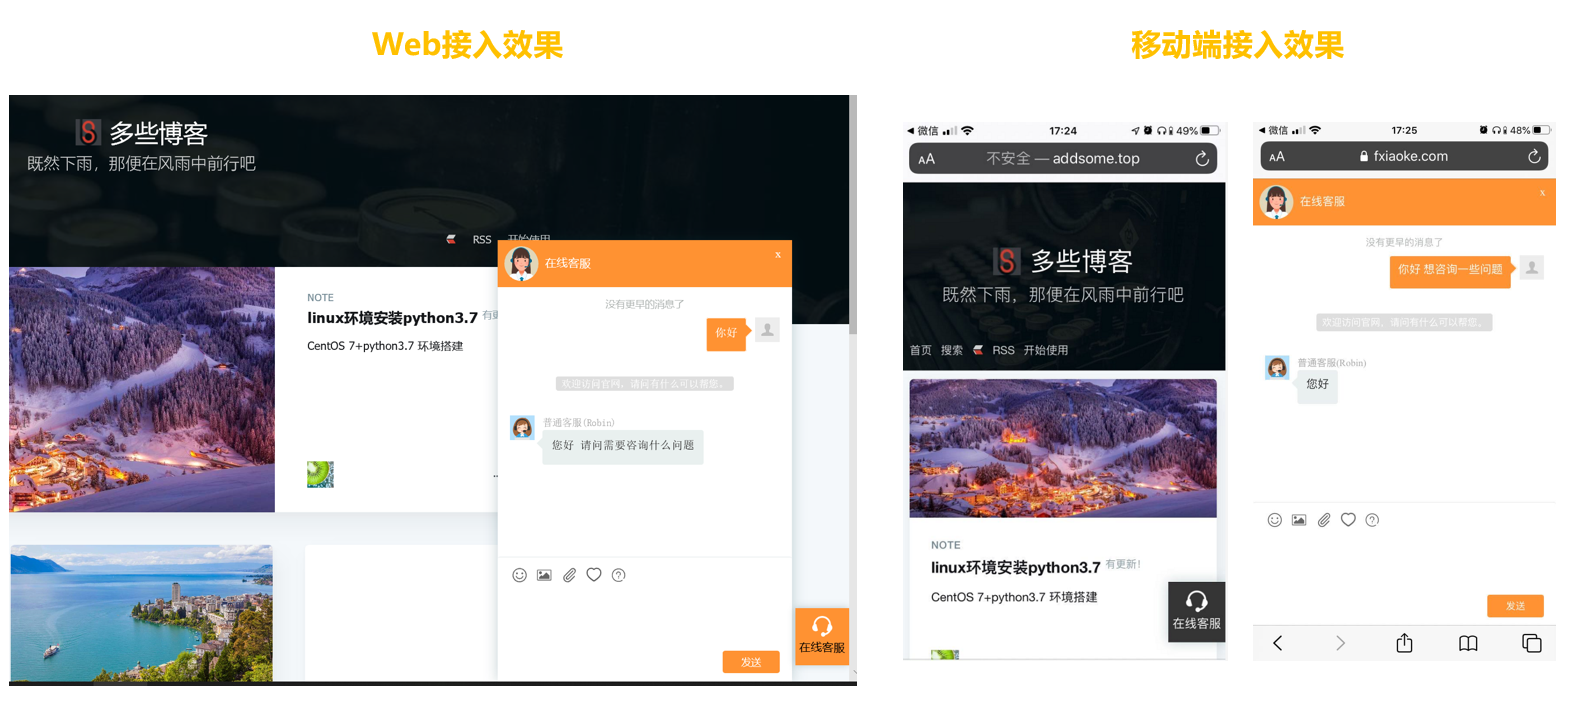
Web Plug-in Access Effect
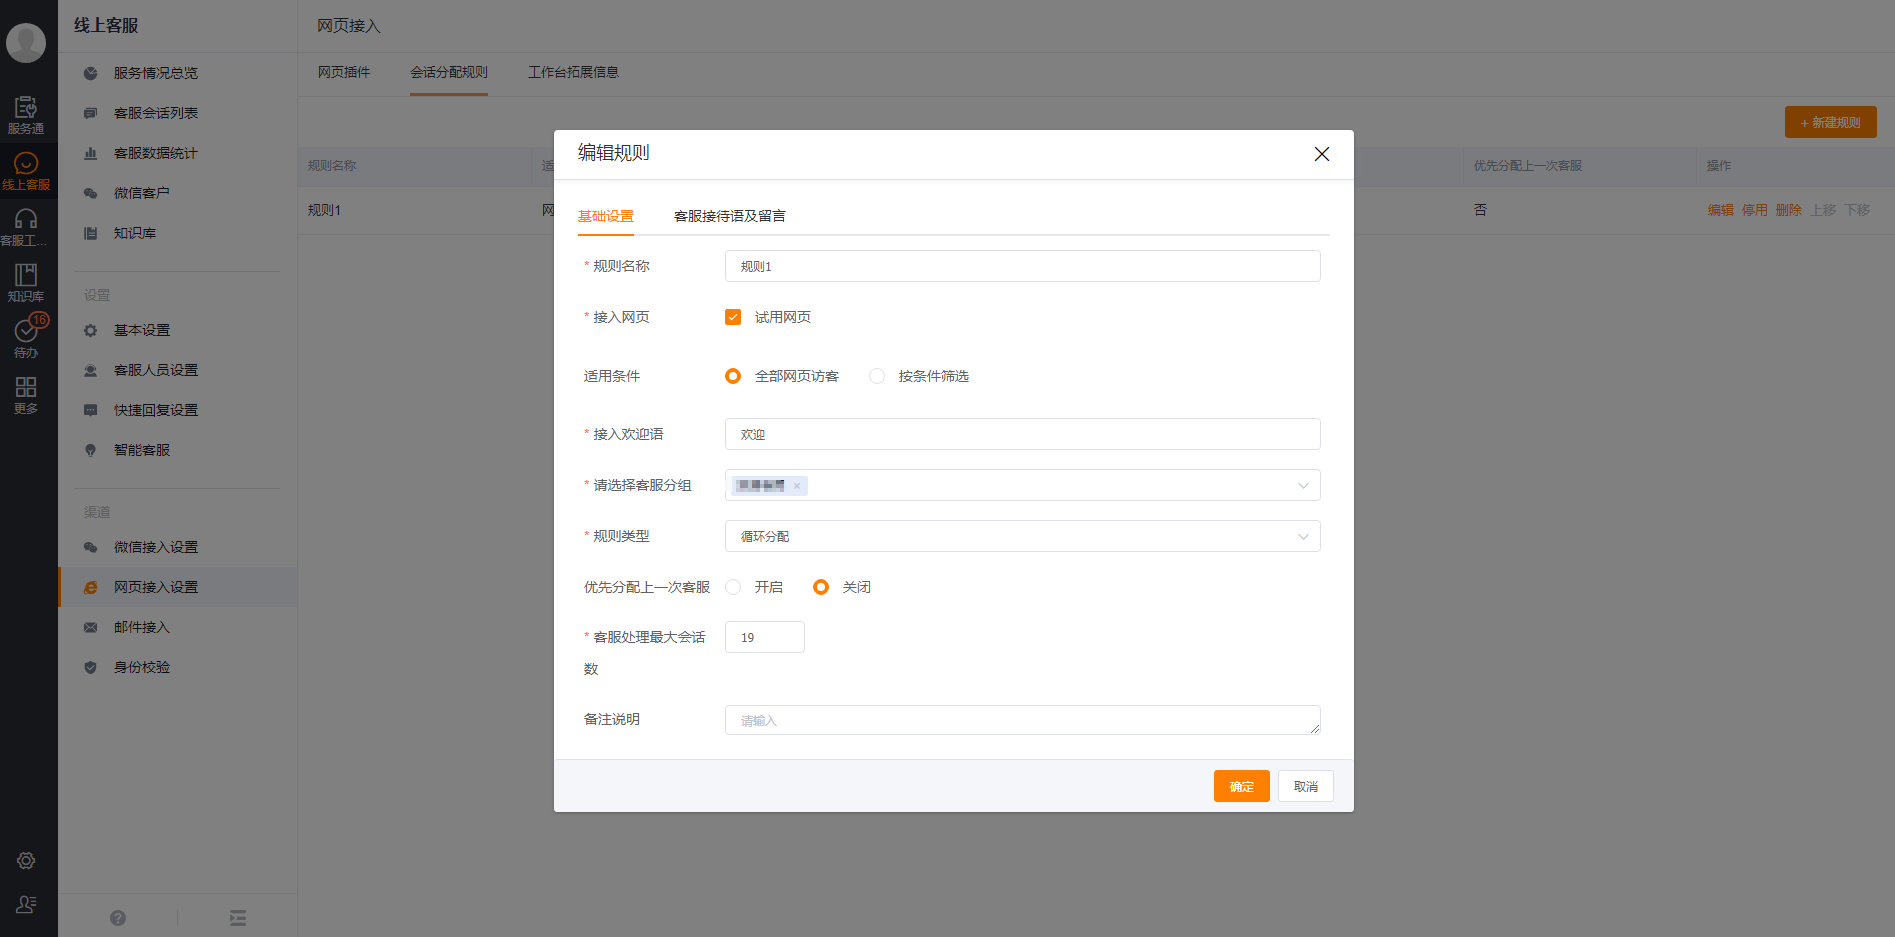
2. Web Chat Distribution Rules
In the previous step, the channel entry of the session has been configured. Next, the session allocation rules need to be configured. Customer sessions will be transferred between customer service groups and personnel according to the set allocation rules. The configuration path is: Online Customer Service -> Web Access Settings -> Chat Distribution Rules. The main setting items of chat distribution rules are as follows:
- Customize the name of the session assignment rule.
- When there are multiple webpage access channels, you can check the webpage channel to which this rule applies, and this rule will only take effect in the selected channel.
- Custom settings to access the welcome message, when the session is connected, it will actively send the welcome message to the account.
- Applicable Condition Settings: You can configure the corresponding customer service grouping conditions for web page visitor sessions to enter.
- All Webpage Visitors: All webpage visitor sessions can enter the selected customer service group.
- Filter by Condition: Only the web page visitor sessions that meet the filter can enter the selected customer service group.
- For sessions that do not match the chat distribution rules, the system will automatically send a notification to the customer service administrator; the administrator can manually assign the chat to a customer service staff.
- Support multiple session allocation rule types in the group:
- load distribution, priority is assigned to the customer service personnel with the least number of real-time sessions;
- Circular allocation, among all the customer service personnel included in the selected customer service group, they are allocated in turn in sequence;
- Idle rate allocation, preferentially allocated to the customer service personnel with the least number of sessions accessed that day;
- Assigned by the person in charge of the customer, the message sent by the user can be pushed to the person in charge of the corresponding customer;,
- Assigned by the person in charge of the contact, the message sent by the user can be pushed to the person in charge of the corresponding contact.
Note: When assigning by contact person/customer person in charge, the person in charge needs to be maintained in the customer service group in advance; it is recommended to add by department, and the system will automatically add/remove corresponding personnel according to changes in department members. the
Chat Distribution Rules
When the customer service cannot handle the conversation in real time, it is necessary to remind and comfort the customer. For situations where the customer service is all busy, none of the customer service is online, and none of the customer service is in service time, the enterprise can customize whether to send a prompt, and if it sends a prompt, it can set the content of the prompt.
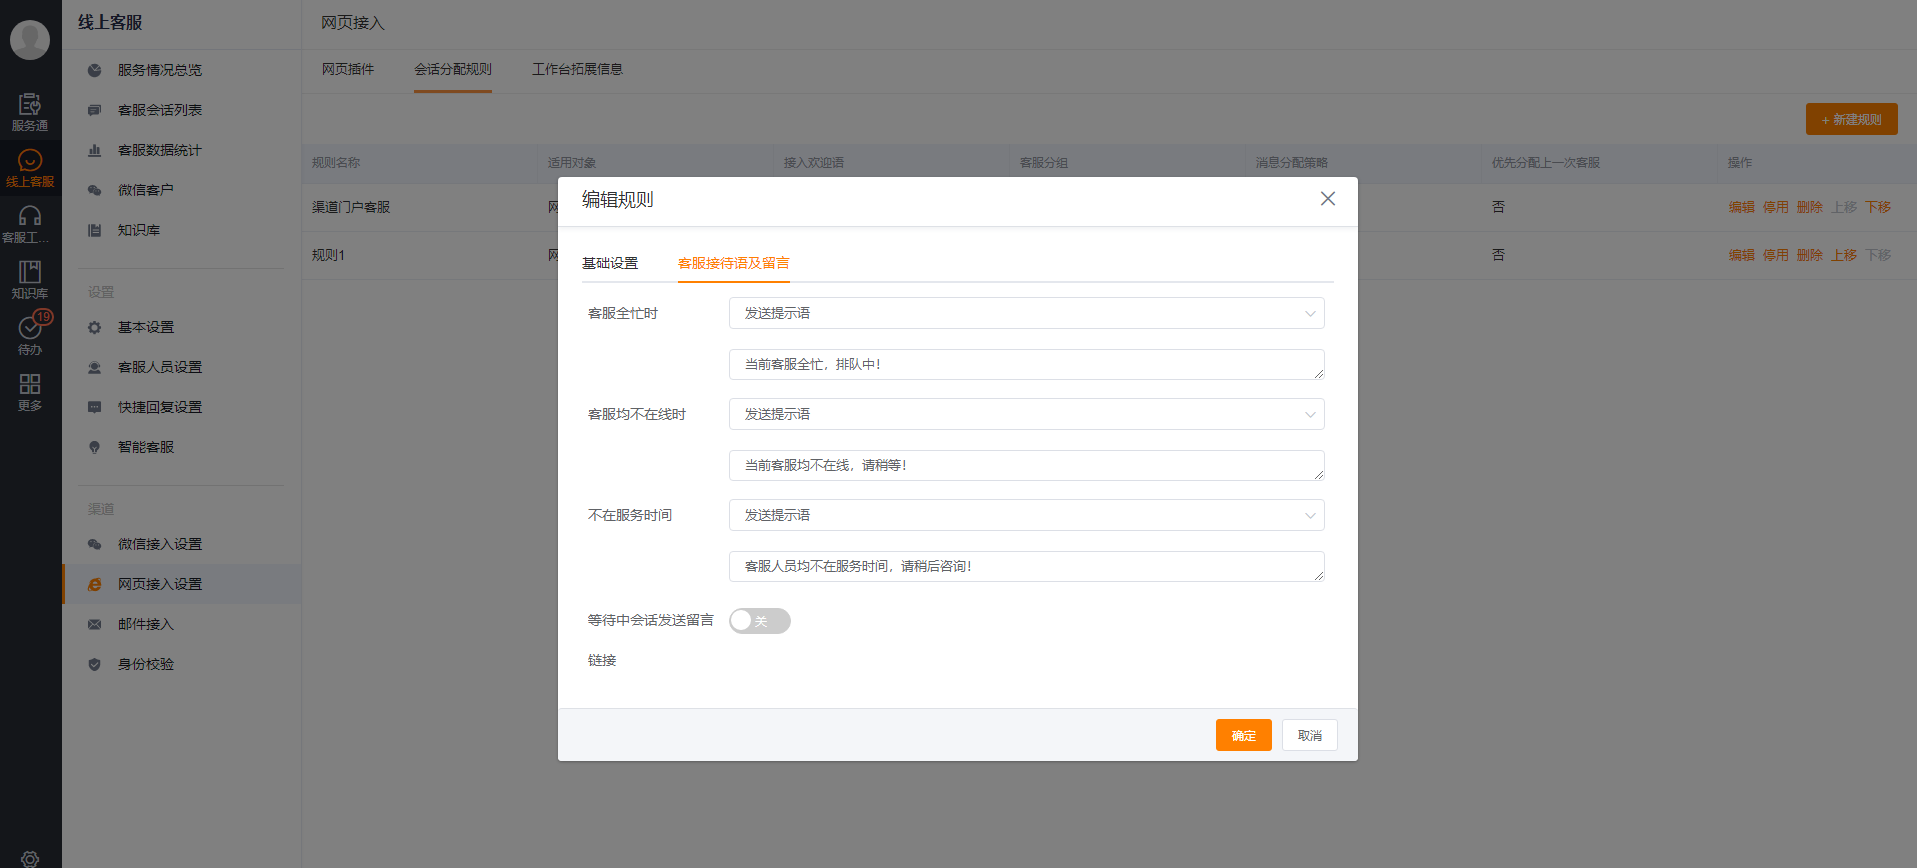
Busy Prompt
When the customer service staff is busy, the message function can be turned on, allowing users to leave a message first, and then process the message when the customer service staff is free. Enterprises can customize the template of the message and collect the message information they want to collect.
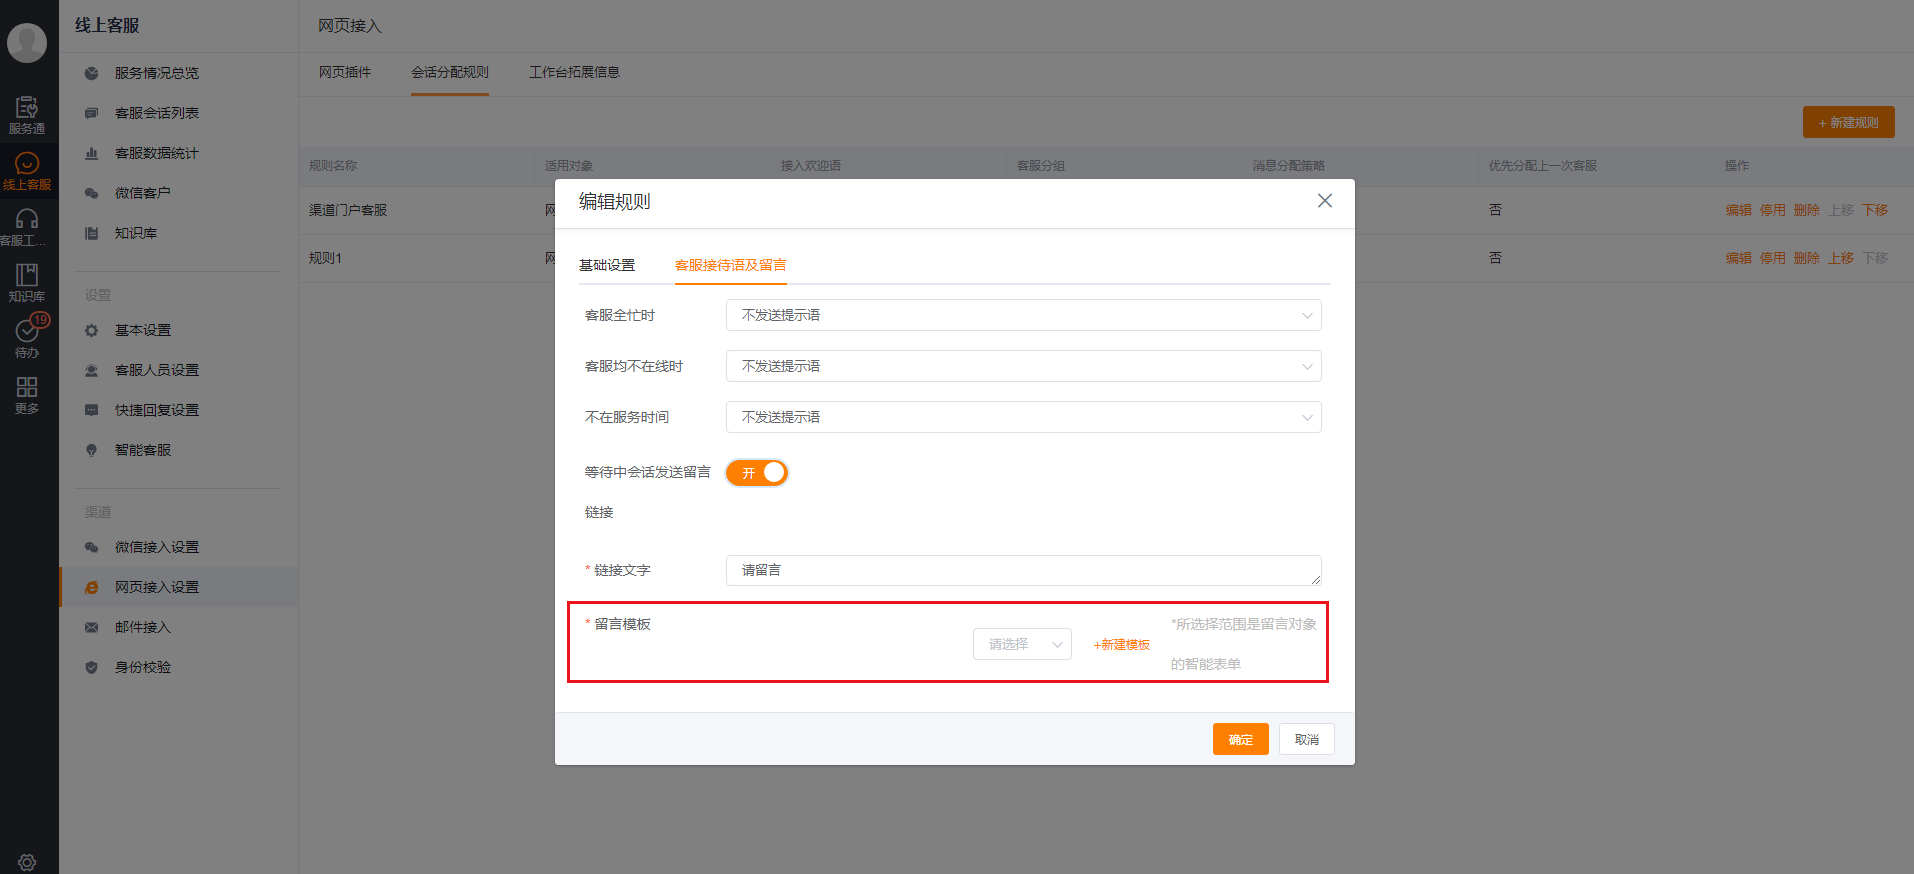
Set Message Template

Accounts fill in the message template
3. Workbench Expansion Information
When customer service staffs process user session information, they need to be able to quickly view the basic information of the visiting account and the associated business information. Online customer service supports configuring the extended information range of the customer service workbench in the background, such as accounts, contacts, leads, work orders, etc., and the expanded information on the right supports custom configuration at the field level, selecting objects and displaying fields, which can naturally connect with enterprises CRM business module.
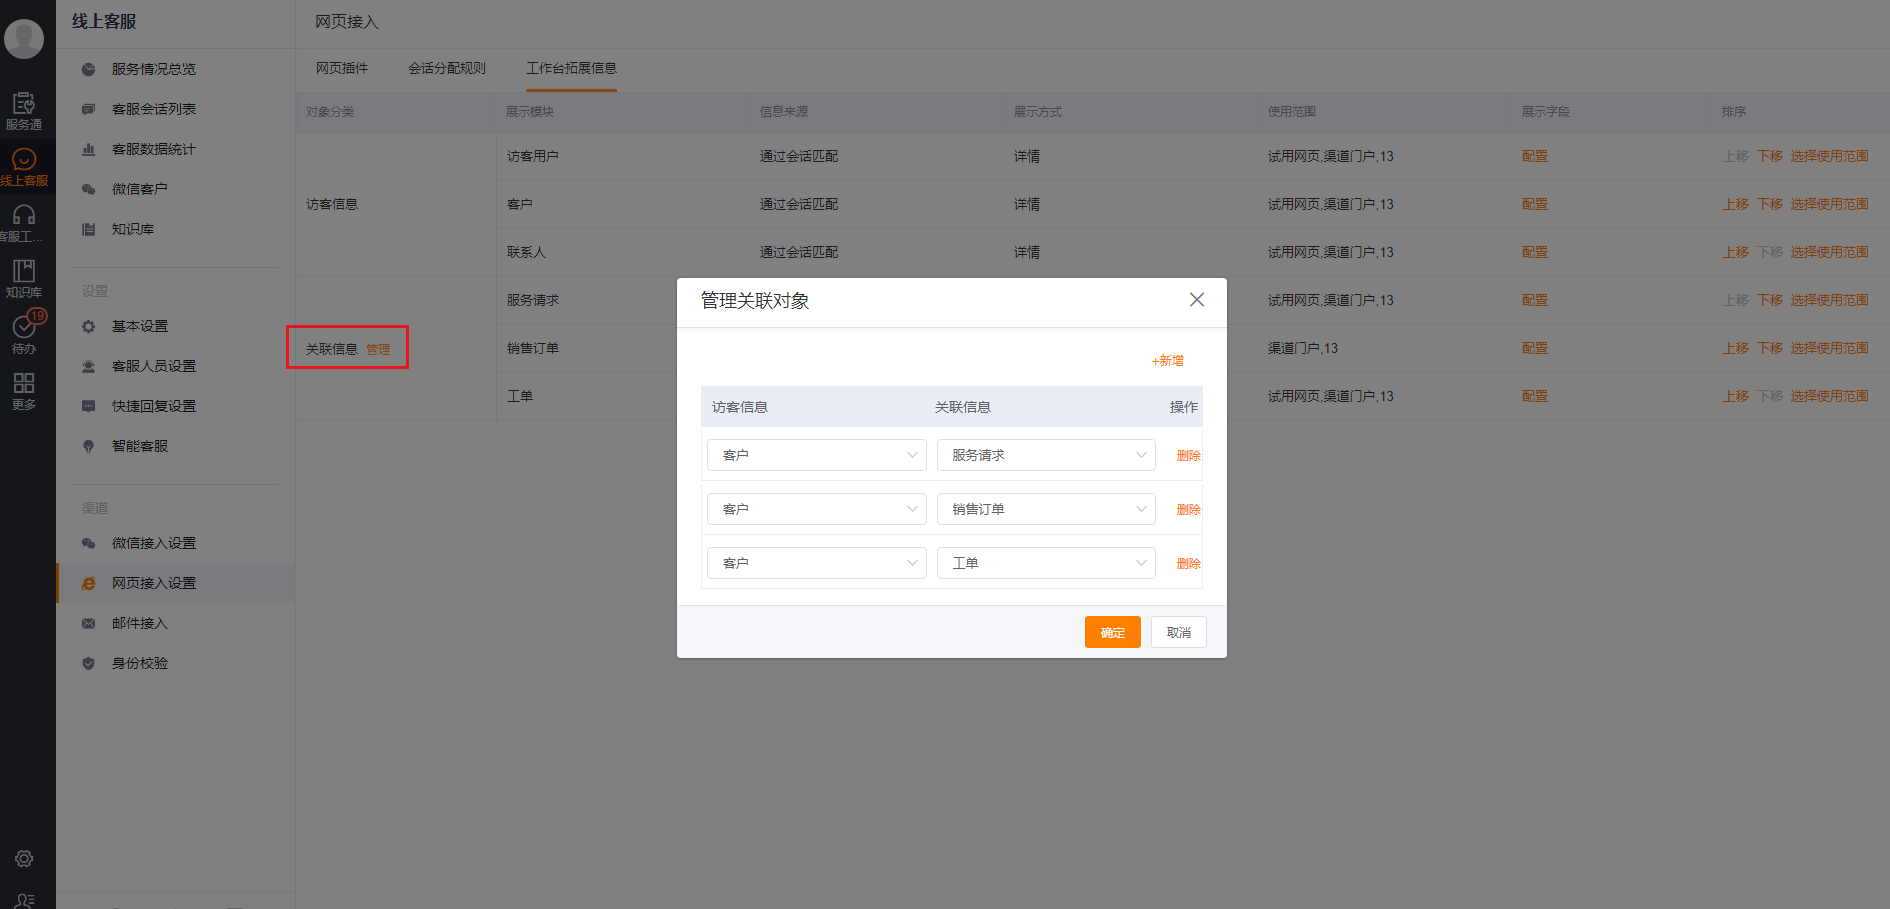
Manage Associated Business Objects
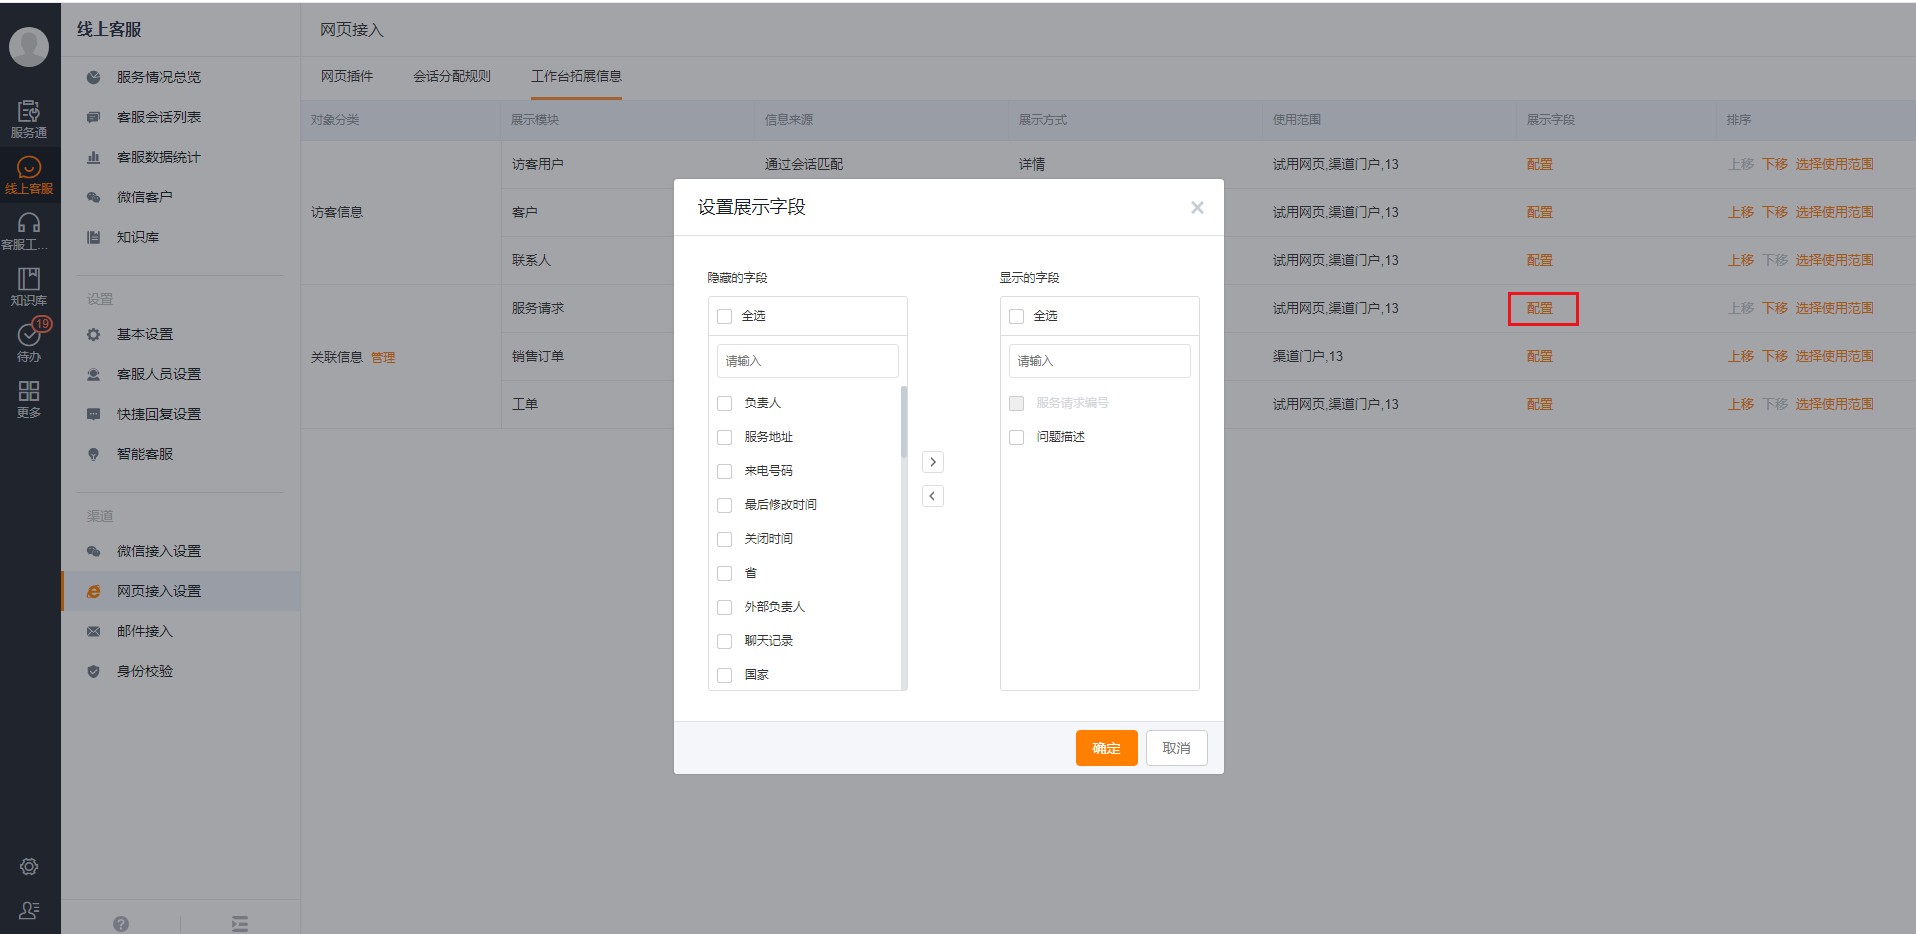
Configure Displayed Fields
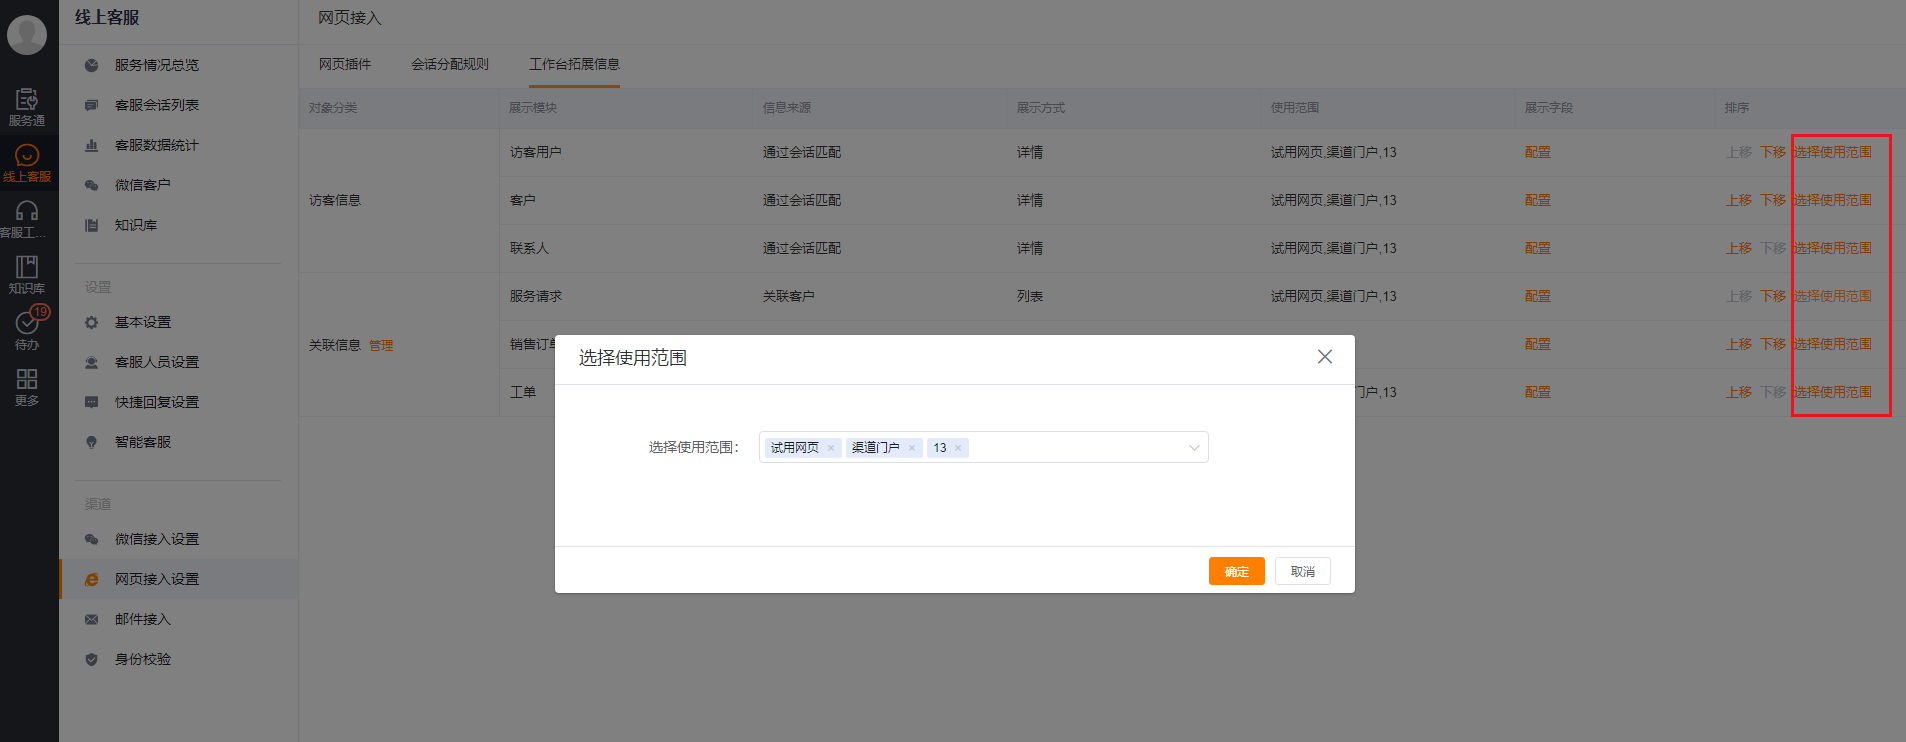
Set Use Scope
After the extended information configuration of the workbench is completed, customer service staff can view account-related information on the sidebar of the customer service workbench. The page effect is shown in the figure below:

Quickly view customer information on the sidebar of the customer service workbench
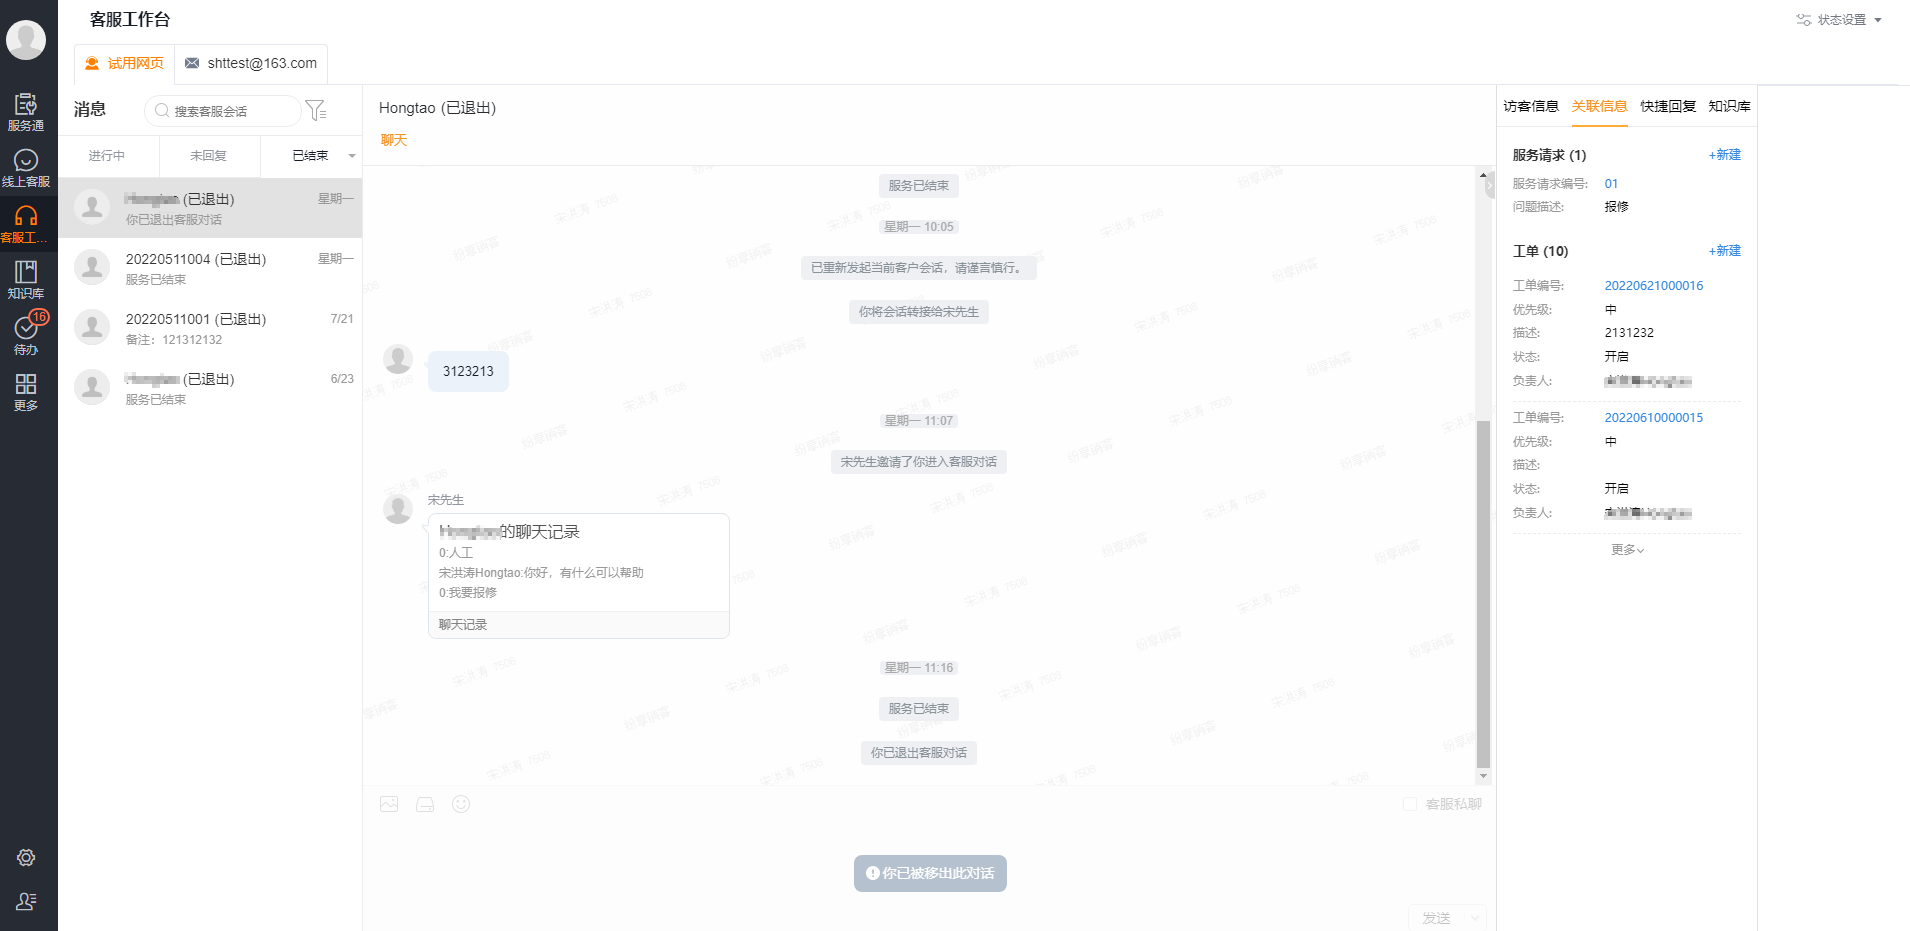
Quickly view business information on the customer service workbench
4. Identity Verification
Web channels are generally used on the official website. If a user logs in on the official website, the account's identity information will be collected on the official website. If the company needs to accurately identify the account's information in ShareCRM, it can enable identity verification function, pass parameters in the customer service plug-in code as required, and you can open the online customer service and the account identity information verification channel in the third-party webpage.
- Configuration Steps before Developer Access
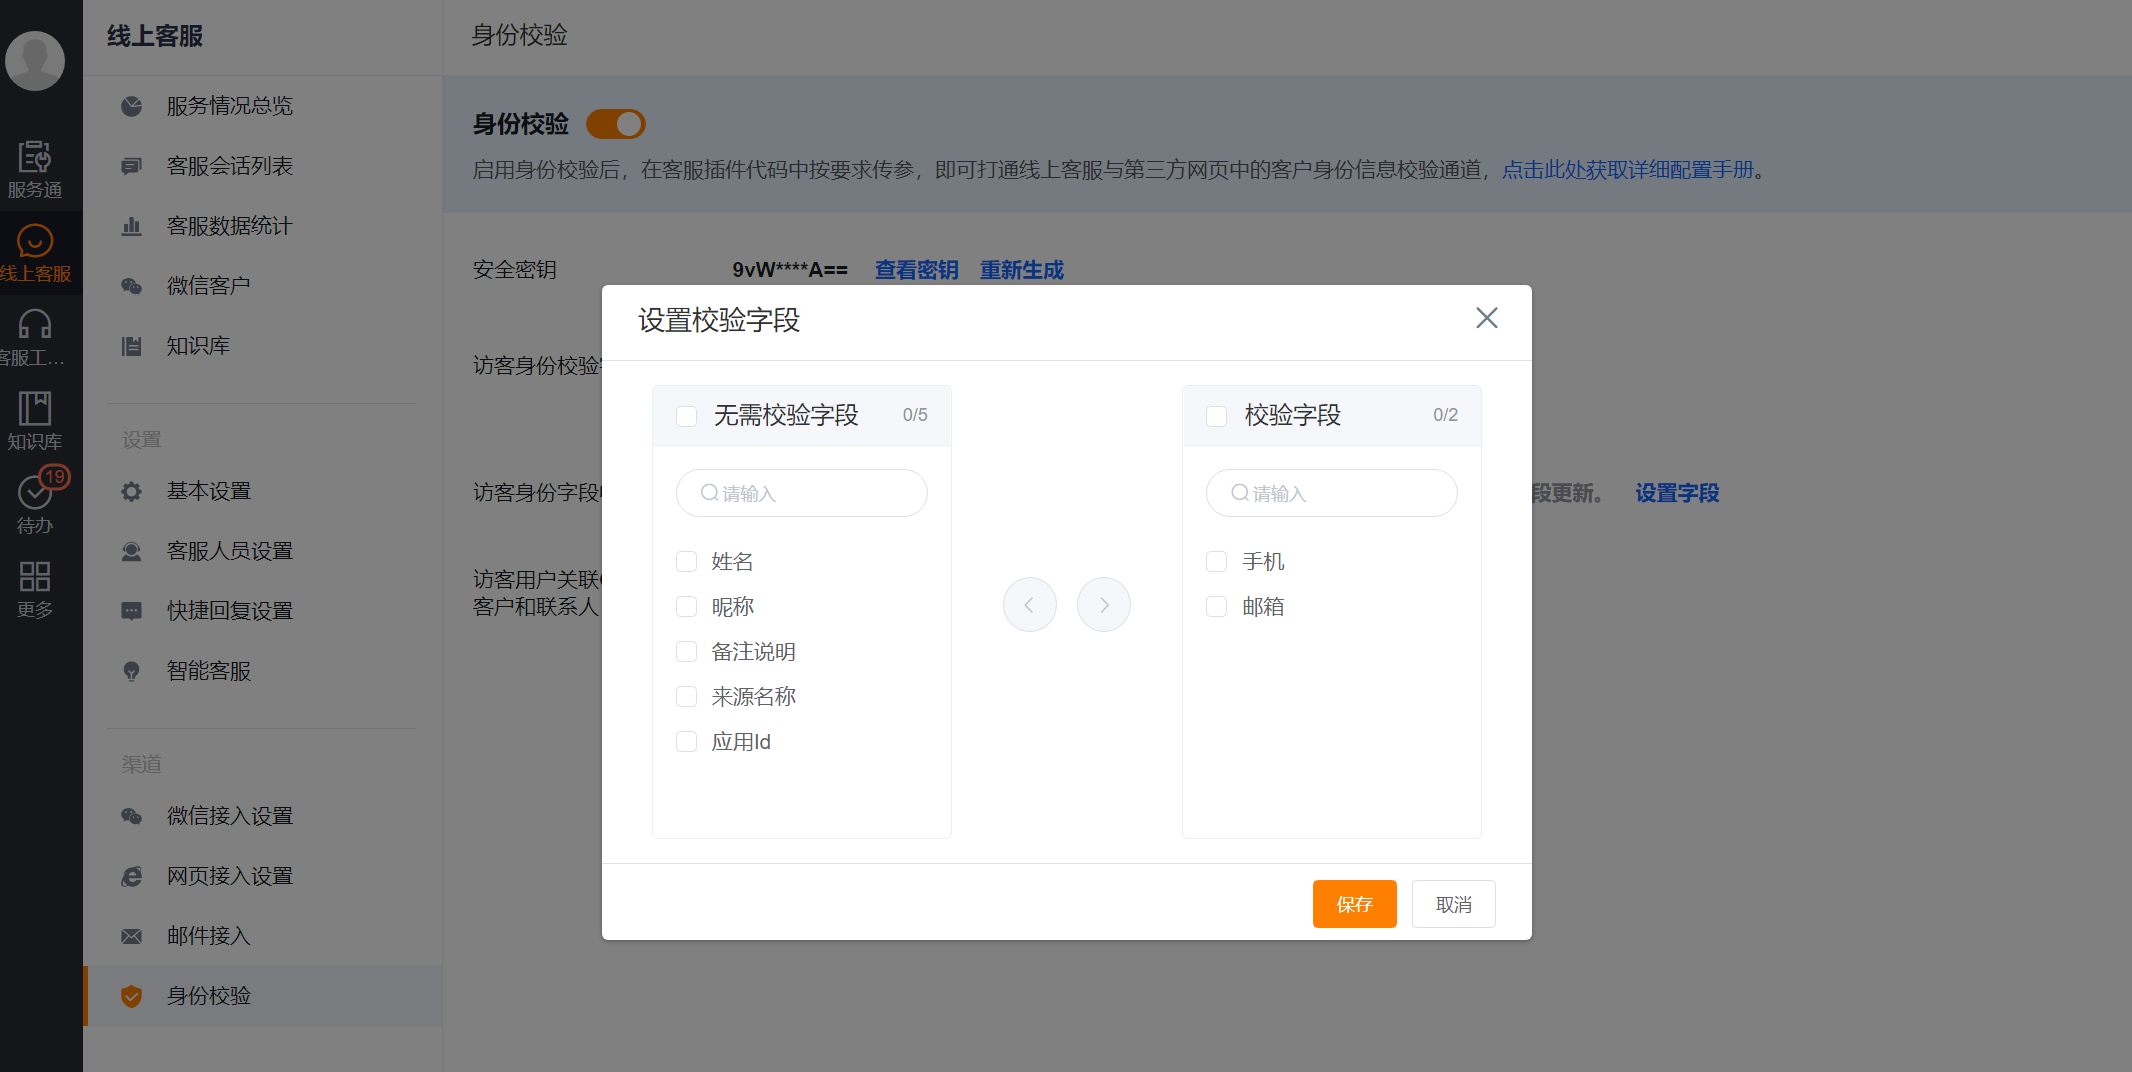
1. Generate an identity verification key: Click "Generate Key" to generate a key. After the page is refreshed, the key will be masked and displayed. You can click the View Key button to view the key again.

2. Set the visitor identity verification field: In the ShareCRM system, all consulting users are stored in the visitor object (the object apiname is "WebImVisitorObj", so that users who initiate consultations from the self-developed official website can be automatically matched to the ShareCRM system. The visitor user needs to configure the verification field, and supports the enterprise to customize the identity verification field. Usually, you can match the name + mobile phone number from the self-developed official website to match the only visitor user. If there is no match, it will create a new visitor user data according to the passed parameters.
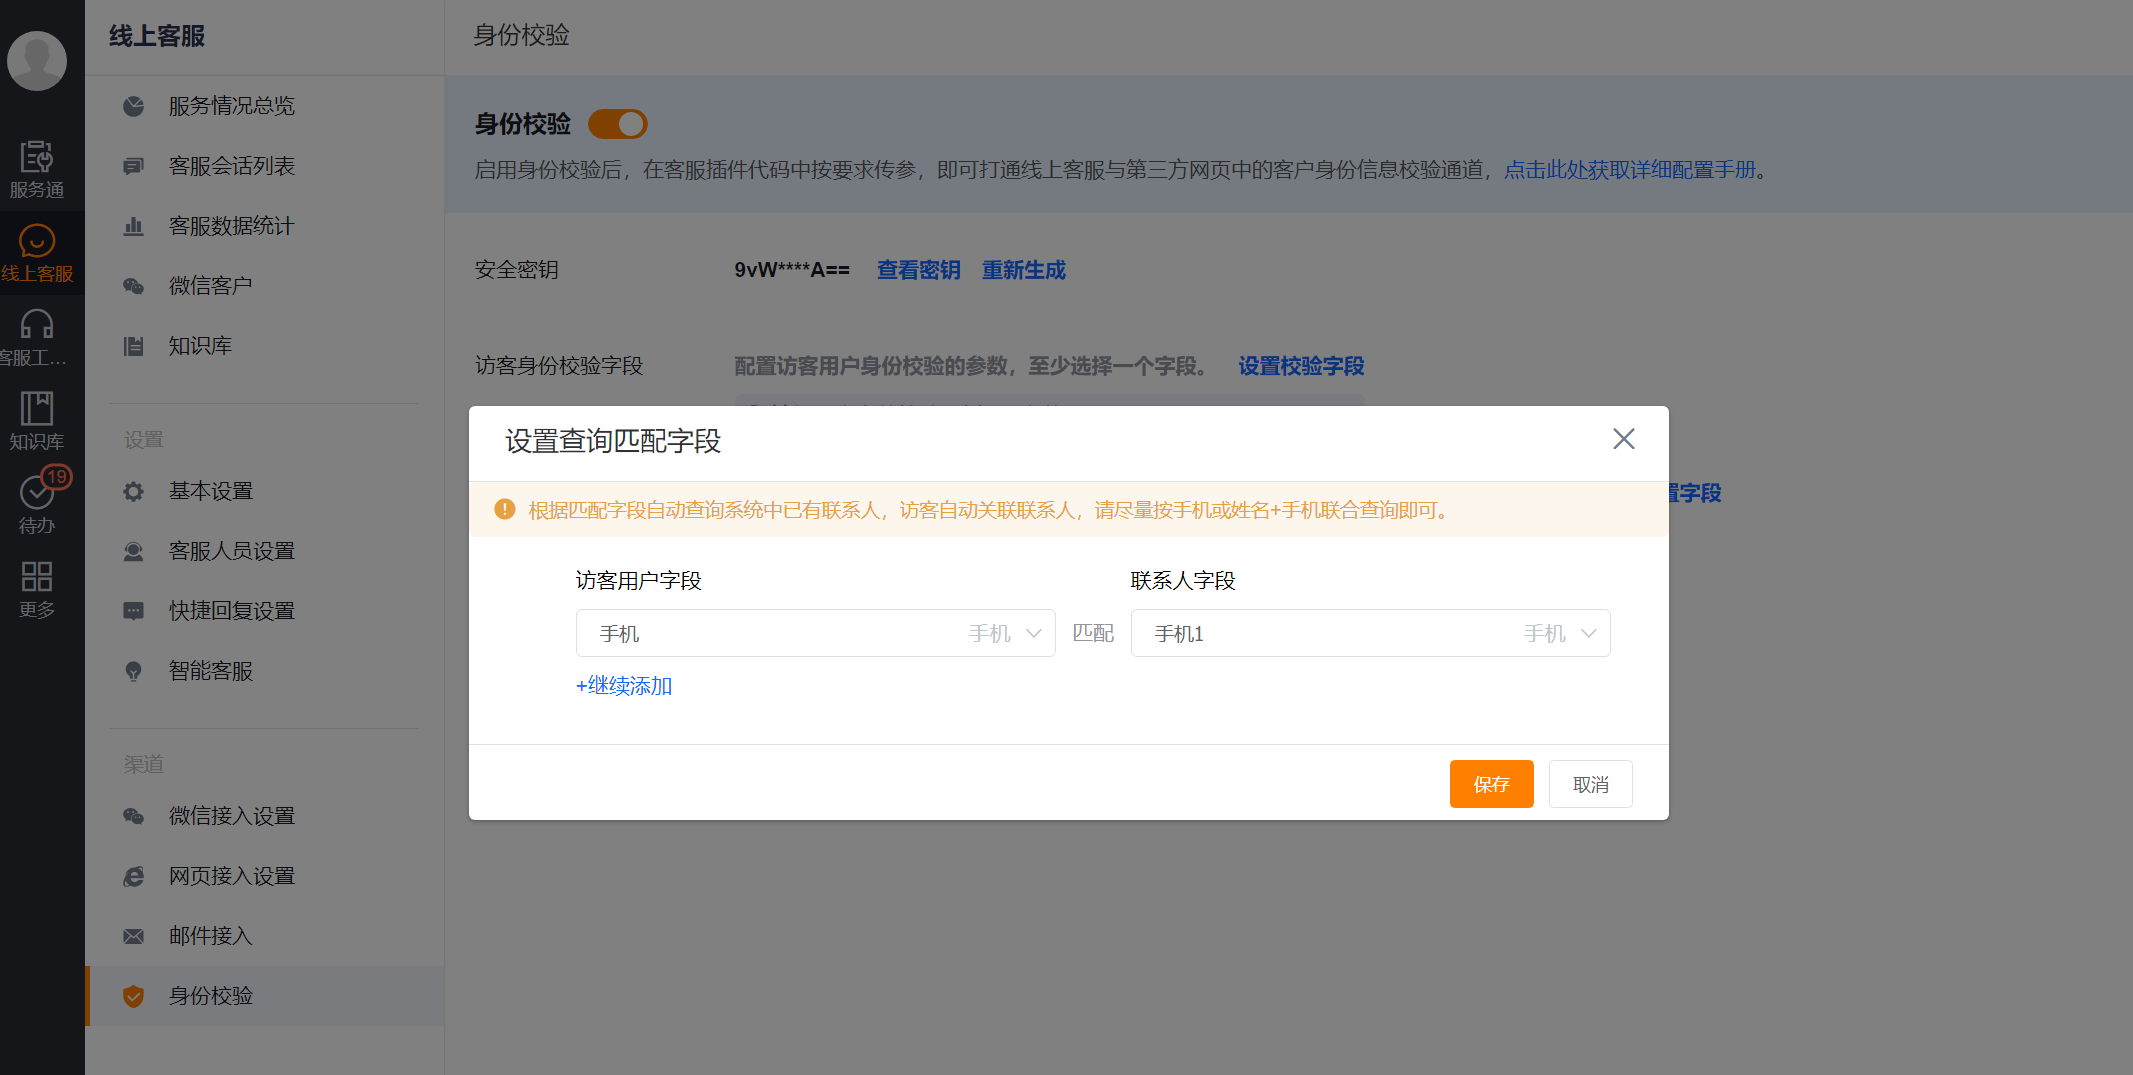
3. Associate visitor users with CRM accounts and contacts: In general, visitor users who enter the ShareCRM system from online customer service consultation need to be manually associated with CRM accounts and contacts by customer service staff. Associated with CRM accounts and contacts, you can import the user information of the self-developed official website system into CRM accounts and contacts, and enable "automatically associate accounts and contacts", set the fields for visitor users to automatically query and match contacts, according to the matching field automatically query the existing contacts in the system, and visitors are automatically associated with contacts. Please try to search by mobile phone or name + mobile phone.
- Identity verification development access instructions 1. Generate a json string for the visitor verification field. The sample parameters are as follows: {"full_name":"Zhang San","phone":"15912345678"} 2. Use the key generated by identity verification , use the AES algorithm to encrypt the json string of the visitor verification field to obtain the encrypted string A 3. Append the produced string A to the customParams parameter of the webpage plug-in
Encryption Algorithm: AES Working Mode: ECB Padding Method: PKCS5Padding
Encryption Sample Code (java)
public static String encrypt(String data, String key) {
try {
    // key conversion
    SecretKey secretKey = toKey(key);
    byte[] enCodeFormat = secretKey. getEncoded();
    SecretKeySpec k = new SecretKeySpec(enCodeFormat, "AES");
    Cipher cipher = Cipher.getInstance("AES/ECB/PKCS5Padding");
    cipher.init(Cipher.ENCRYPT_MODE, k);
    byte[] dataArray = data. getBytes("utf-8");
    byte[] encode = cipher.doFinal(dataArray);
    // ciphertext conversion
    return bytesToHexString(encode);
} catch (Exception e) {
    LOGGER. error("failed to encrypt, data={}, key={}", data, key, e);
    return null;
}
}
private static SecretKey toKey(String key) throws Exception {
byte[] data = Base64. decodeBase64(key);
SecretKey secretKey = new SecretKeySpec(data, "AES");
return secretKey;
}
private static final String bytesToHexString(byte[] bArray) {
StringBuffer sb = new StringBuffer(bArray. length);
String sTemp;
for (int i = 0; i < bArray. length; i++) {
    sTemp = Integer.toHexString(0xFF & bArray[i]);
    if (sTemp. length() < 2)
    sb.append(0);
    sb.append(sTemp.toUpperCase());
}
return sb.toString();
}