
When creating a data dashboard, you can create both personal and enterprise types.
1. Create Personal Data Dashboard
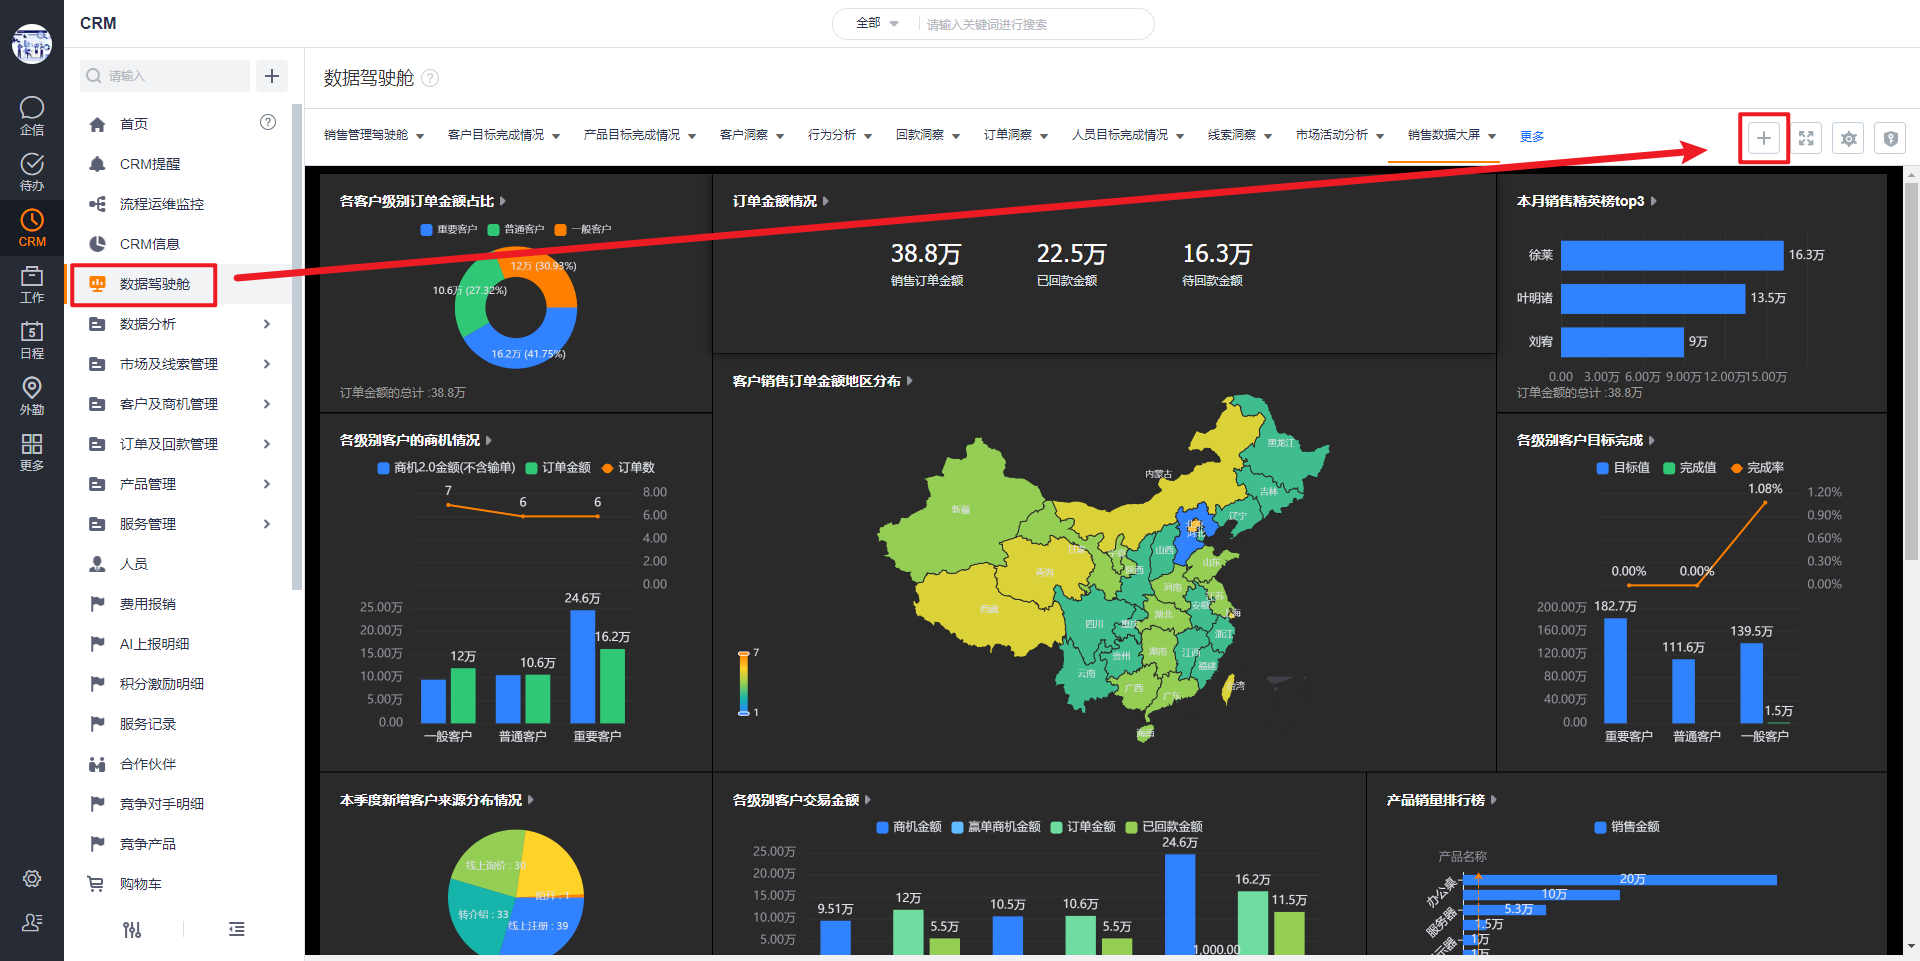
1. Entry: Data Dashboards - New
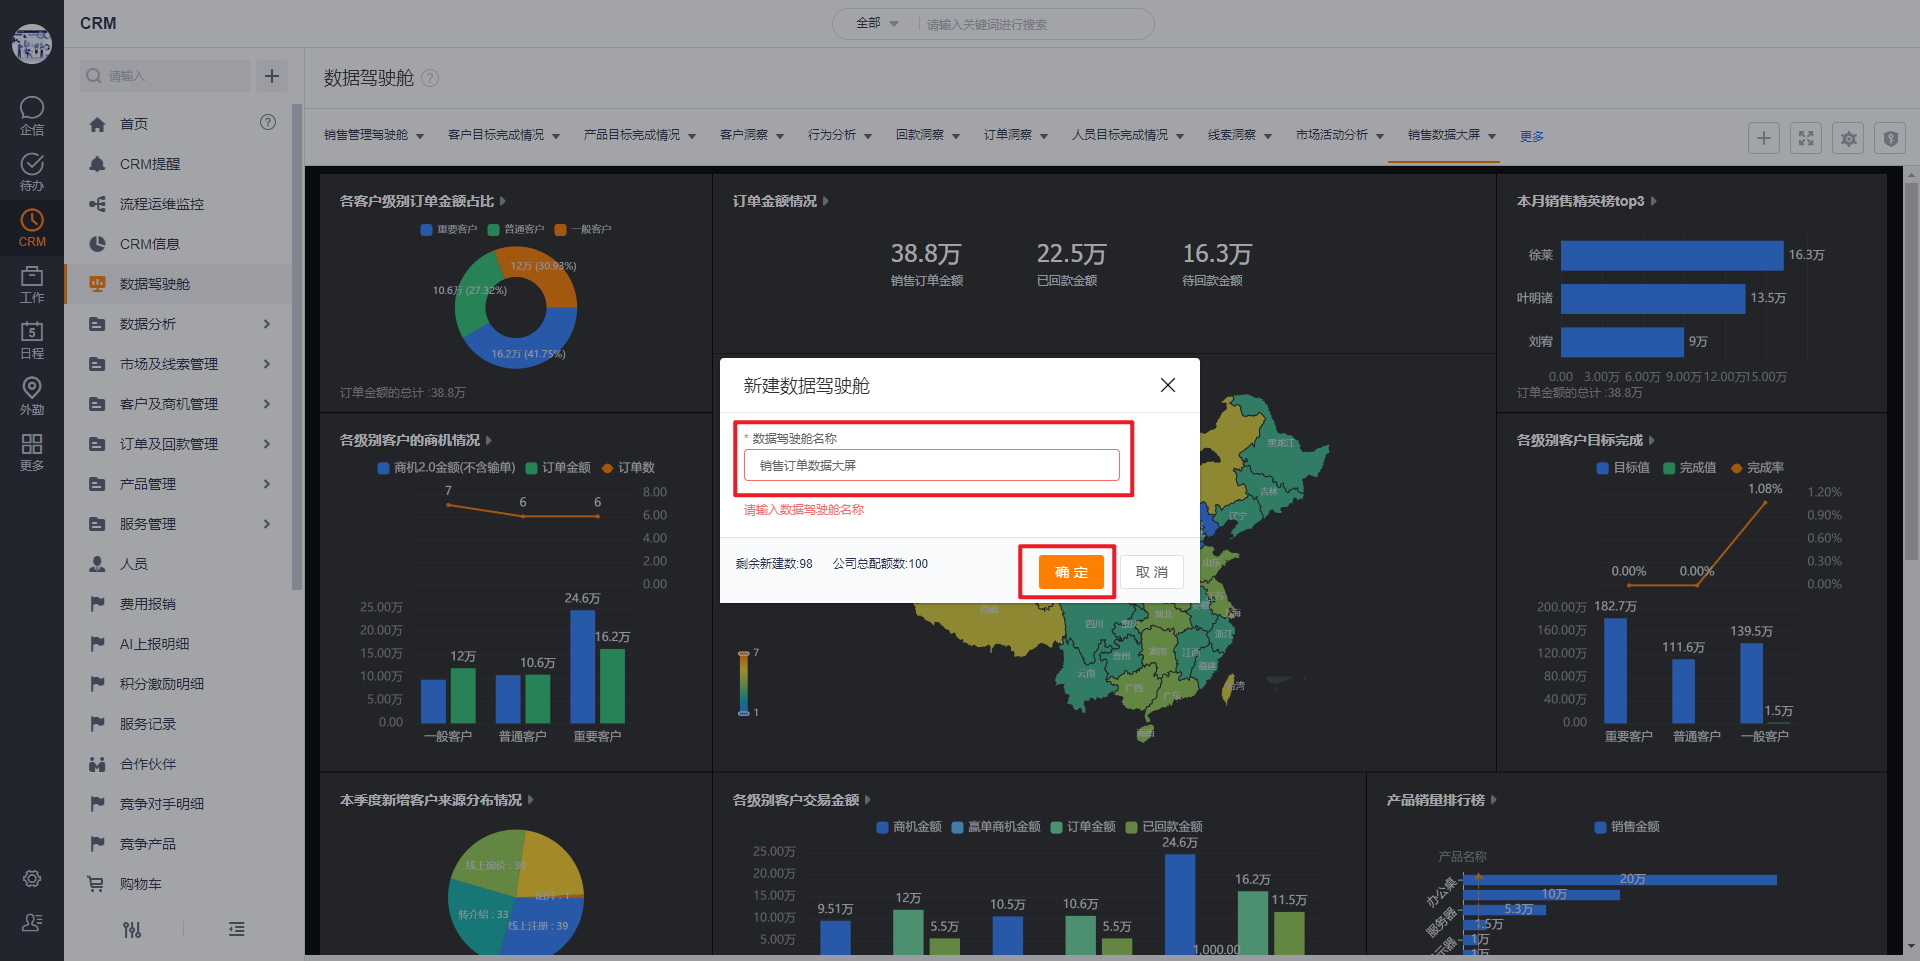
2. Fill in the name of the data dashboard. The name of the data dashboard should summarize the theme of dashboard.
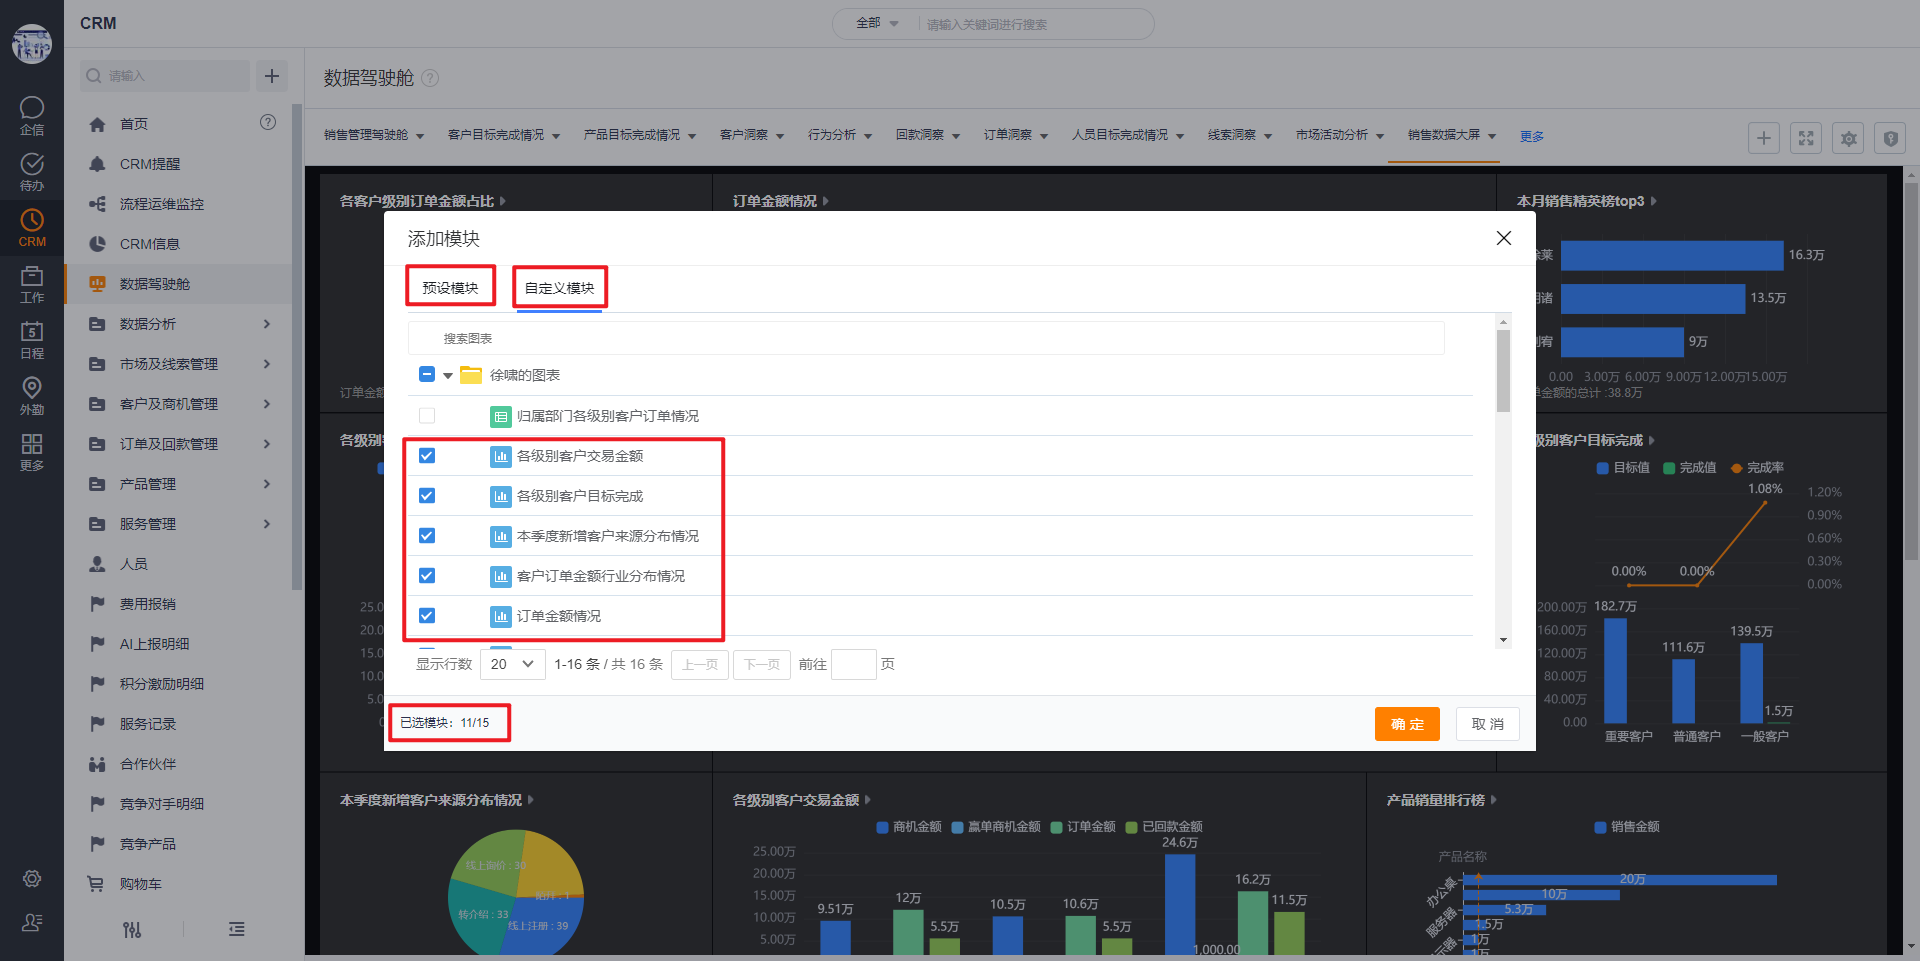
3. To add a module, you can choose a preset module or a custom module, here we choose a custom module. Select the specific charts you want to display, select up to 15 charts, and click OK.
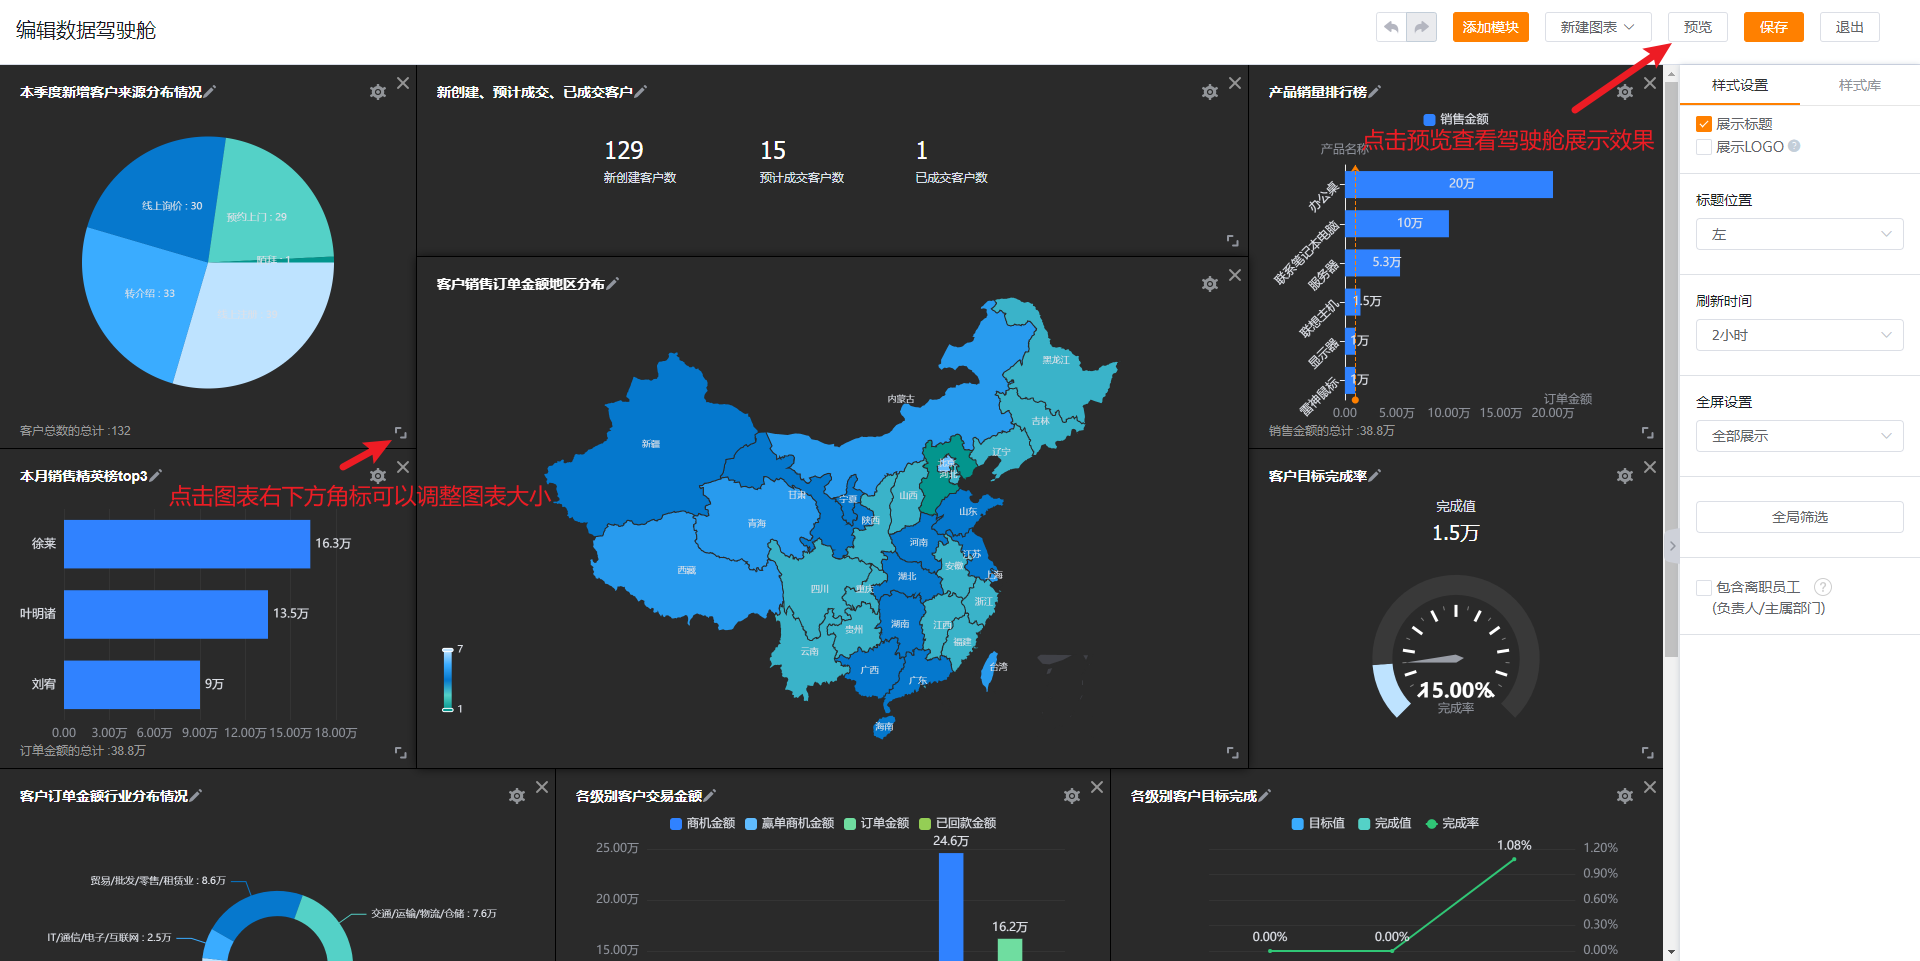
4. Select the chart, long press the mouse to adjust the position of the chart. Click on the lower right corner of the graph to resize the graph. After the chart position and size configuration is complete, click Preview to view the effect.
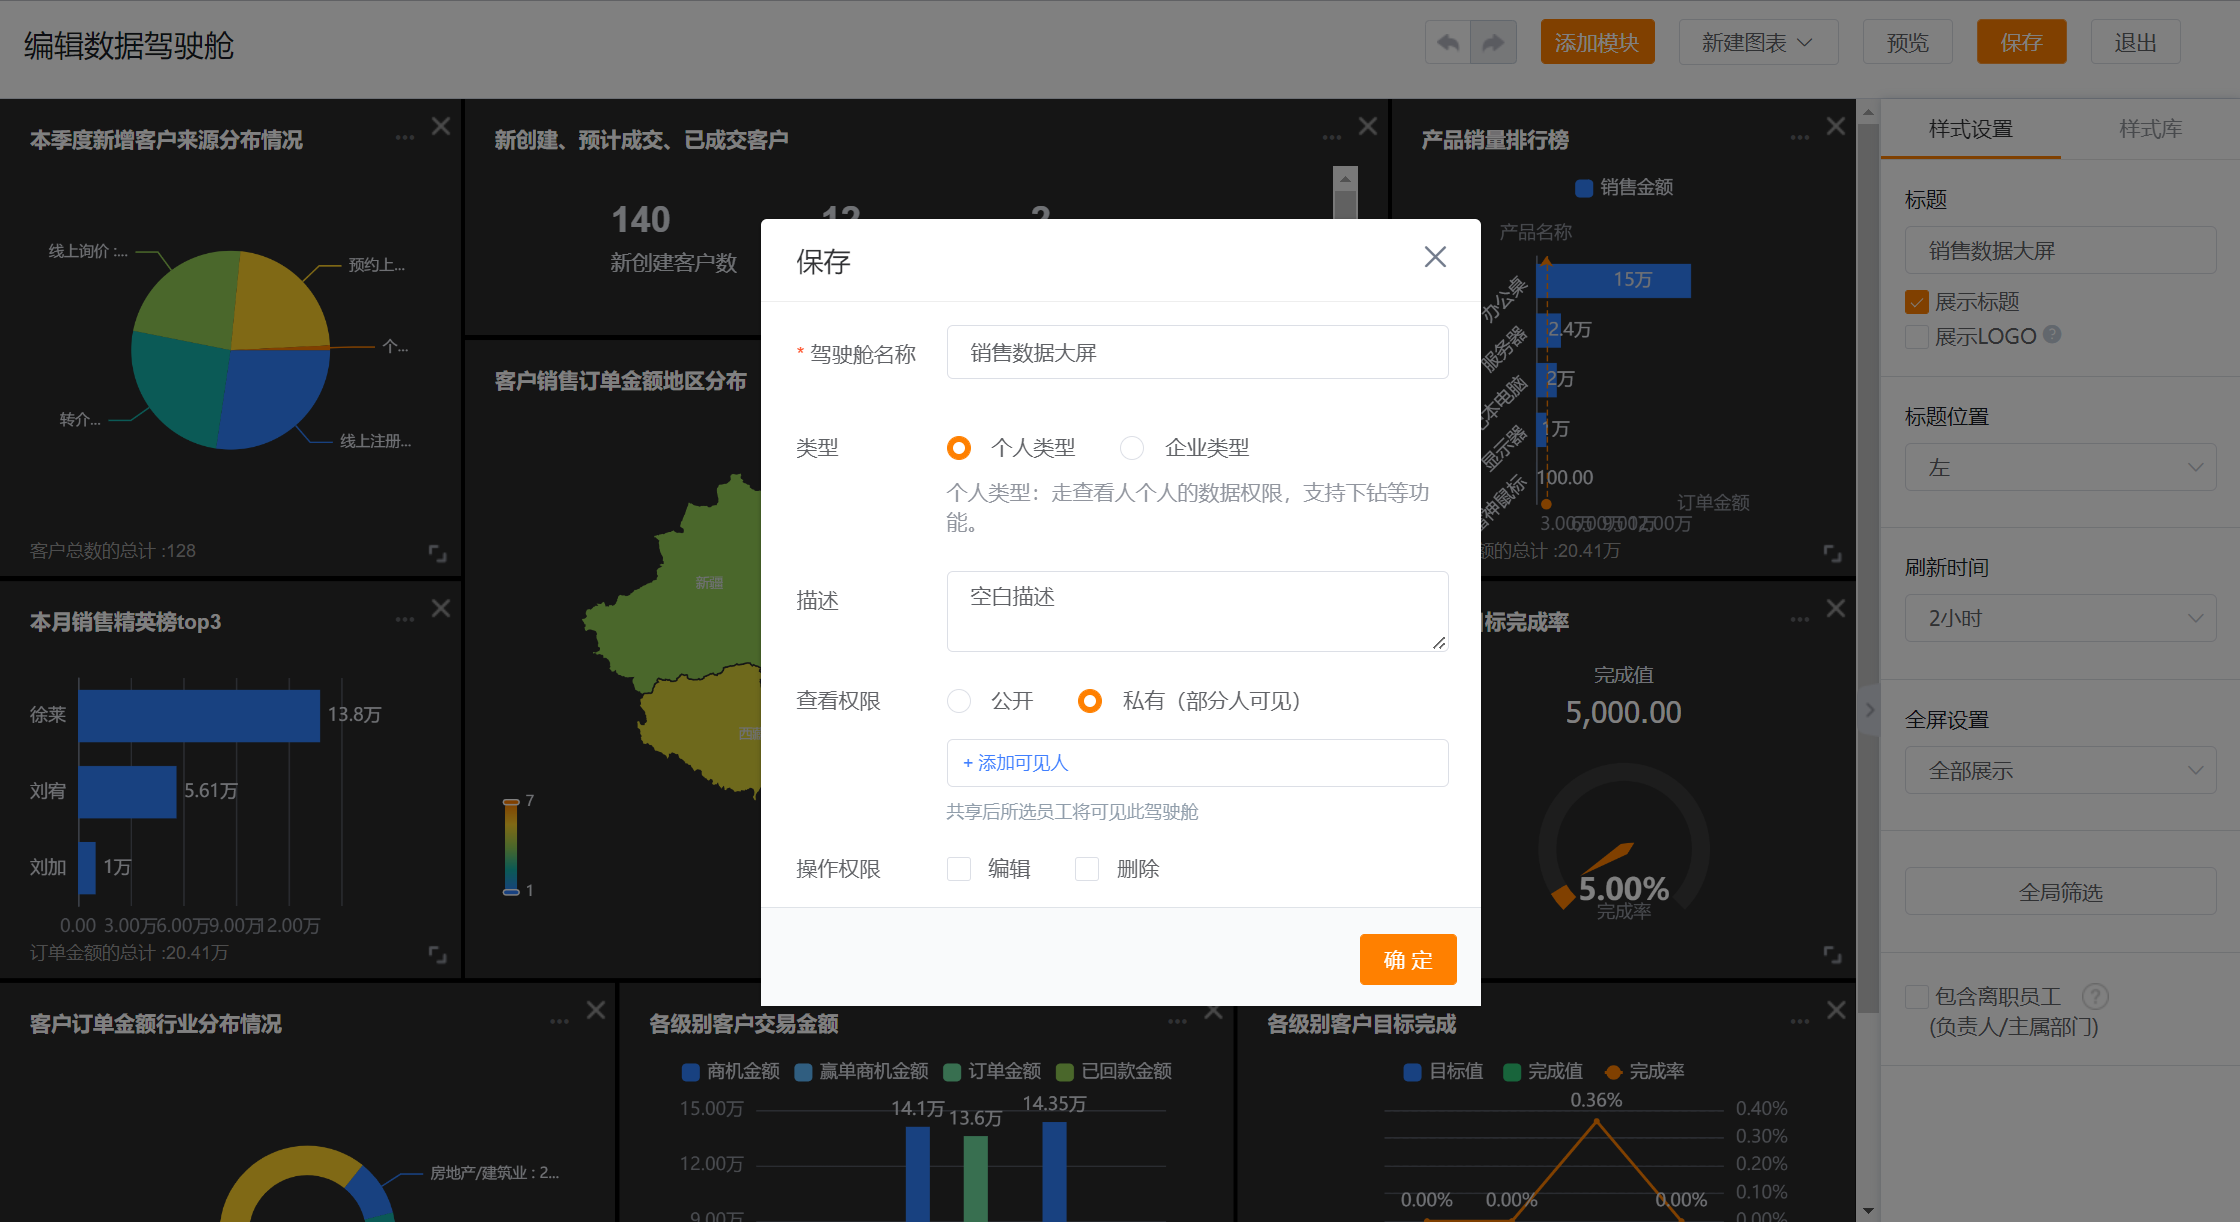
5. Click Save to modify the dashboard name. The CRM administrator or report administrator needs to select the personal type as the type, and ordinary employees do not display the type. Set the viewing permission to public or private. Public means that everyone with viewing permission in the background can see it, and private means that designated personnel with viewing permission in the background can see it. Set the operation authority to edit or delete. Edit means that people who can view and have edit rights in the background can edit the cockpit. Delete means that people who can view and have delete rights in the background can delete the cockpit. Click OK to create a new personal type data cockpit.
2. Create Enterprise Data Dashboard
Only CRM administrators and report administrators have permission to create enterprise data dashboards. The creation method is basically the same as that of the personal data dashboard, just select the enterprise dashboard as the type when saving. The data dashboard viewing permission of the enterprise type can only be private and does not support configuration operation permissions. For specific steps, please refer to Create Personal Data Dashboard .