Marketing staff can create different activity micro-pages for different marketing activities. There are rich components in the micro-pages, which support flexible customization of activity pages, and the pages have built-in form components.
1. Create Micro-page
1.1 How to make a micro page
1. Create a new micro-page to understand the types of micro-page usage scenes;
1) Visit [Content Center] - [Micro-page], click [New Micro-page], and select to create a general micro-page or a campaign micro-page:
* General micropage
Applicable to content or display titles that do not change with the scene, such as product display, case display and other neutral content, which can be added to multiple marketing activities to acquire customers due to the needs of the event;
Note: The micropage list only displays general micropages;
* Activity micro page
As the name implies, it is a micro-page dedicated to a certain activity. The display content or form of the micro-page only serves a certain activity and cannot be applied to other activities;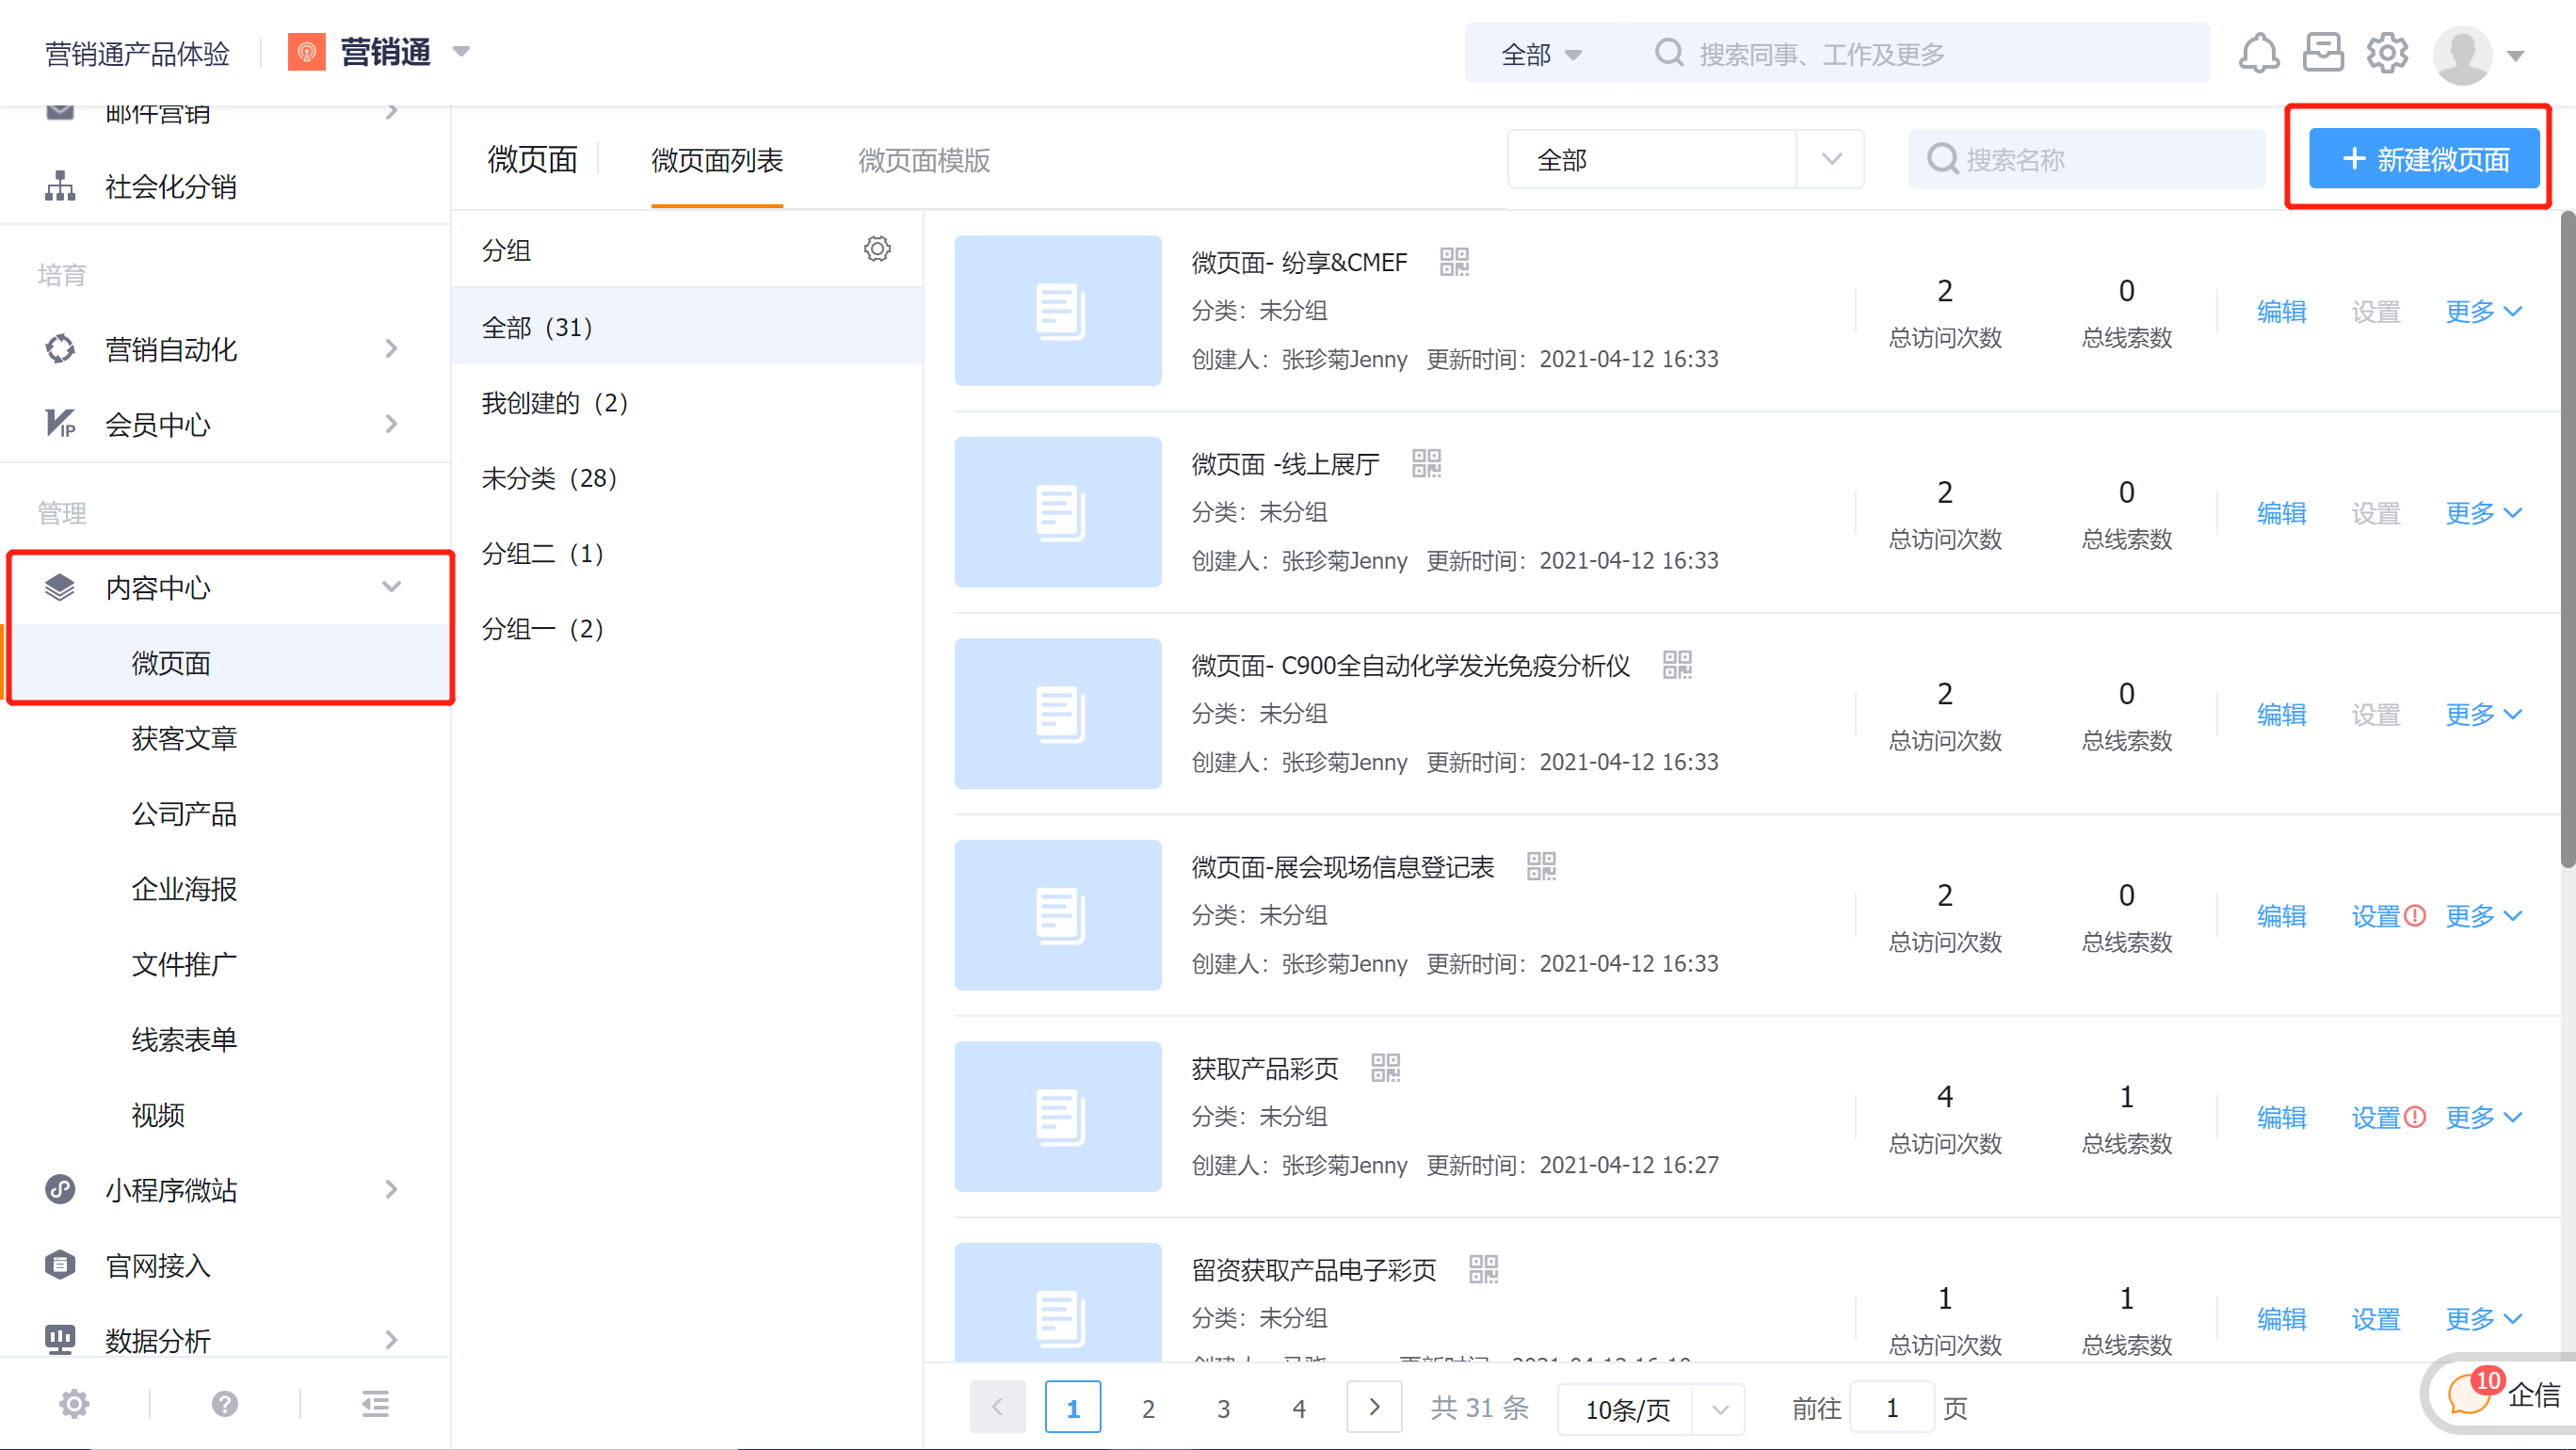

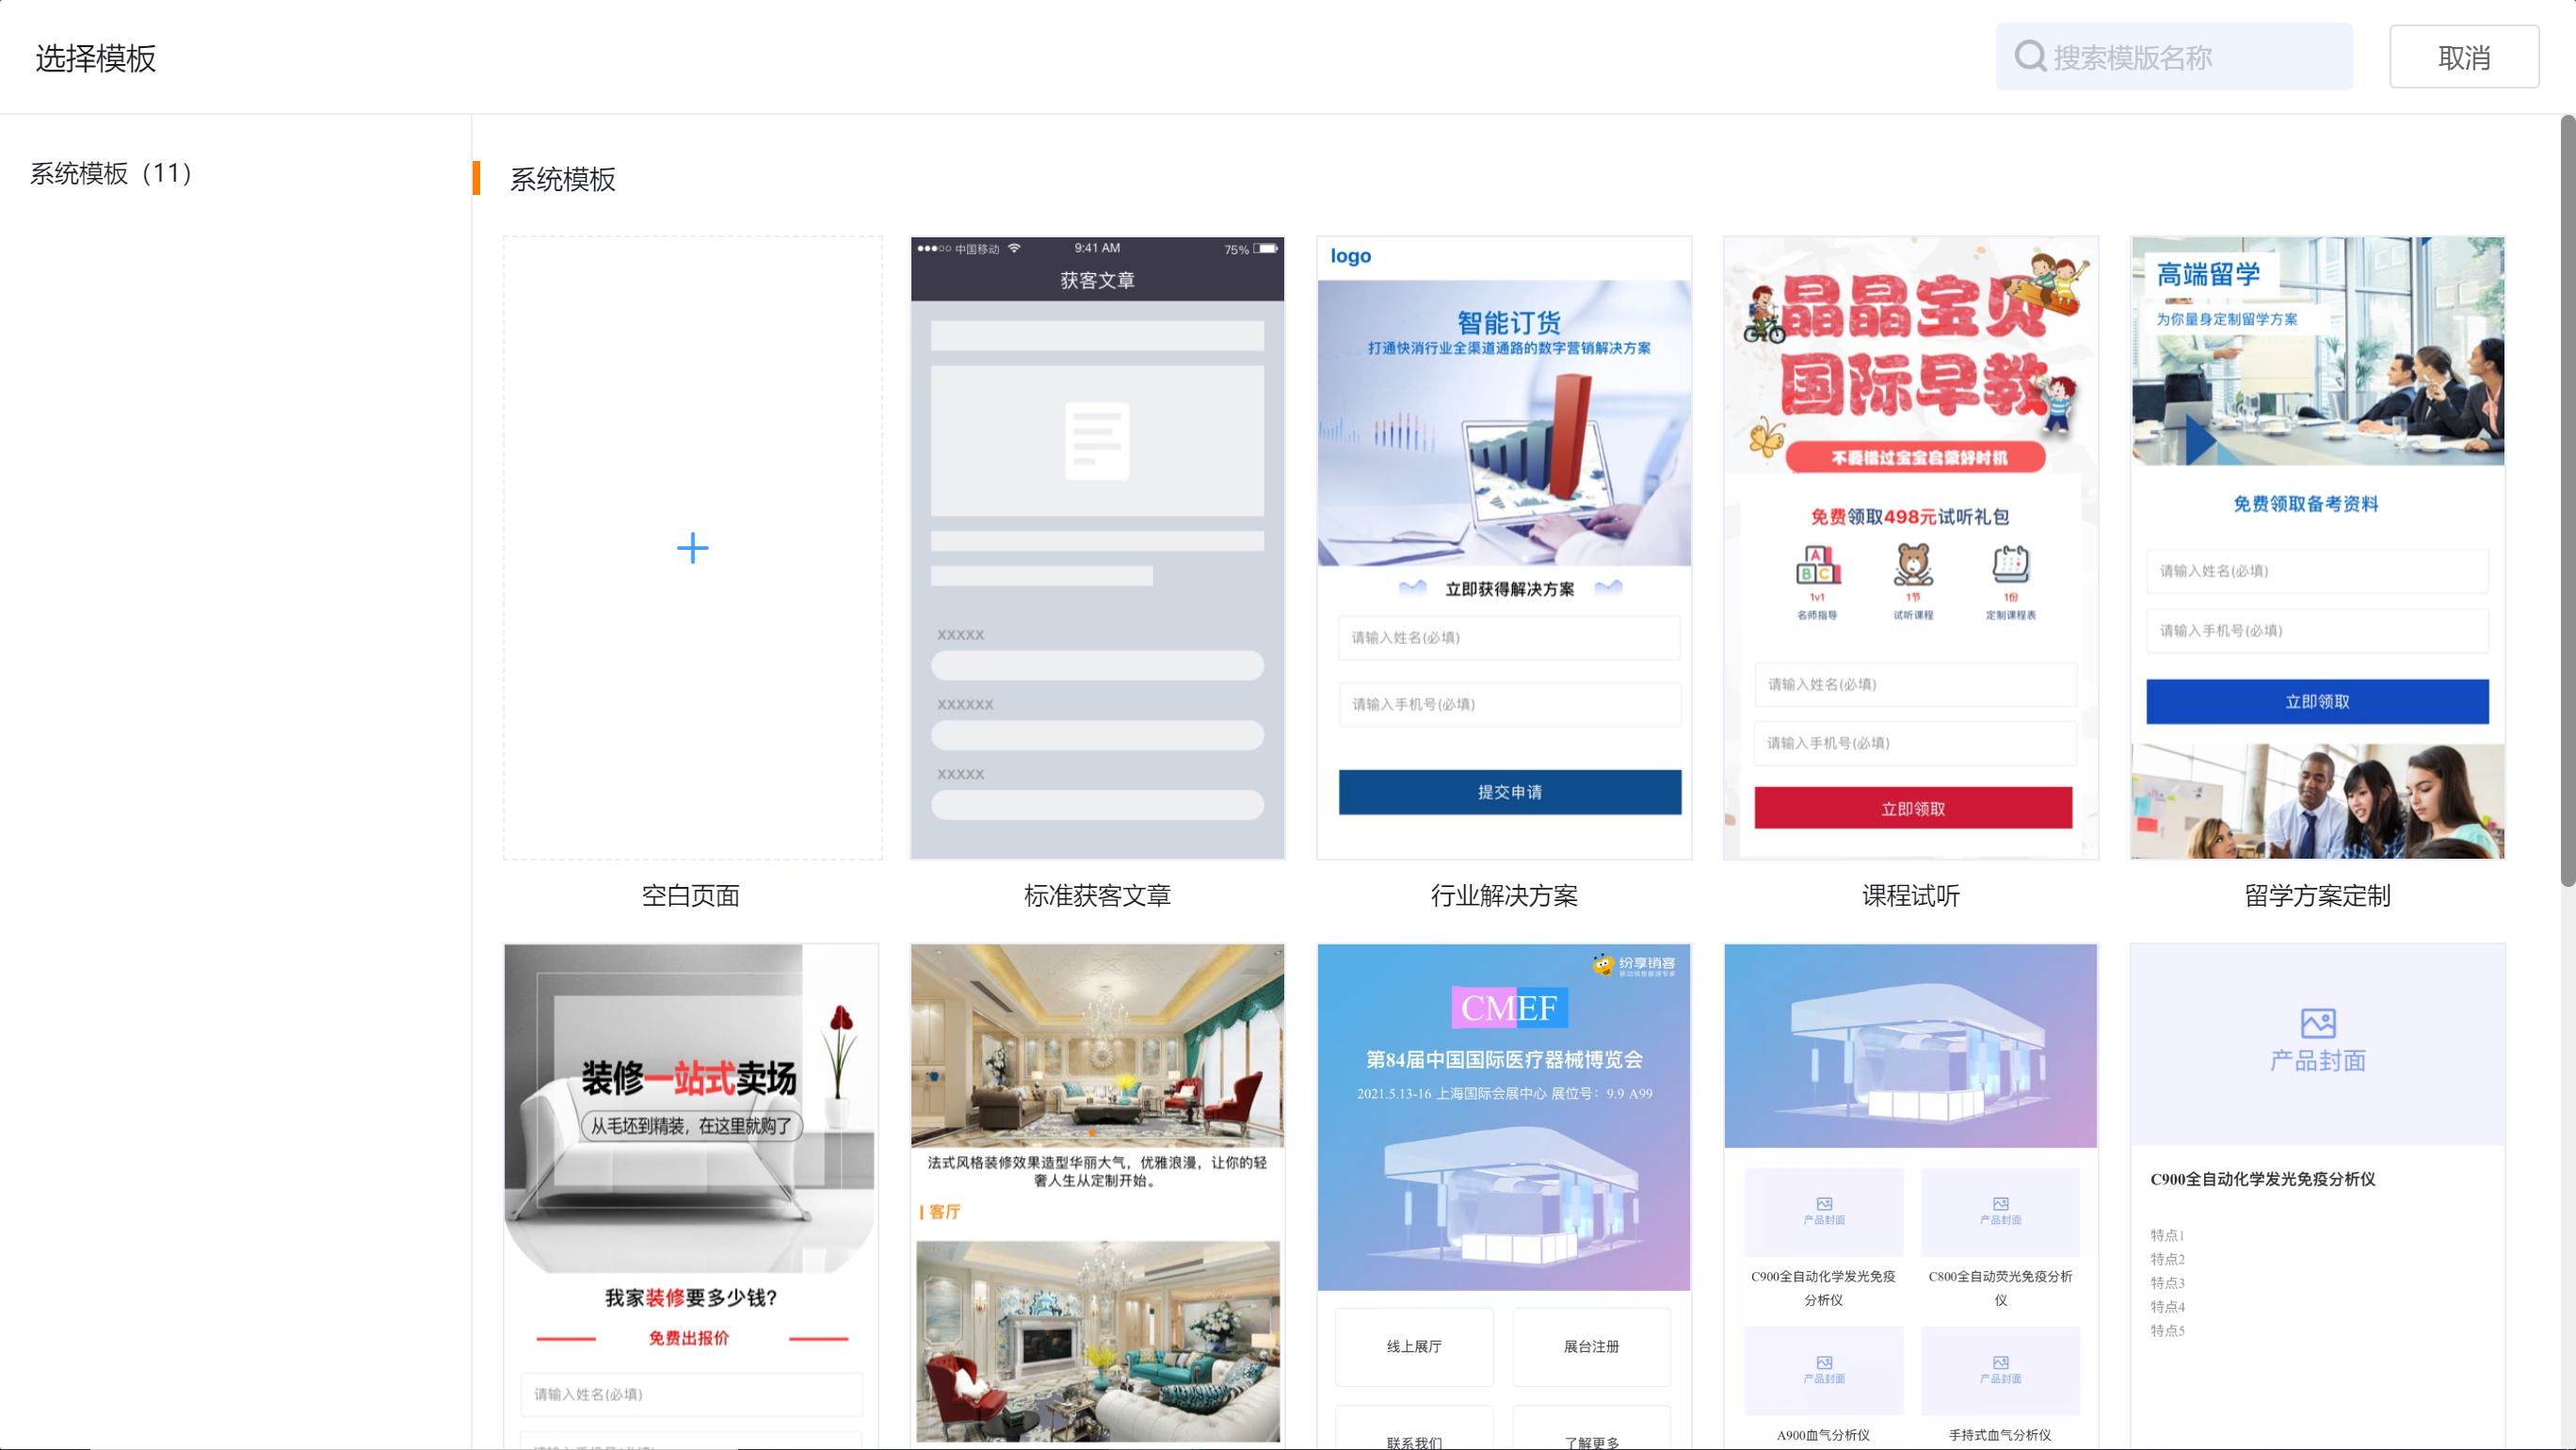
2) After selecting the type of micro-page, enter the template selection page, you can select a quick creation from the micro-page template or create it from a blank, and then use the blank template as an example to explain the operation of an event registration form;
3) Set the name of the micro-page and start creating a new micro-page;

2. Before designing the micro-page, understand the layout of the micro-page design window;
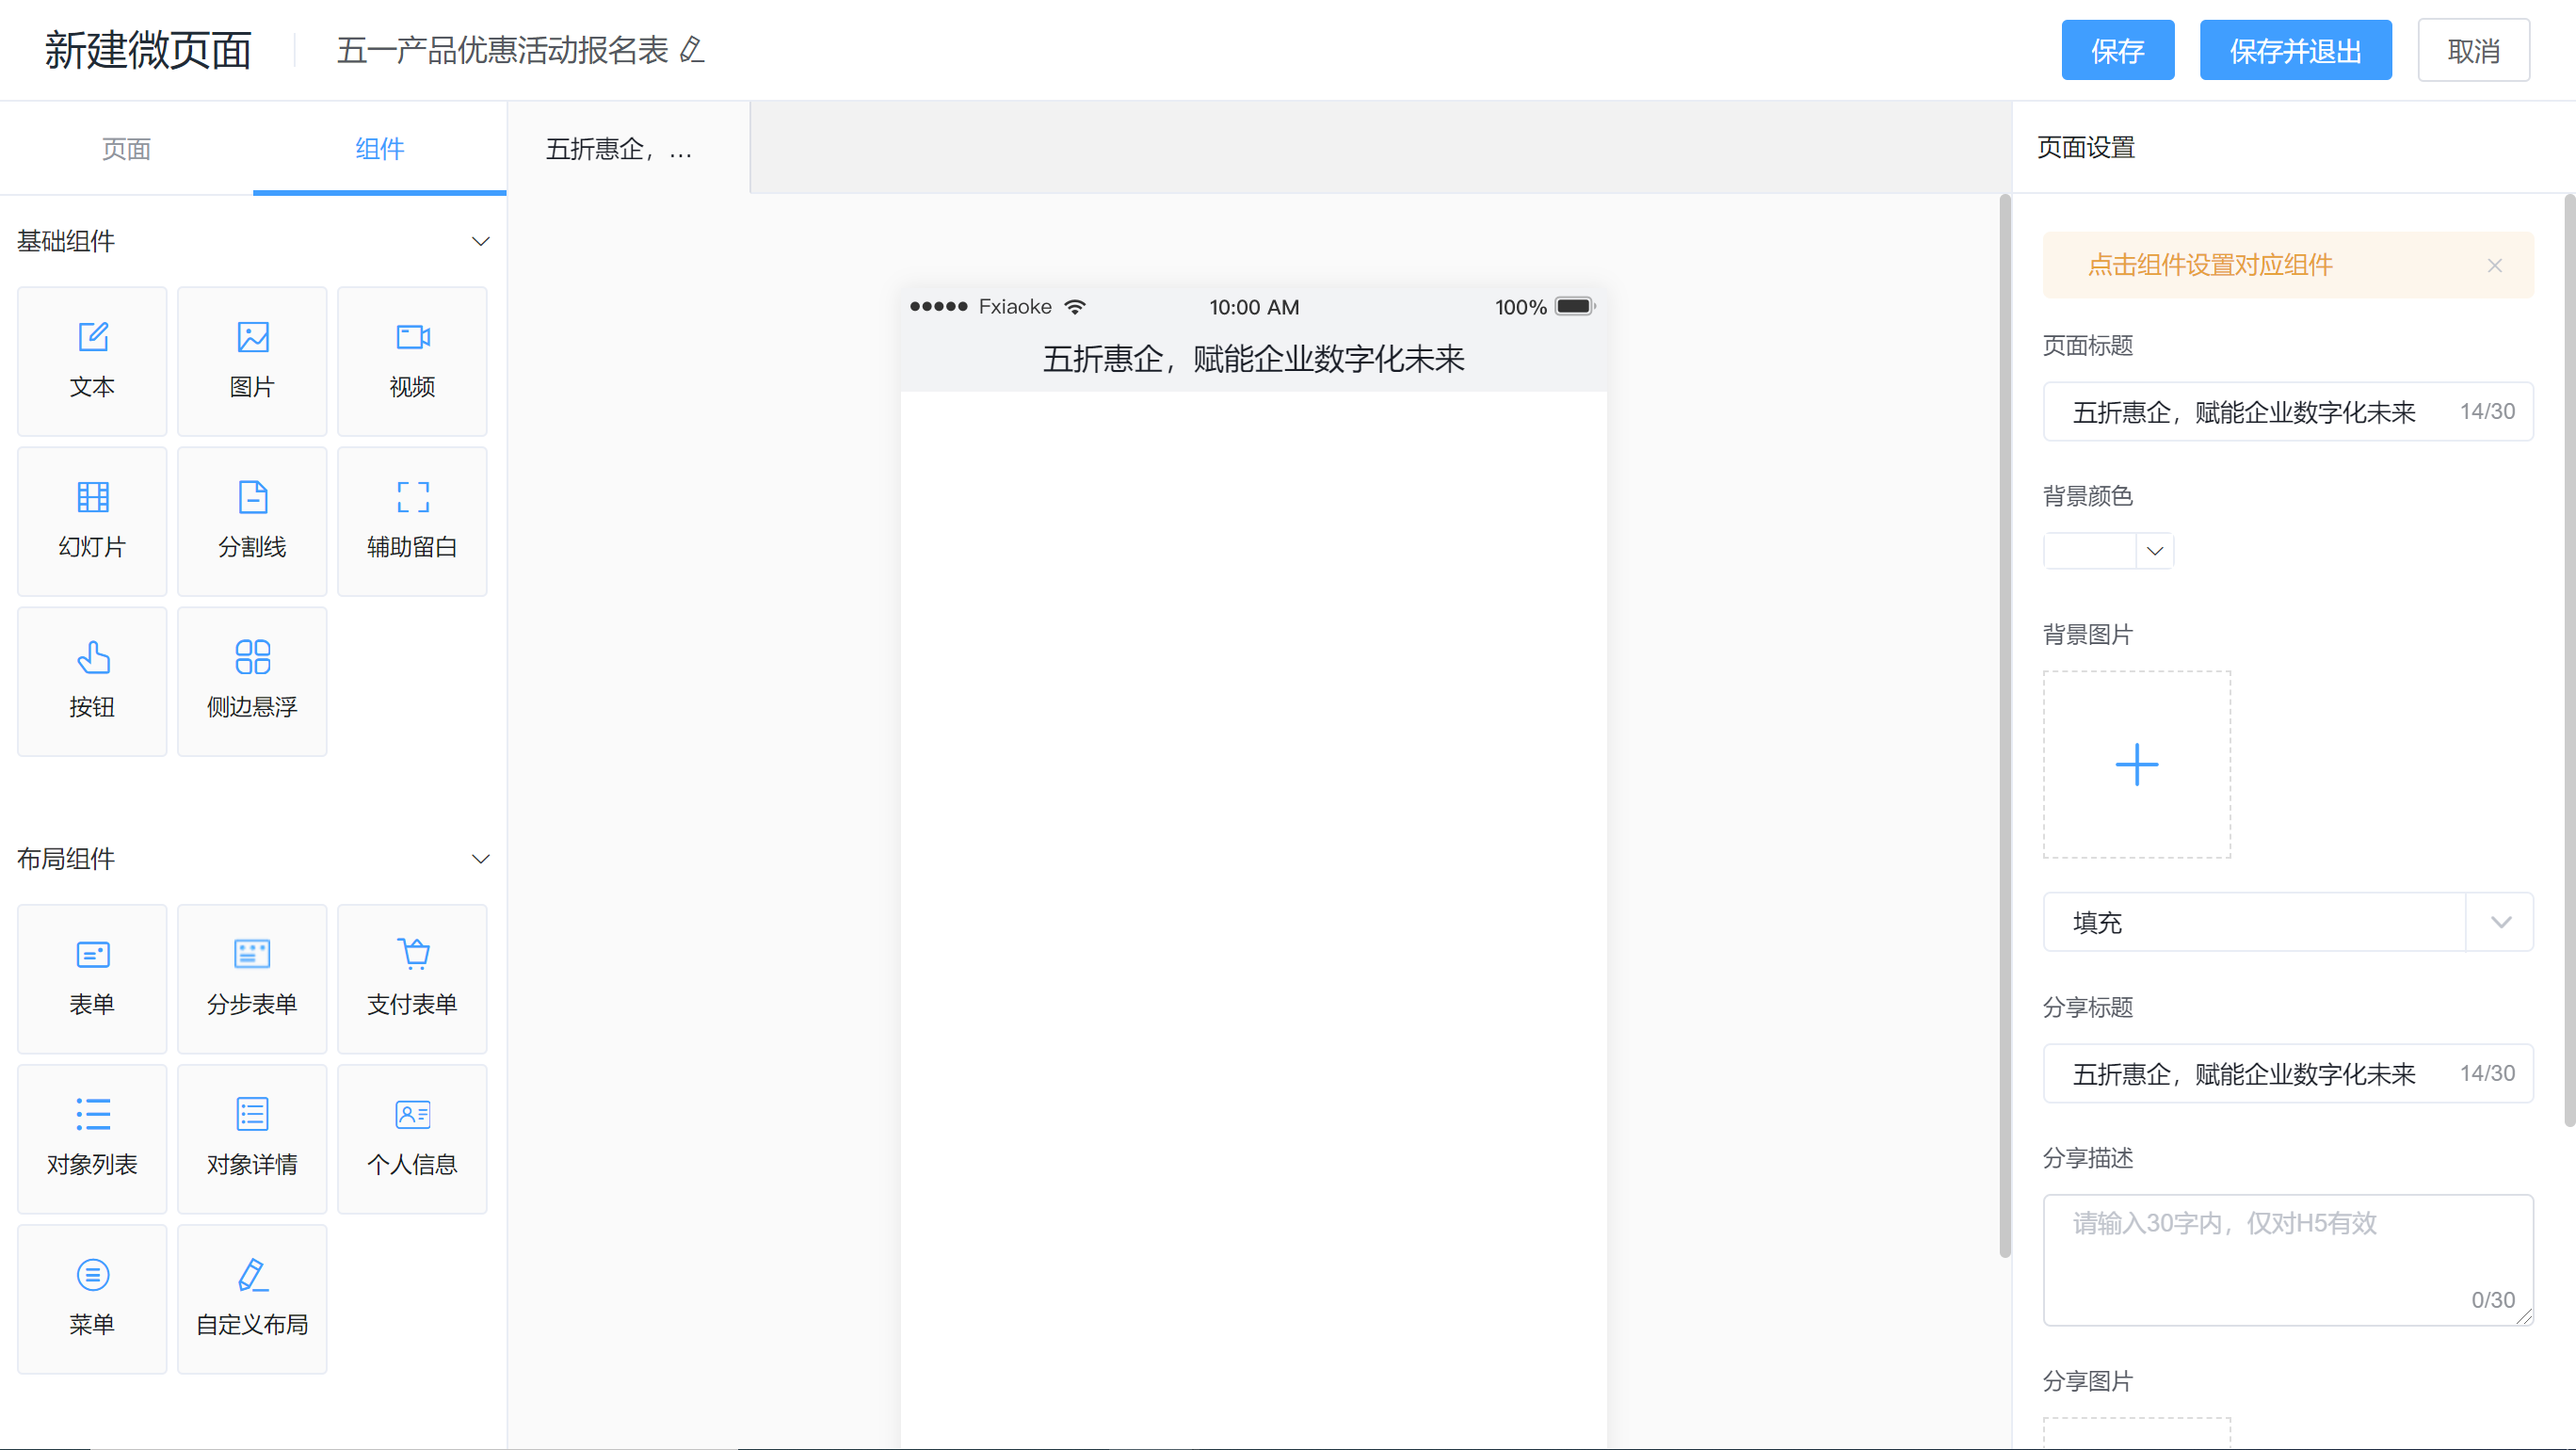
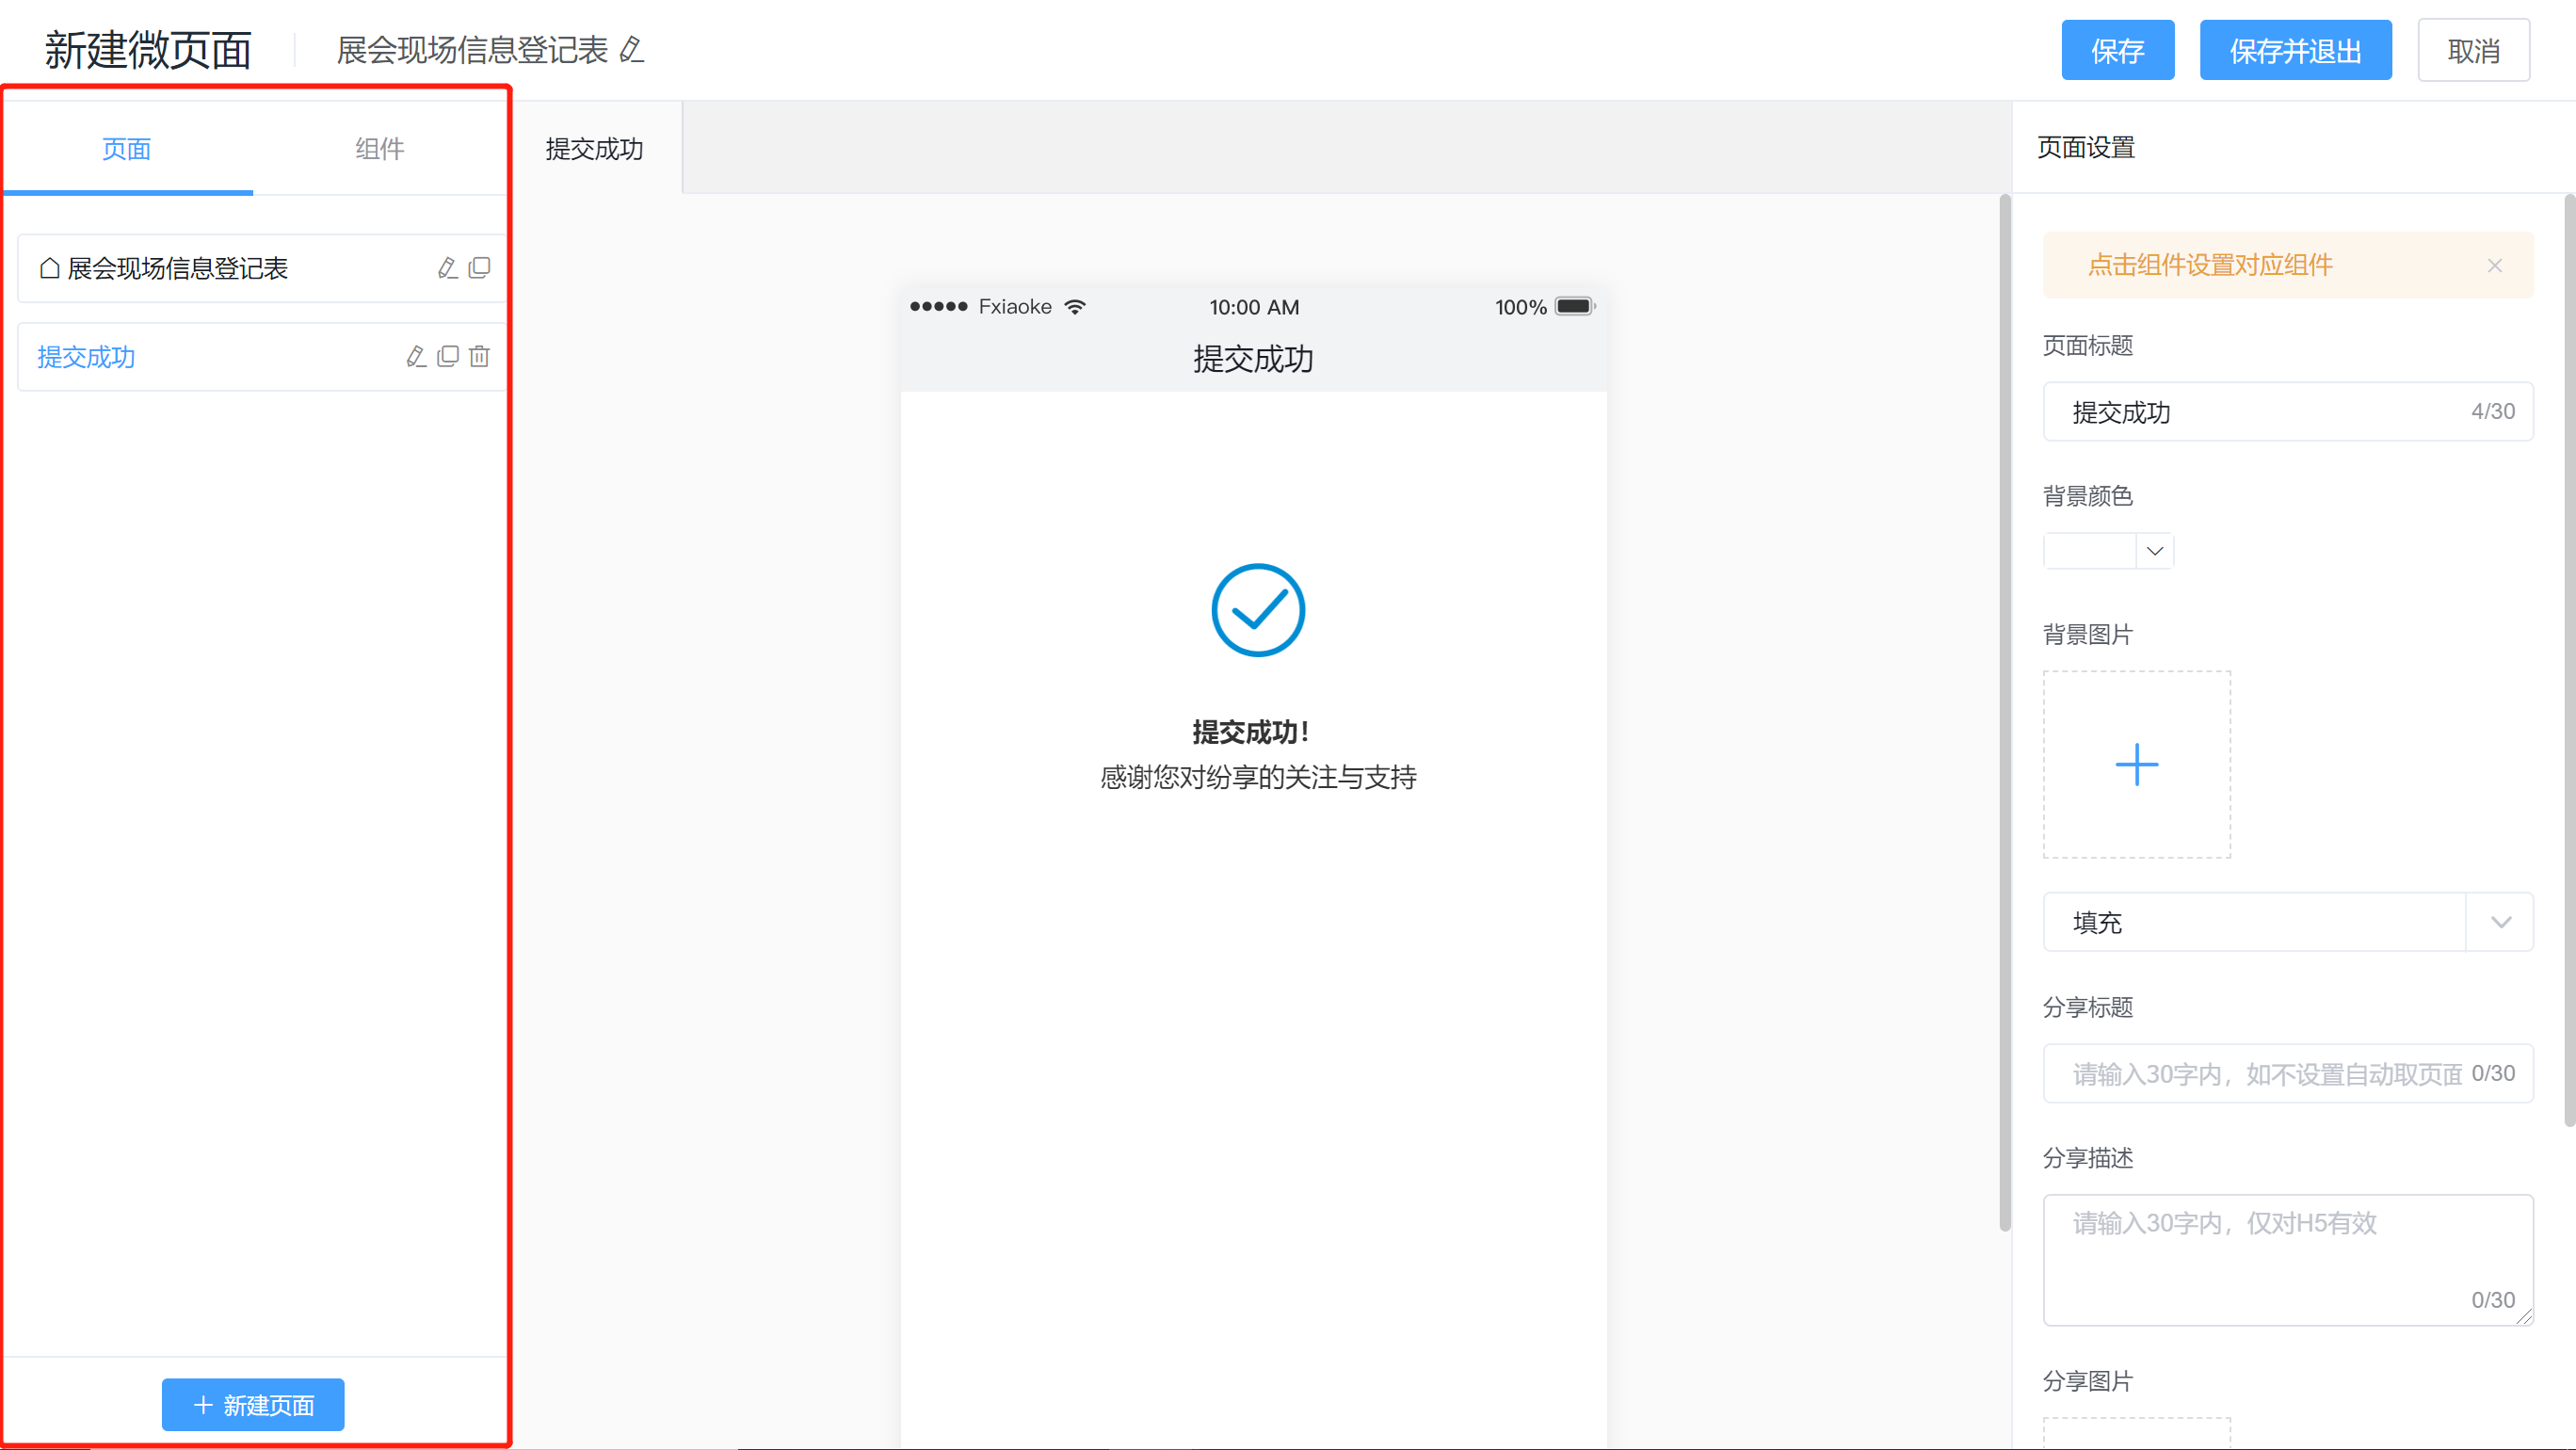
1) The left side of the micro-page design window: page management, component selection area
- Pages can manage internal pages here, and micro-pages can add multiple internal pages, such as the successful submission page after the form is successfully submitted, which can be added here;
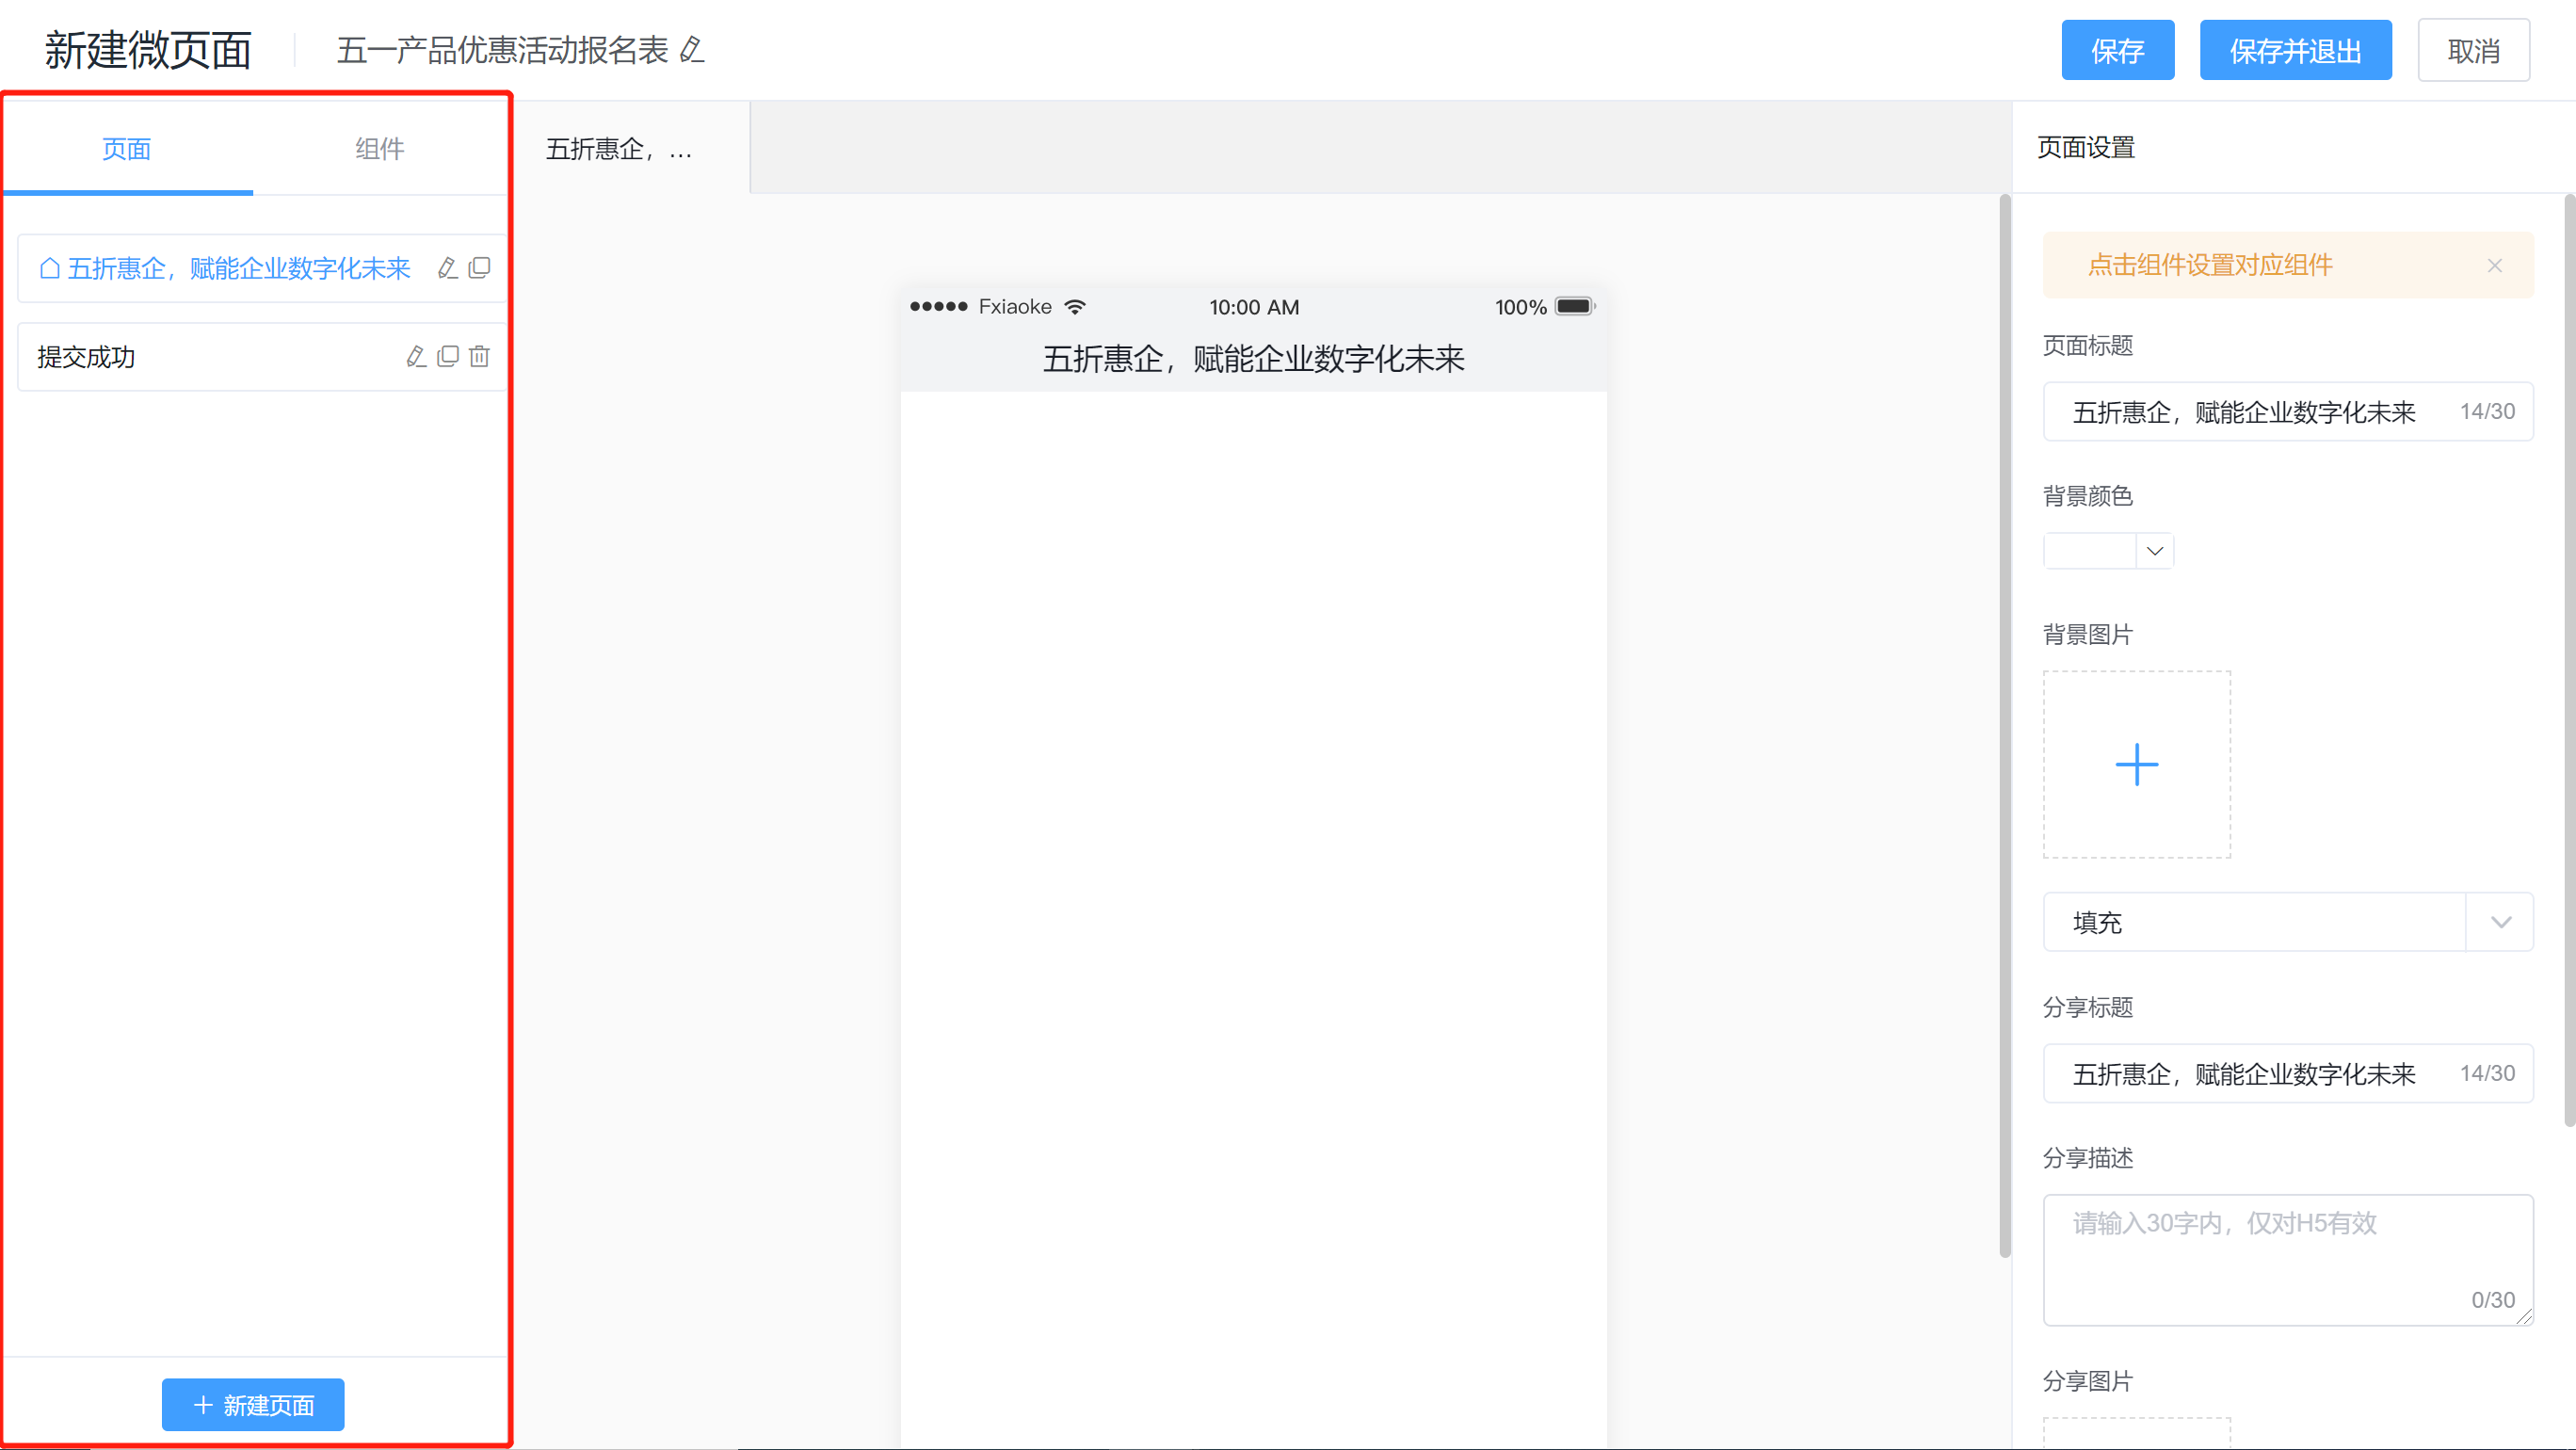
- The component page is used to display content information components, such as images, texts, videos, forms, etc.;
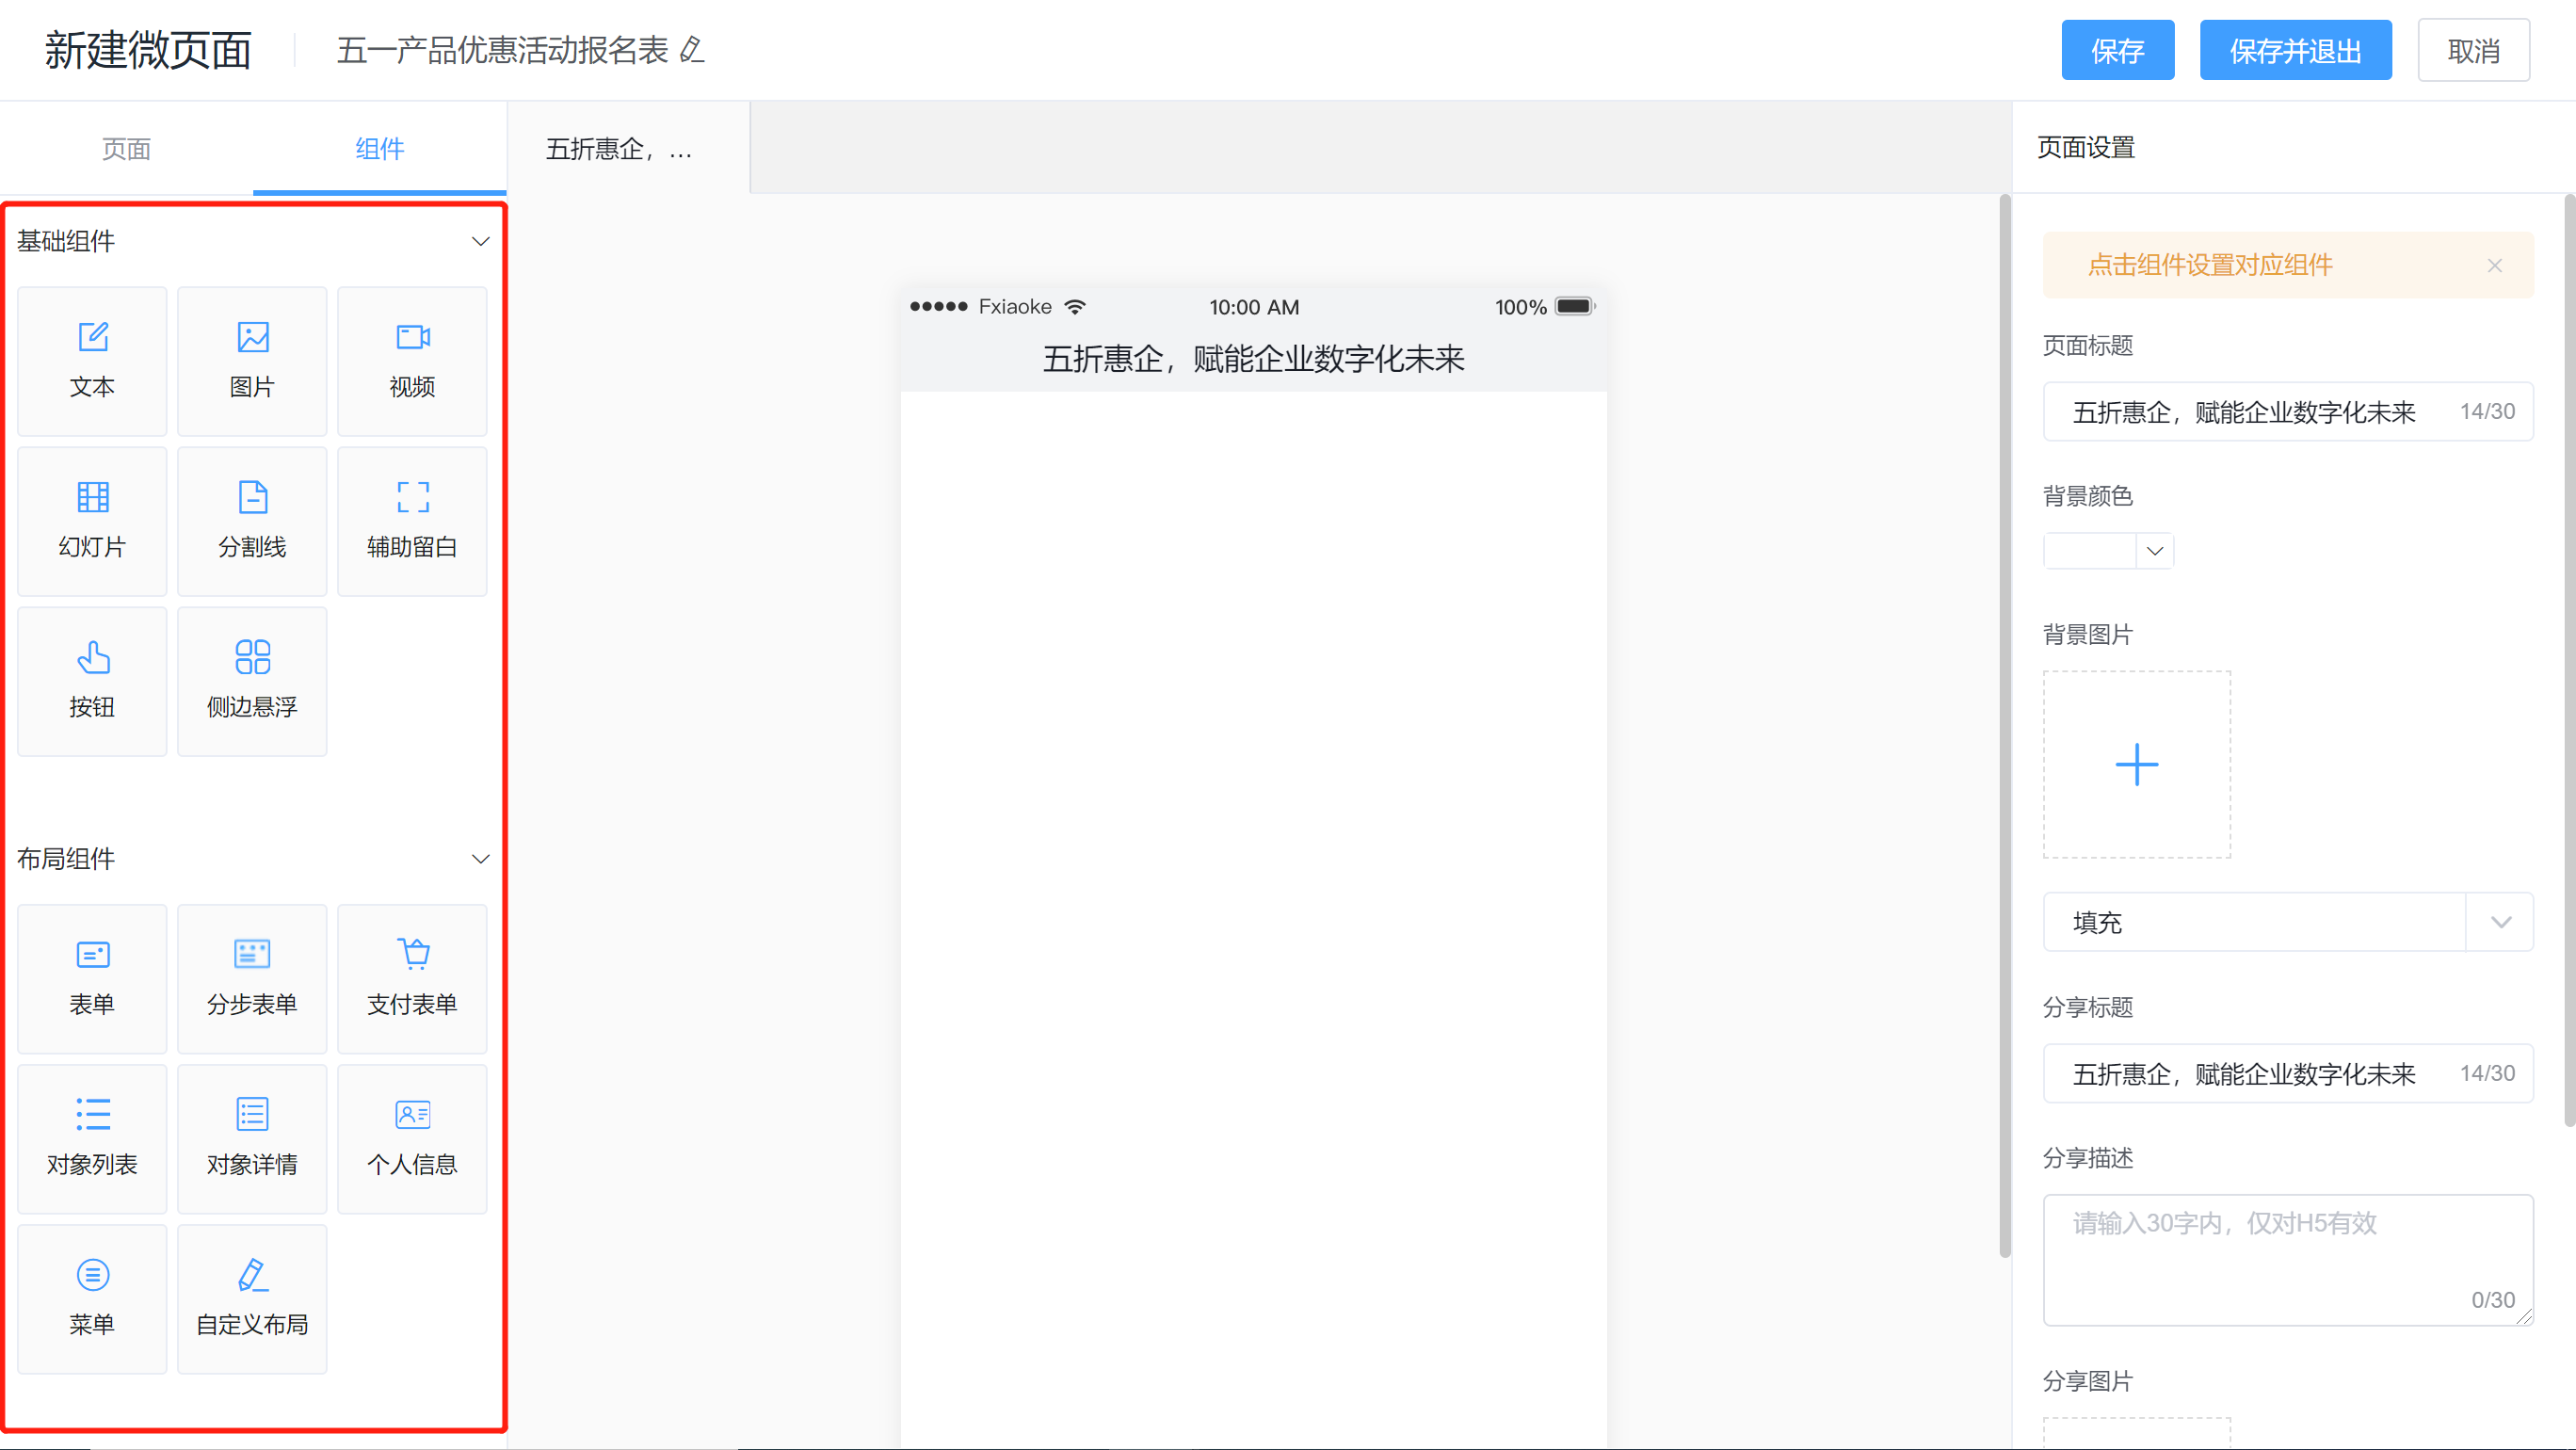
Click the left mouse button and hold down the component to drag it to the canvas;
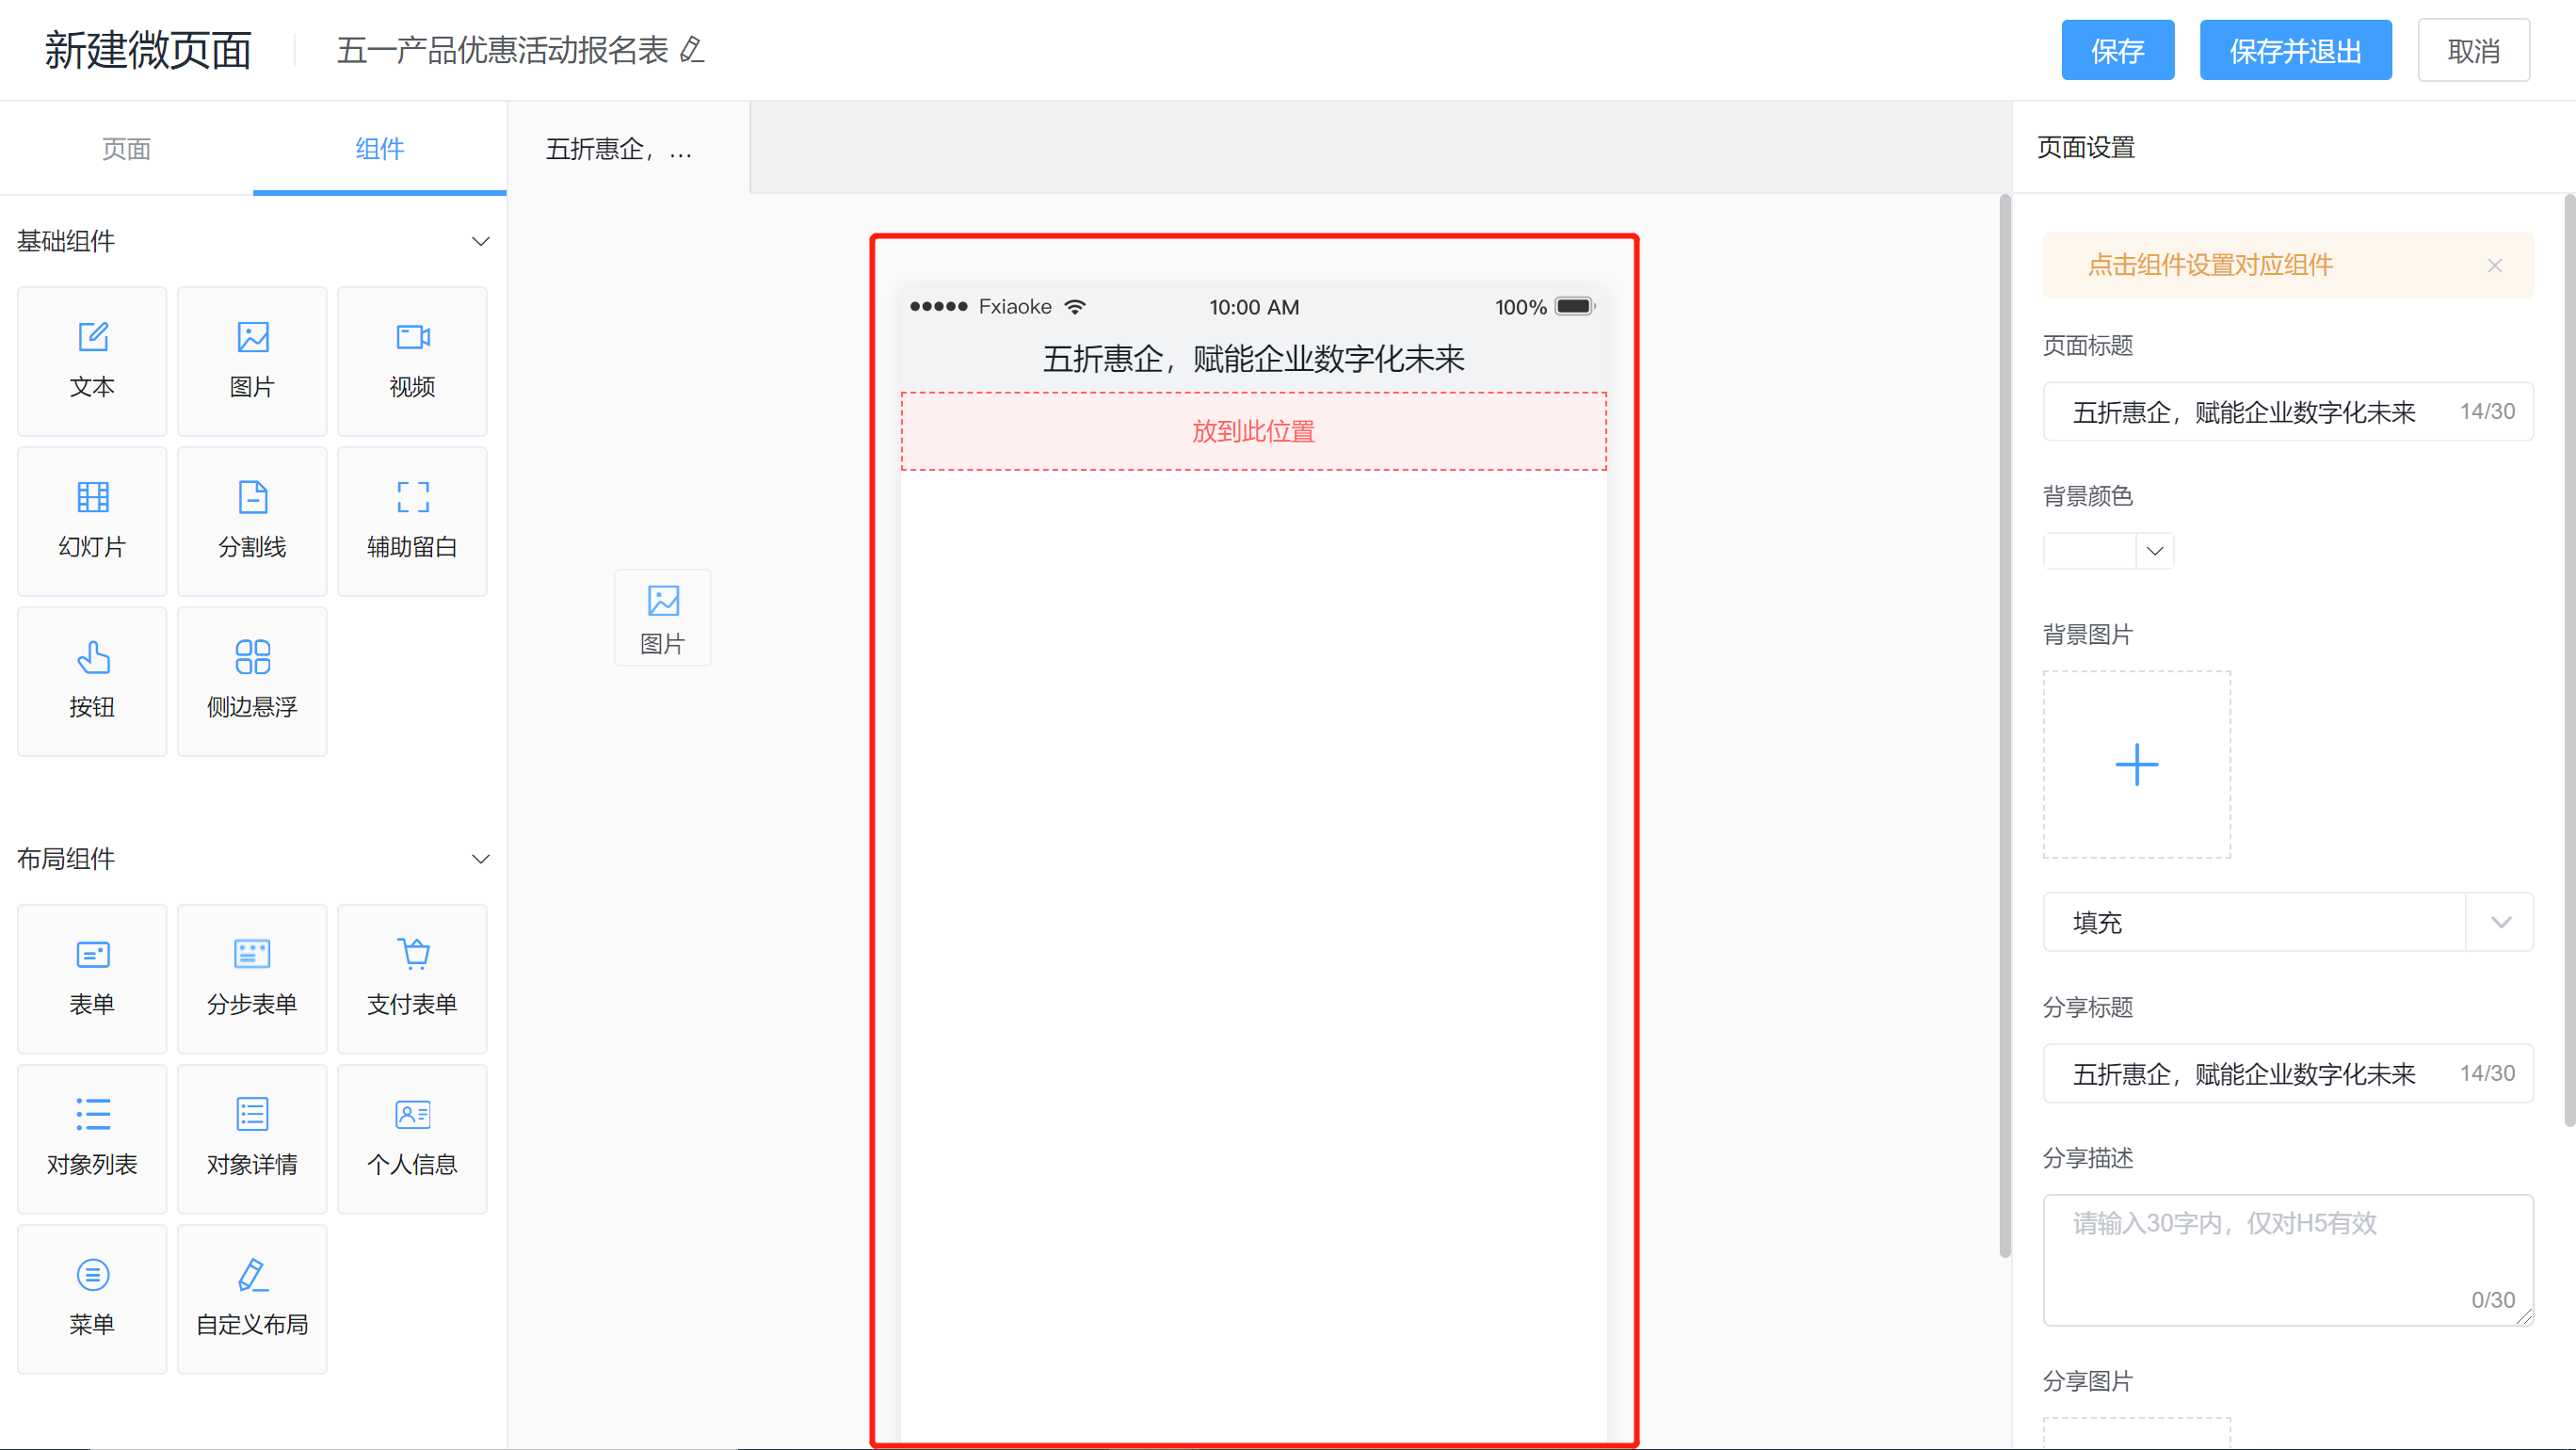
2) The middle part of the micro-page design window: the canvas, where page components are organized and content edited;
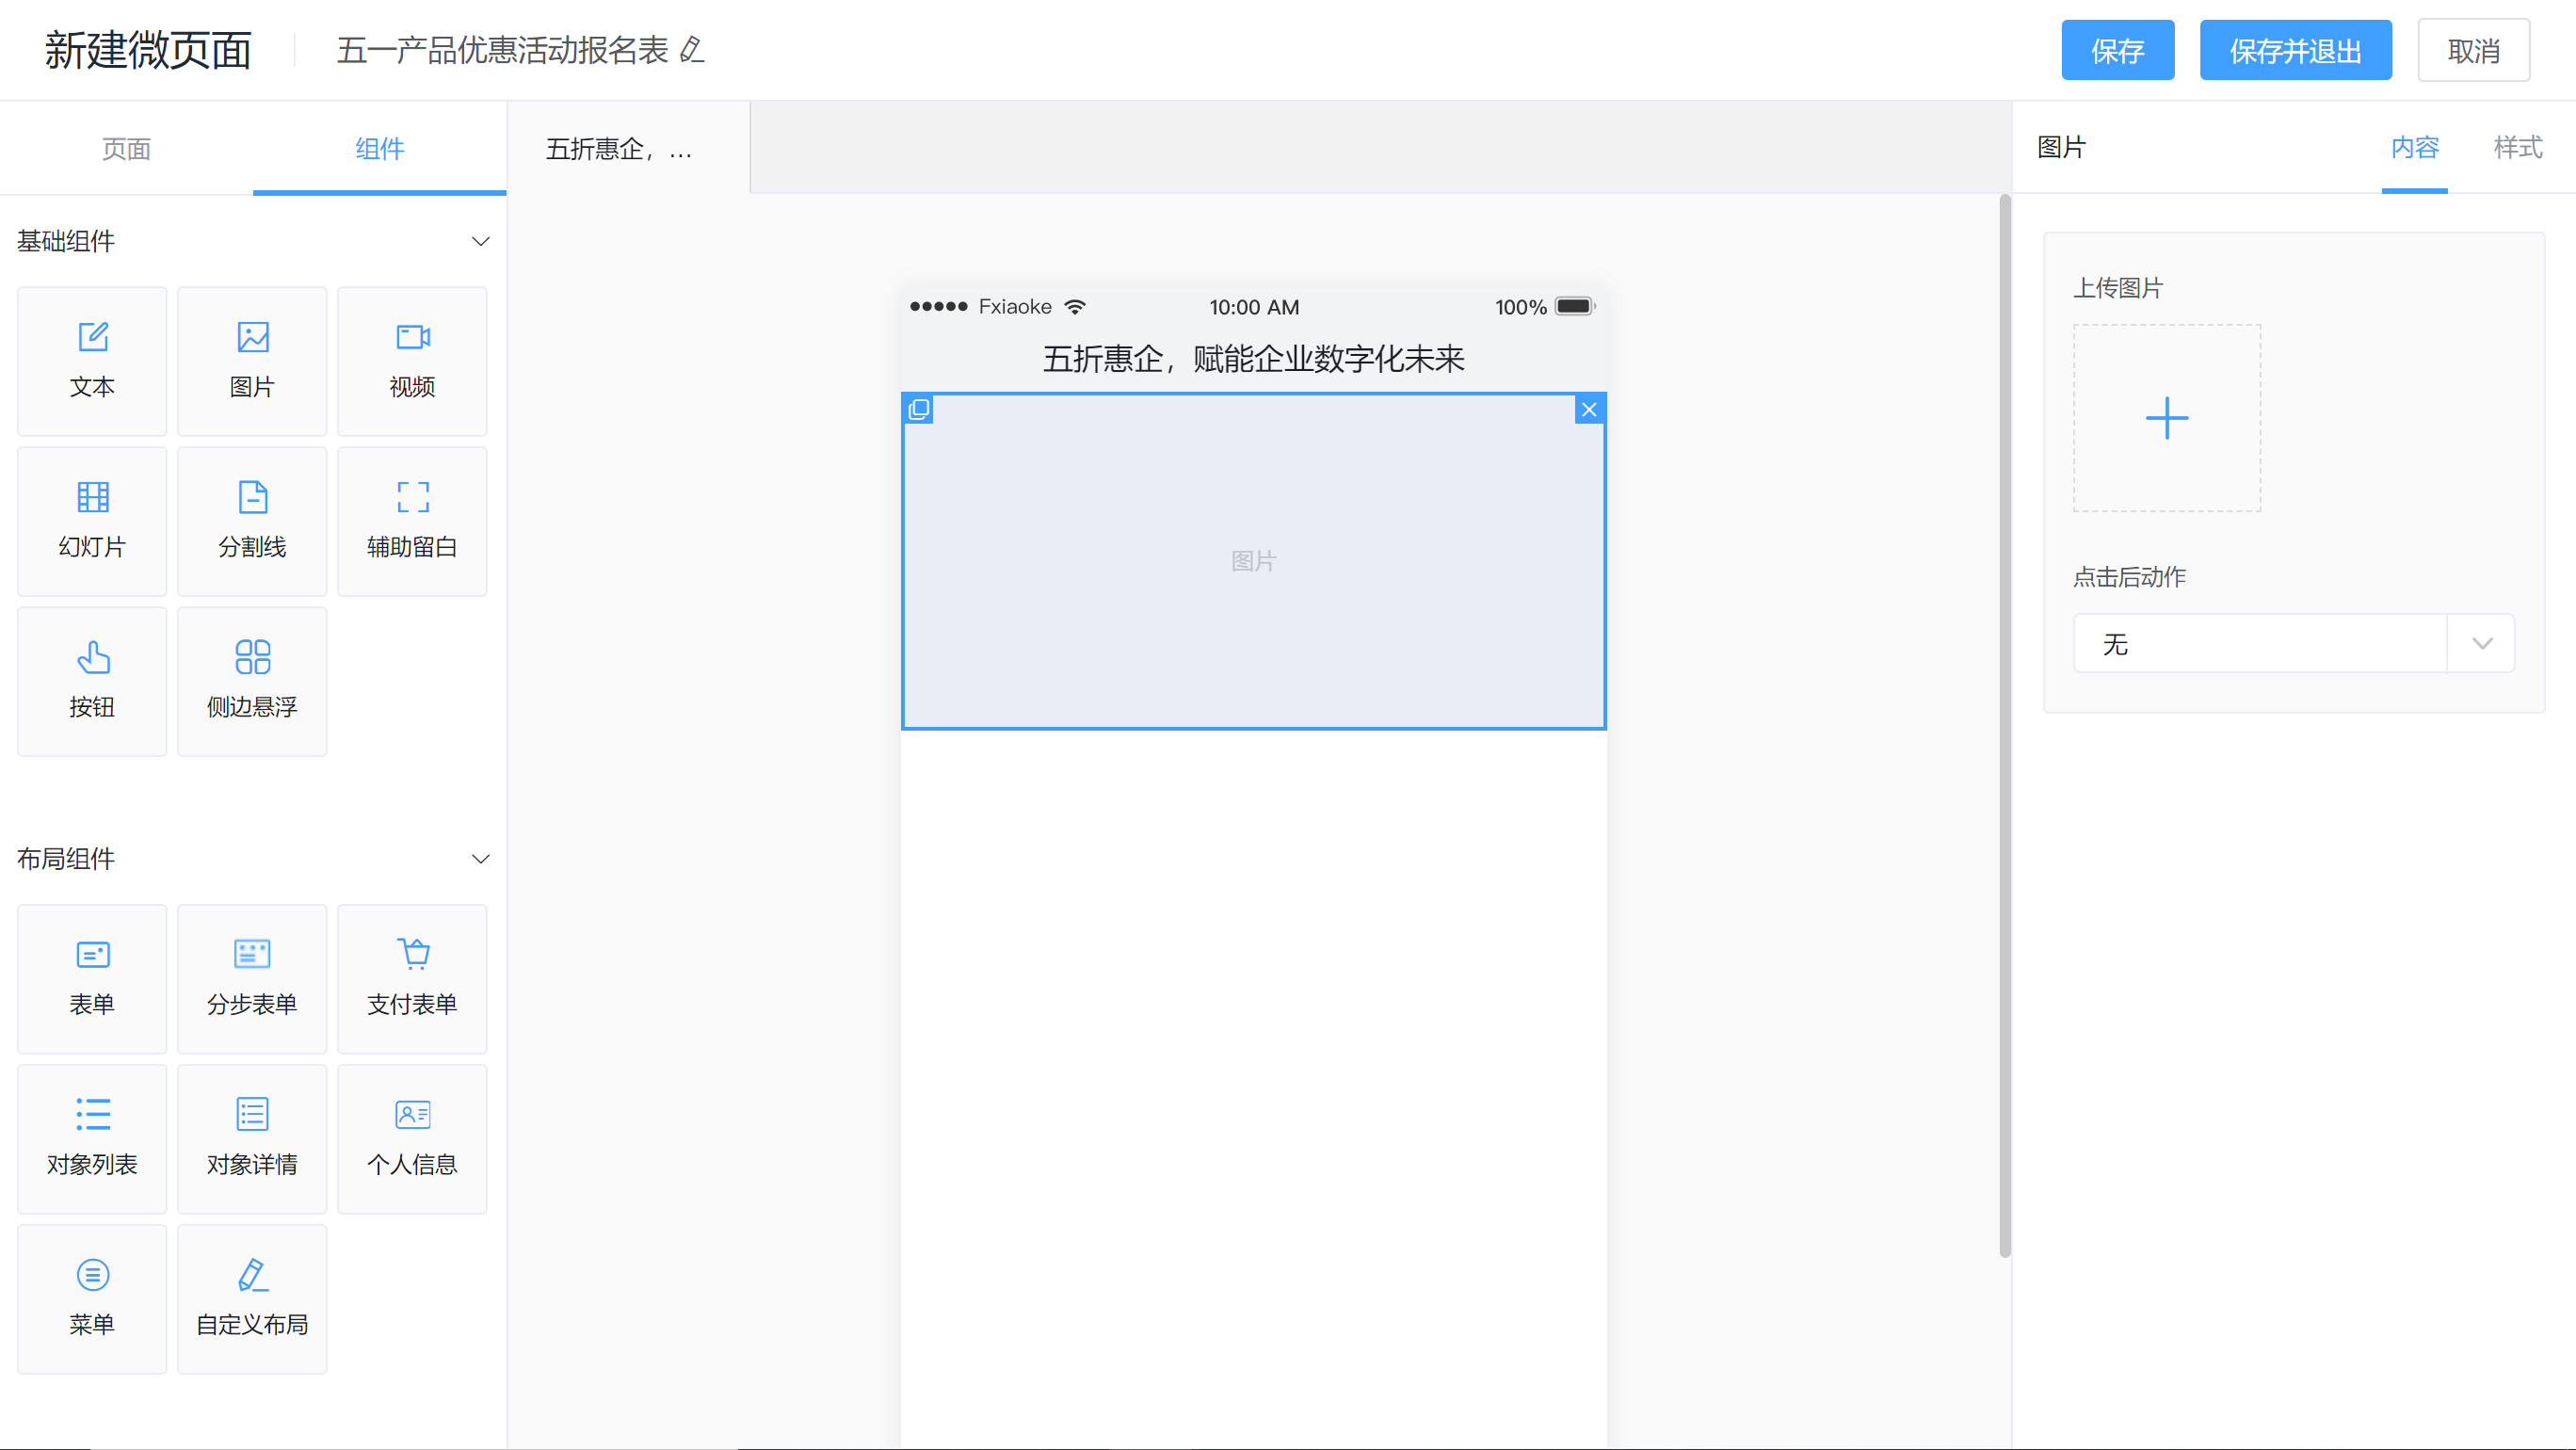
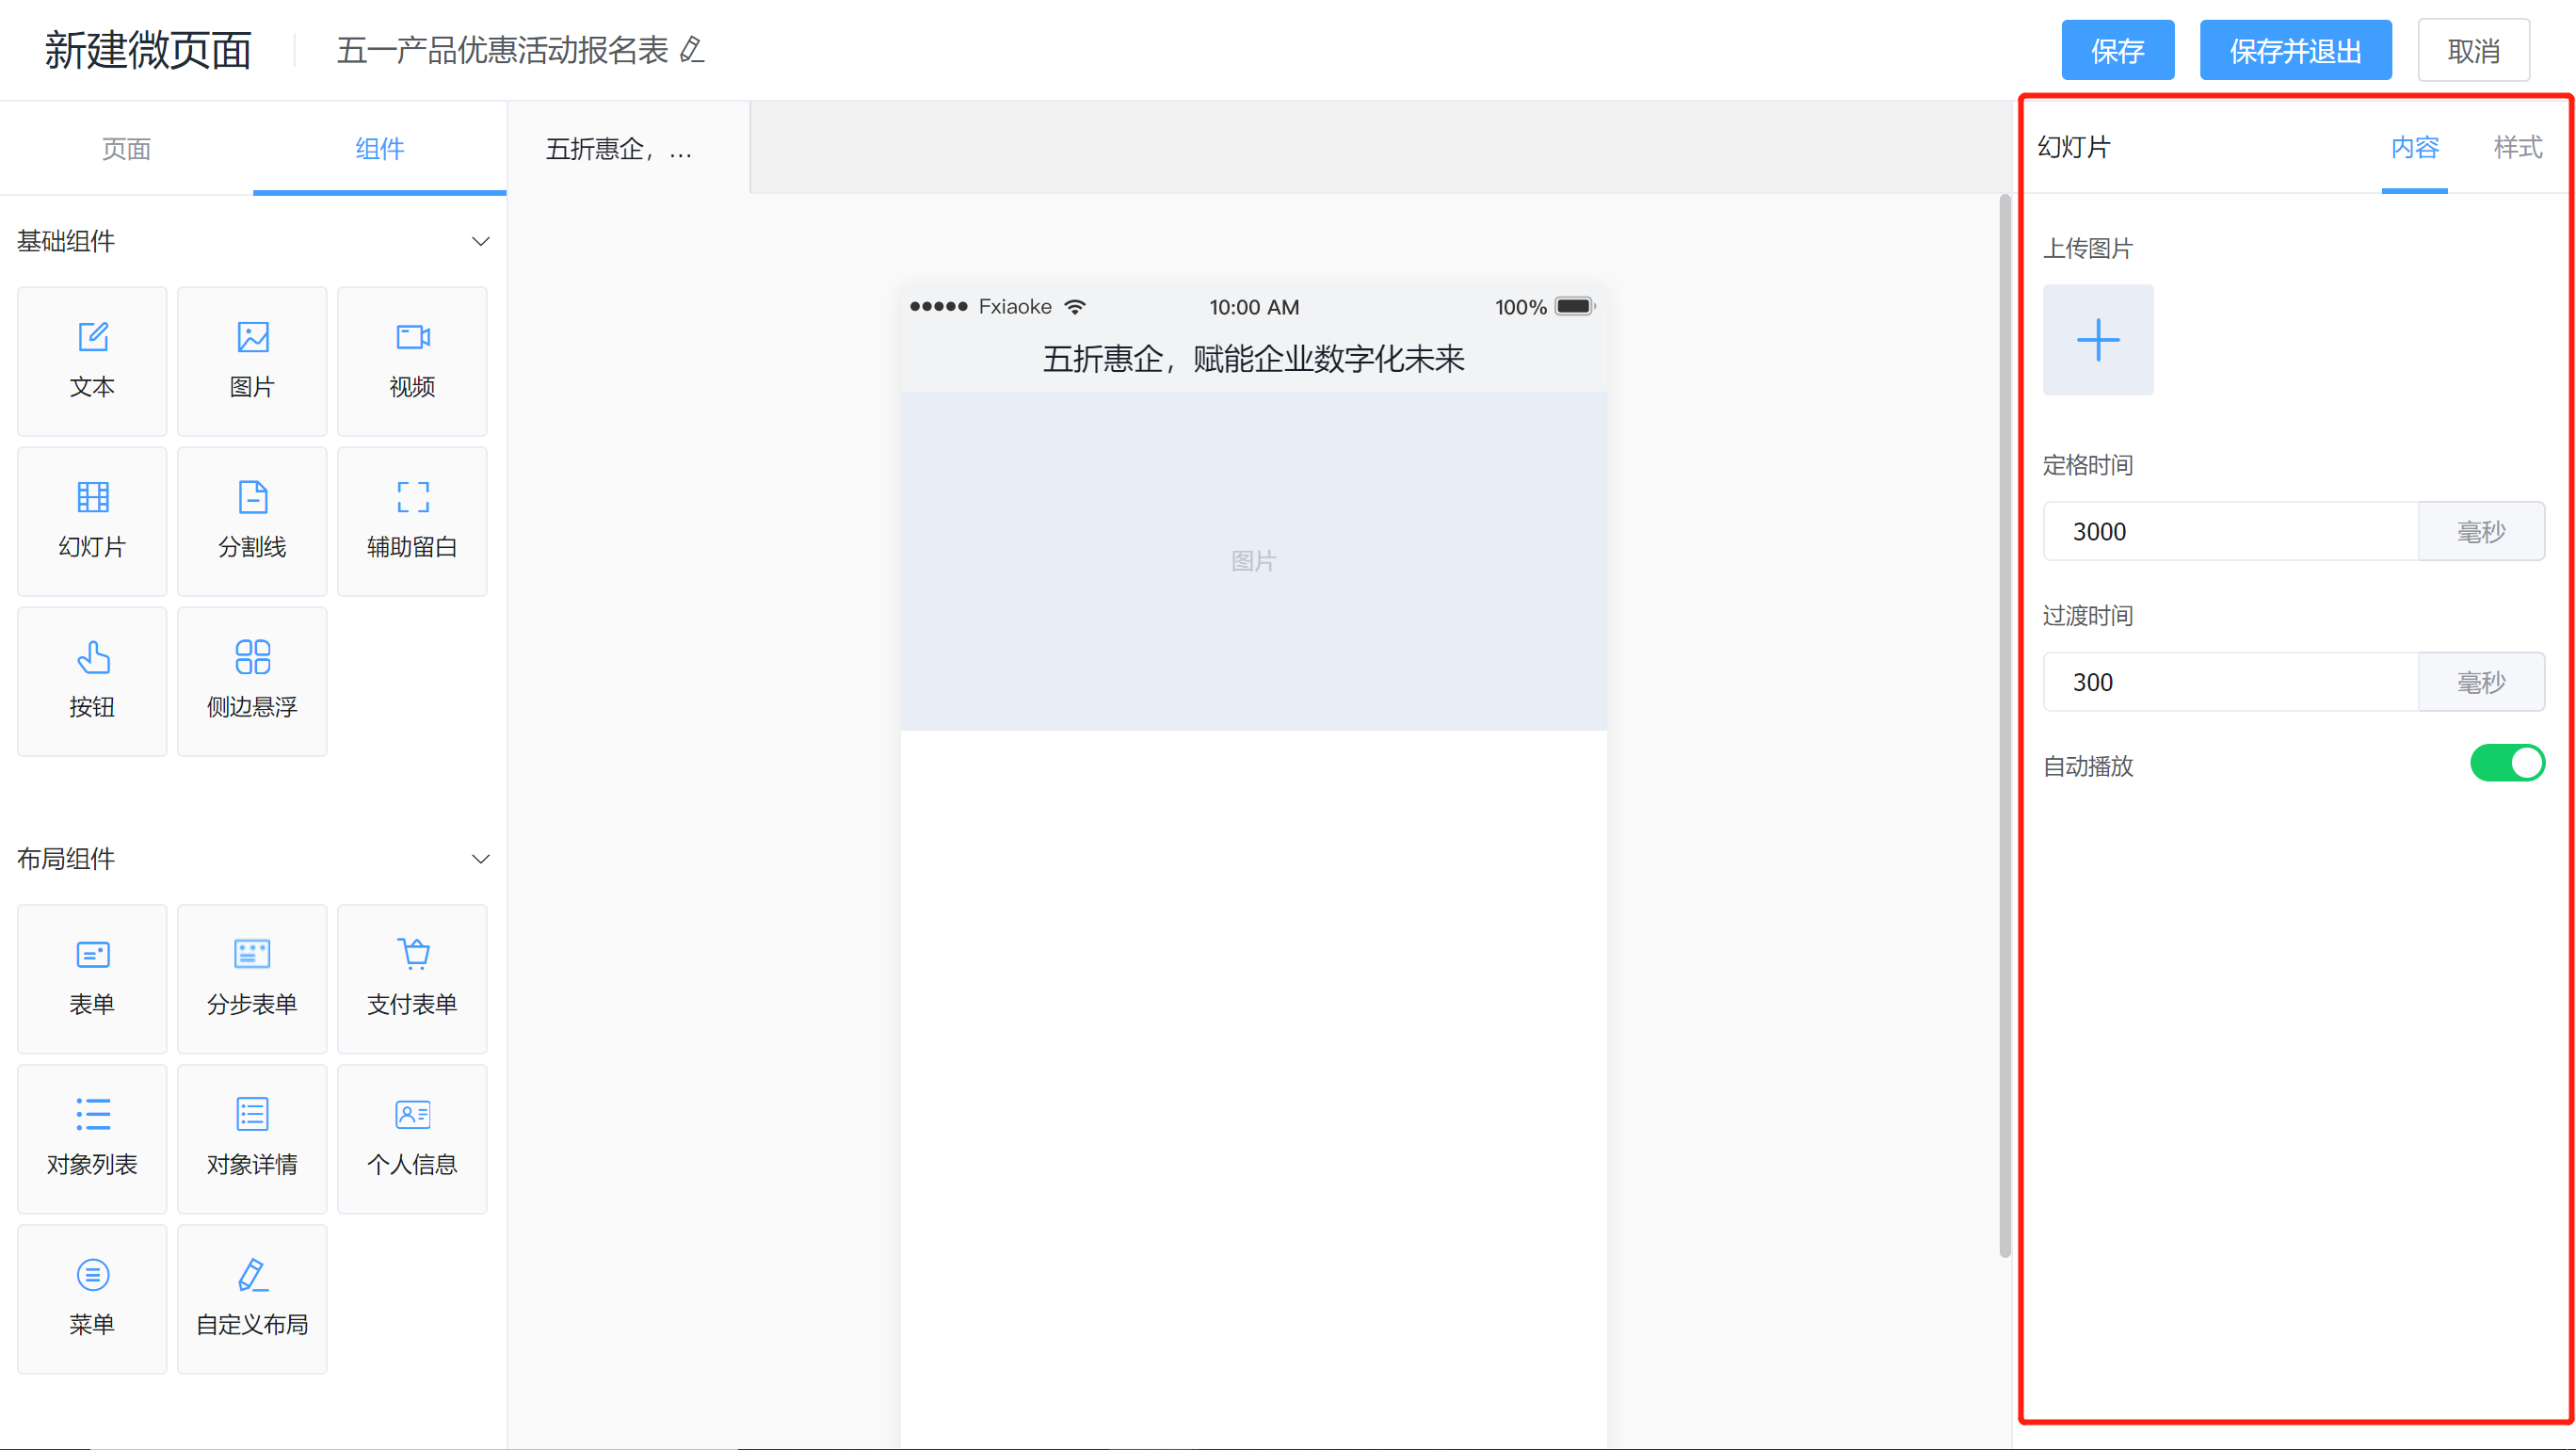
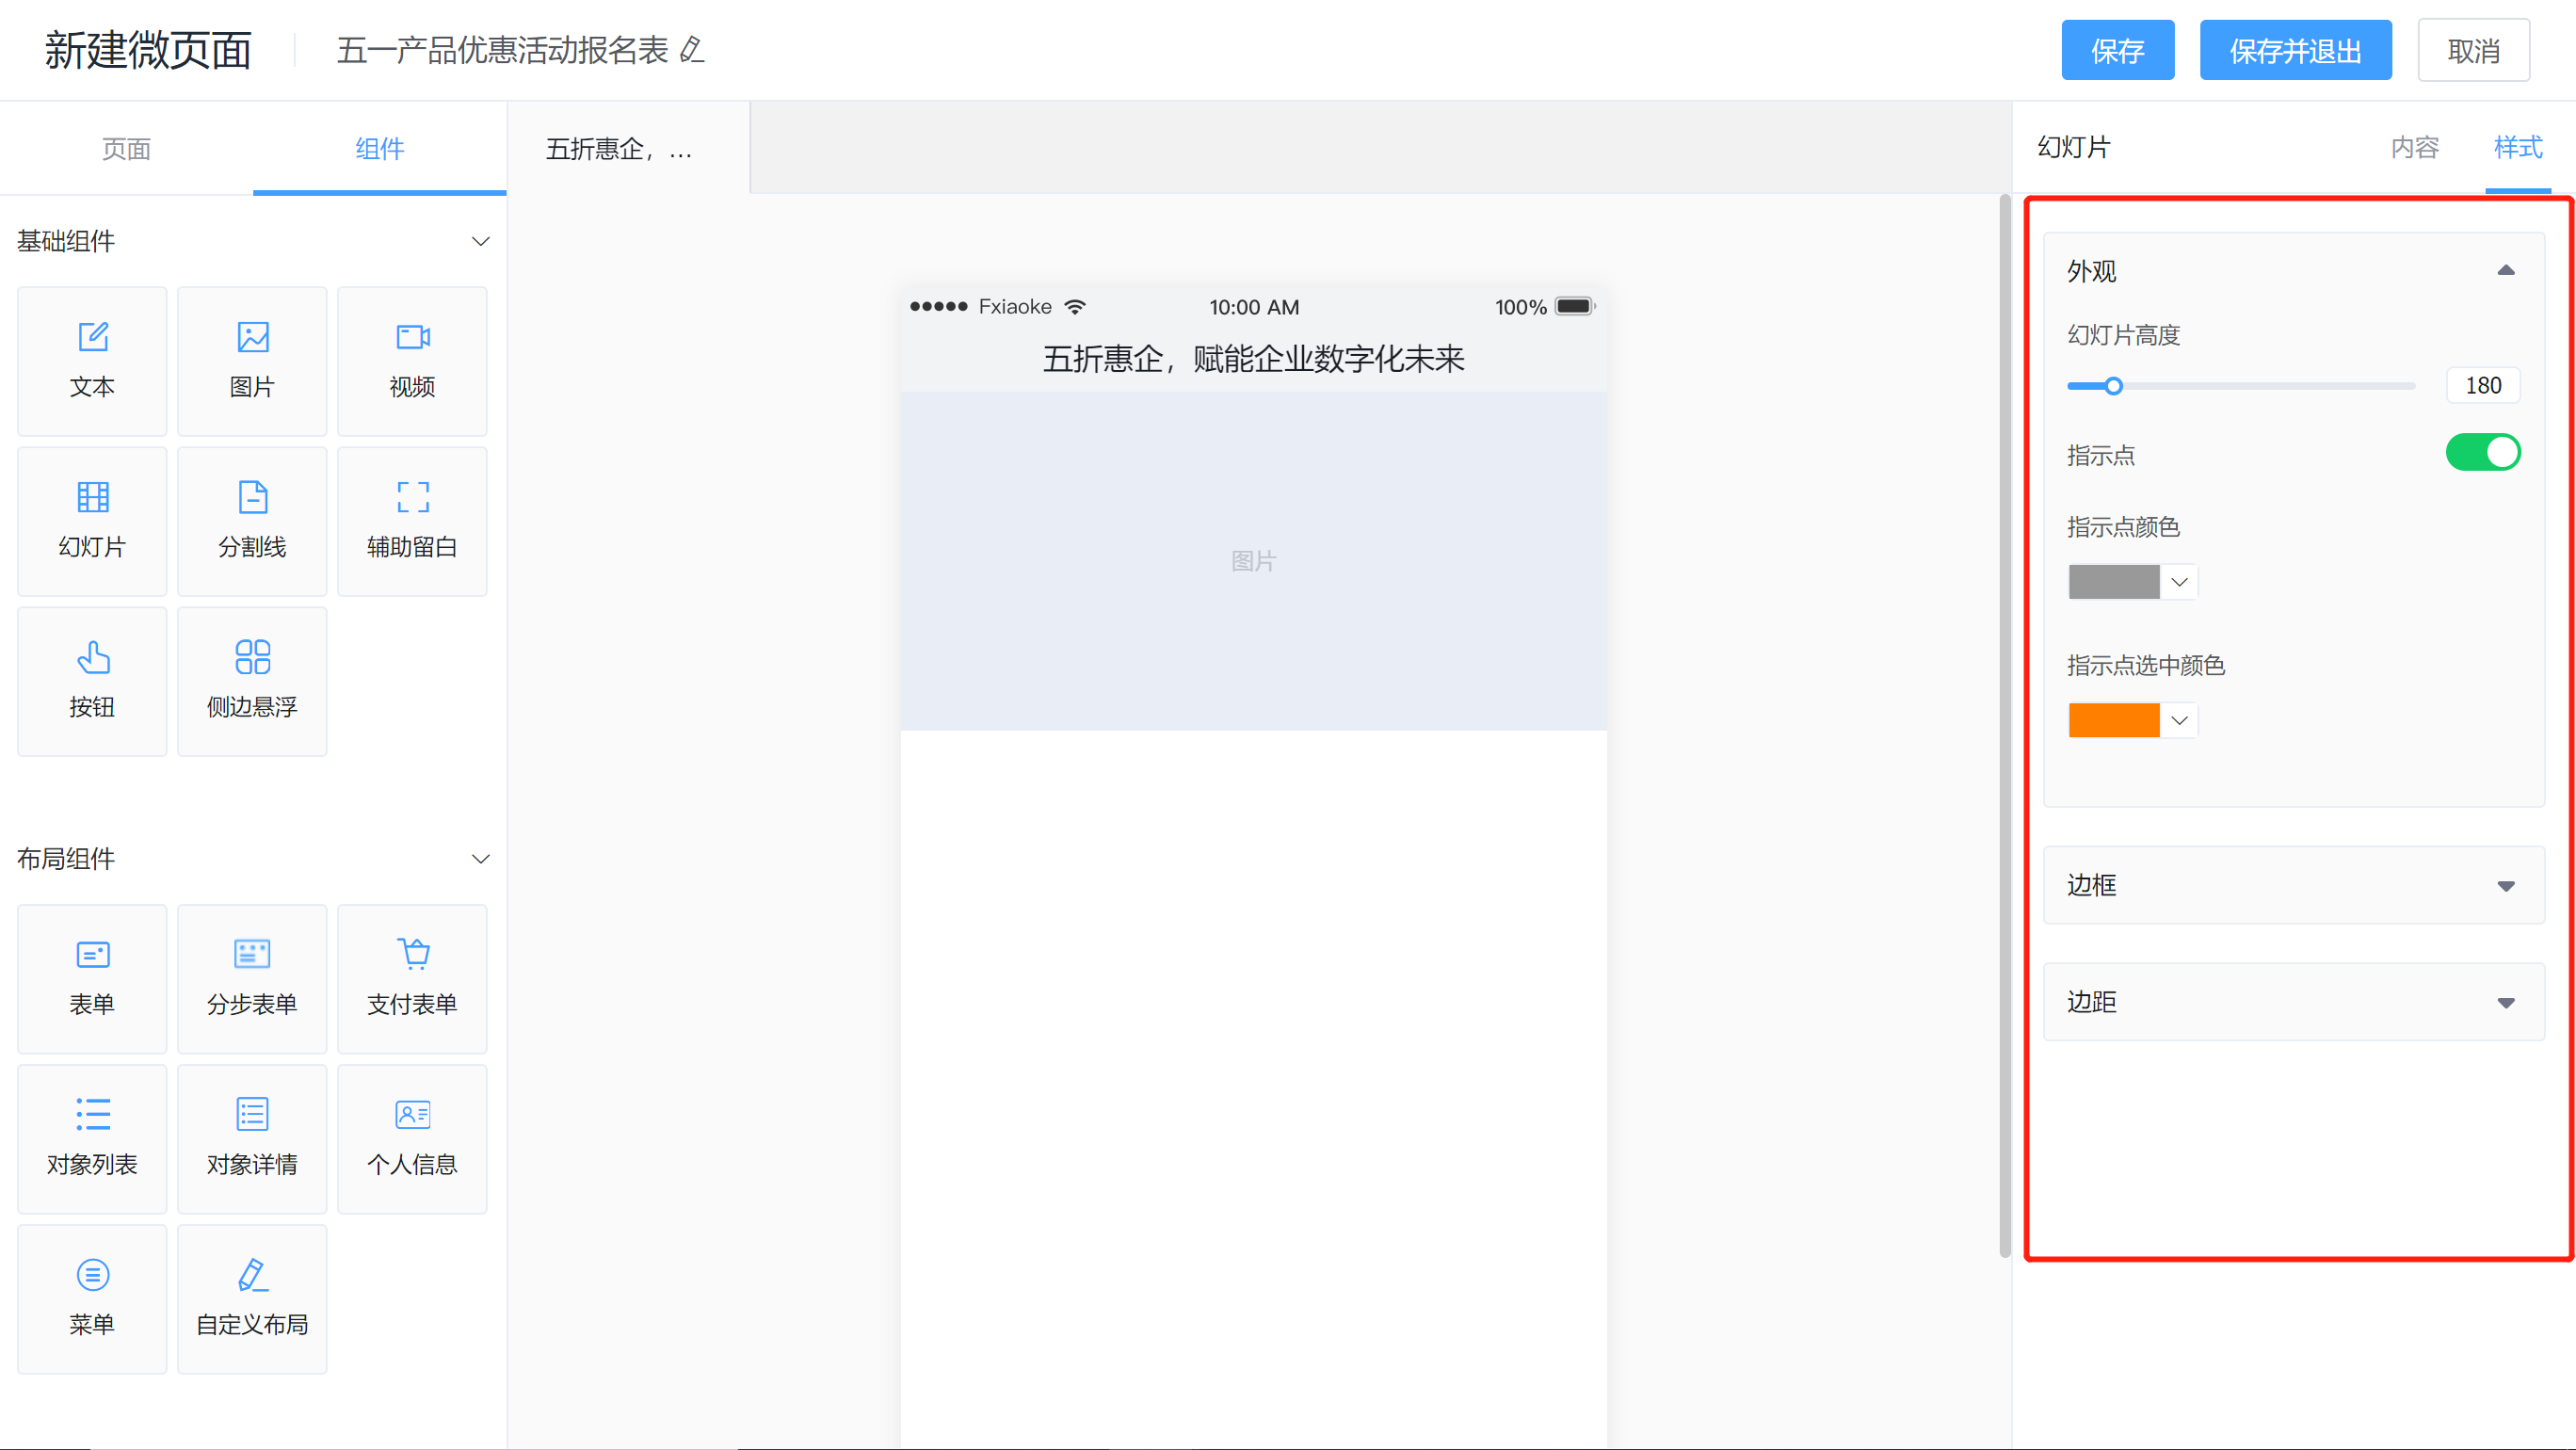
3) On the right side of the micro-page, component setting area:
- Page Settings: set the page title, post title, post description, and post images here

- Component Settings: set the display content and style of the component;
3. Design micro-pages (add a custom layout to display content, a form component)
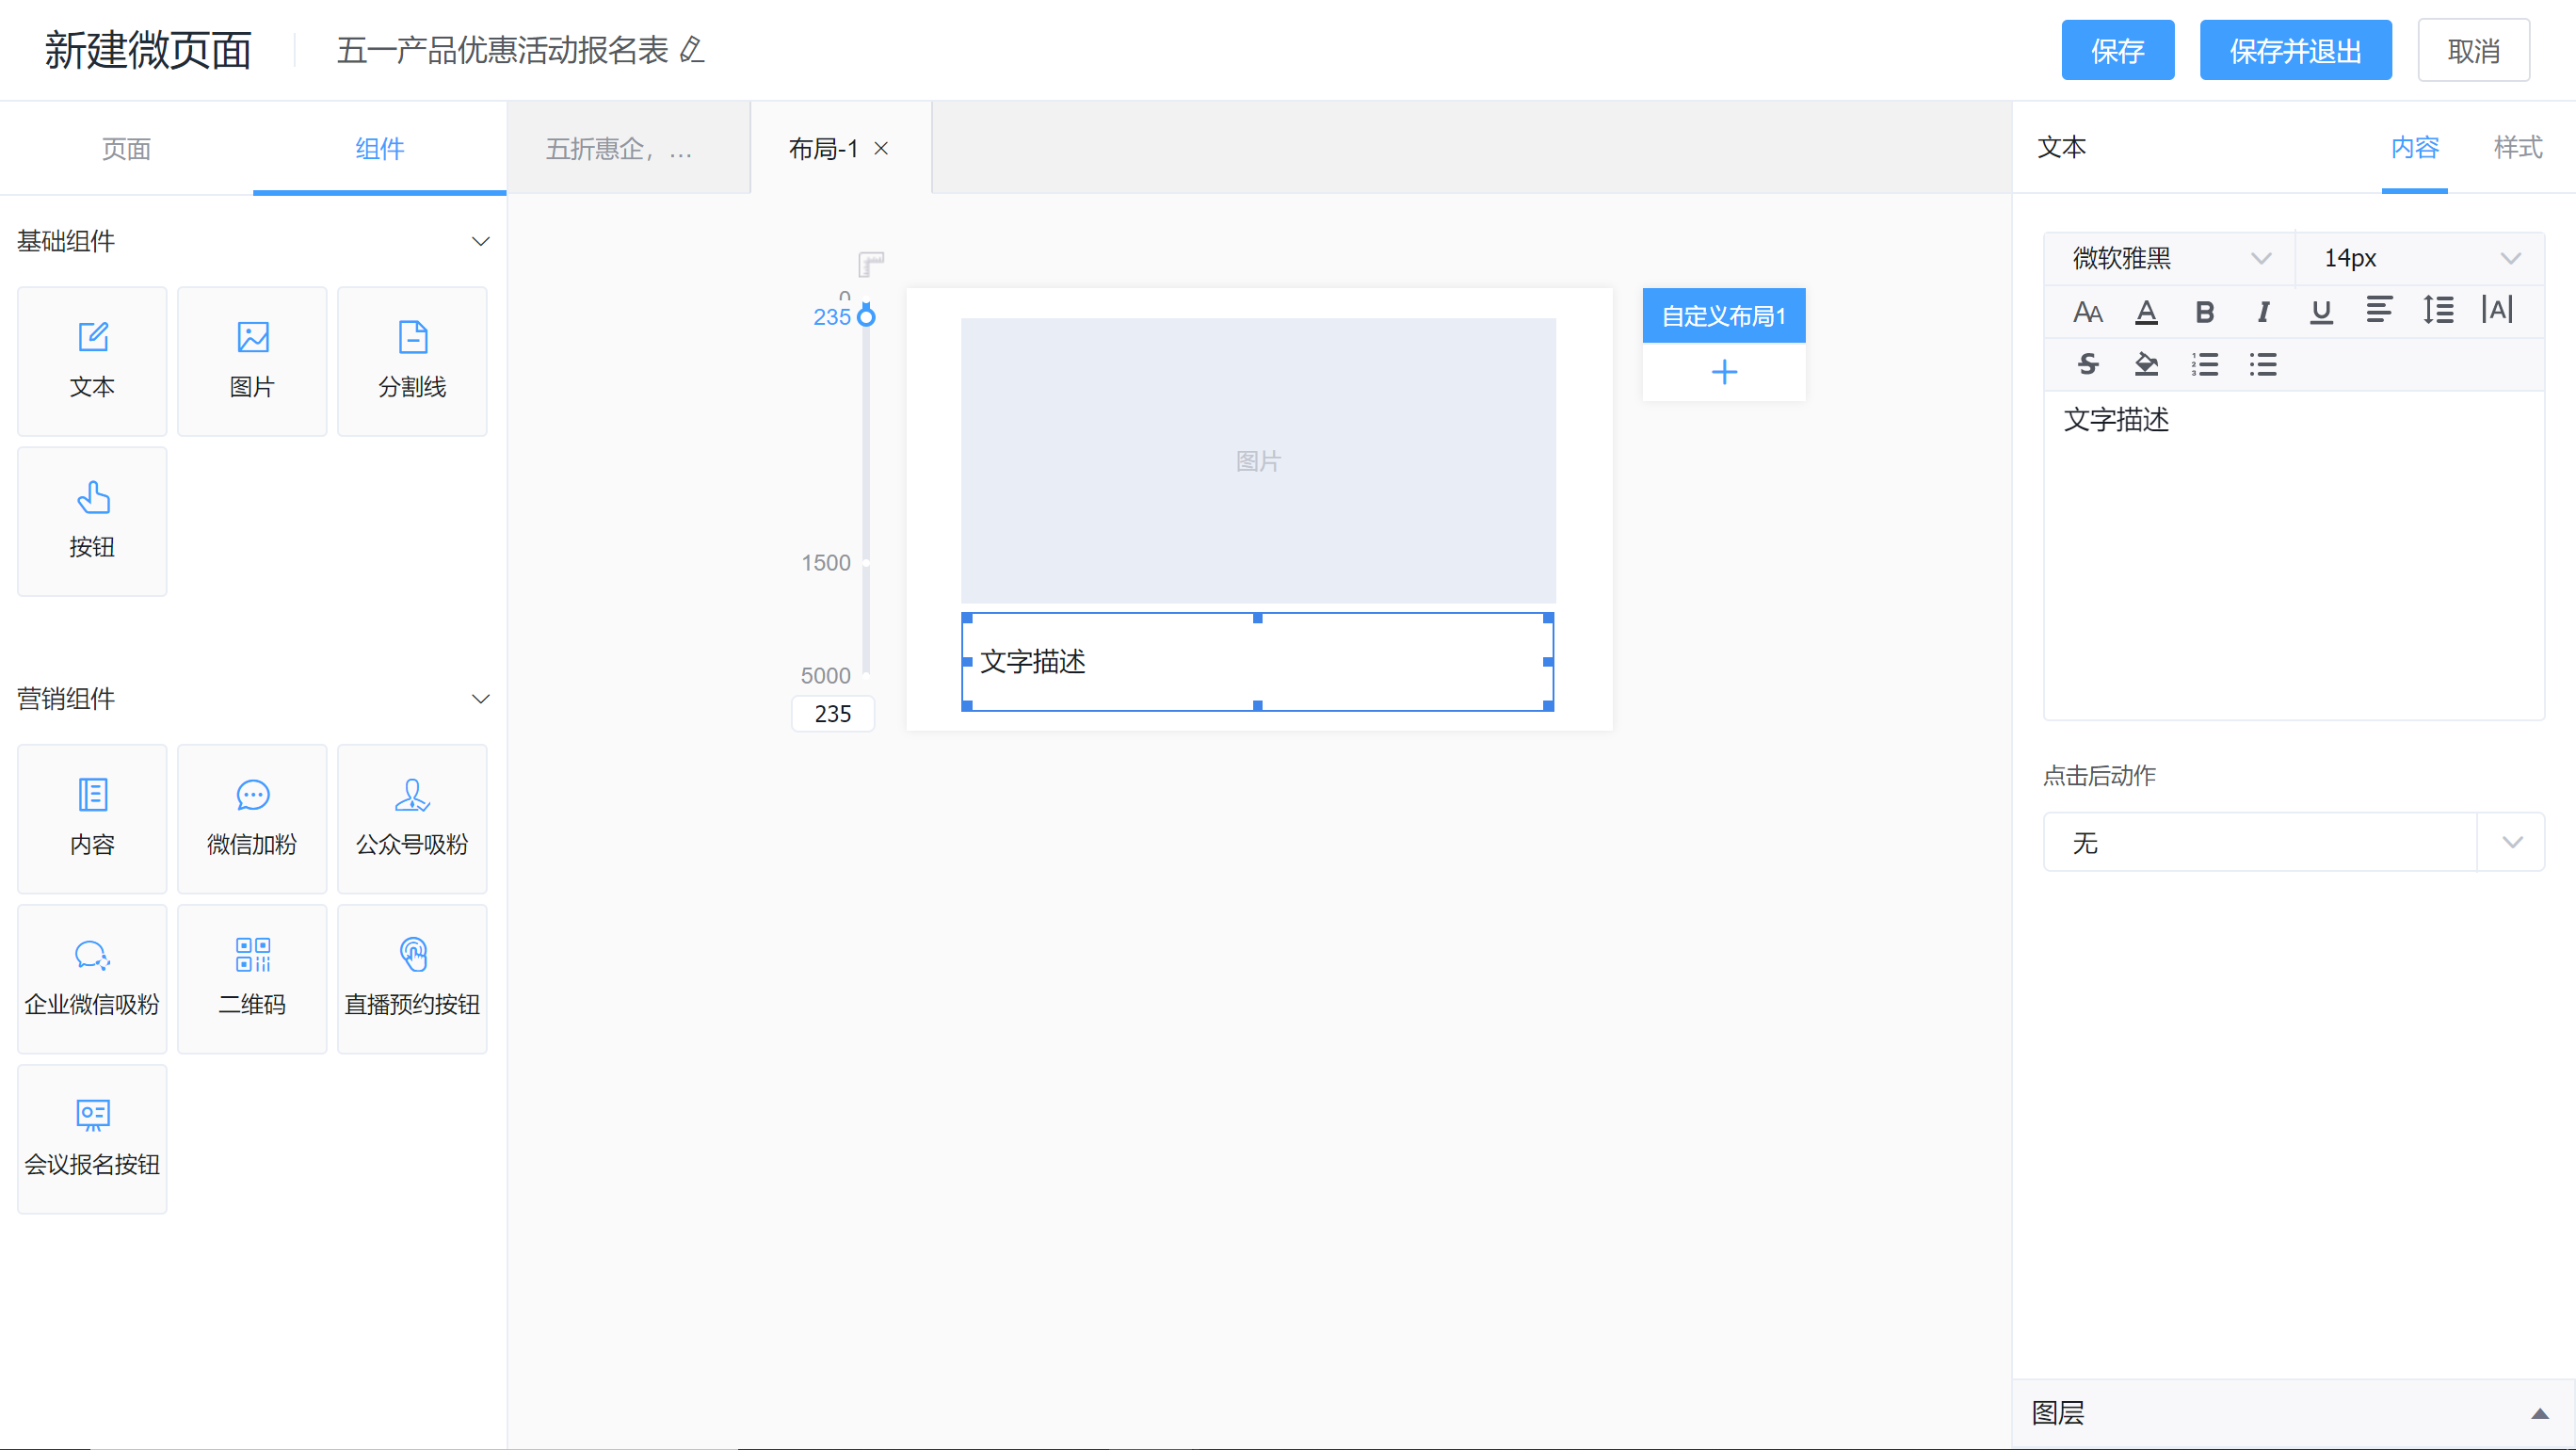
- Layout Component: You can customize the display content more flexibly. Usually, the display of graphics and text can be designed through the [Custom Layout] component;
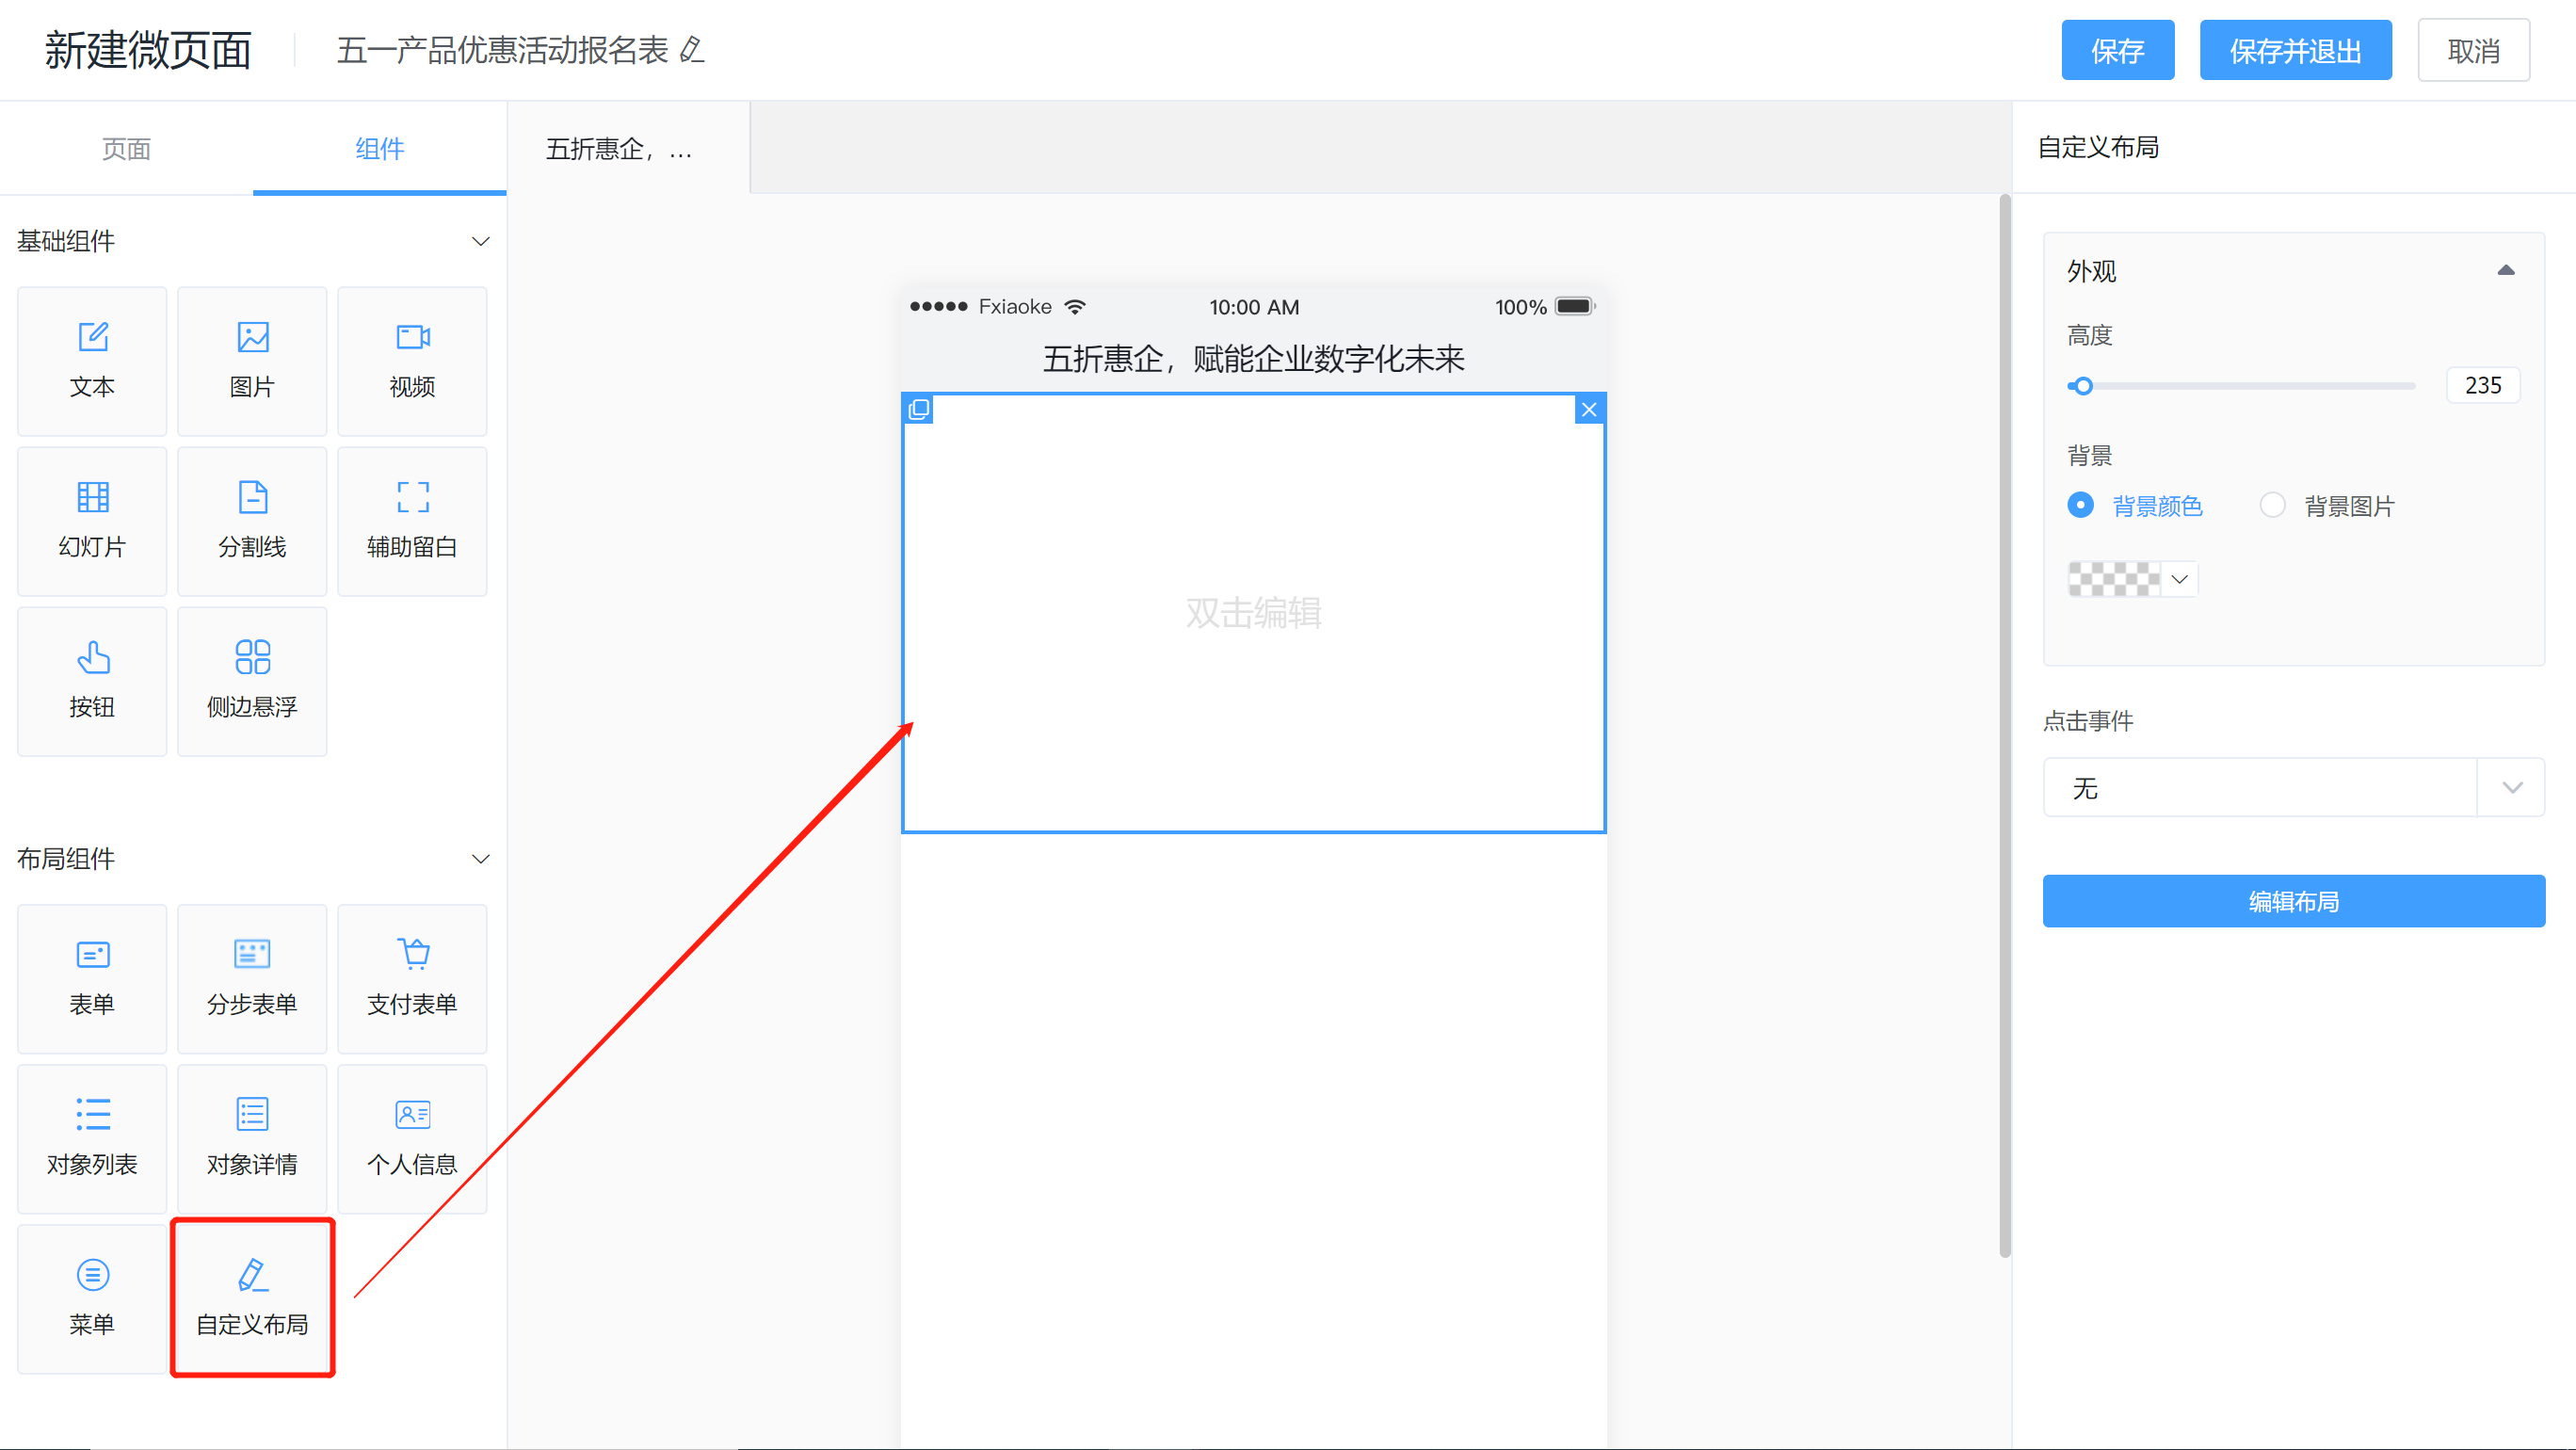
Double-click the custom layout component on the canvas to enter the editor for graphic display design:
- Form Components: usually used for information collection;
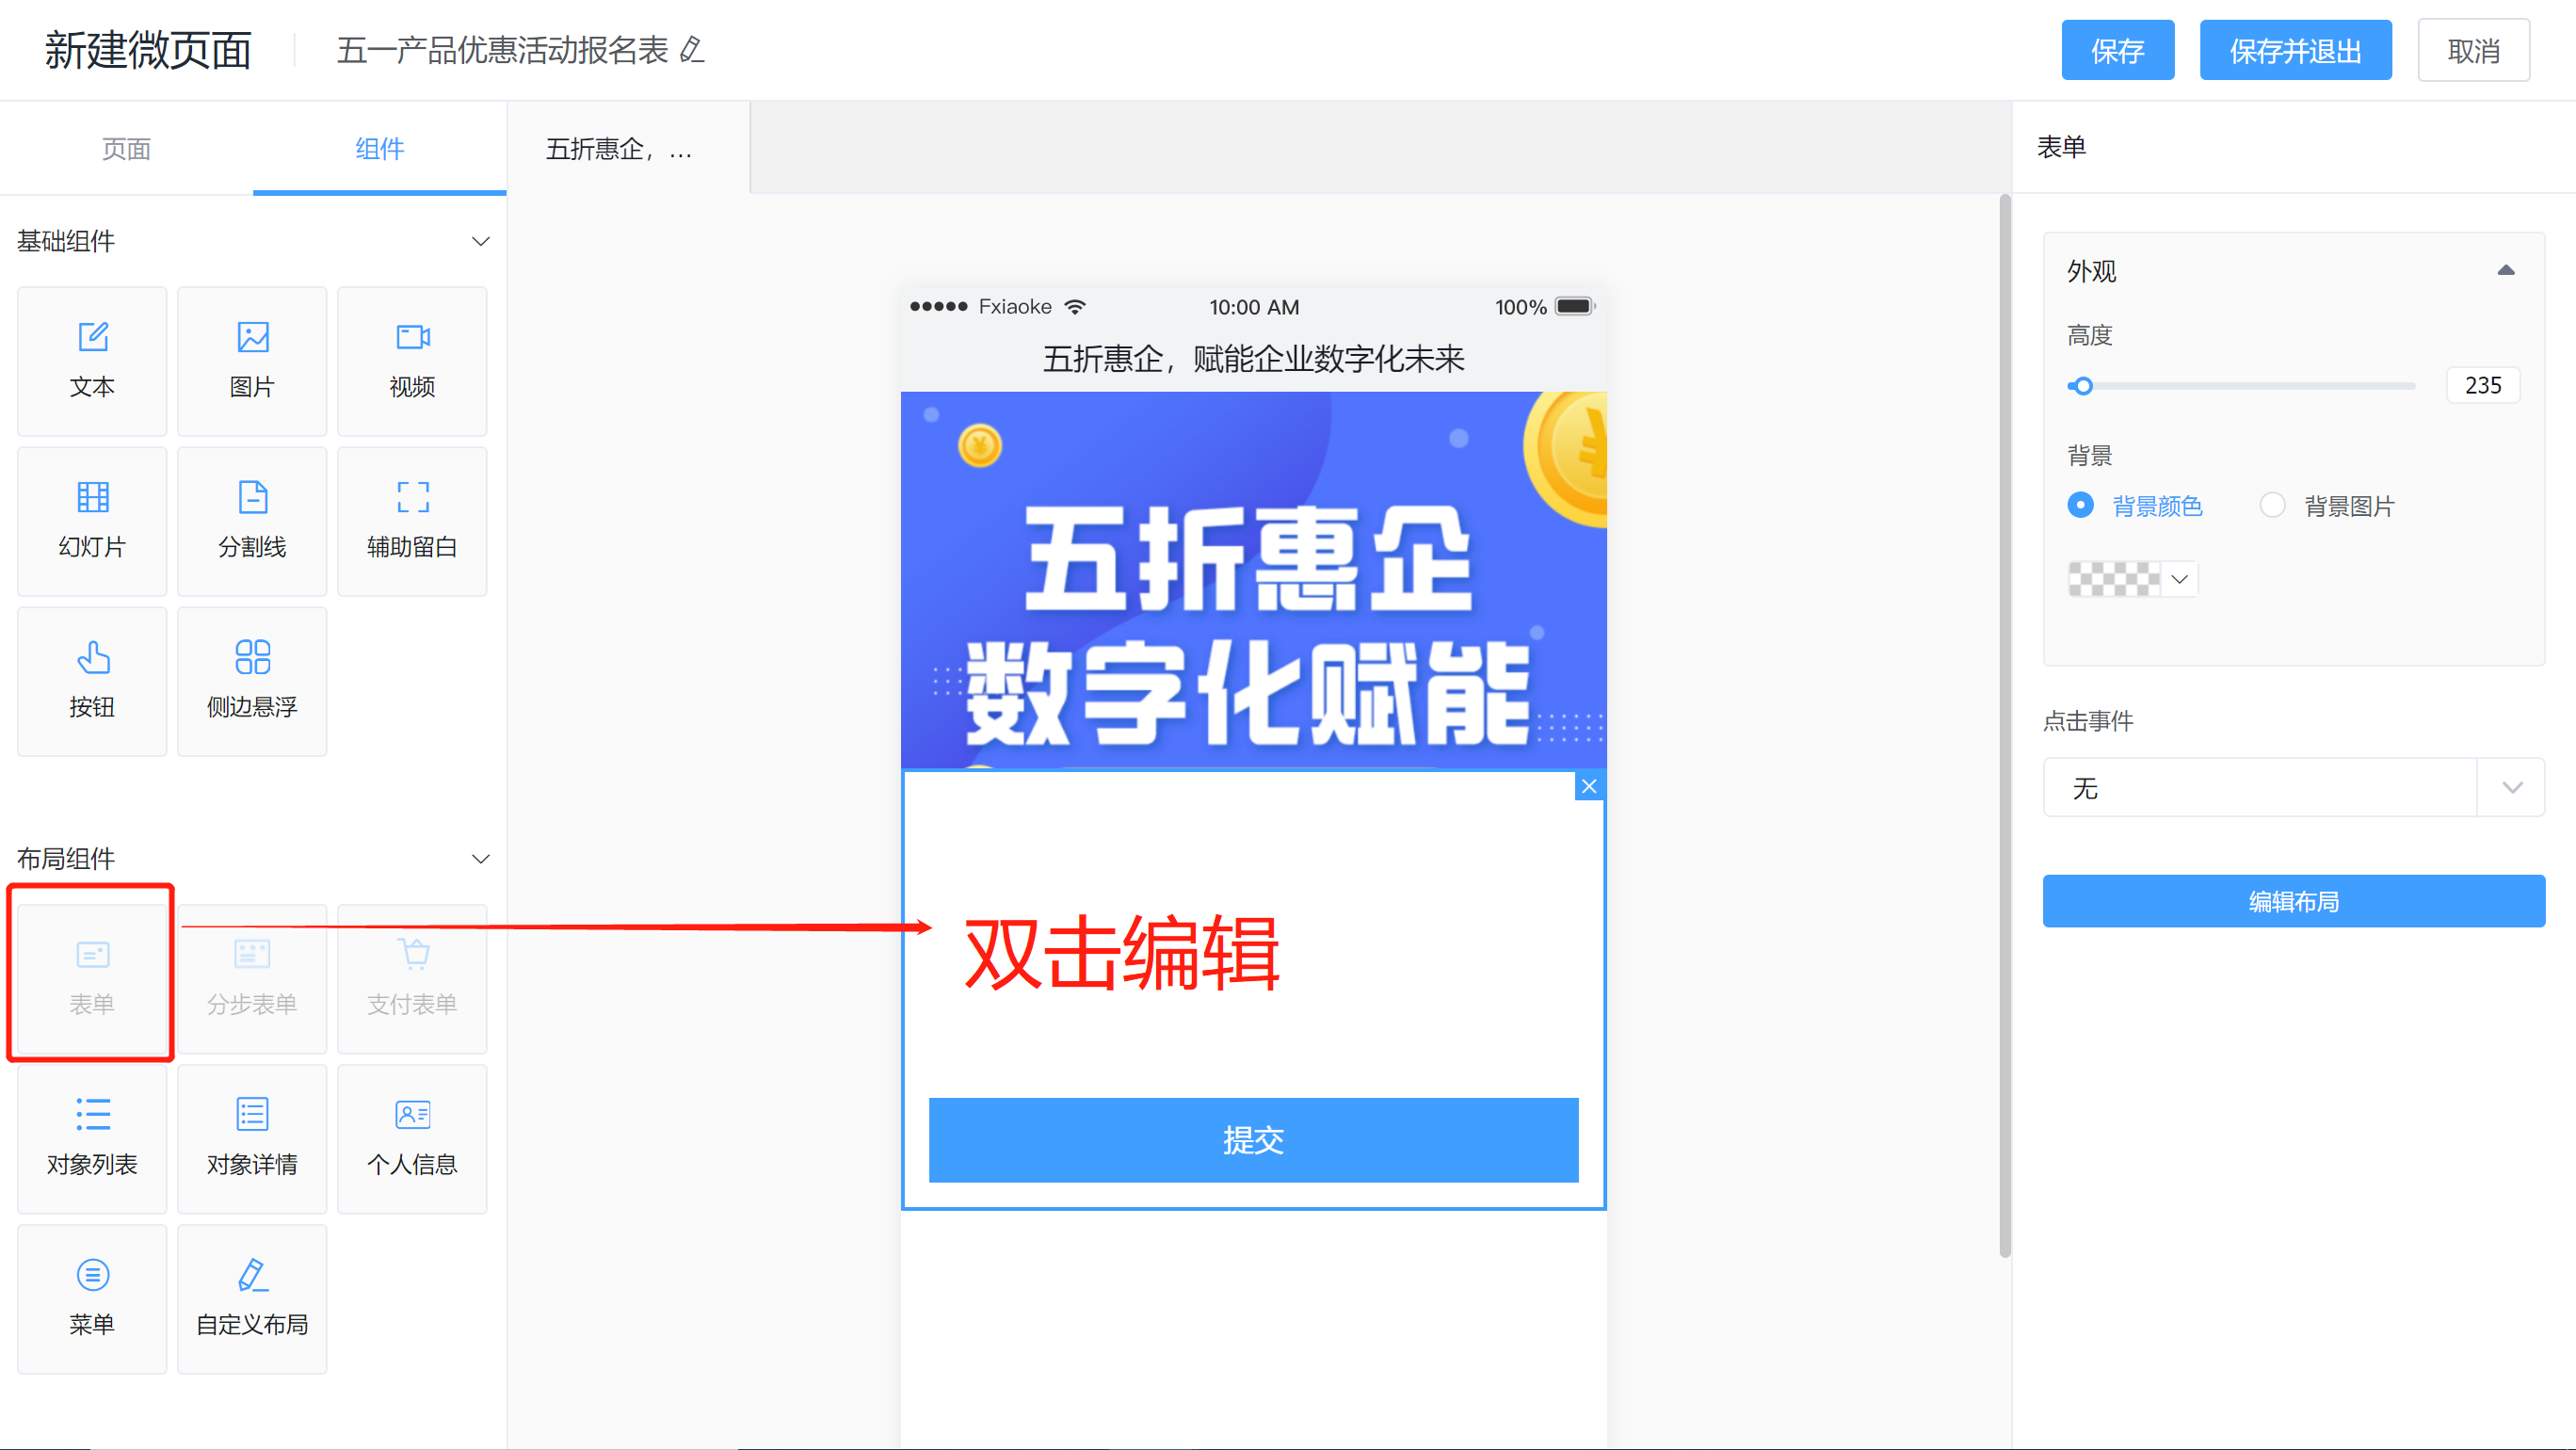
Double-click the form component on the canvas to enter editing and form design:
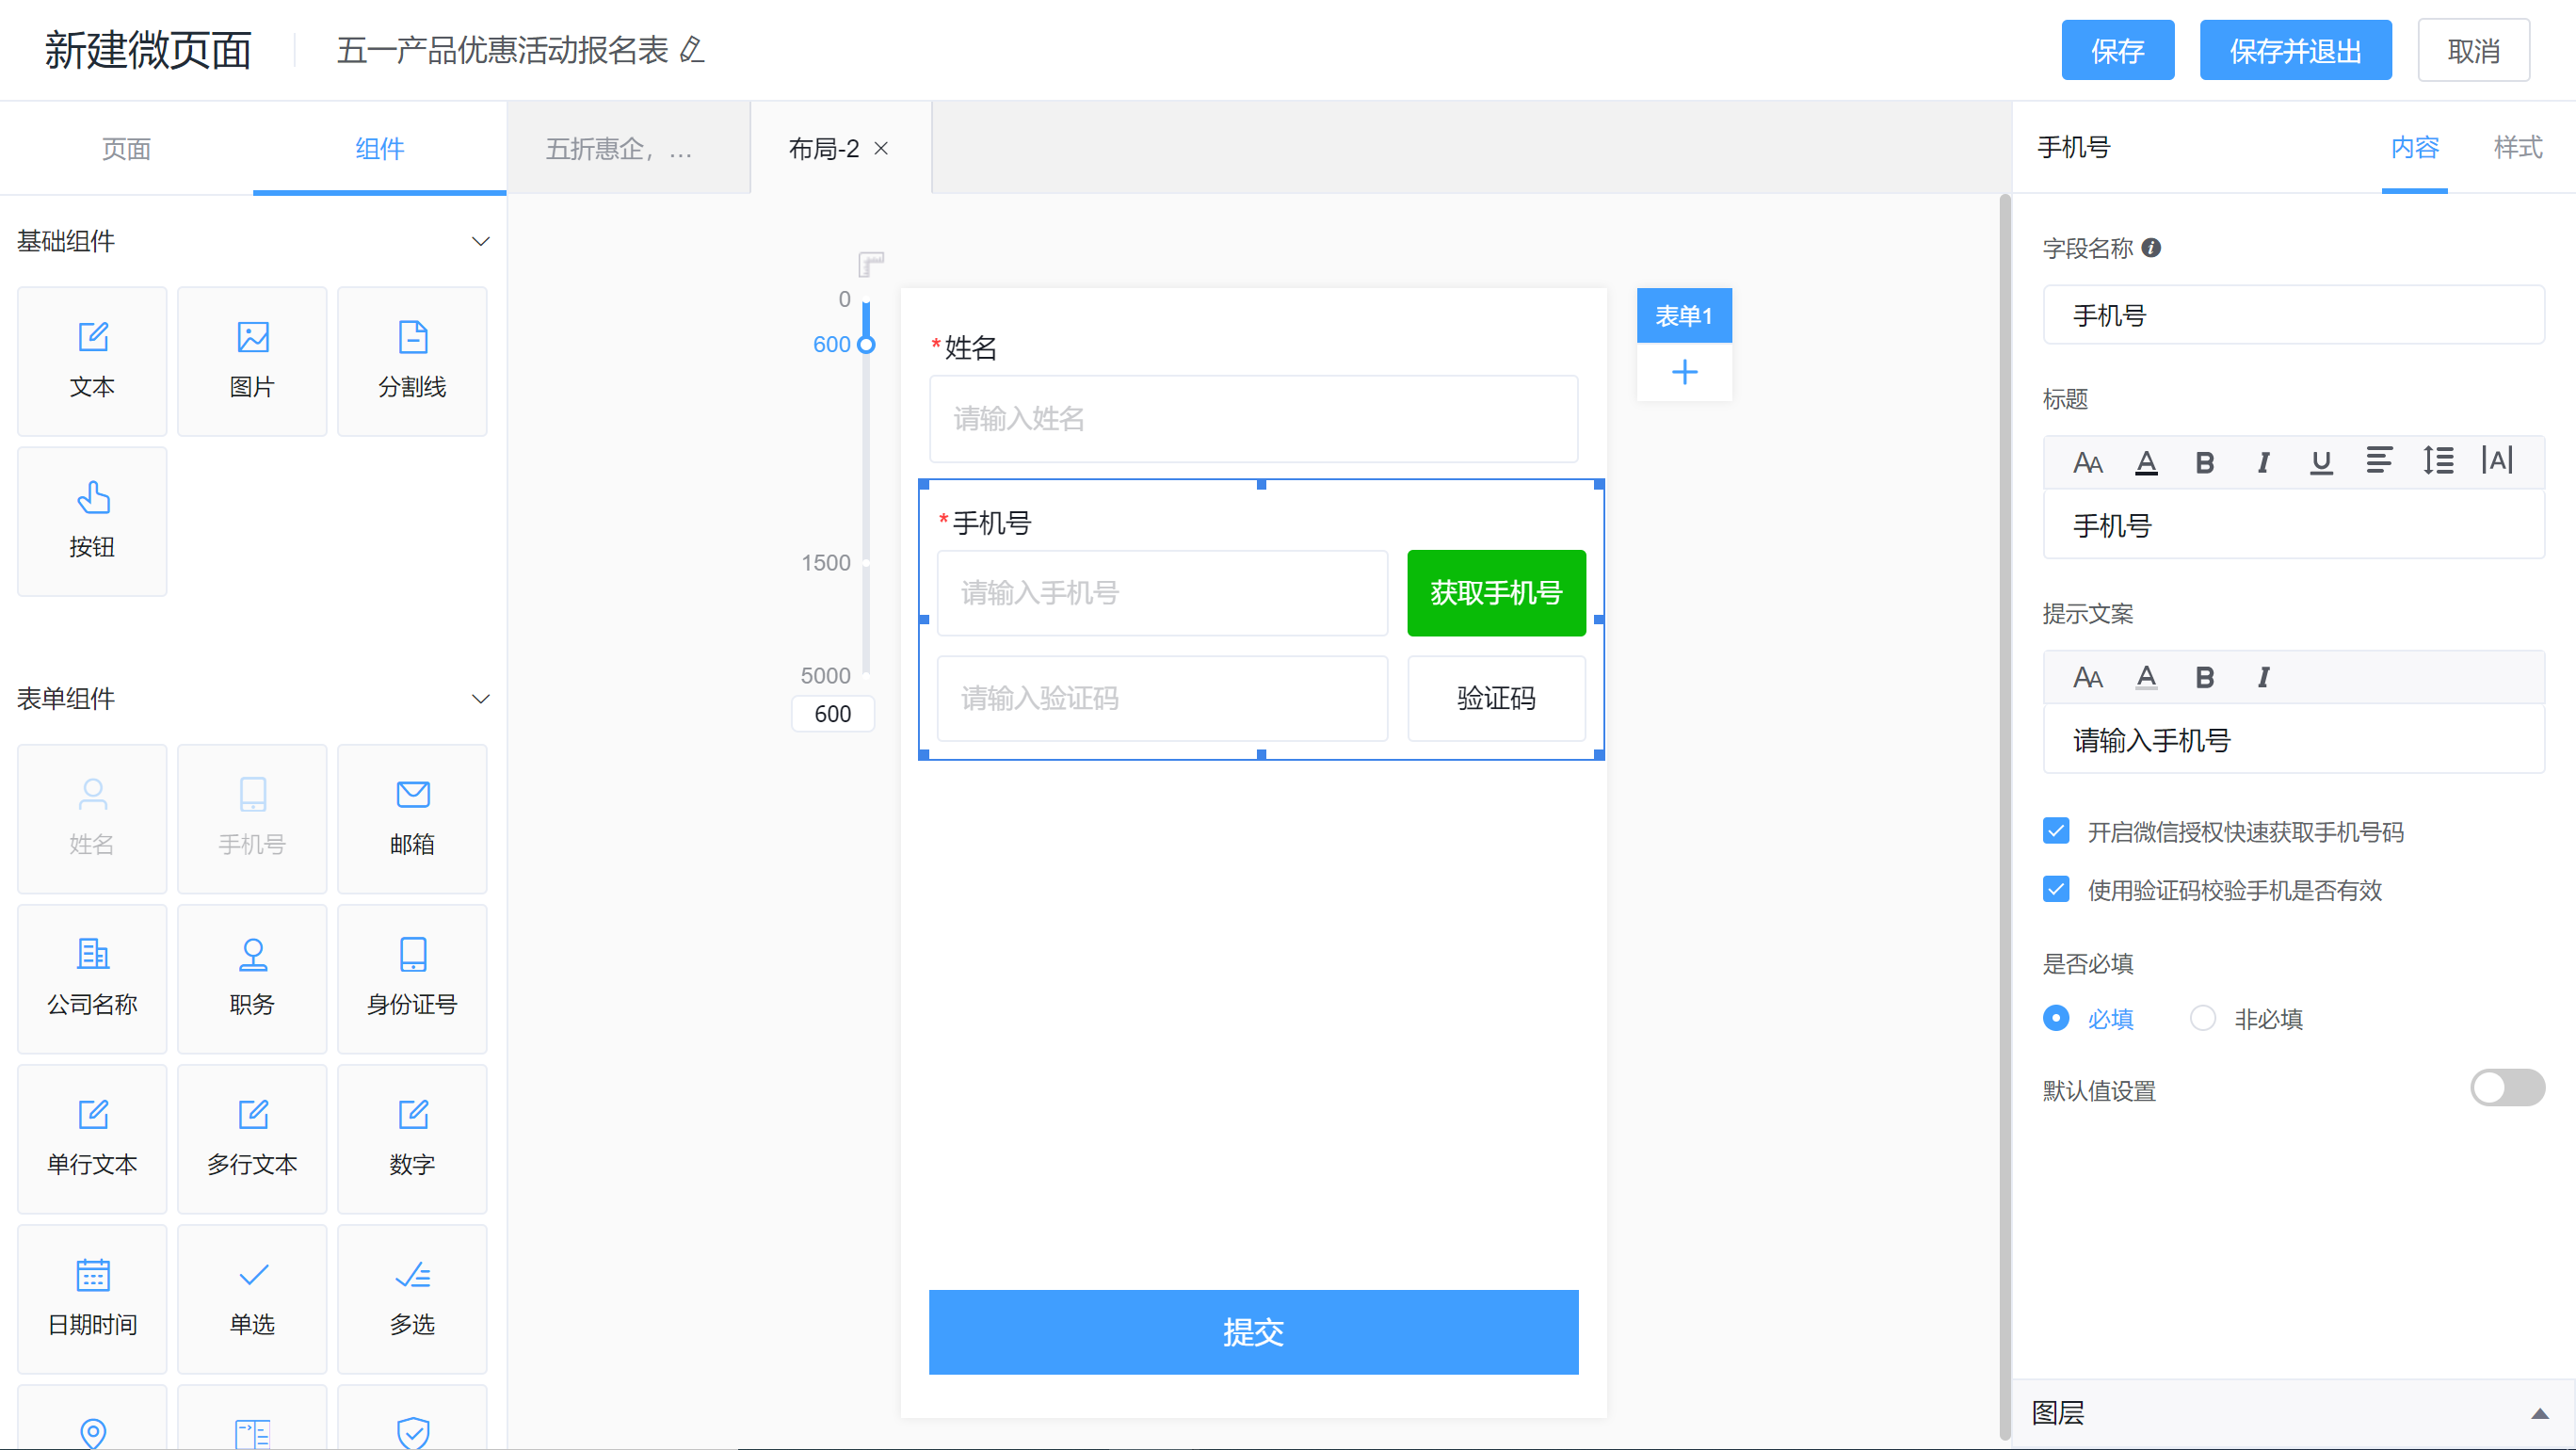
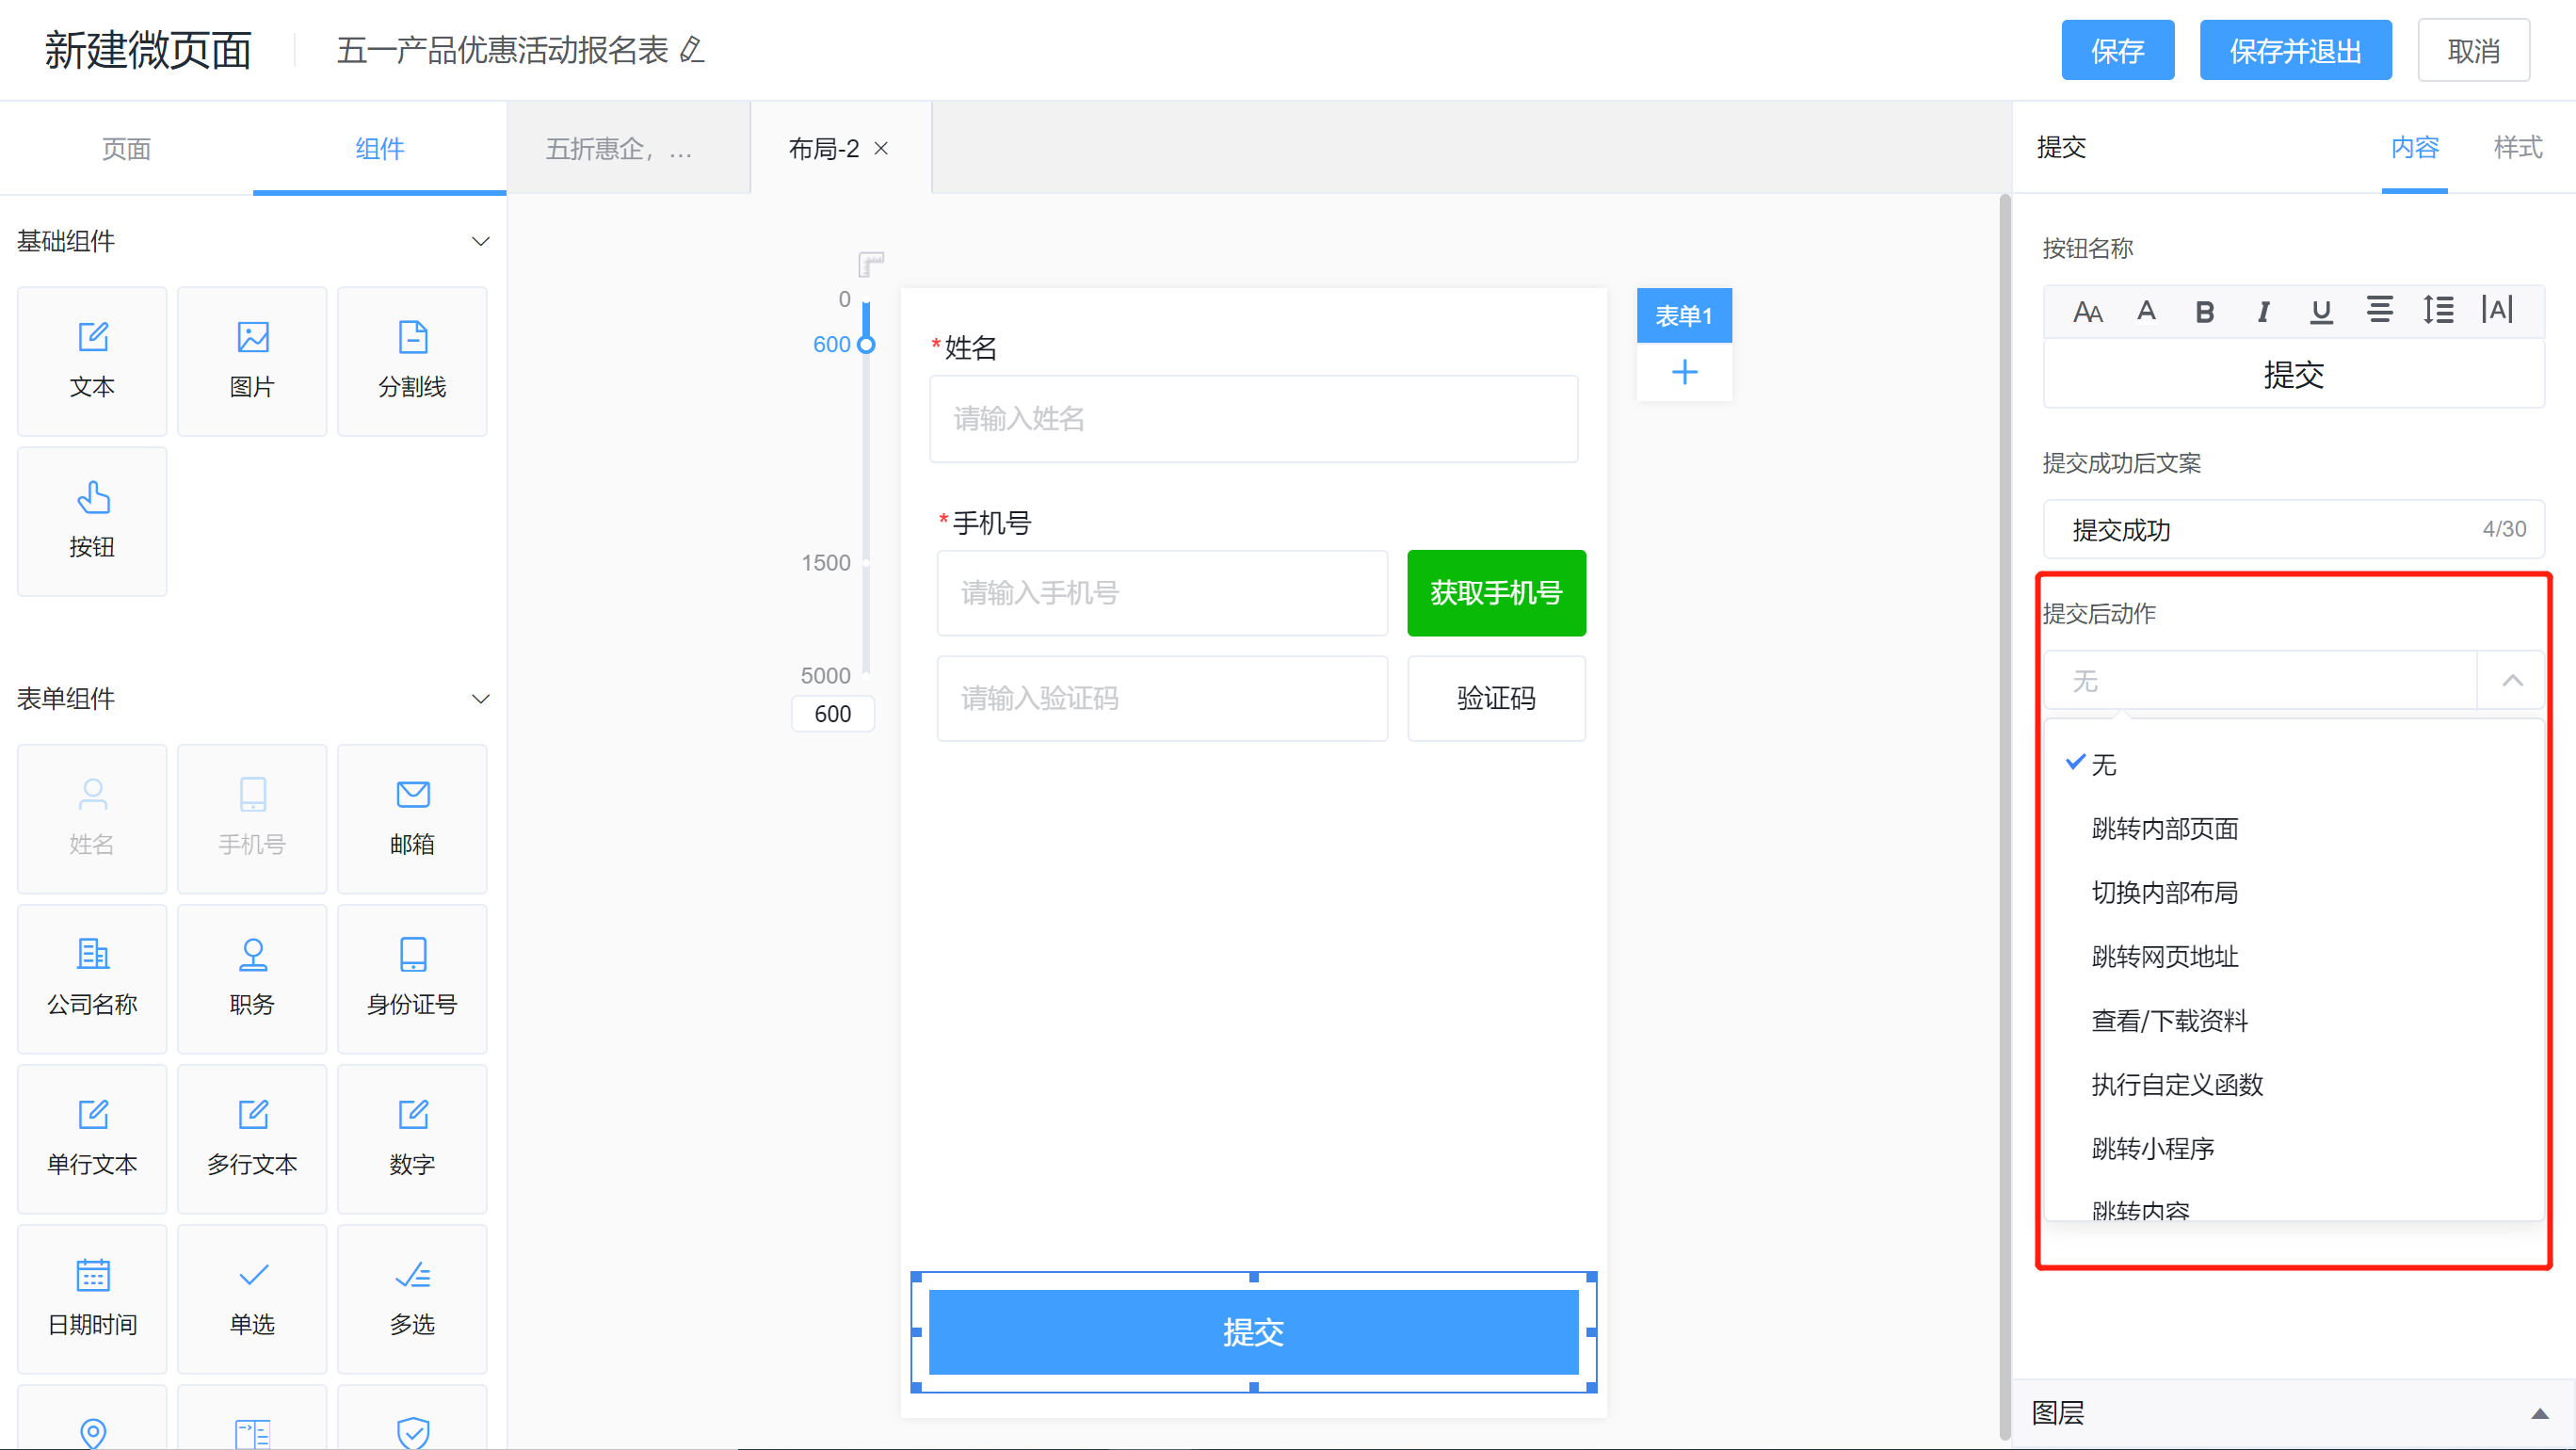
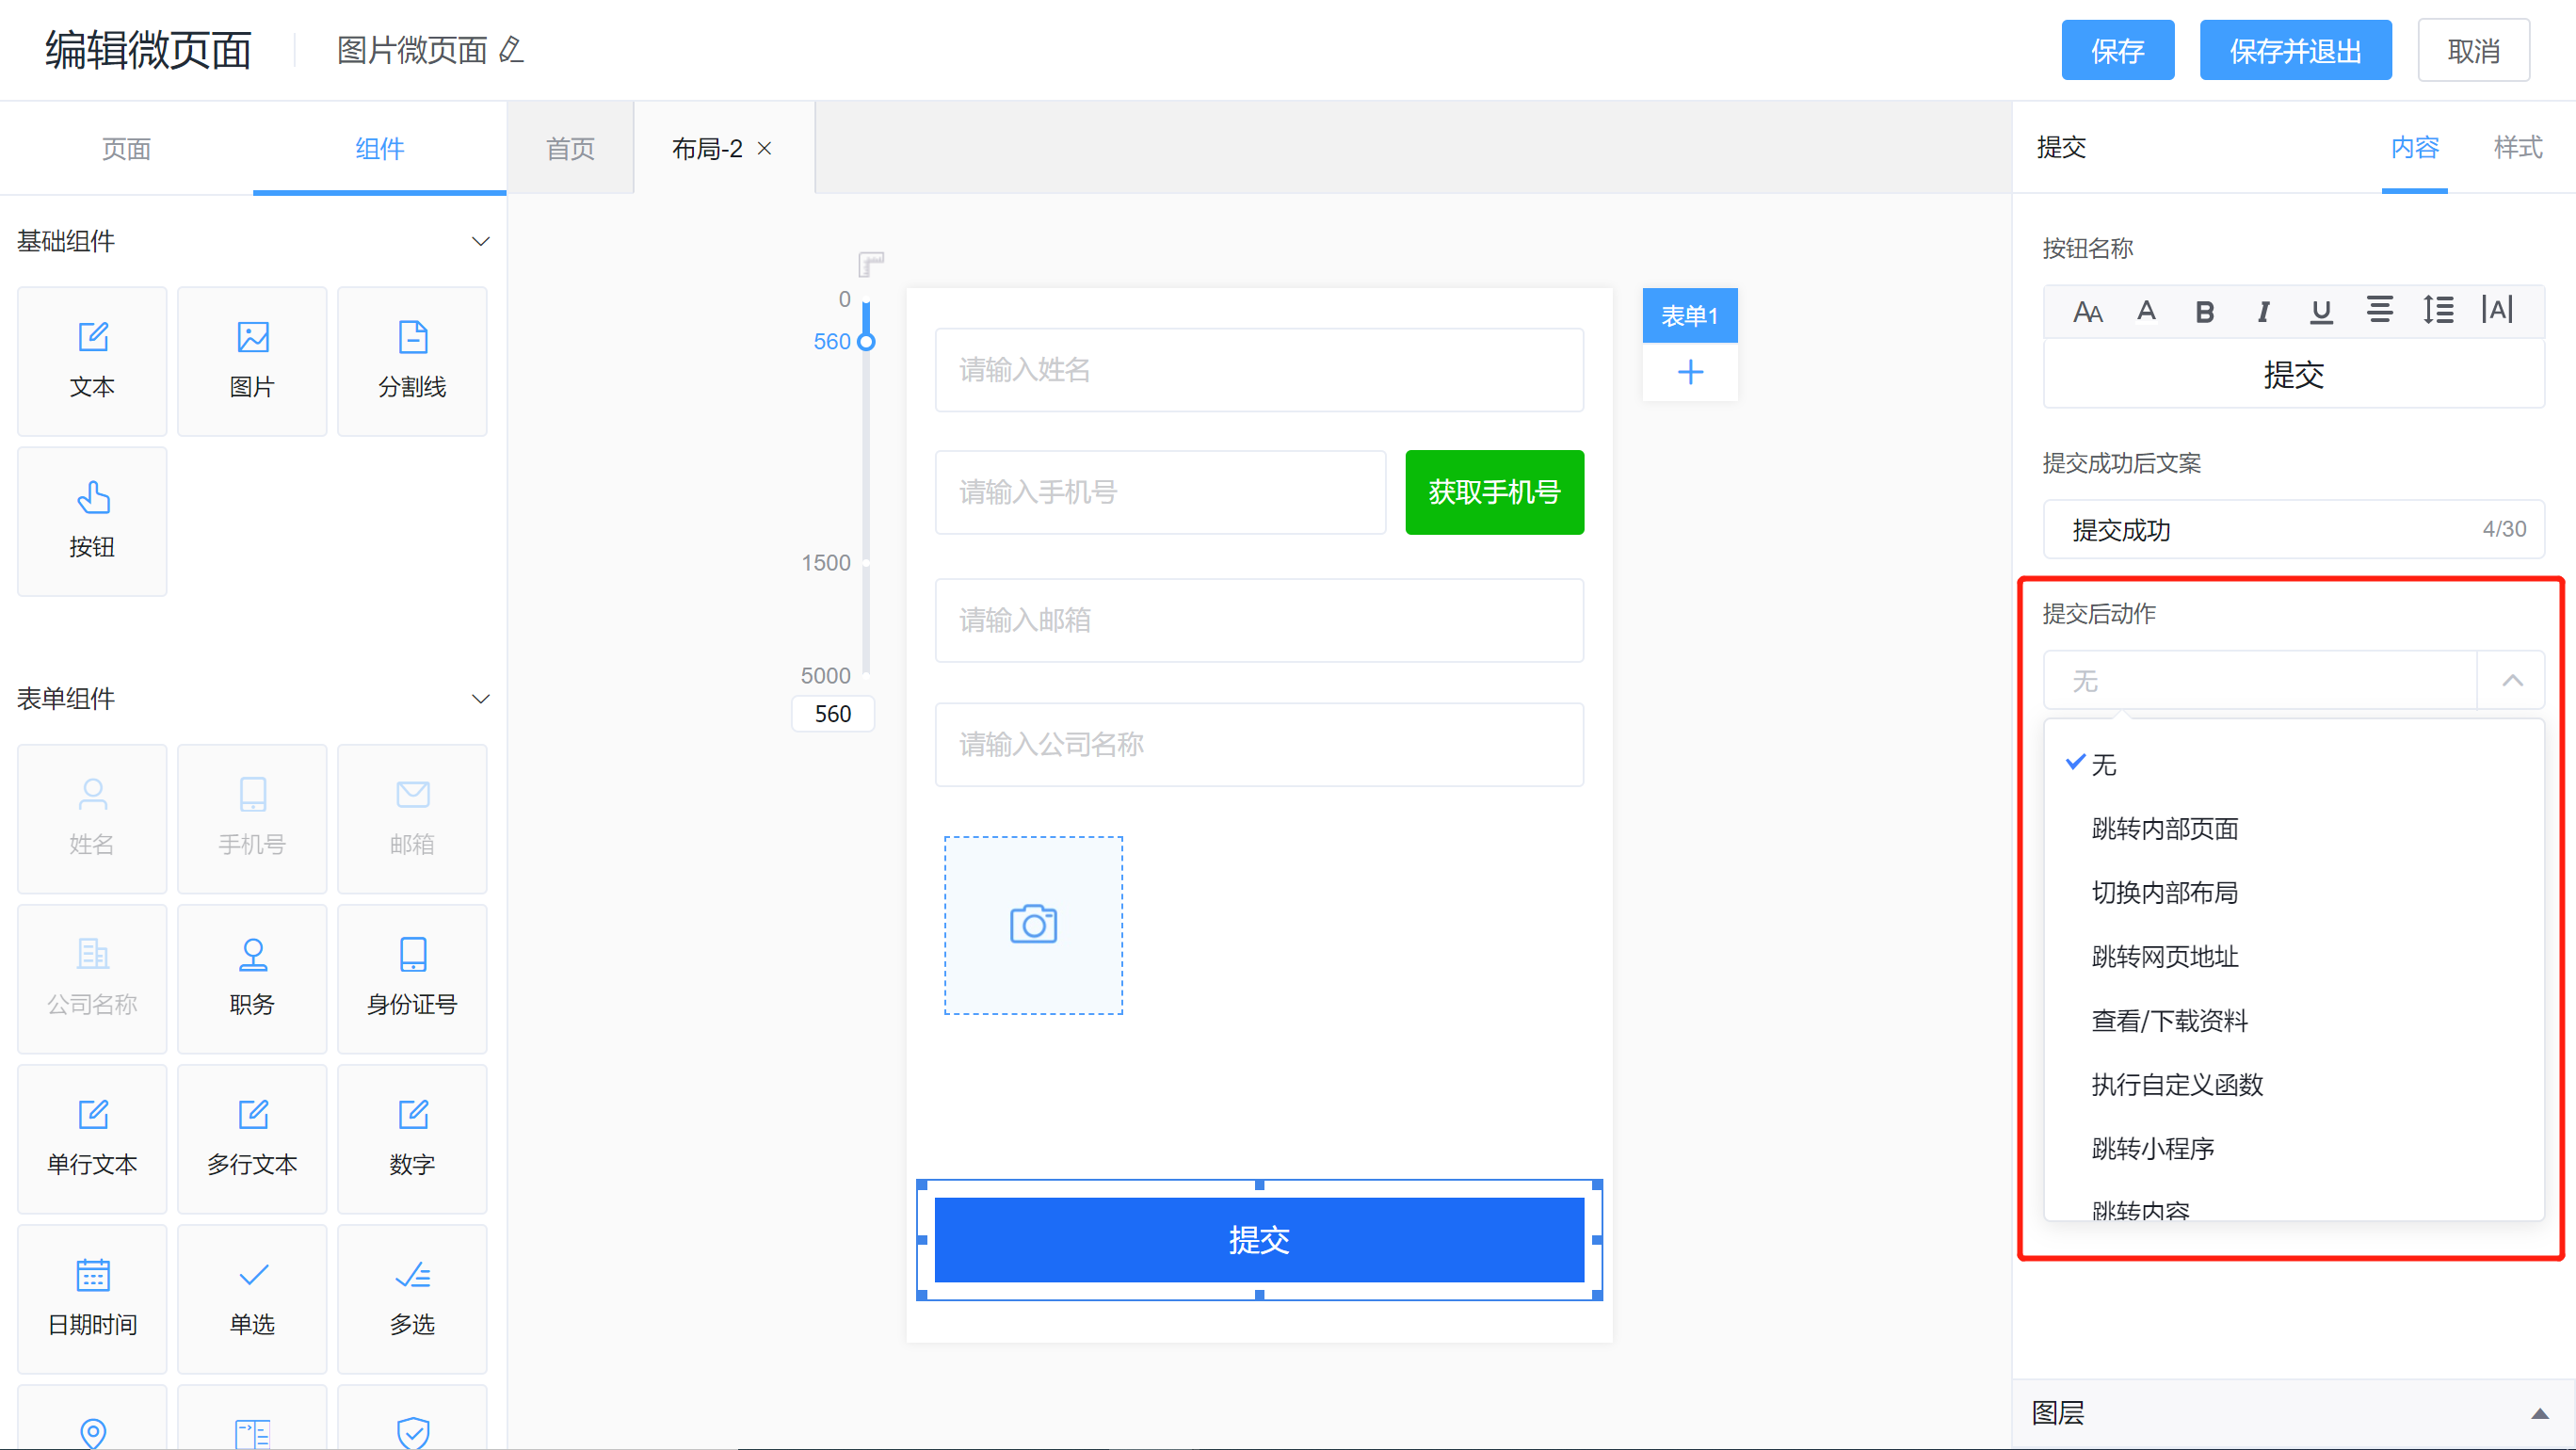
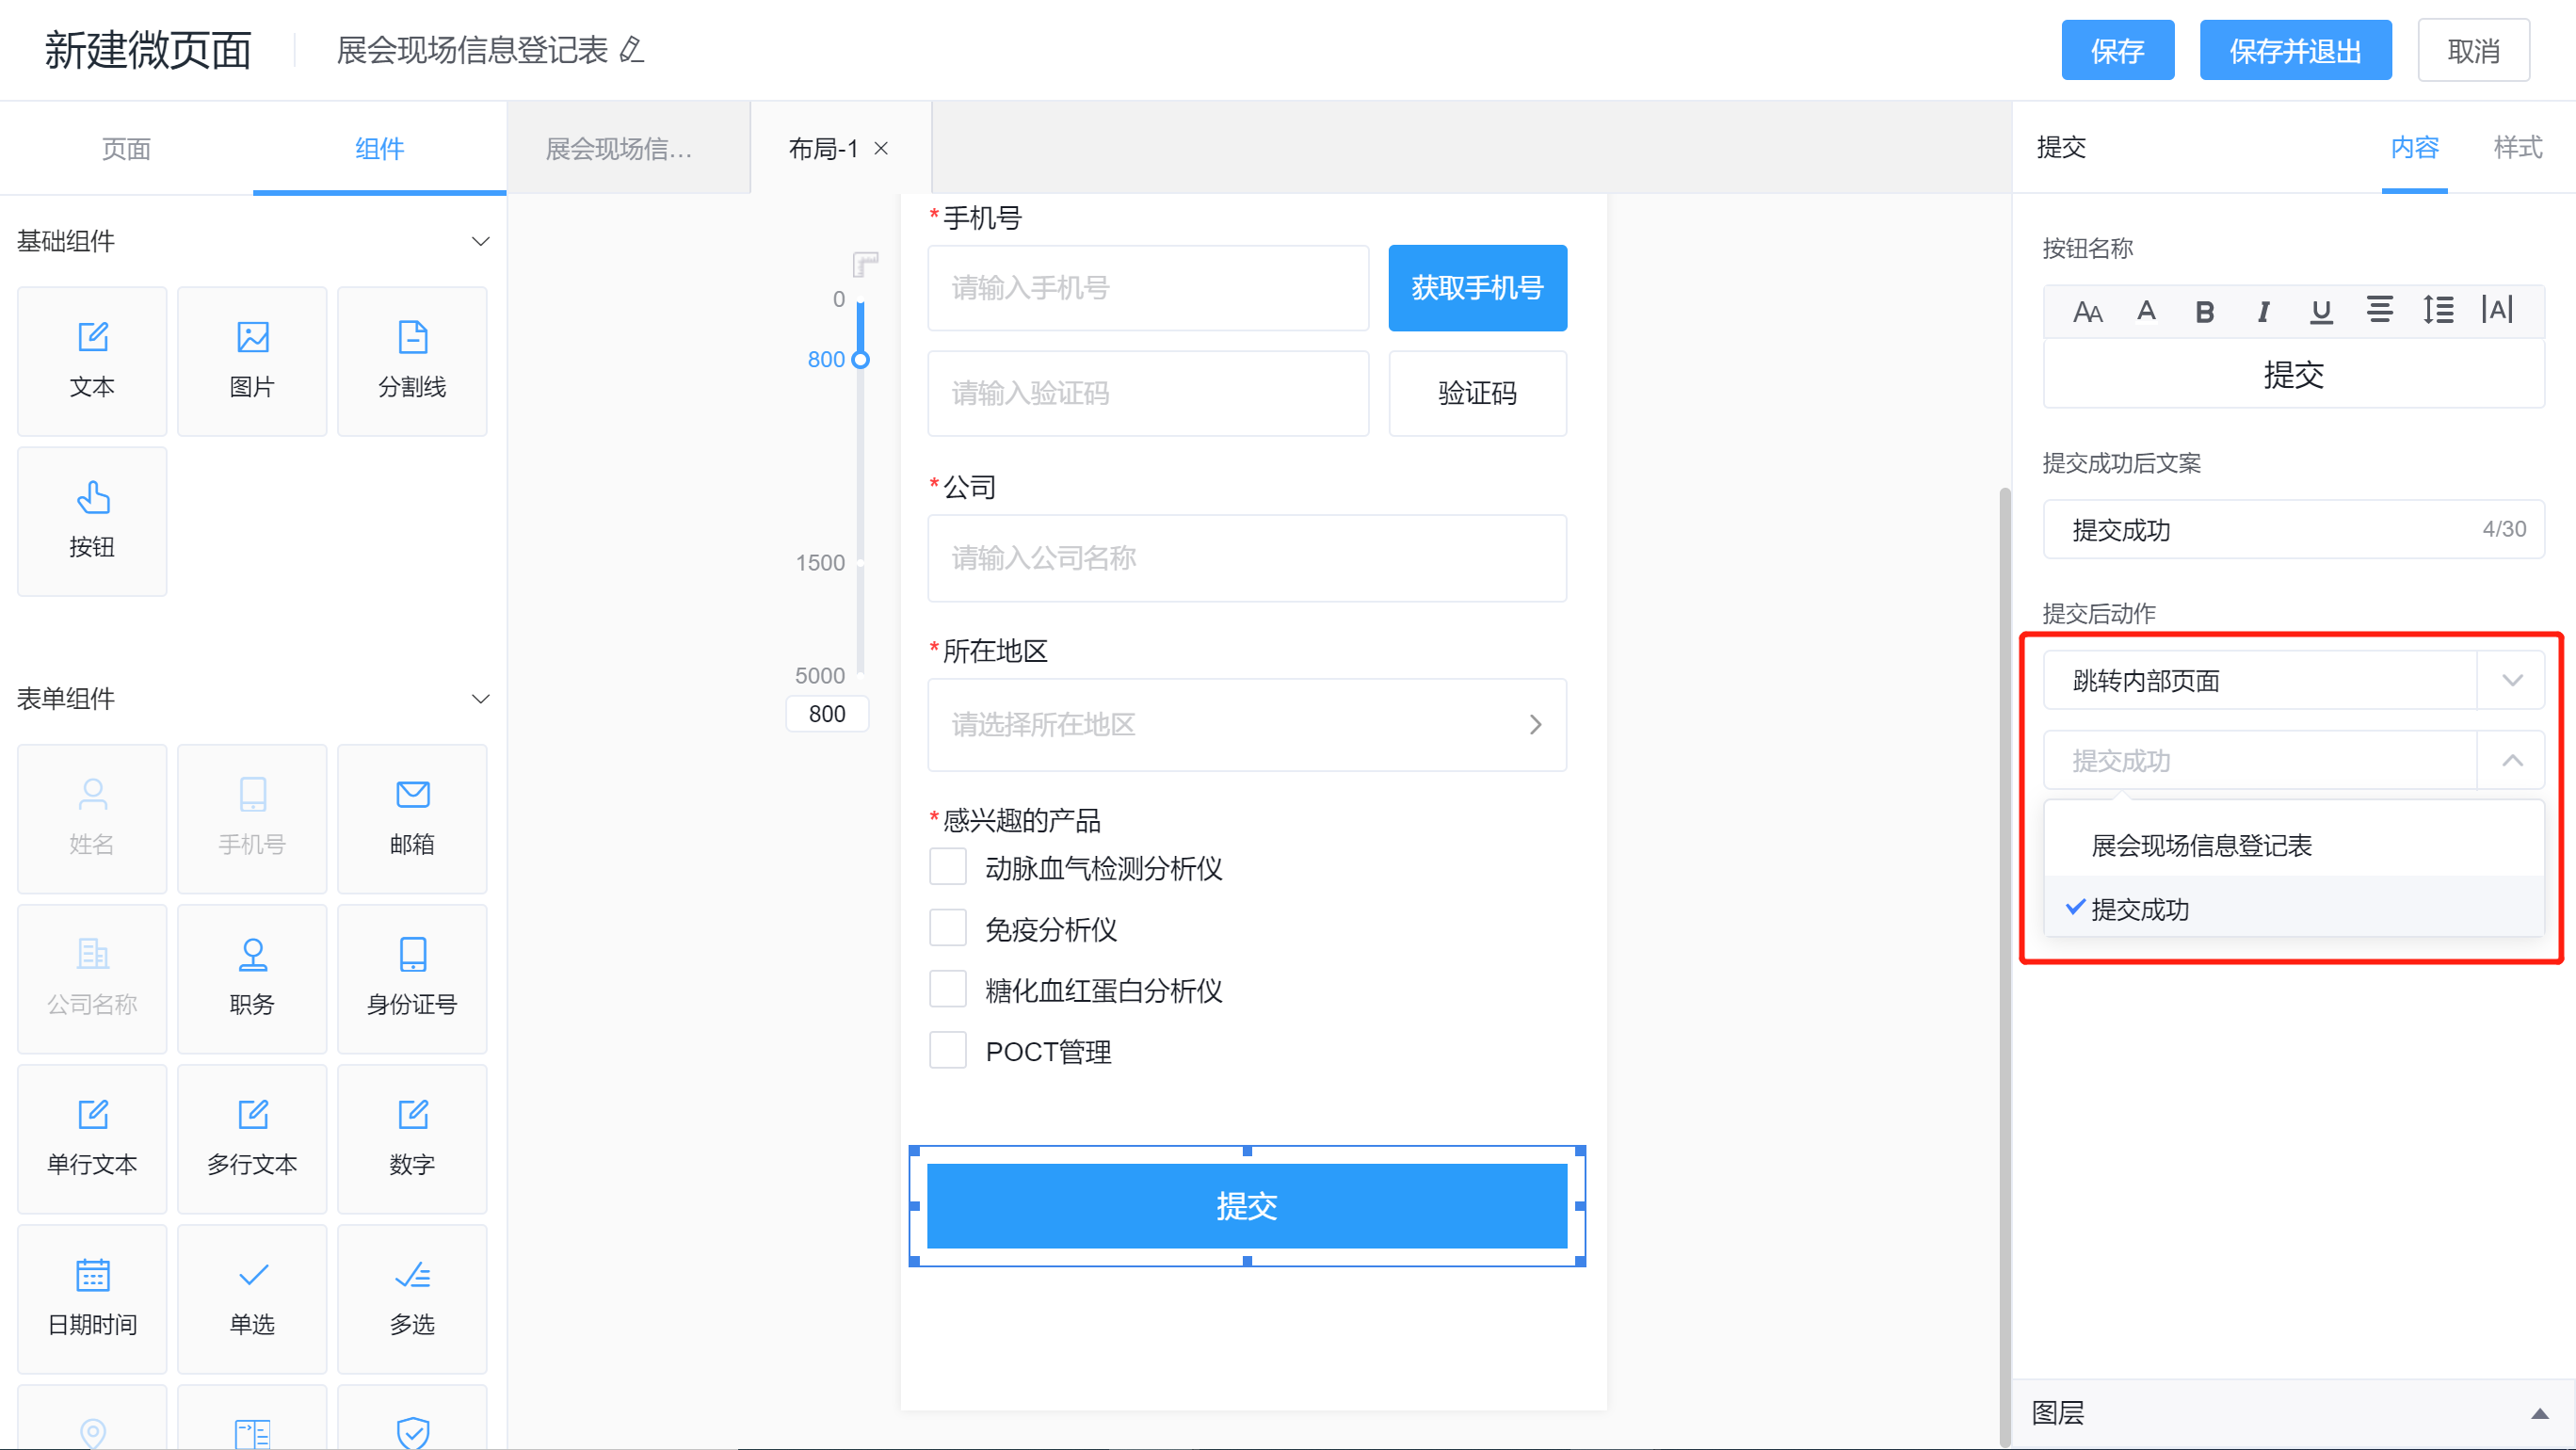
After the form design is completed, you can click the [Form Submission] button to set the action after the form is submitted (that is, where the user wants to guide the user after submitting the form: download data, pay attention to the official account or others)
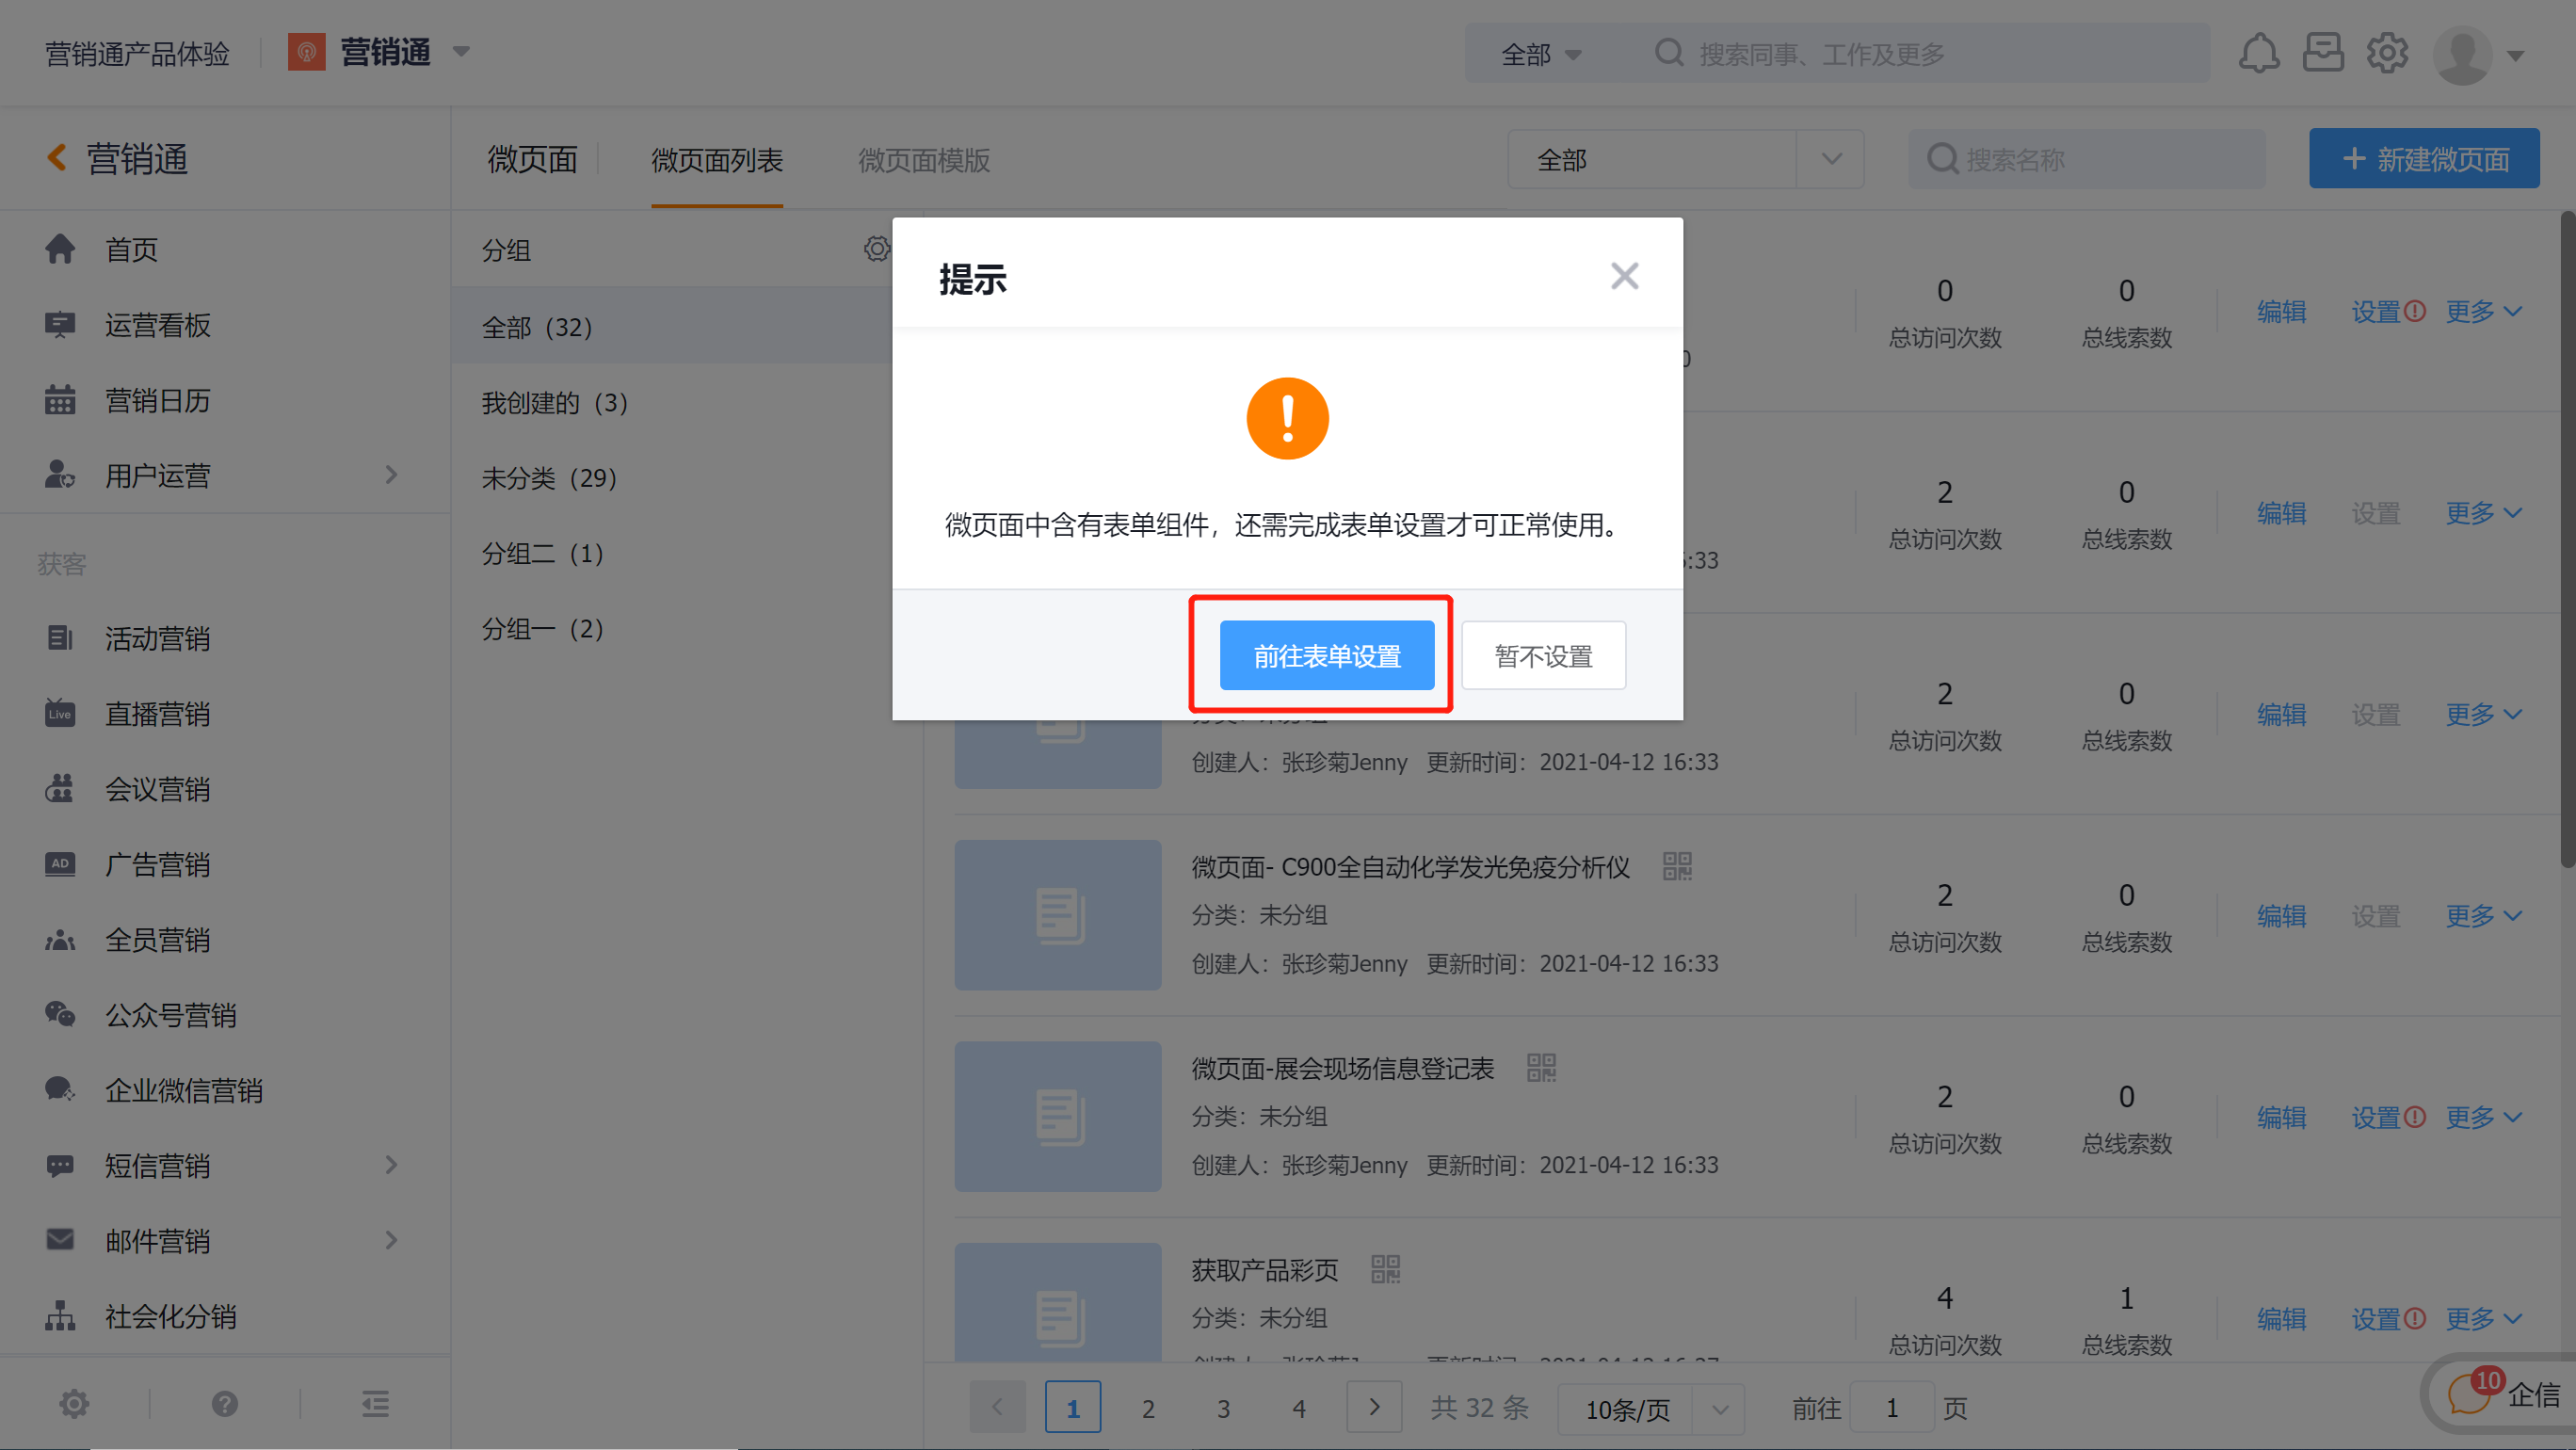
4. Set Micro-pages (mainly for form settings)
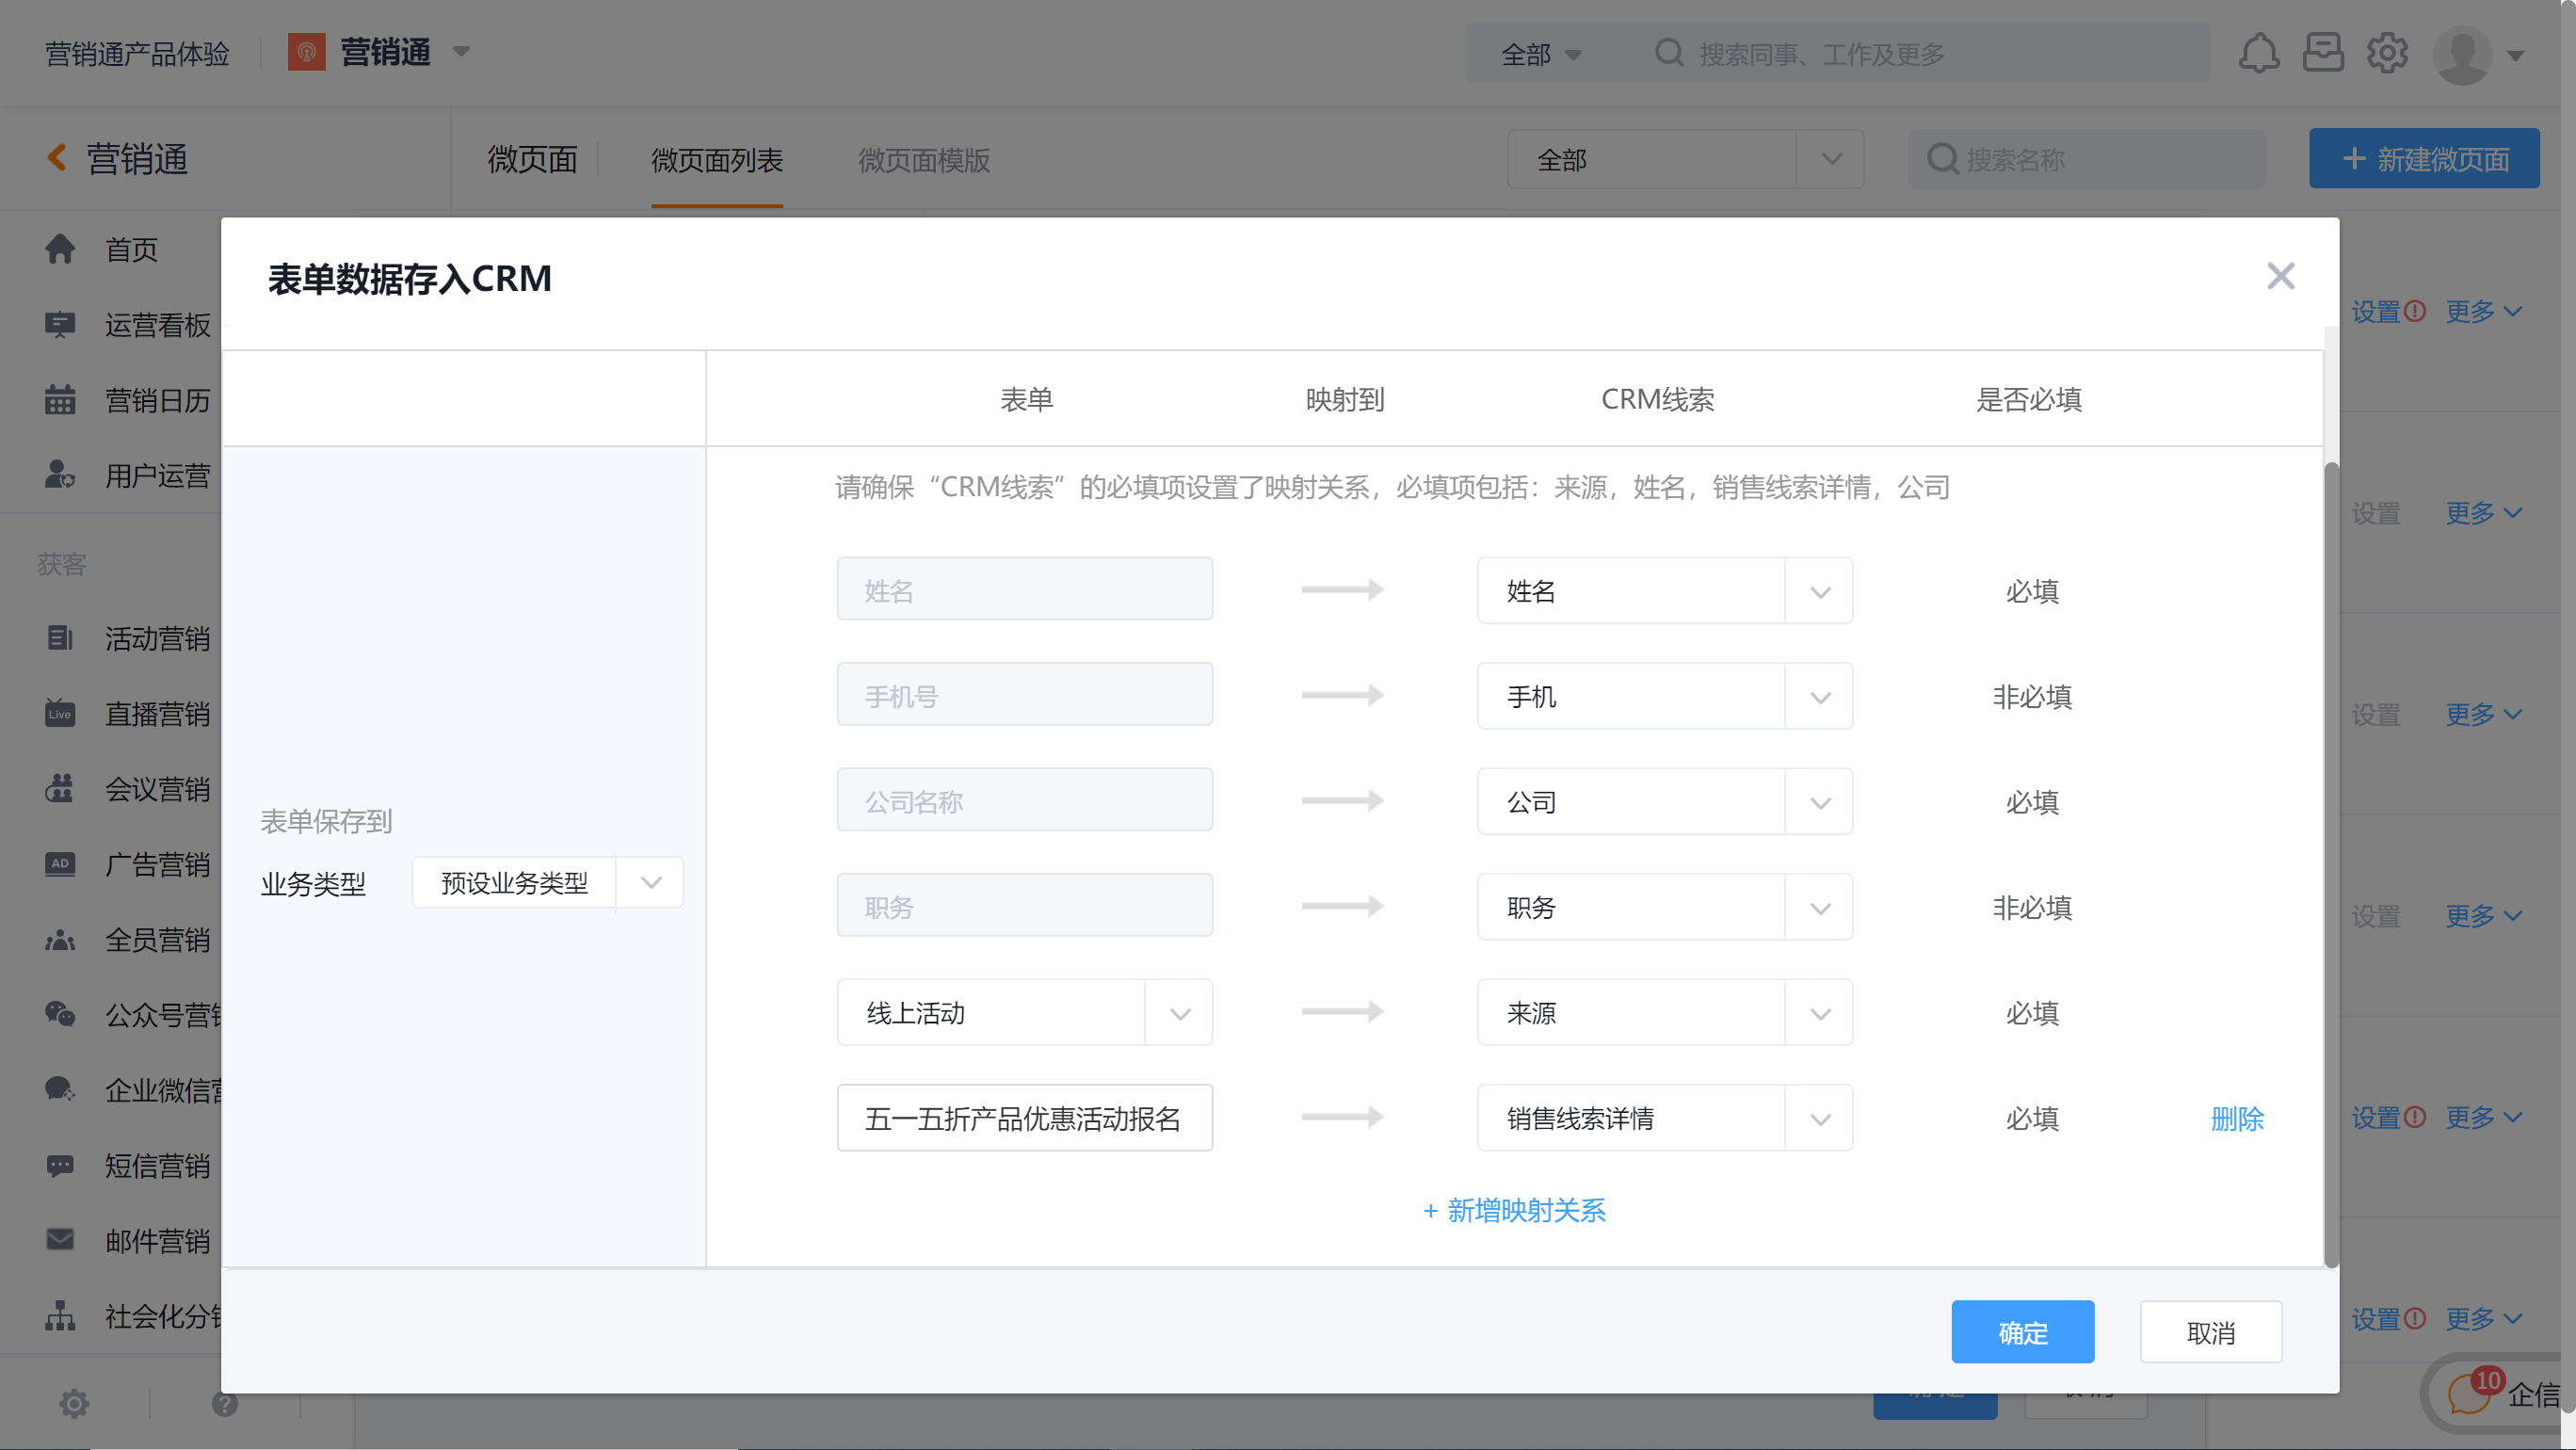
After the design of the micro-page is completed, click [Save and Exit] in the upper right corner of the page, save the micro-page and return to the micro-page list, and set up the micro-page according to the prompts (the micro-page contains a form and needs to complete the form setting before the data can be synchronously entered into the CRM leads pool )
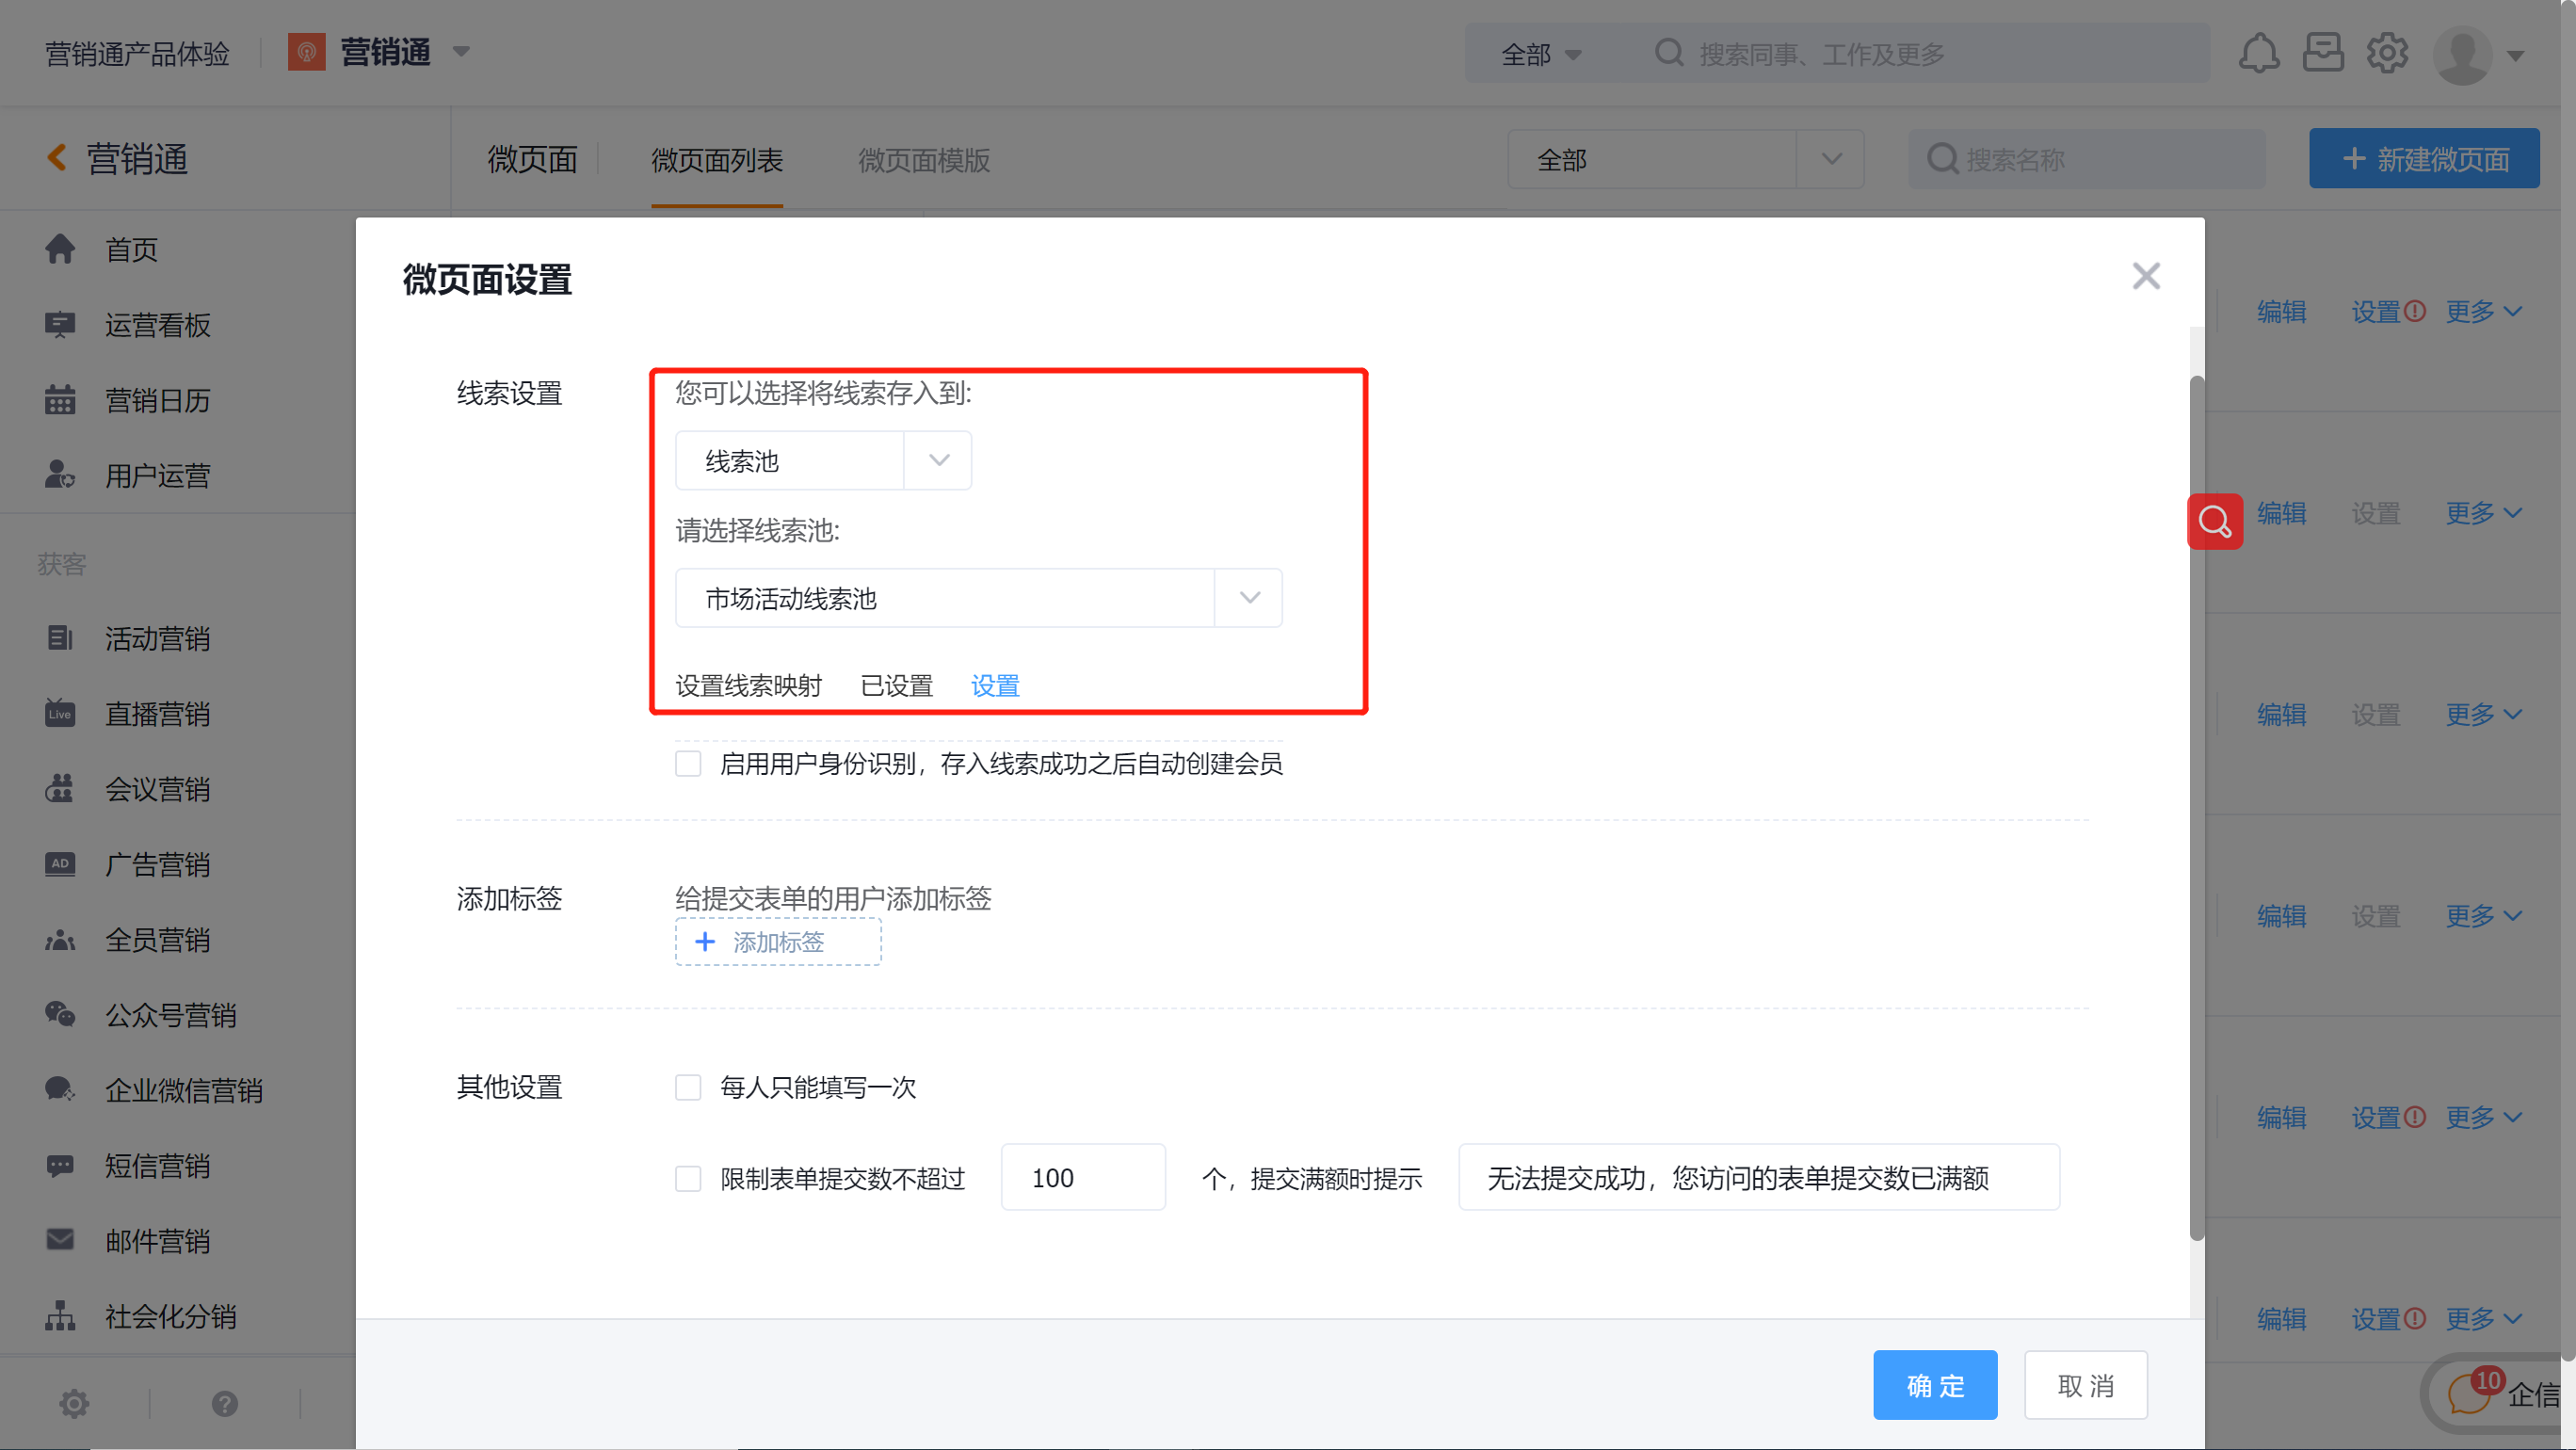
Leads Settings:
- Stored in [Lead Pool] (recommended), suitable for unified management of market activity leads and distribution of potential leads collected through the form; selecting this option also requires you to create a corresponding market lead pool in advance in the [Lead Pool] of the management background and Establish corresponding allocation rules;
- Stored in [Sales Leads], it is applicable if you want the promotion staff to be directly responsible for following up the leads. Selecting this option will automatically set the promotion staff as the person in charge of obtaining leads. Please make sure that all your promotion staff have the new If there is no permission for the lead, it will be set to "system", and you also need to manually change the person in charge in CRM.
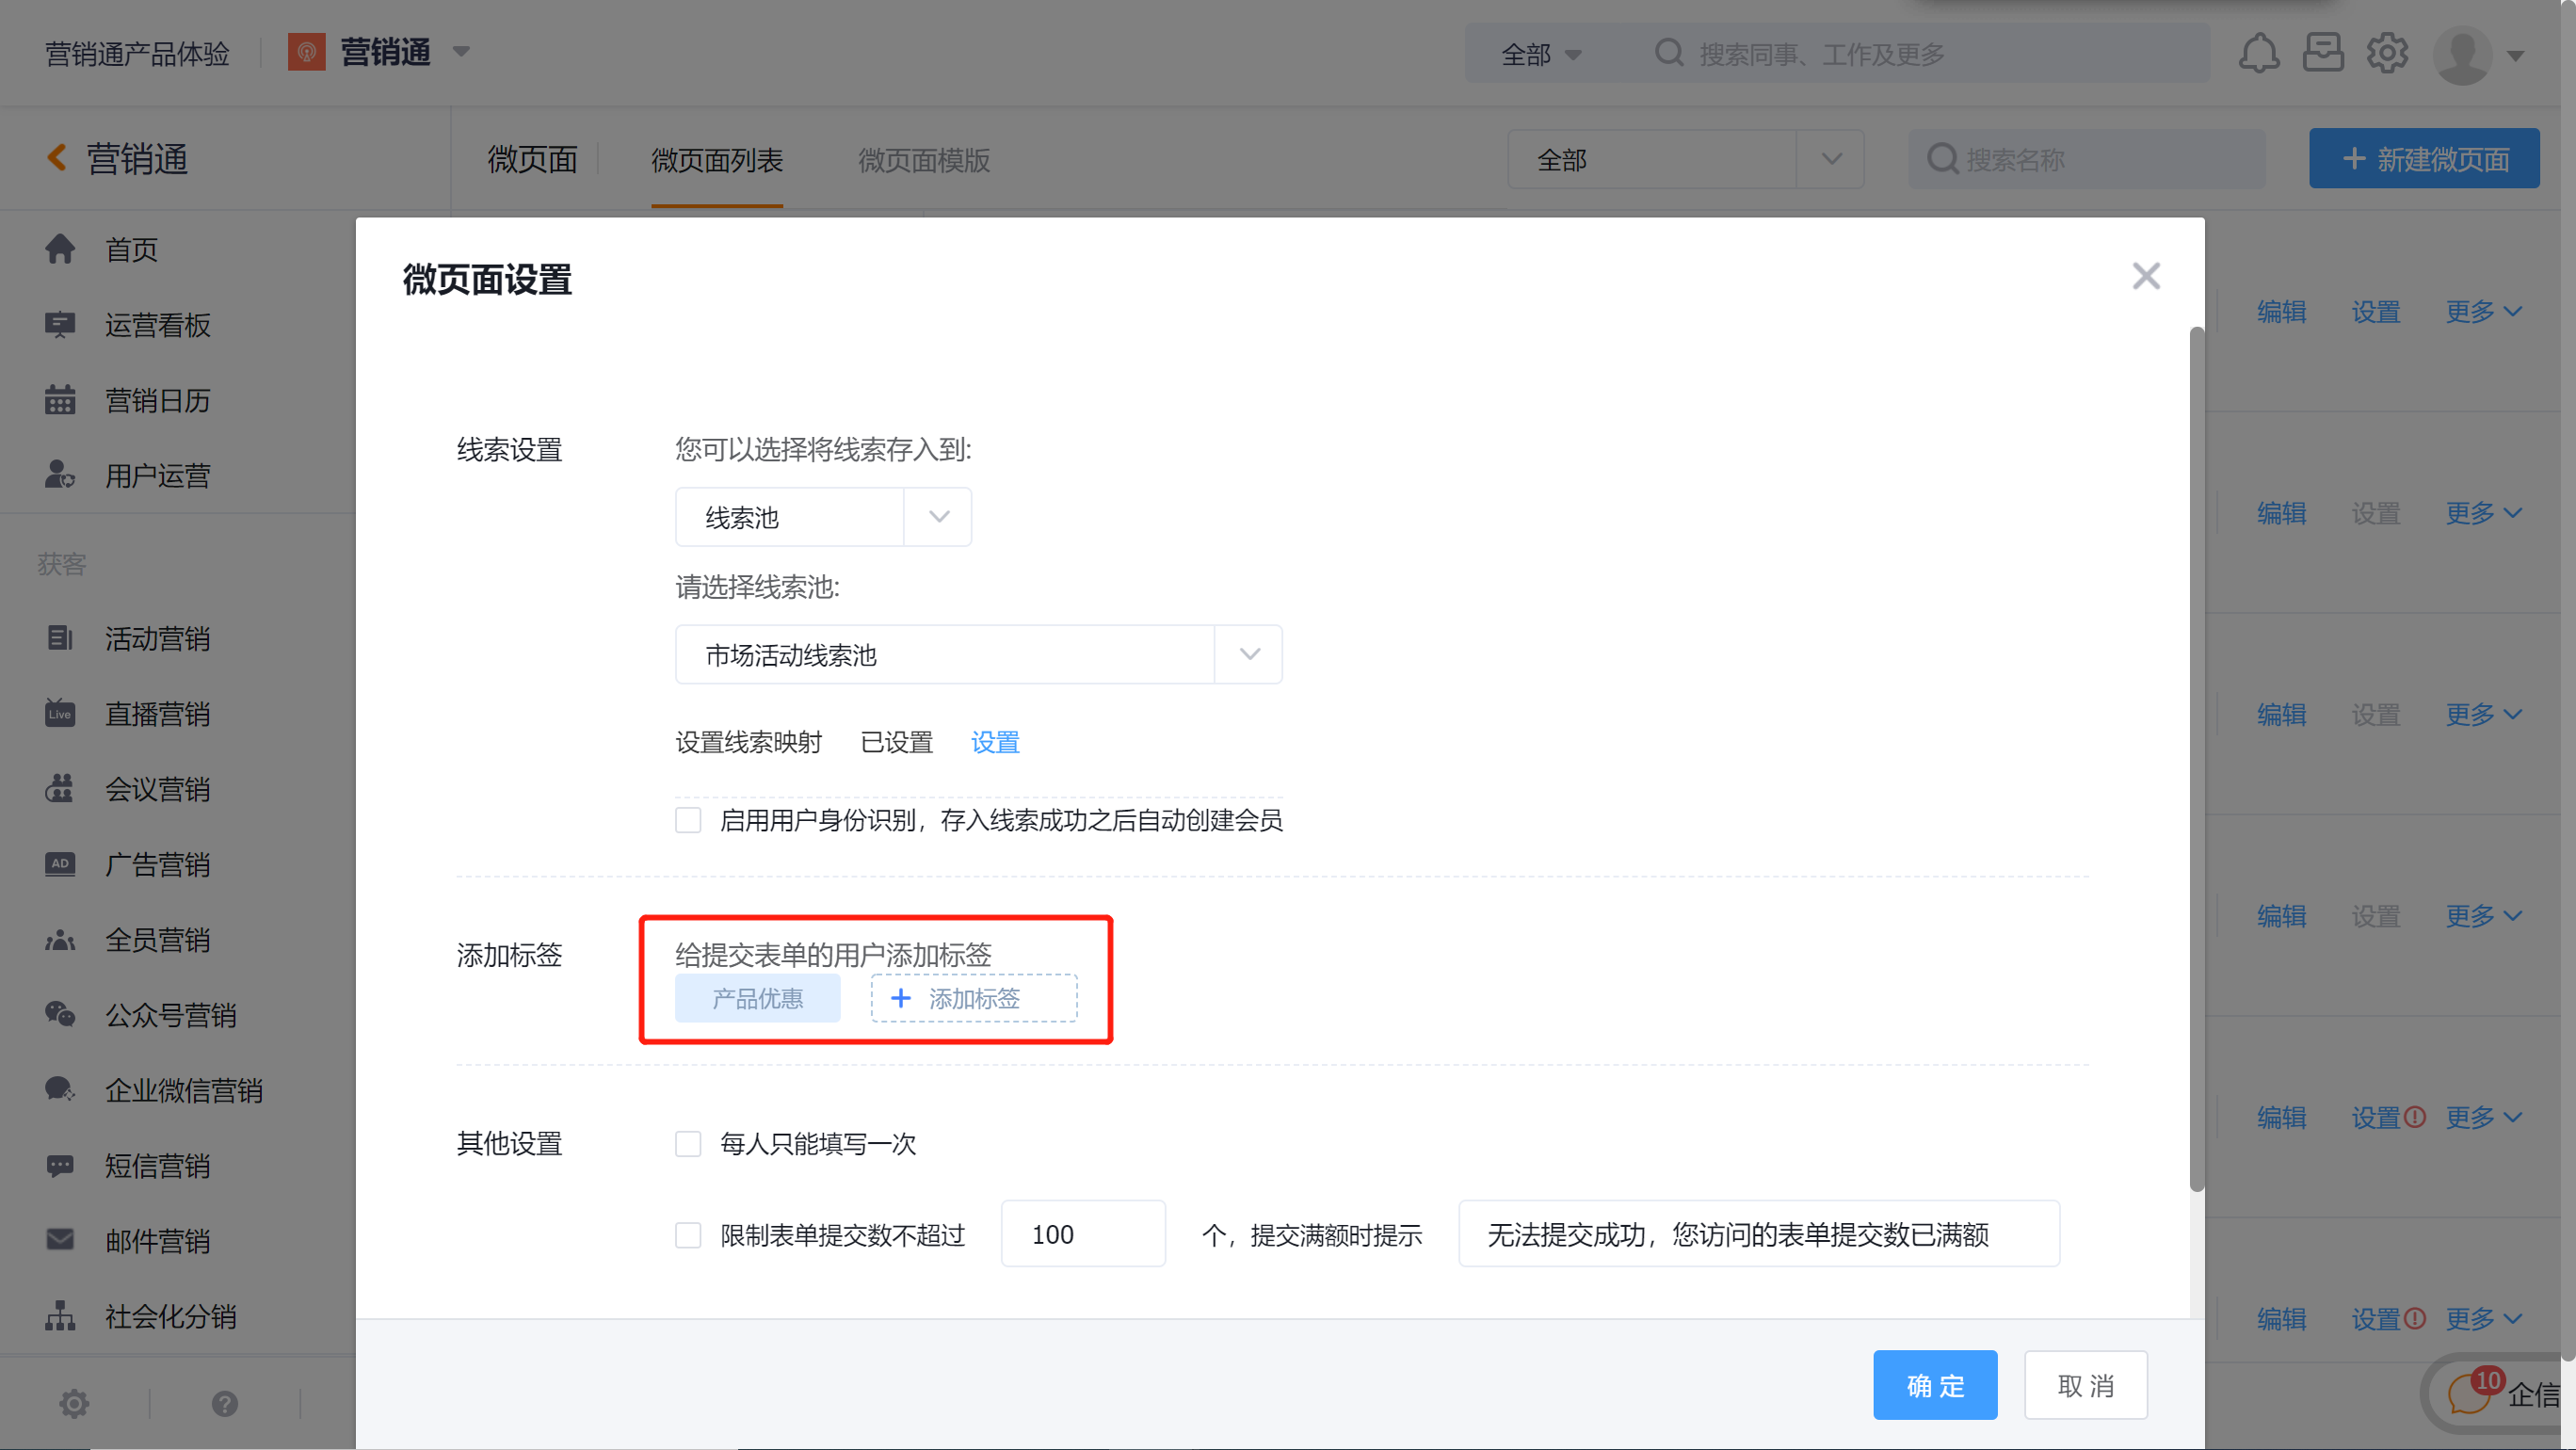
Tag Settings: According to the content or the characteristics of the activity, you can set labels for the users who submit the form. For example, the example activity "Dialogue New Growth" agriculture and animal husbandry special session, corresponding to the content label [agriculture and animal husbandry industry], activity preference [online live broadcast], follow-up Use these labels to quickly screen target groups for targeted marketing;
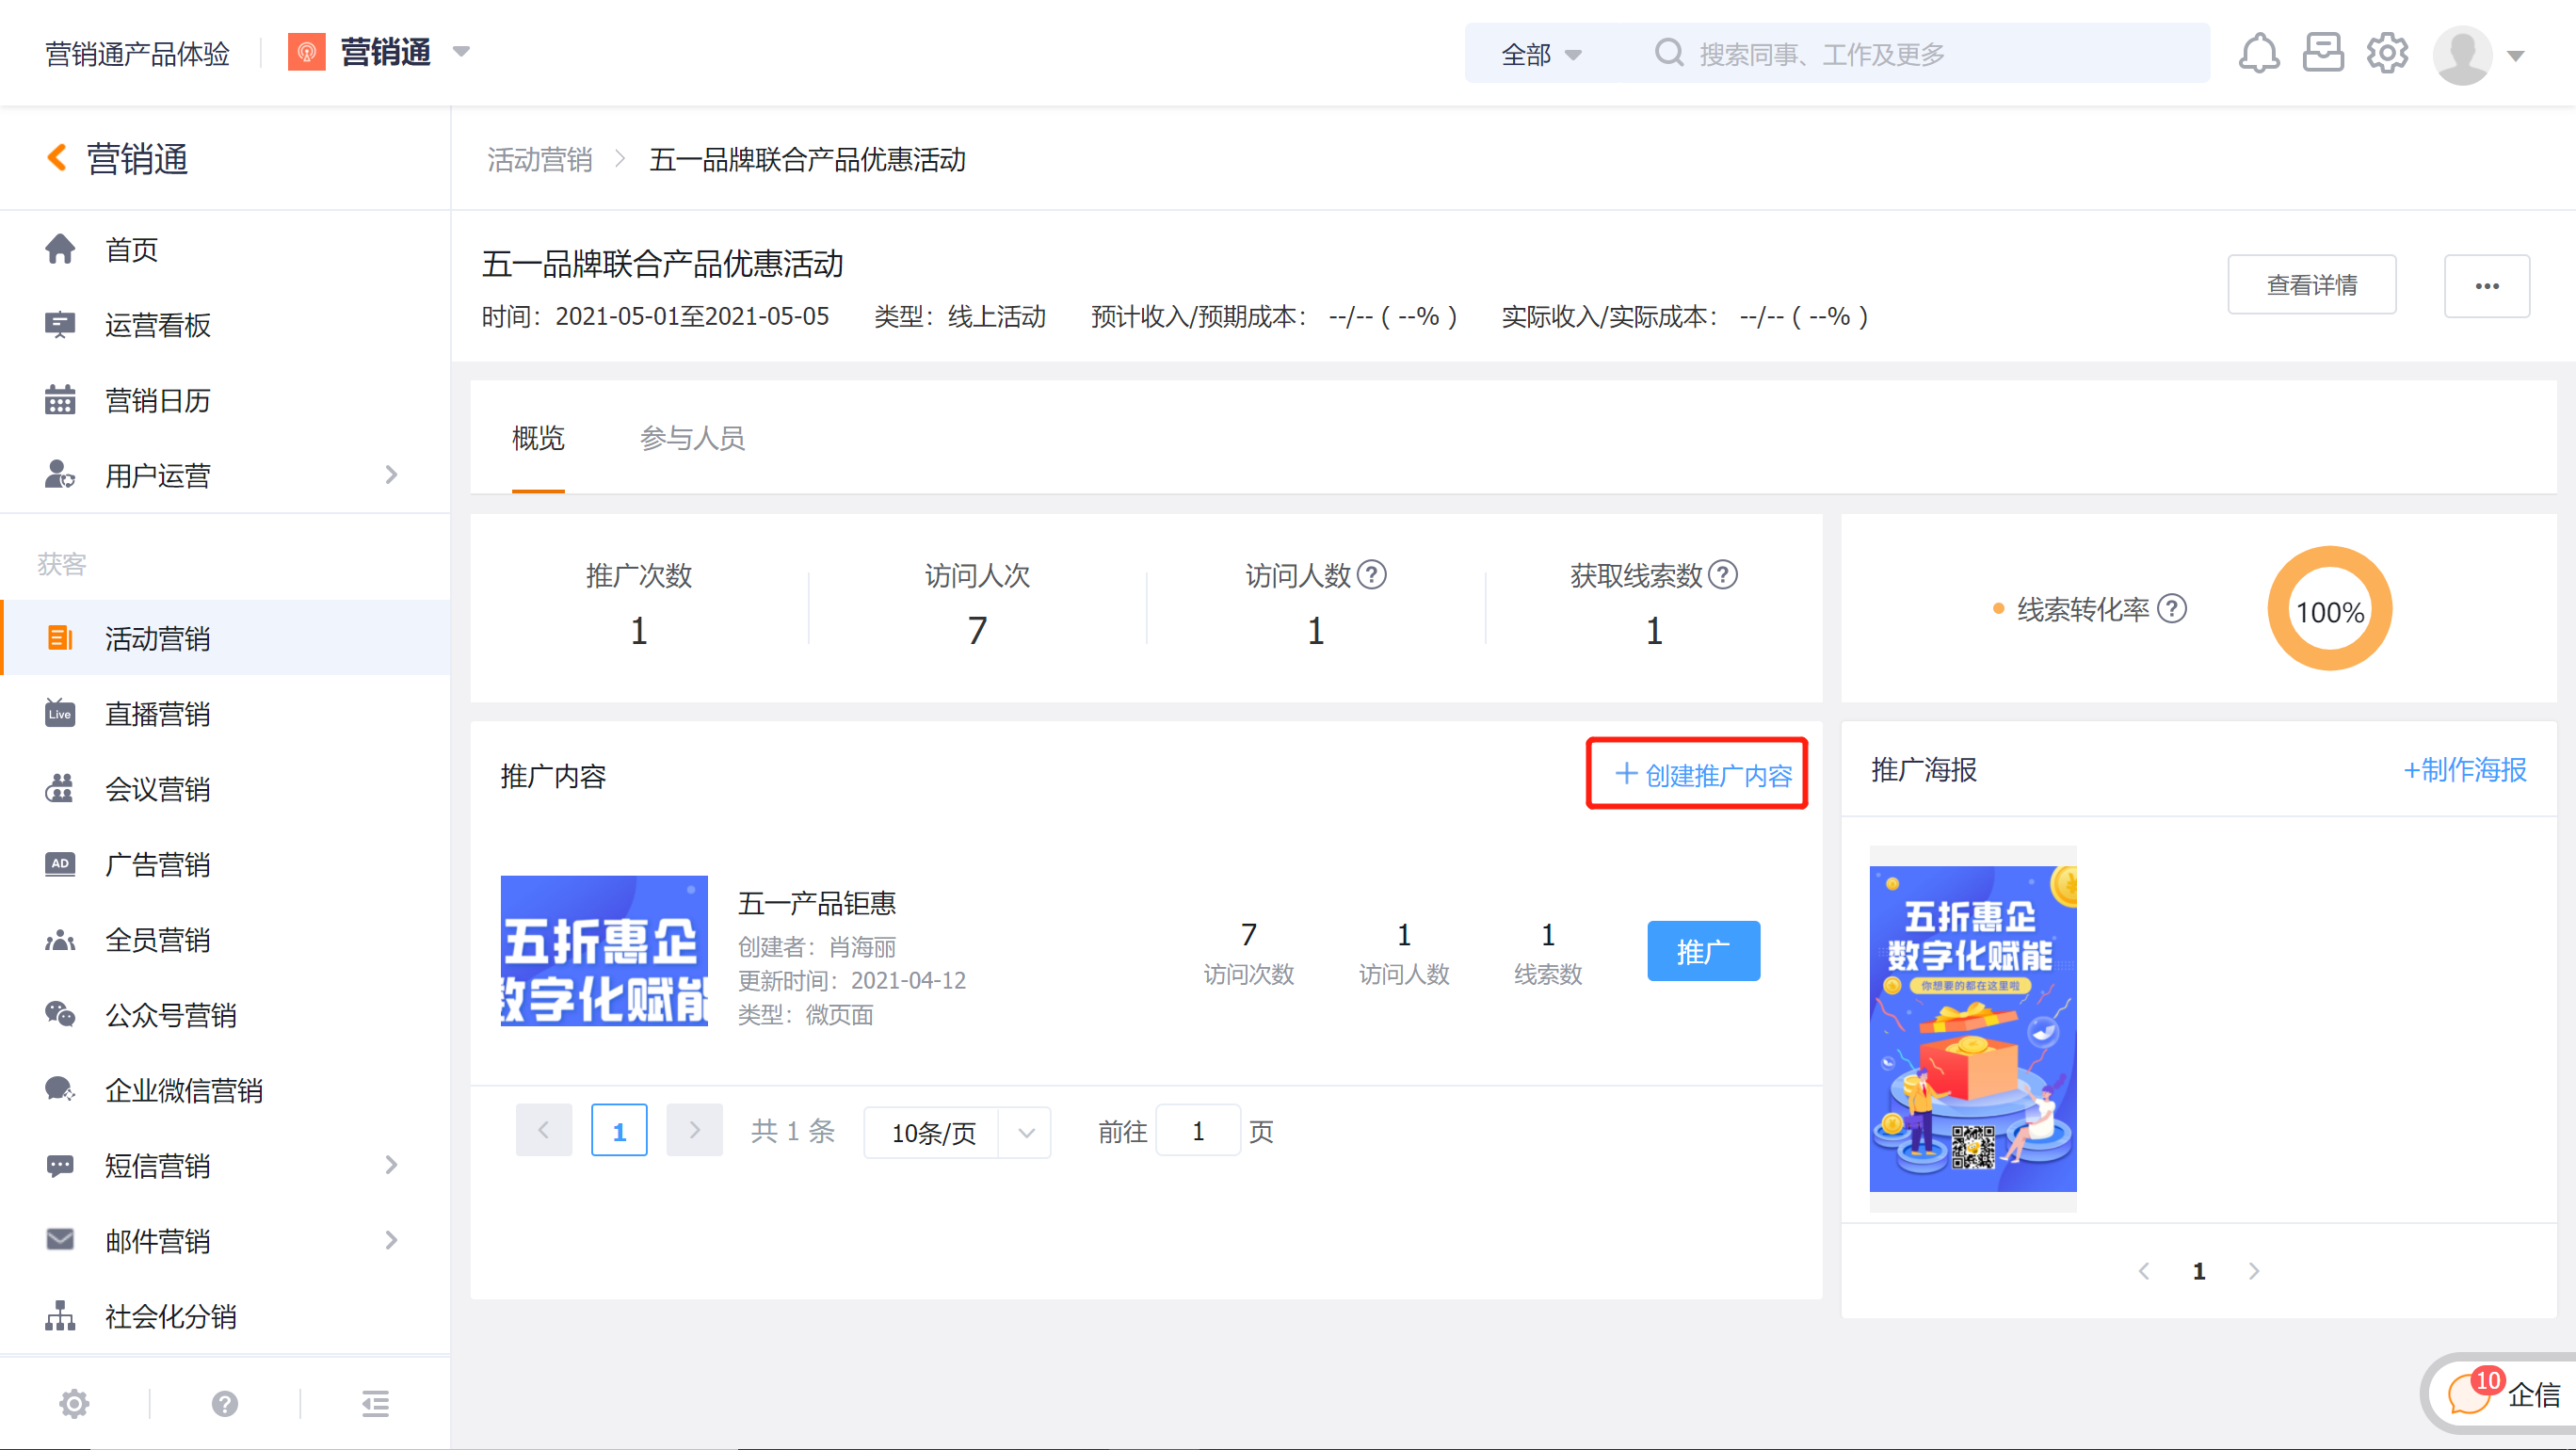
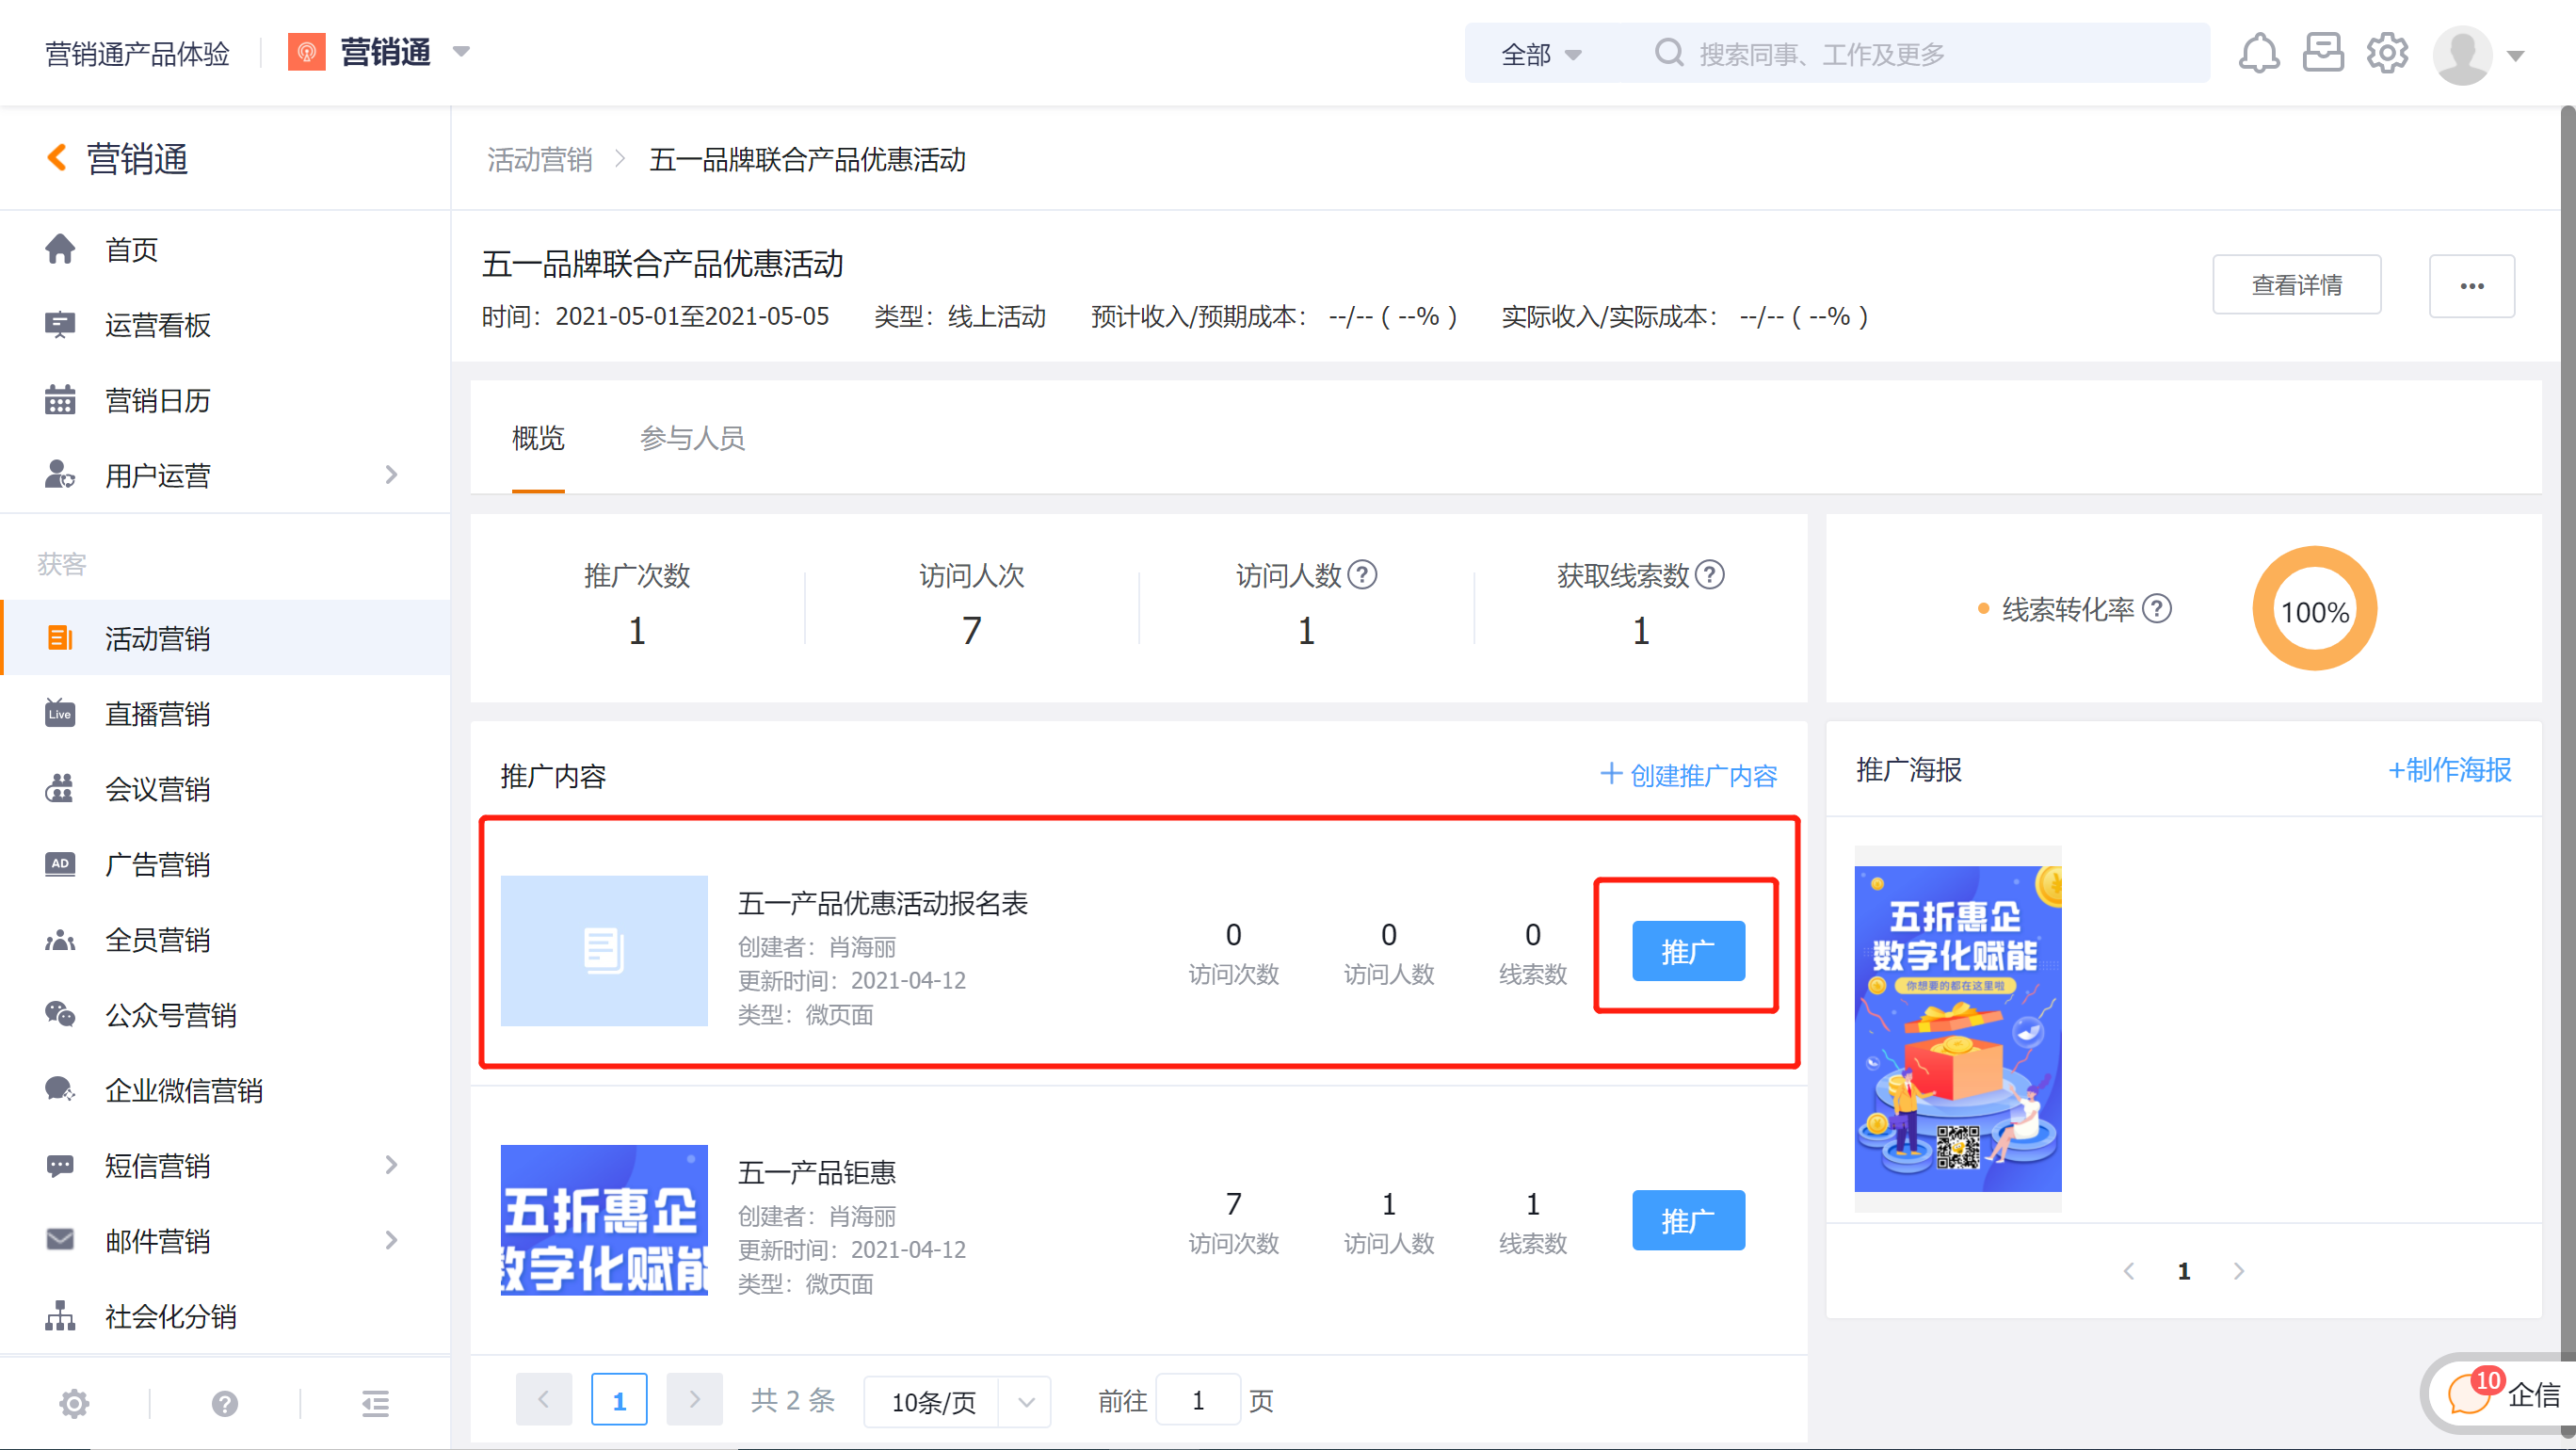
5. Micro-page Promotion
After completing the form settings, you can add the micro-page under marketing activities for promotion; click [+Create promotion content] in the promotion content area of [Event Marketing], [Conference Marketing] or [Live Marketing] to select the The created micro-page is added to the event for promotion;

2. Adjust Image Size & Resolution Ratio
In order to better improve the reading experience of the micro-page on the mobile terminal, the following restrictions are imposed on the upload of pictures on the micro-page:
- Image size up to 2M
- The maximum image resolution ratio is 1080px;
When encountering high-definition pictures with super-large resolution given by the designer, you can use
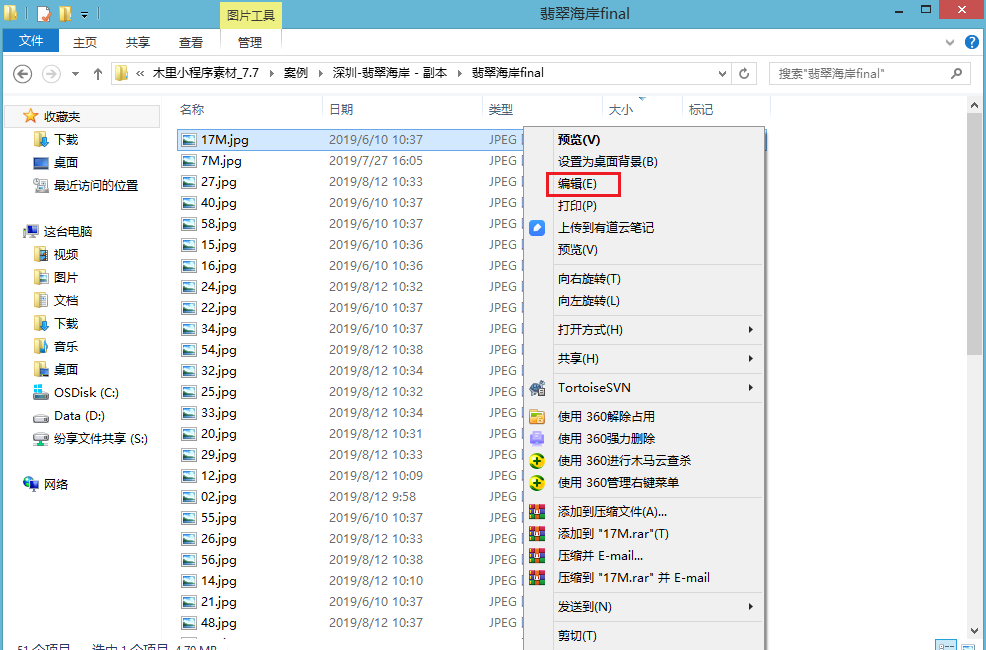
1. Find the picture that needs to be adjusted in the system folder, right-click and select [Edit] to enter the drawing to edit the picture;
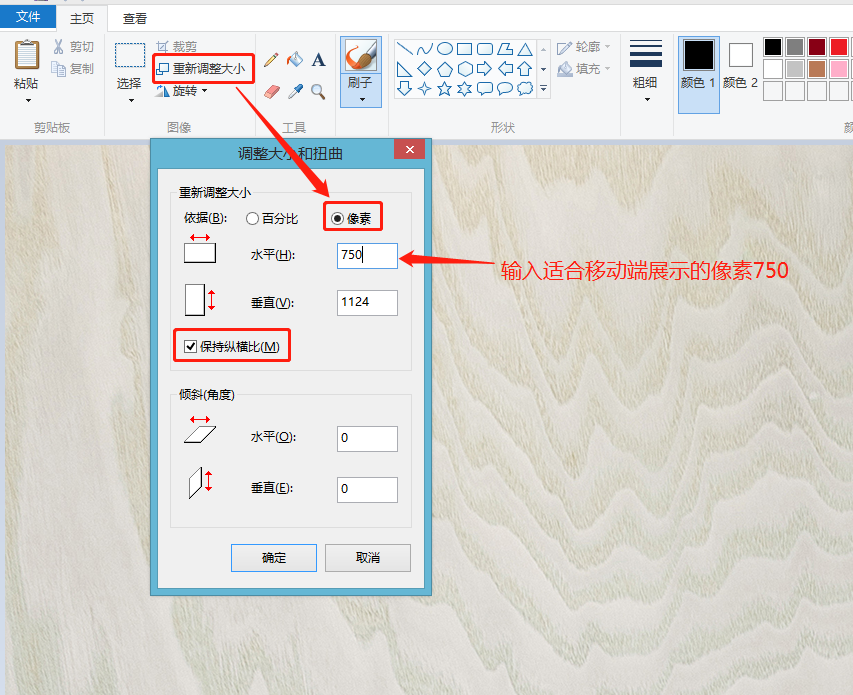
2. Find [Resize] in the upper left area of the drawing and click it. In the pop-up window [Resize and Distort], select the resize basis as "Pixels", check "Keep Aspect Ratio", and enter 750 in the horizontal input box (that is, the standard display pixel of the mobile terminal is 750px), and then save the picture
3. Micro-page Jump Action Description
In order to better interact with content or business data through micro-pages, the basic components of micro-pages, text, images, and buttons are all supporting actions after clicking and executing;
3.1 Jump to Internal Pages
When you click on the text, image or button, you can open a certain content page in the current micro-page site, such as the successful submission guide page after the form is submitted;
1) Add internal pages to the micro-page internal page list;
2) At the position where the jump needs to be set, set the click/submit action to jump to the internal page;
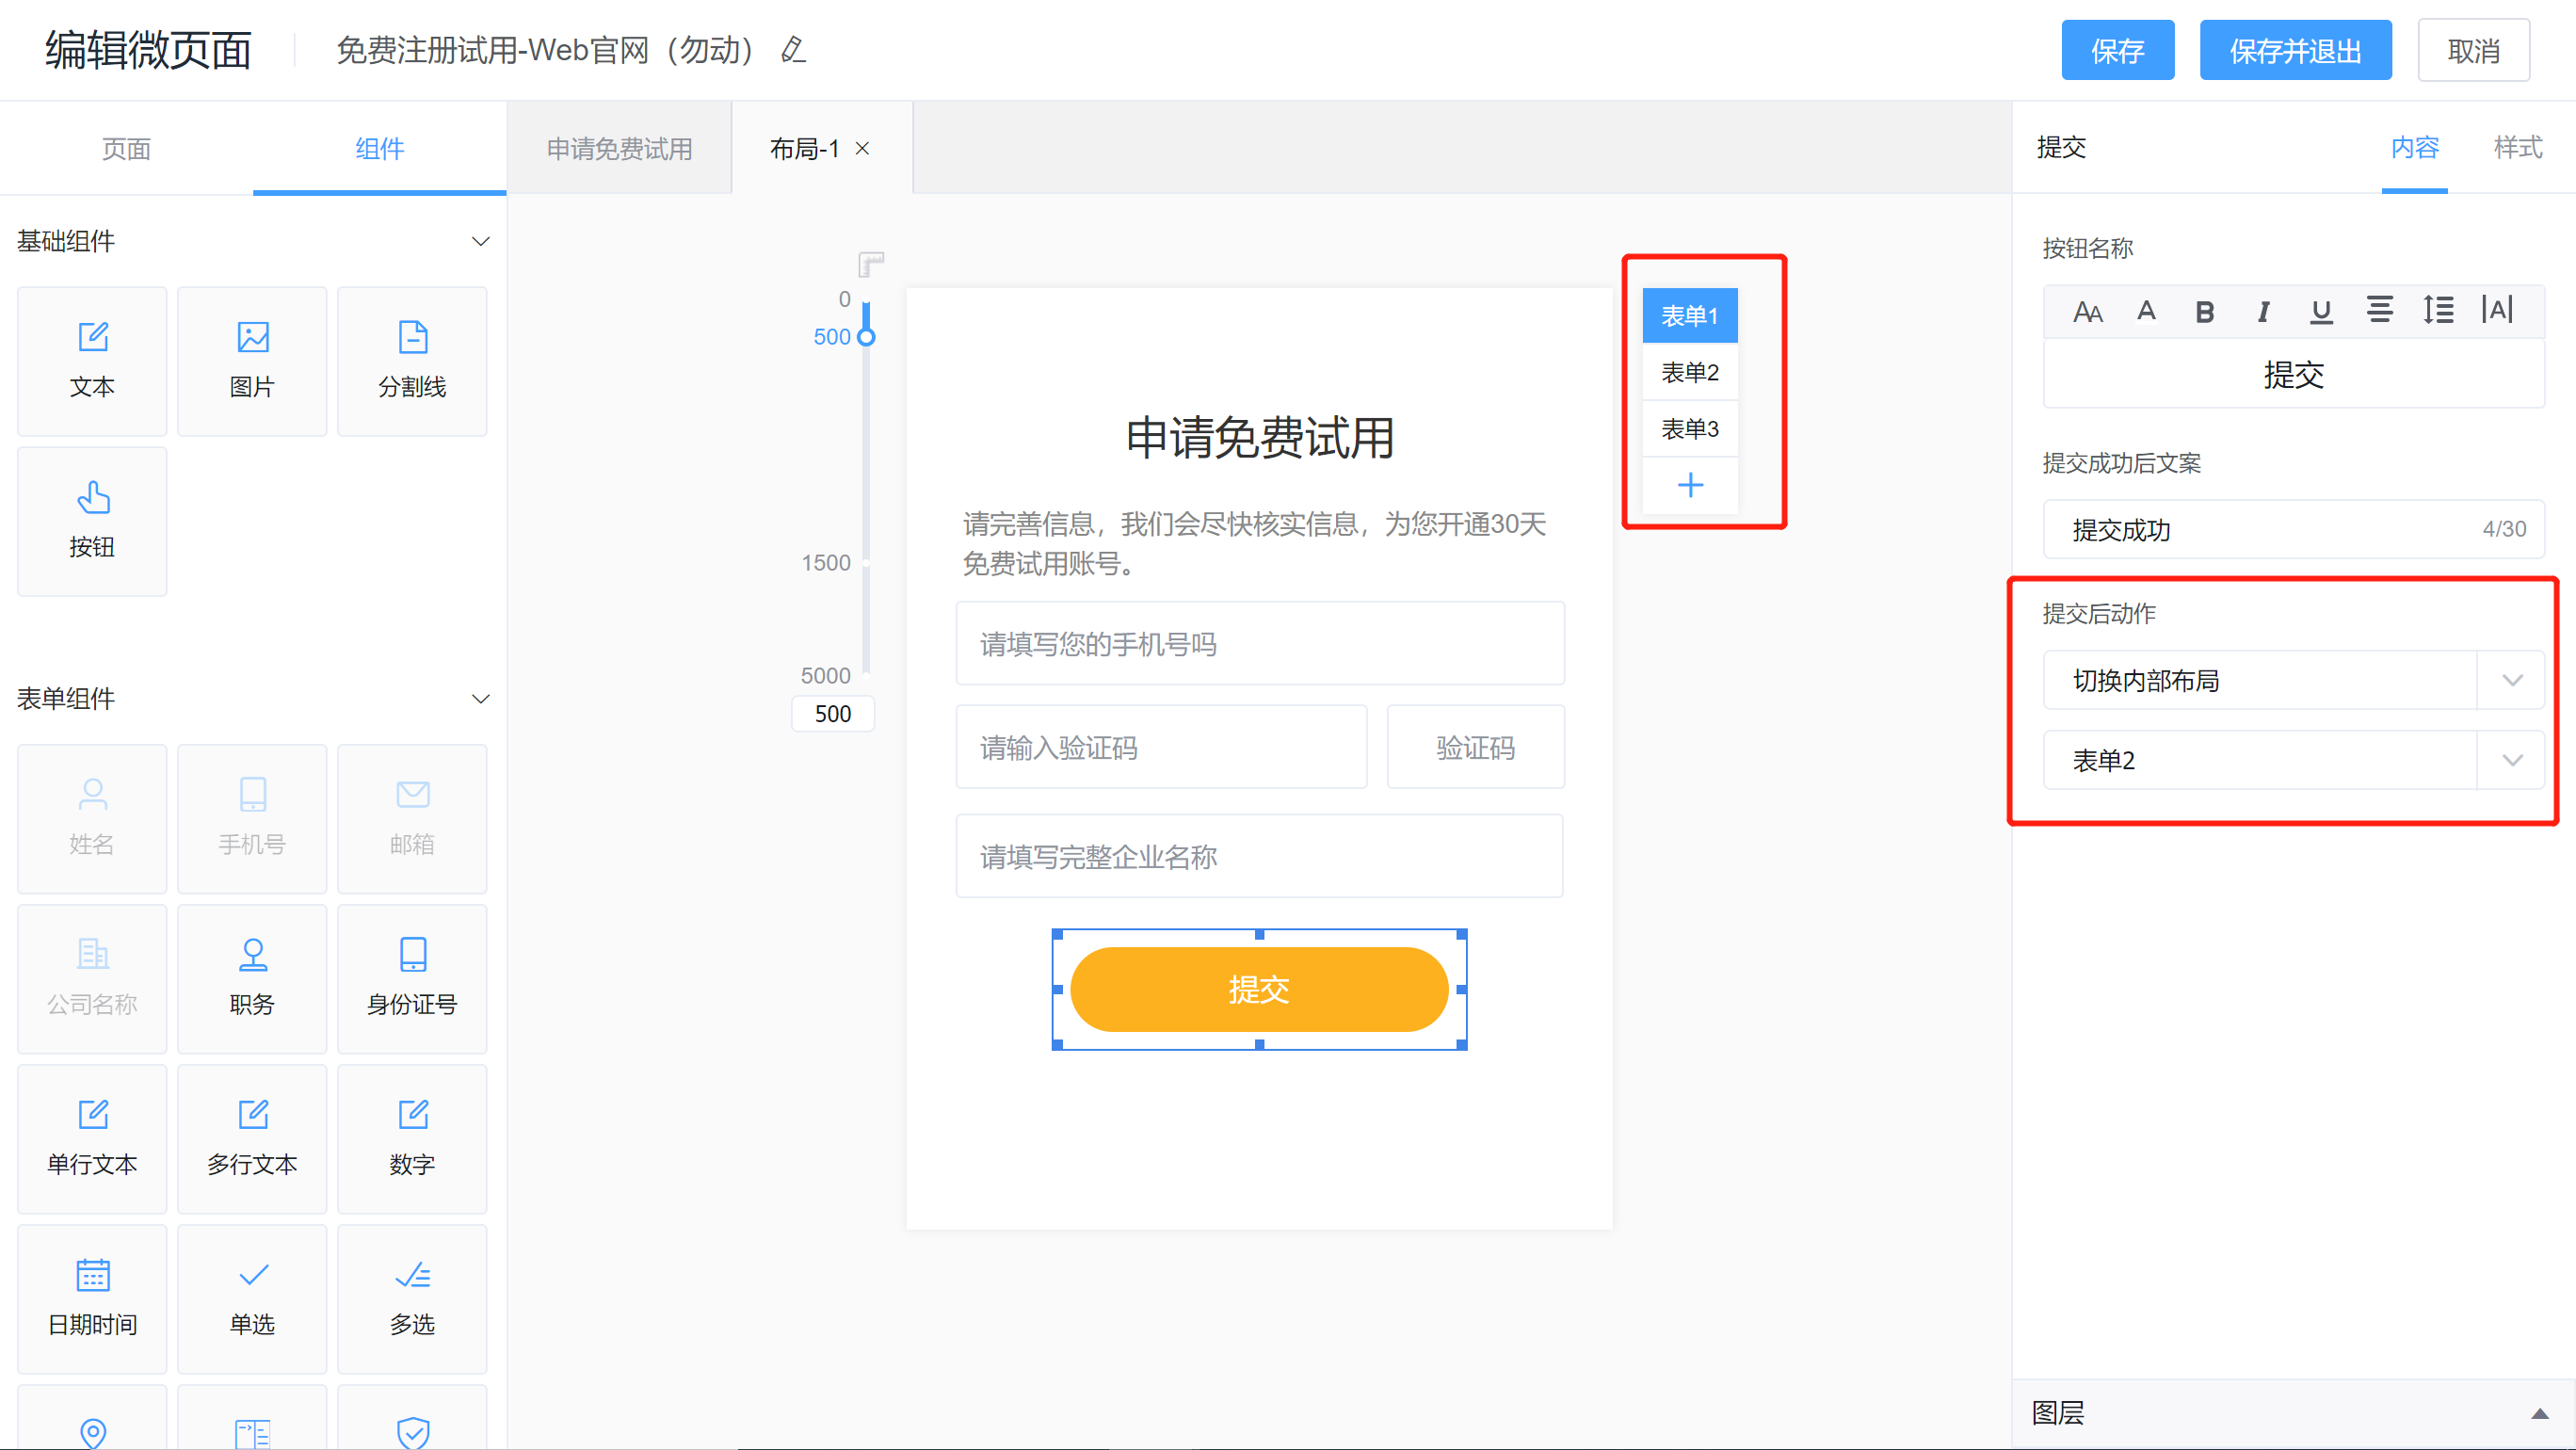
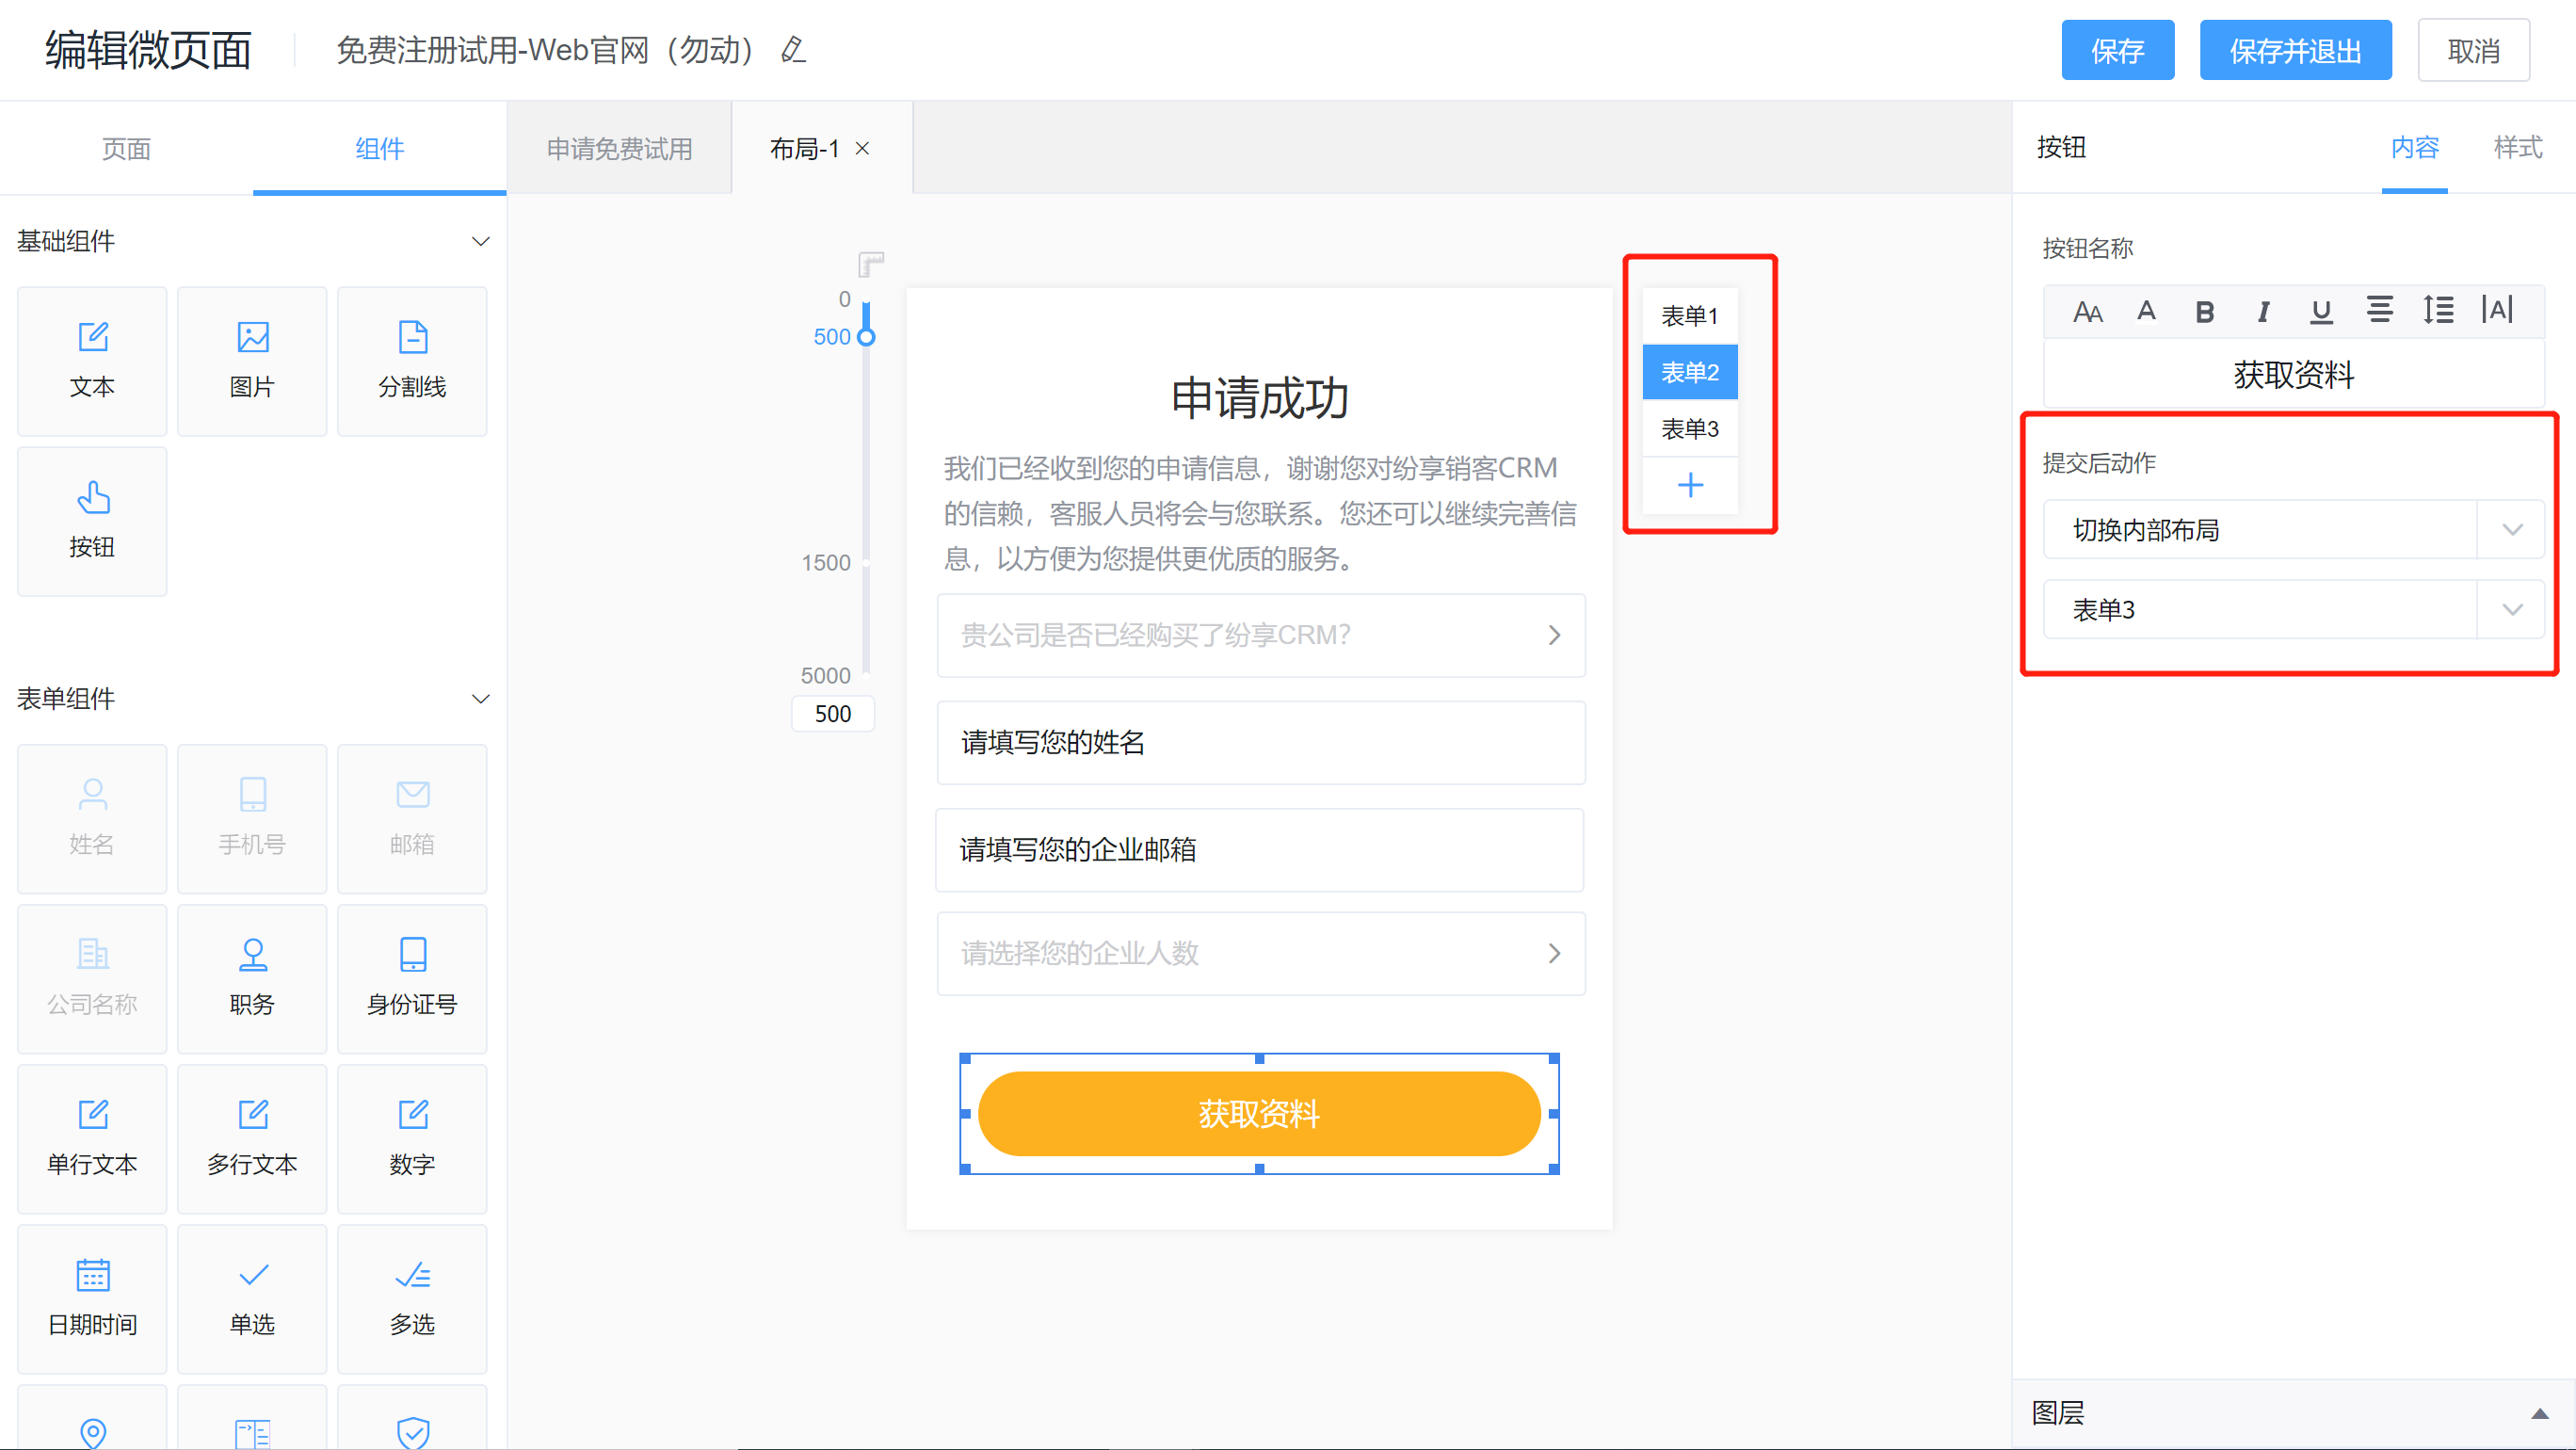
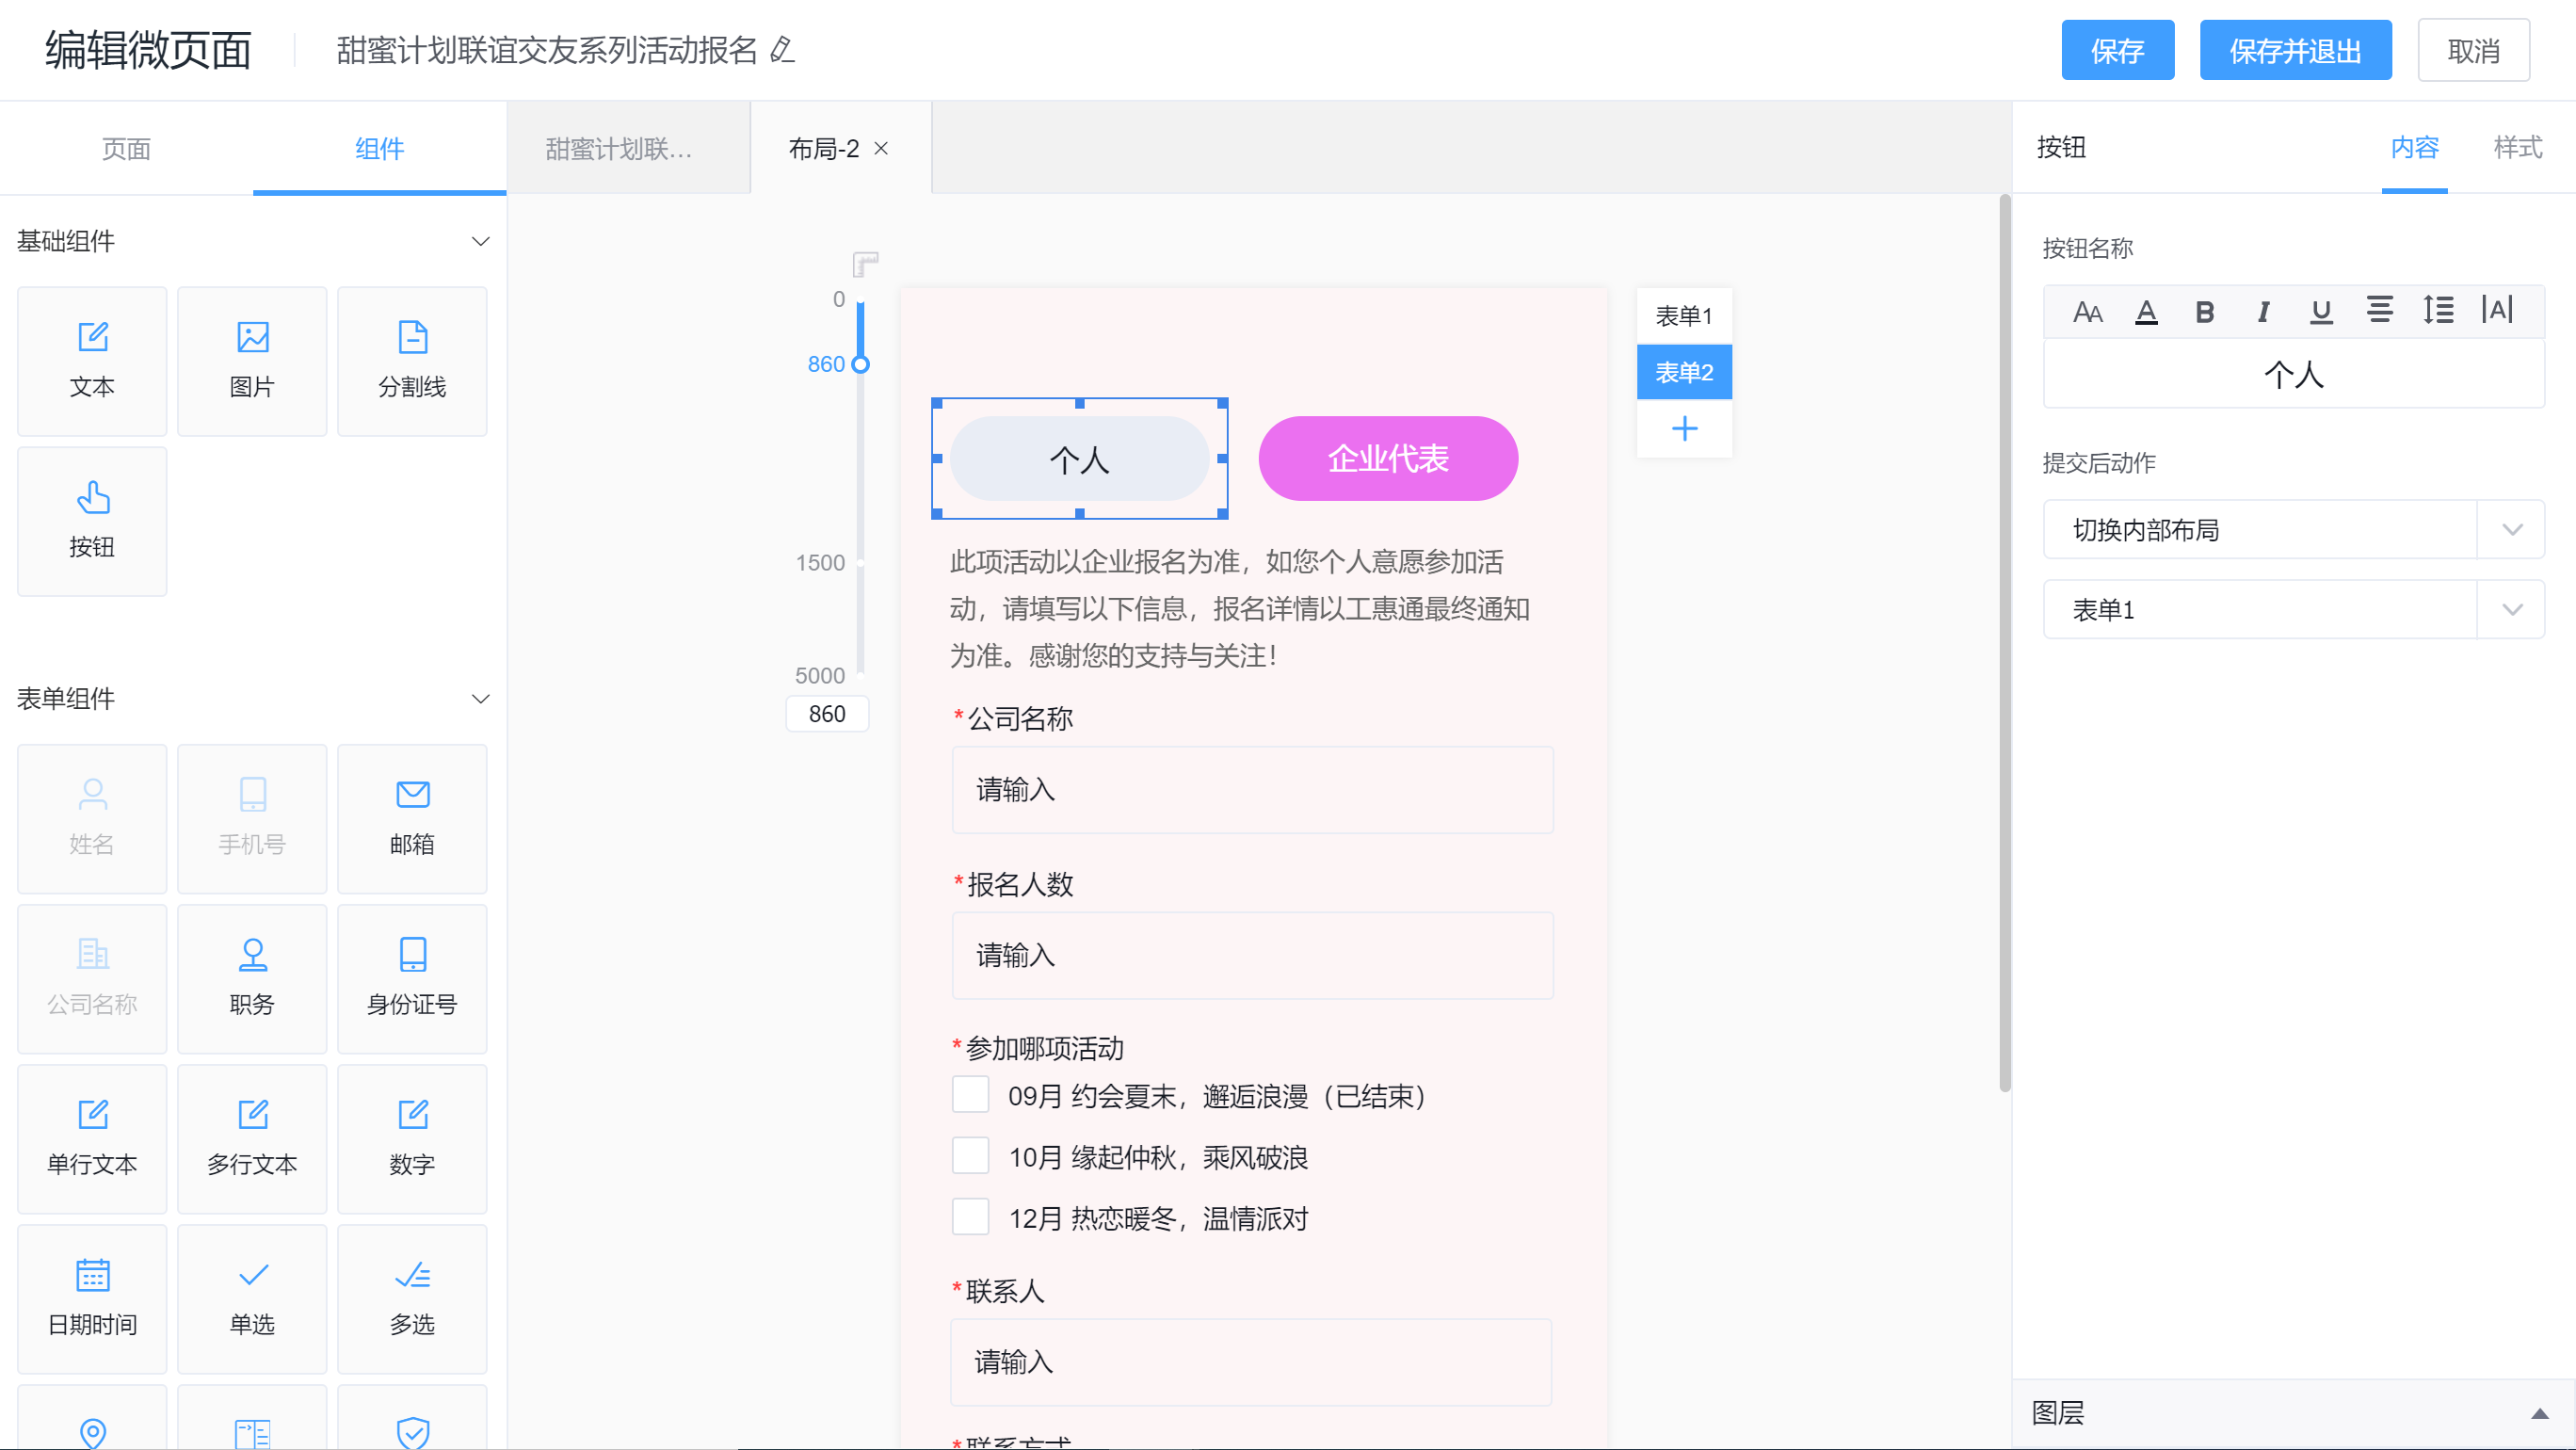
3.2 Switch Internal Layout
When you click text, images or buttons, you can switch to a certain internal layout on the current page, which is suitable for example: submitting form content step by step, displaying different form collection fields according to different user roles, switching content layout, etc.;
3.3 Jump to Web Address
When you click on a text, image or button, you can go to an external link, which is applicable to scenarios such as: opening official account tweets, entering the official website, jumping to external lottery links, etc.;

3.4 View Data
When you click on the text, image or button, you can open the preview window of the specified ShareCRM netdisk file, which is suitable for scenes such as: viewing white papers, viewing industry solutions, etc.;
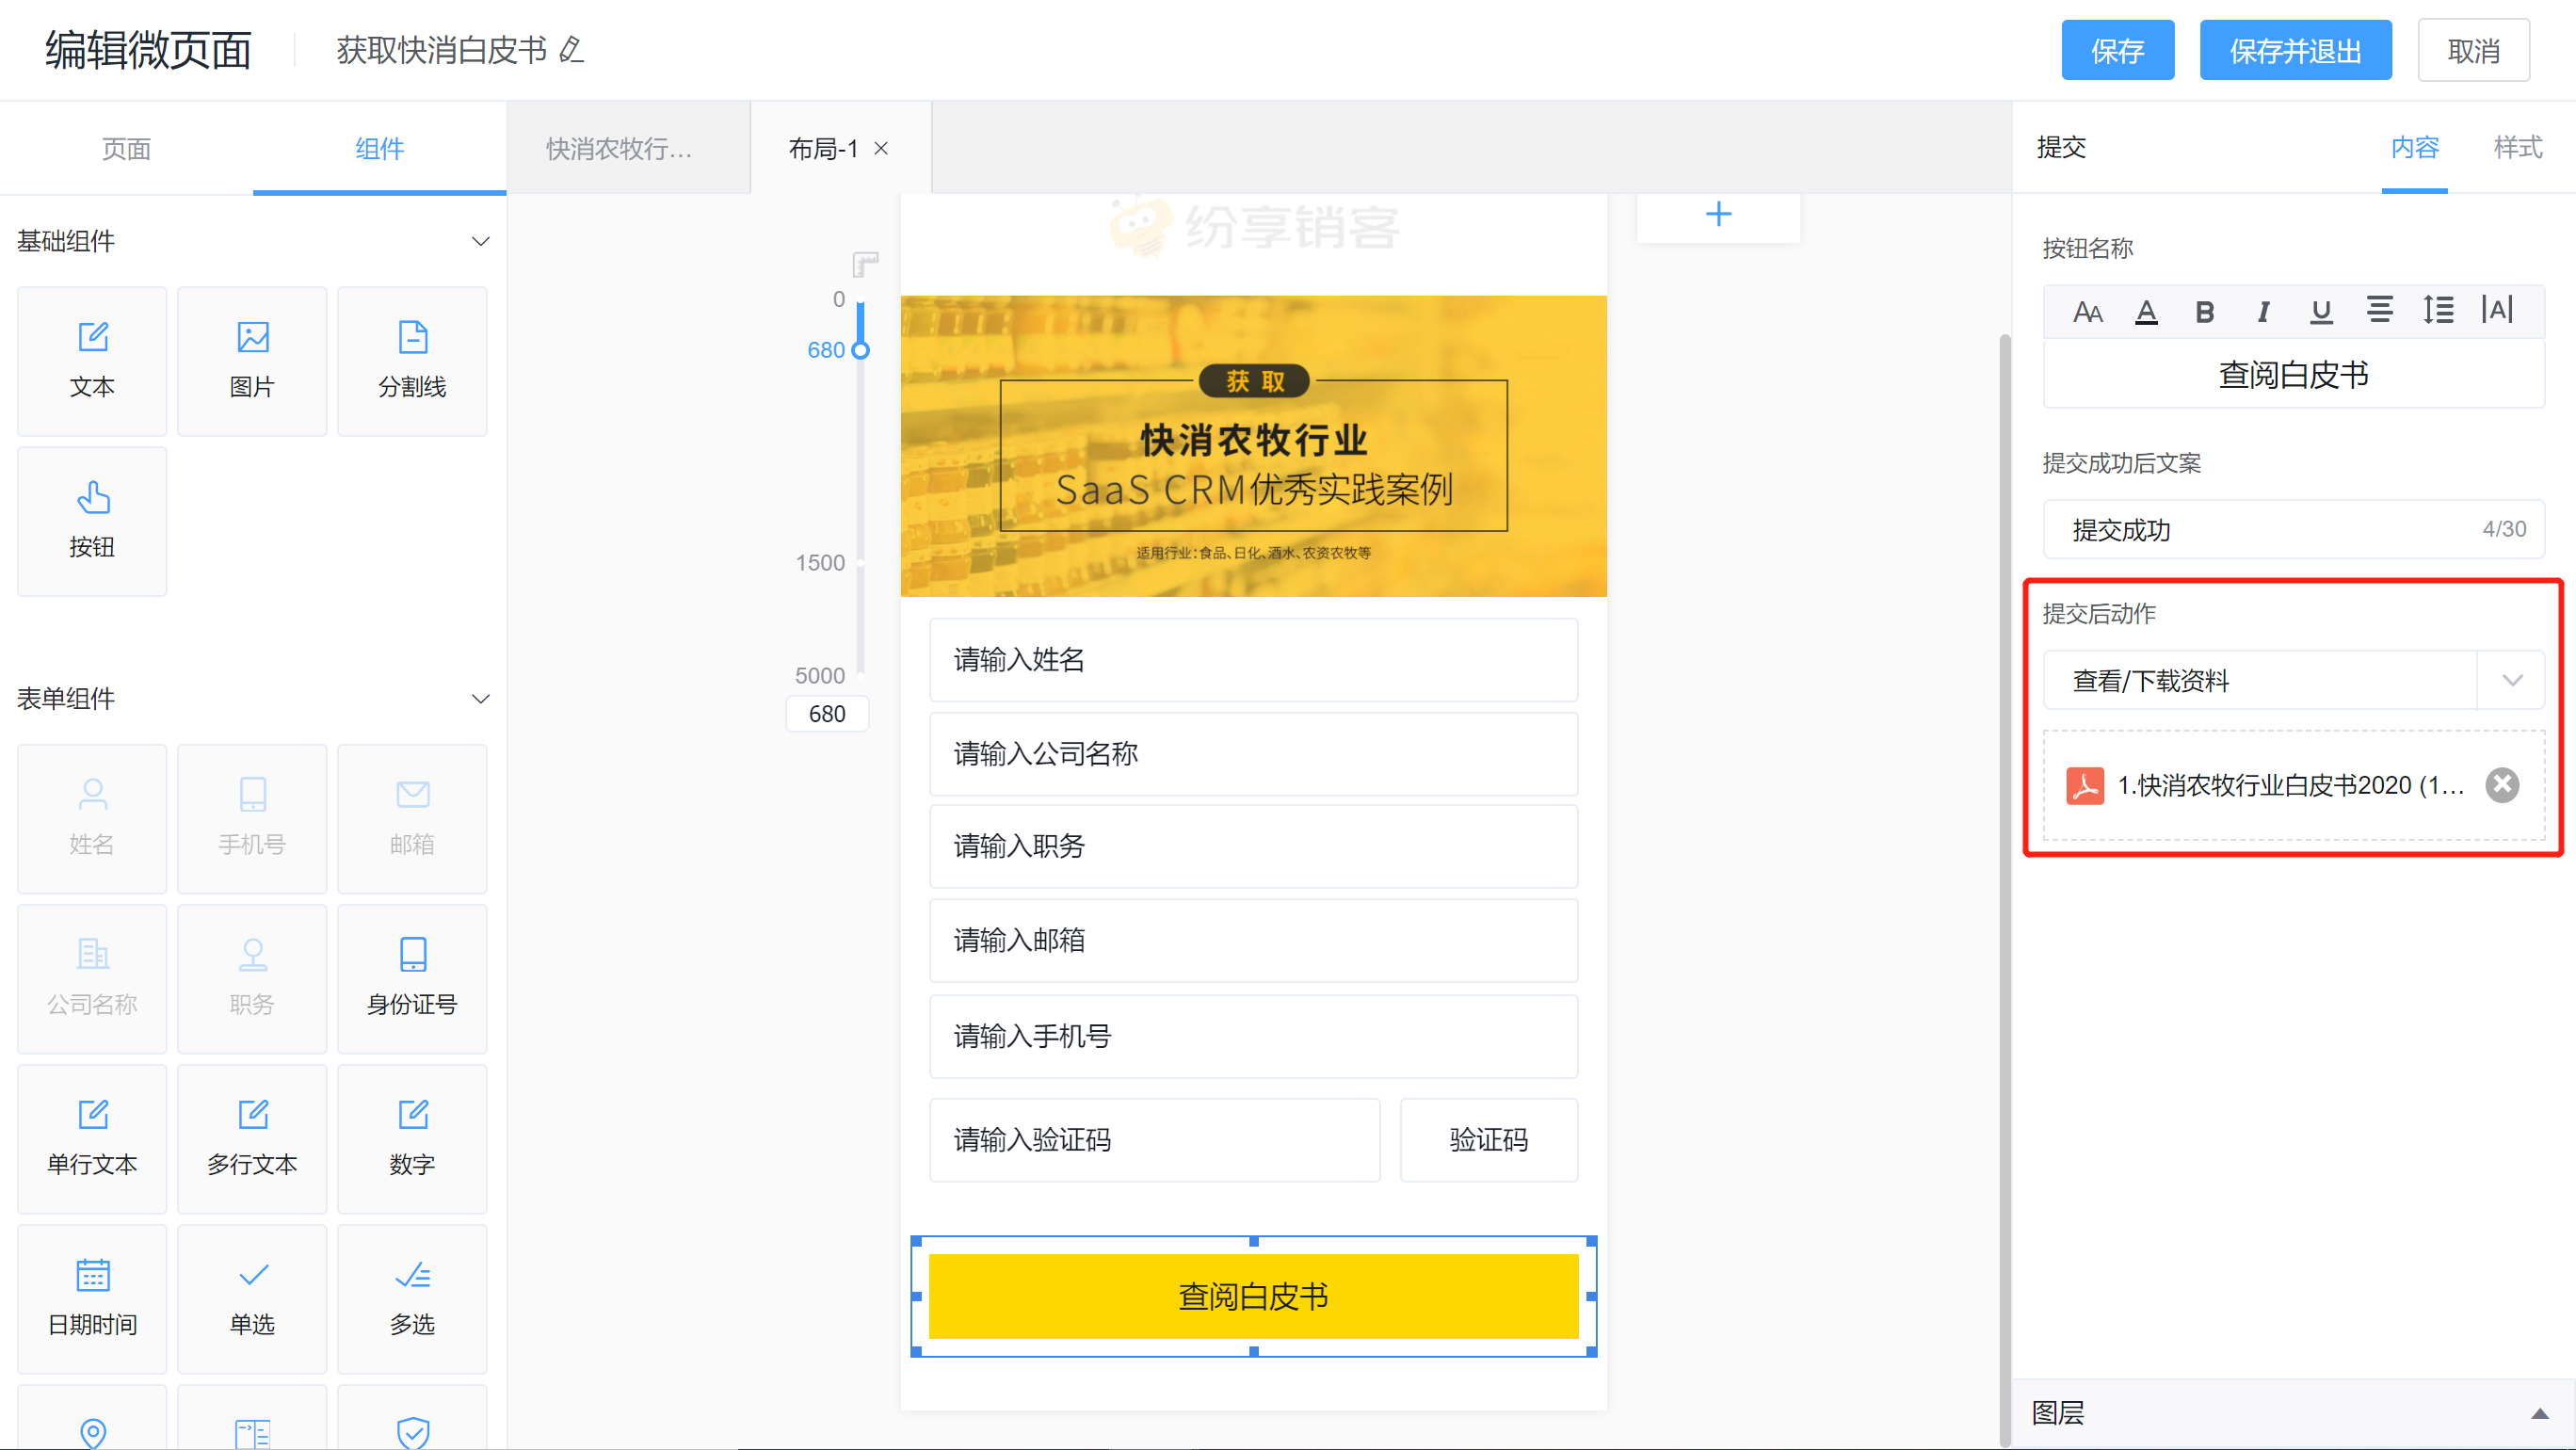
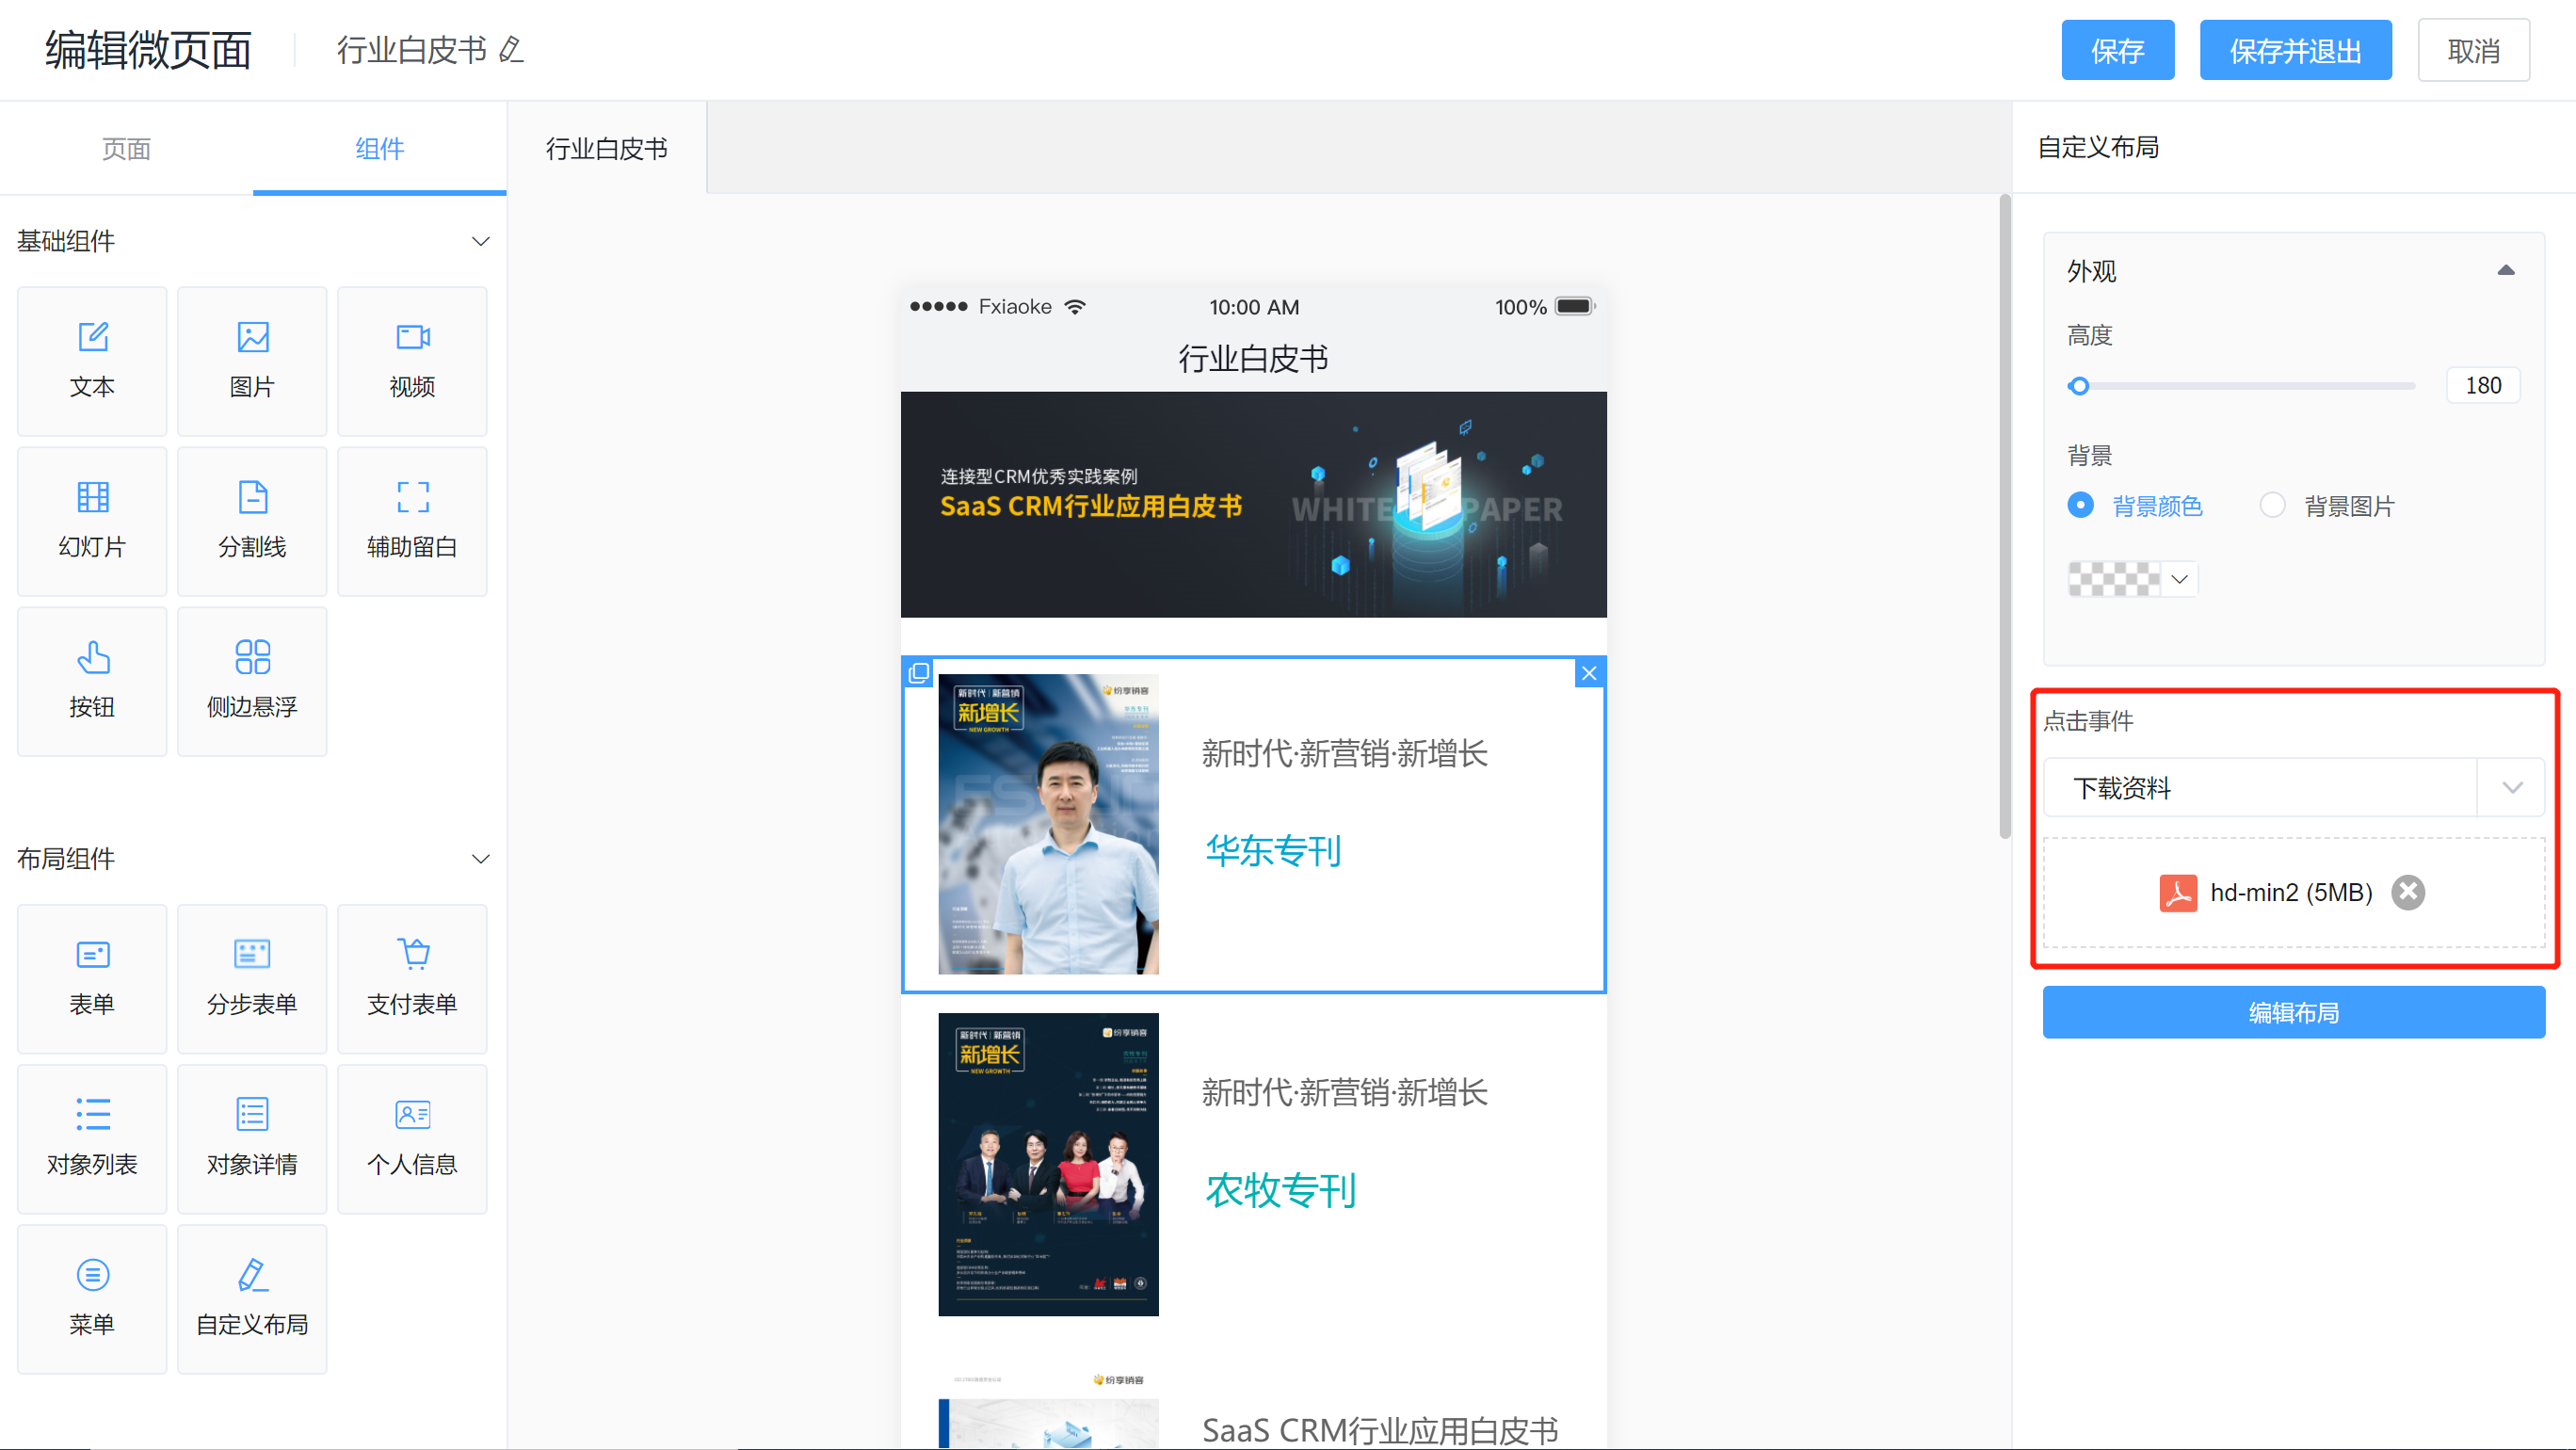
3.5 Download Data
When you click on the text, image or button, you can open the designated ShareCRM netdisk file, which is suitable for scenes such as: downloading white papers, obtaining industry solutions, and conference PPTs;
3.6 Custom Function
When the form submit button is clicked, a CRM custom function can be executed, which is usually used to interact with CRM data. It is suitable for example: jumping pages or content distribution according to form submission information, interactive verification of form data and CRM business object data, and displaying a certain business list, detailed data, etc.;

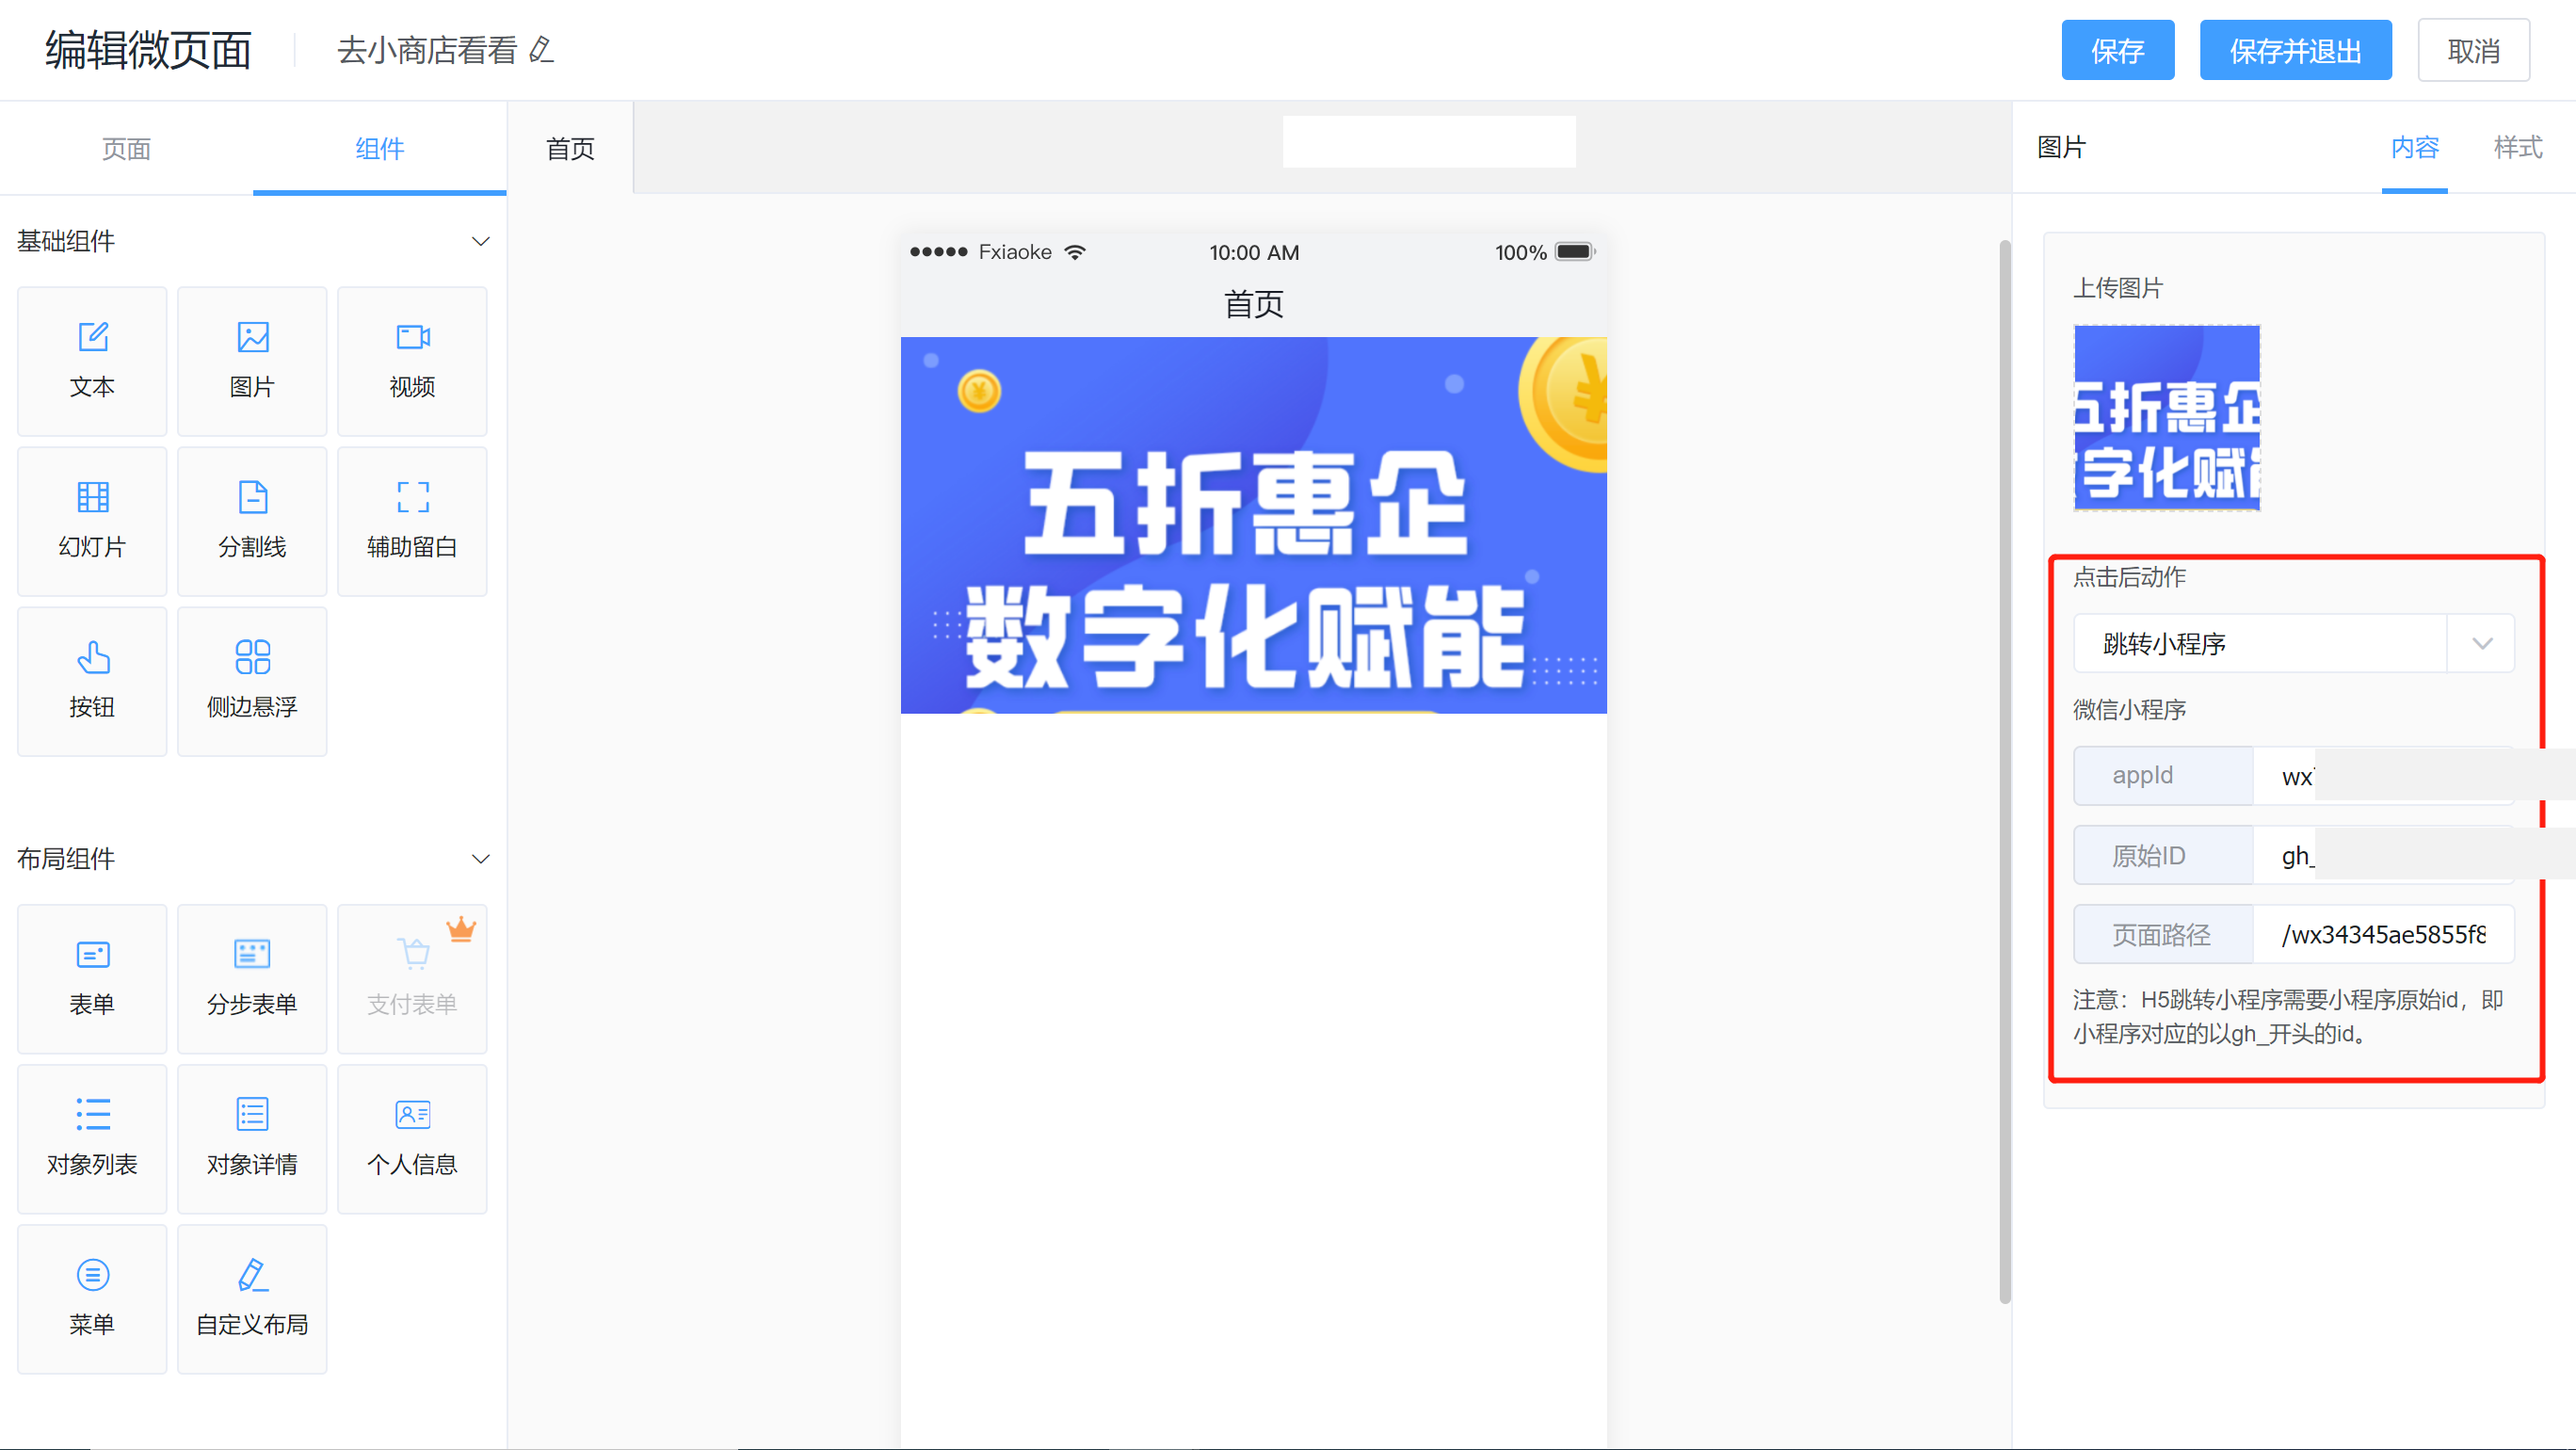
3.7 Mini Program
An external mini program can be opened when a text, image or button is clicked;
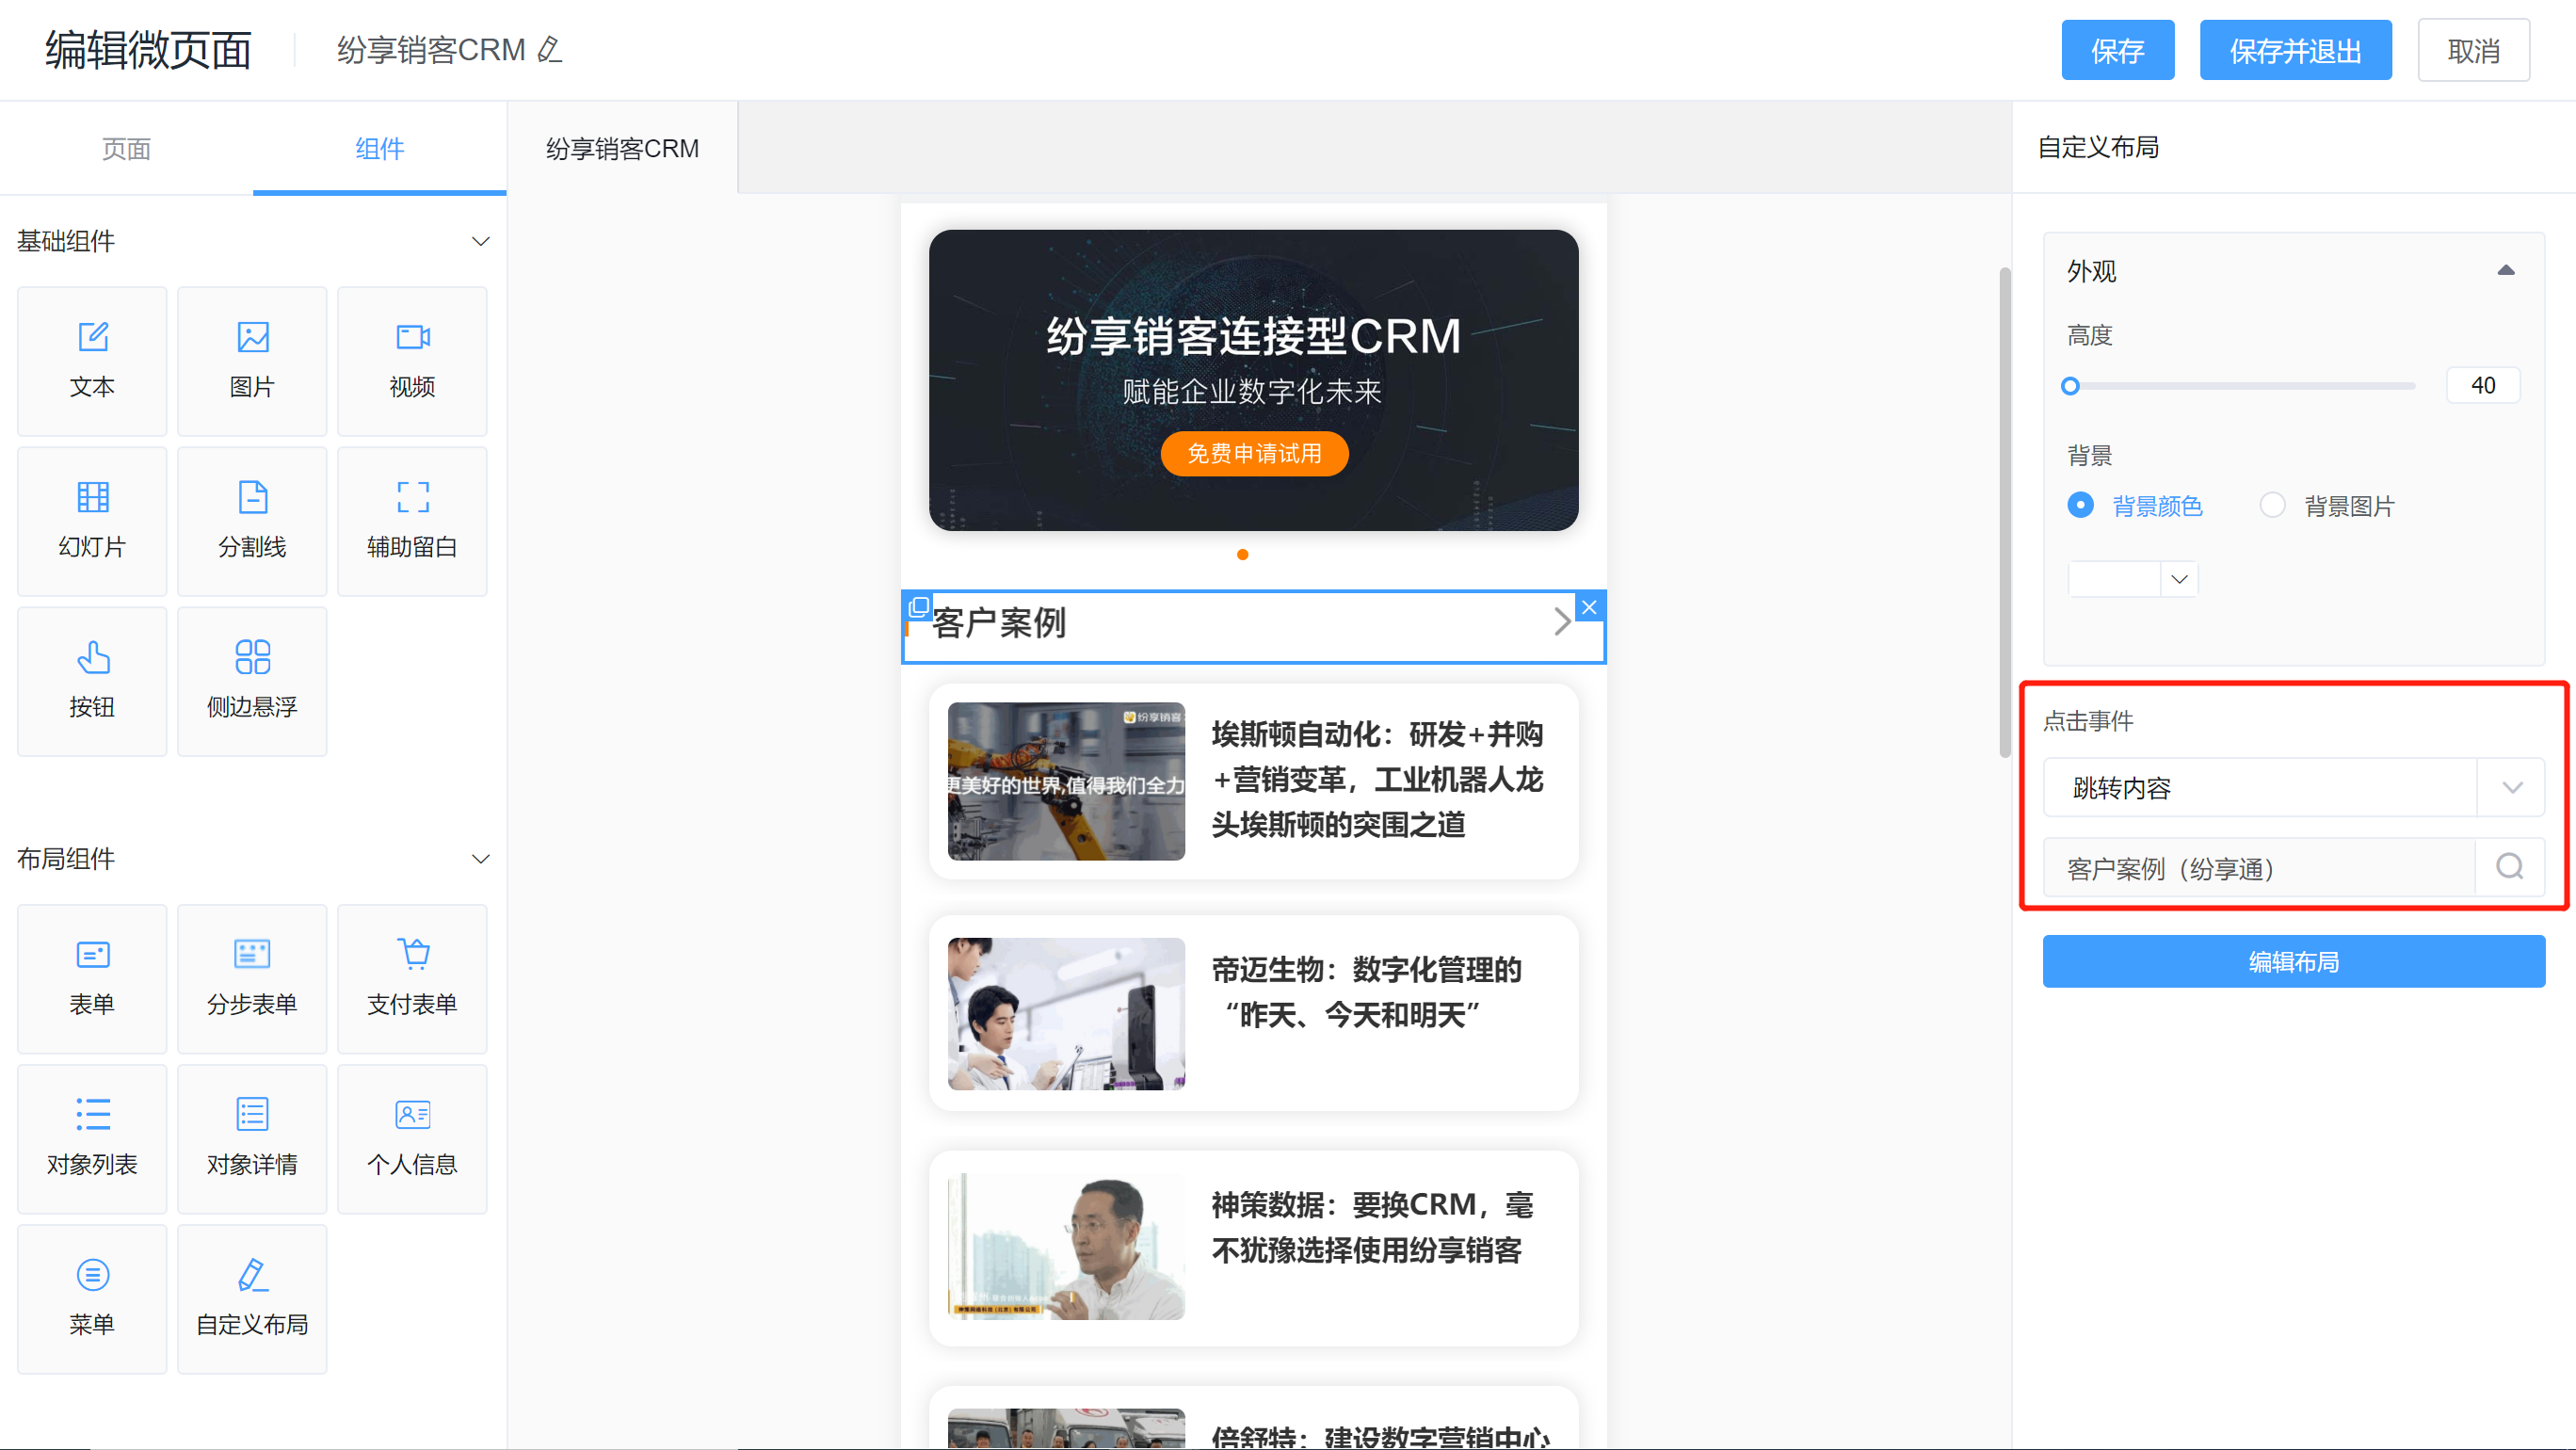
3.8 Jump to Content
When you click on text, images or buttons, you can select to jump to open the specified content in the E-Marketing content center;
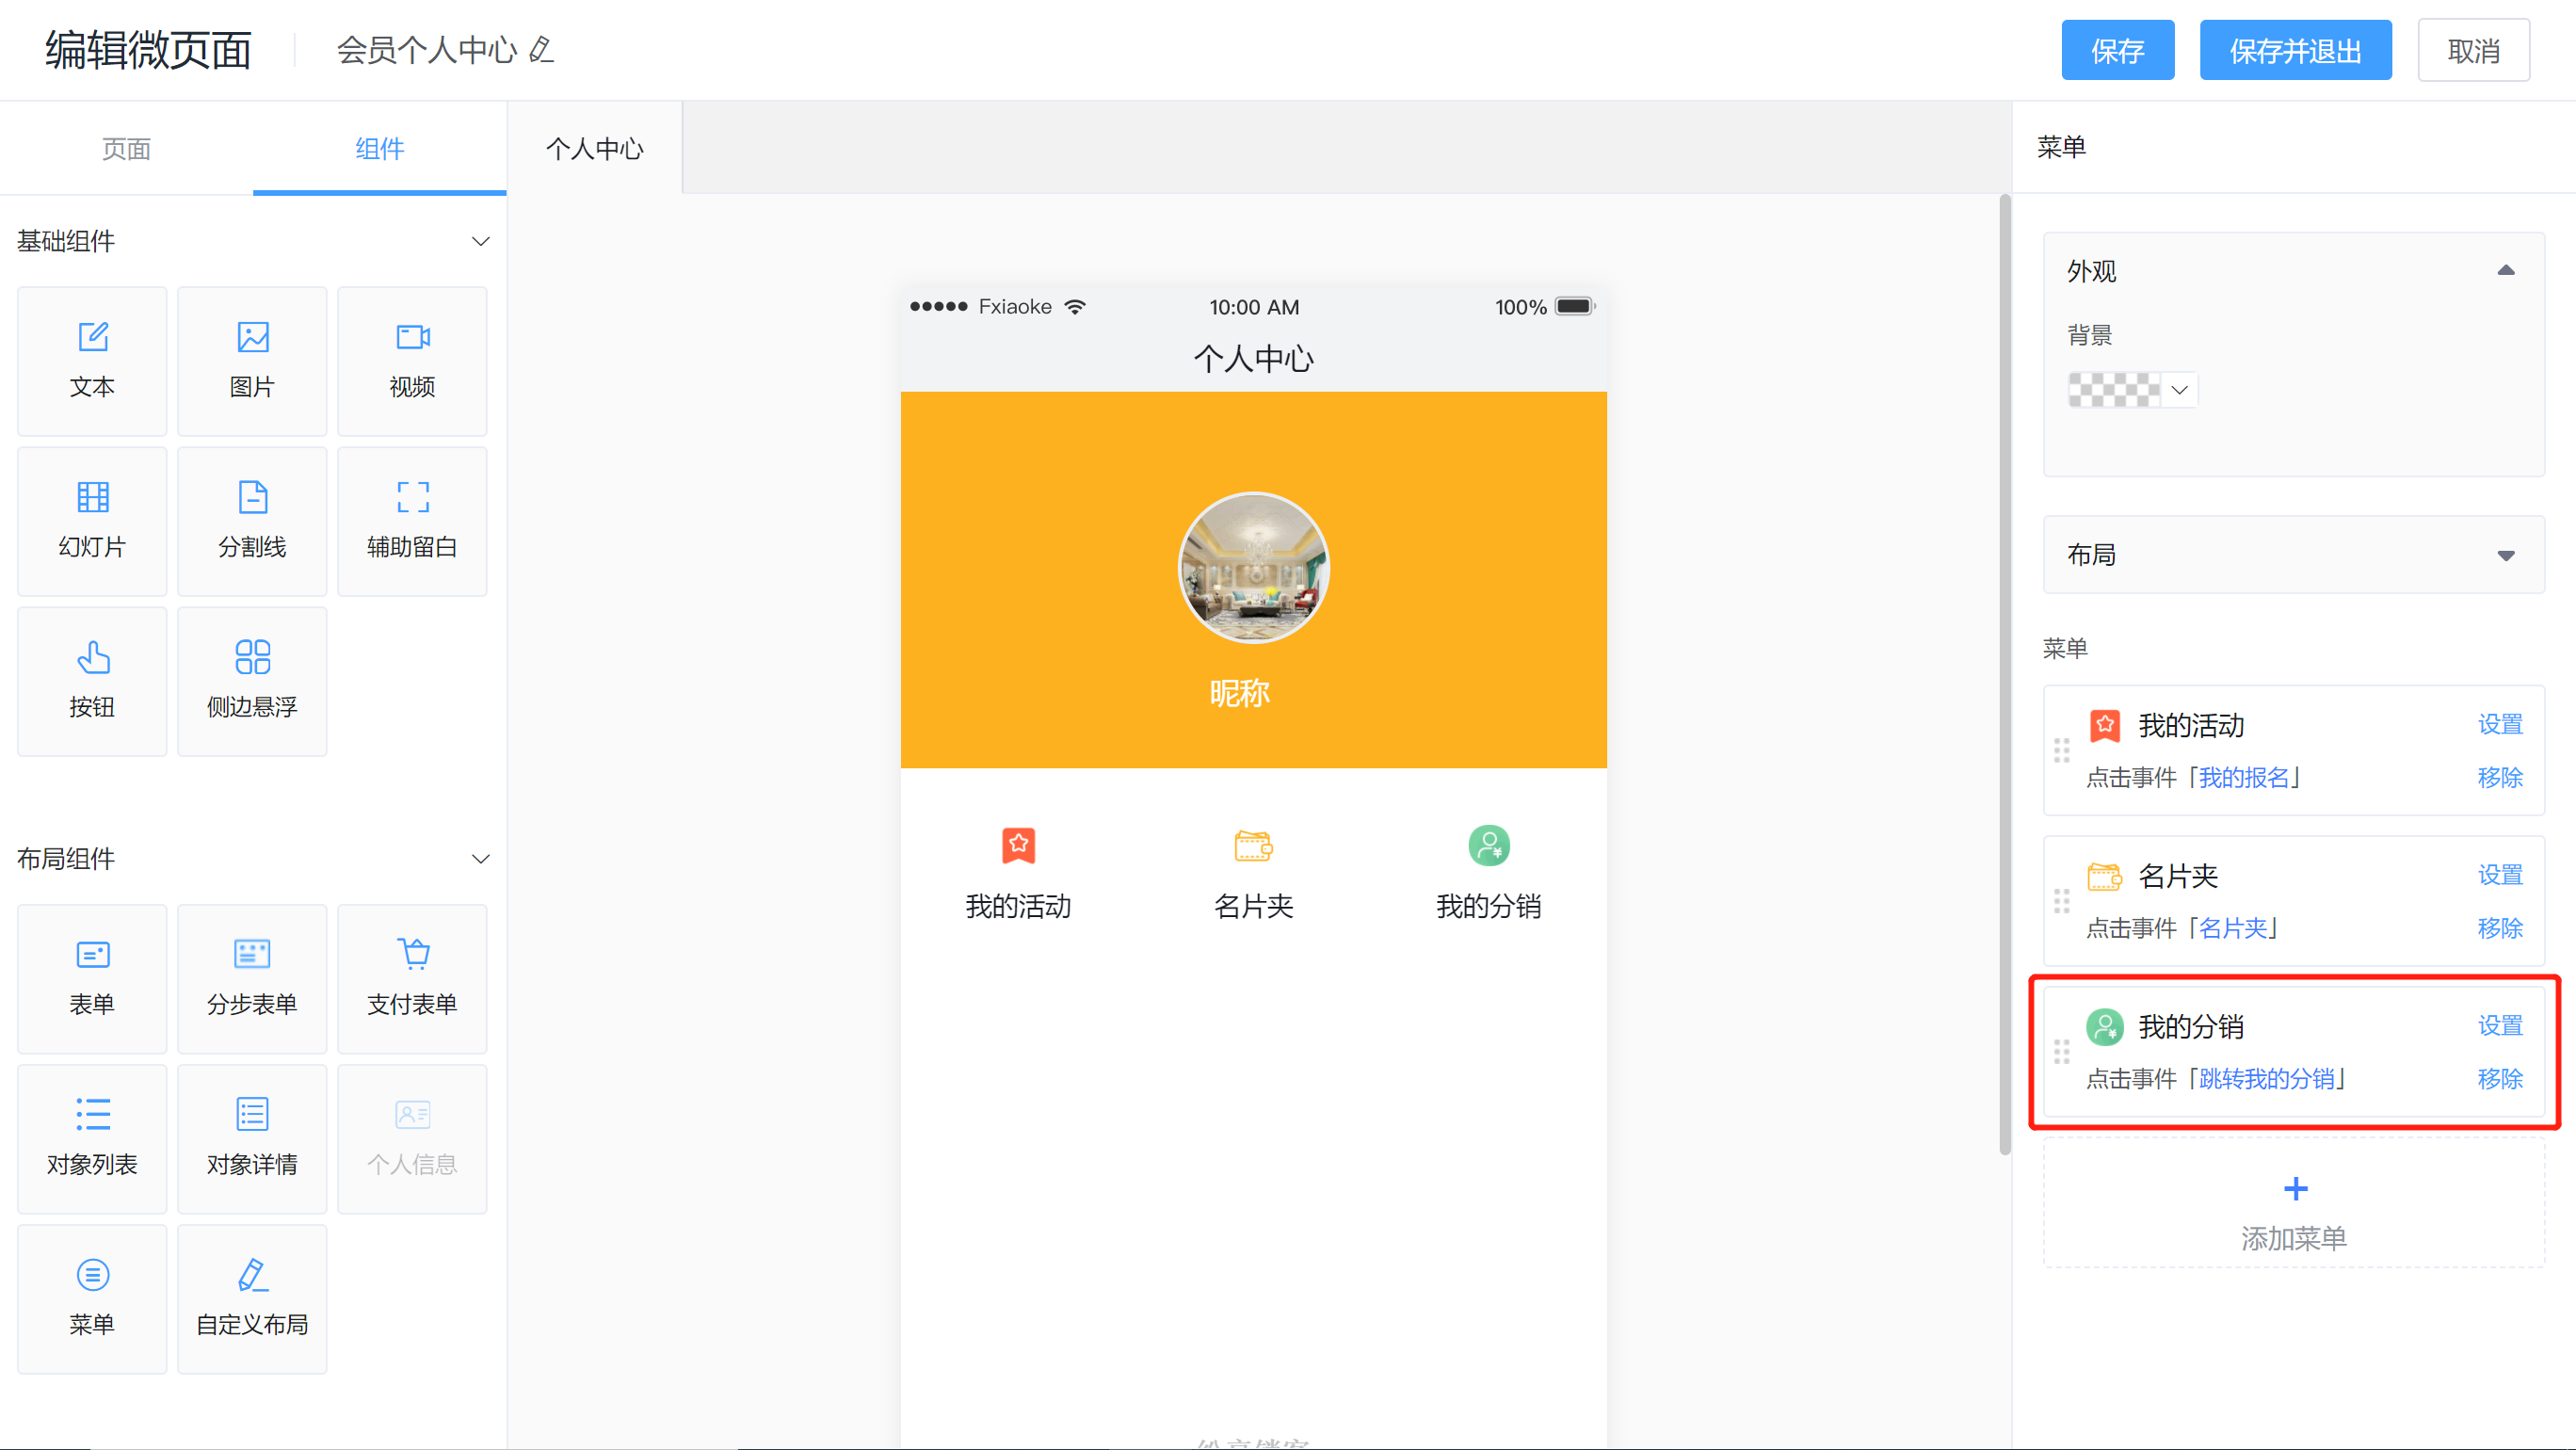
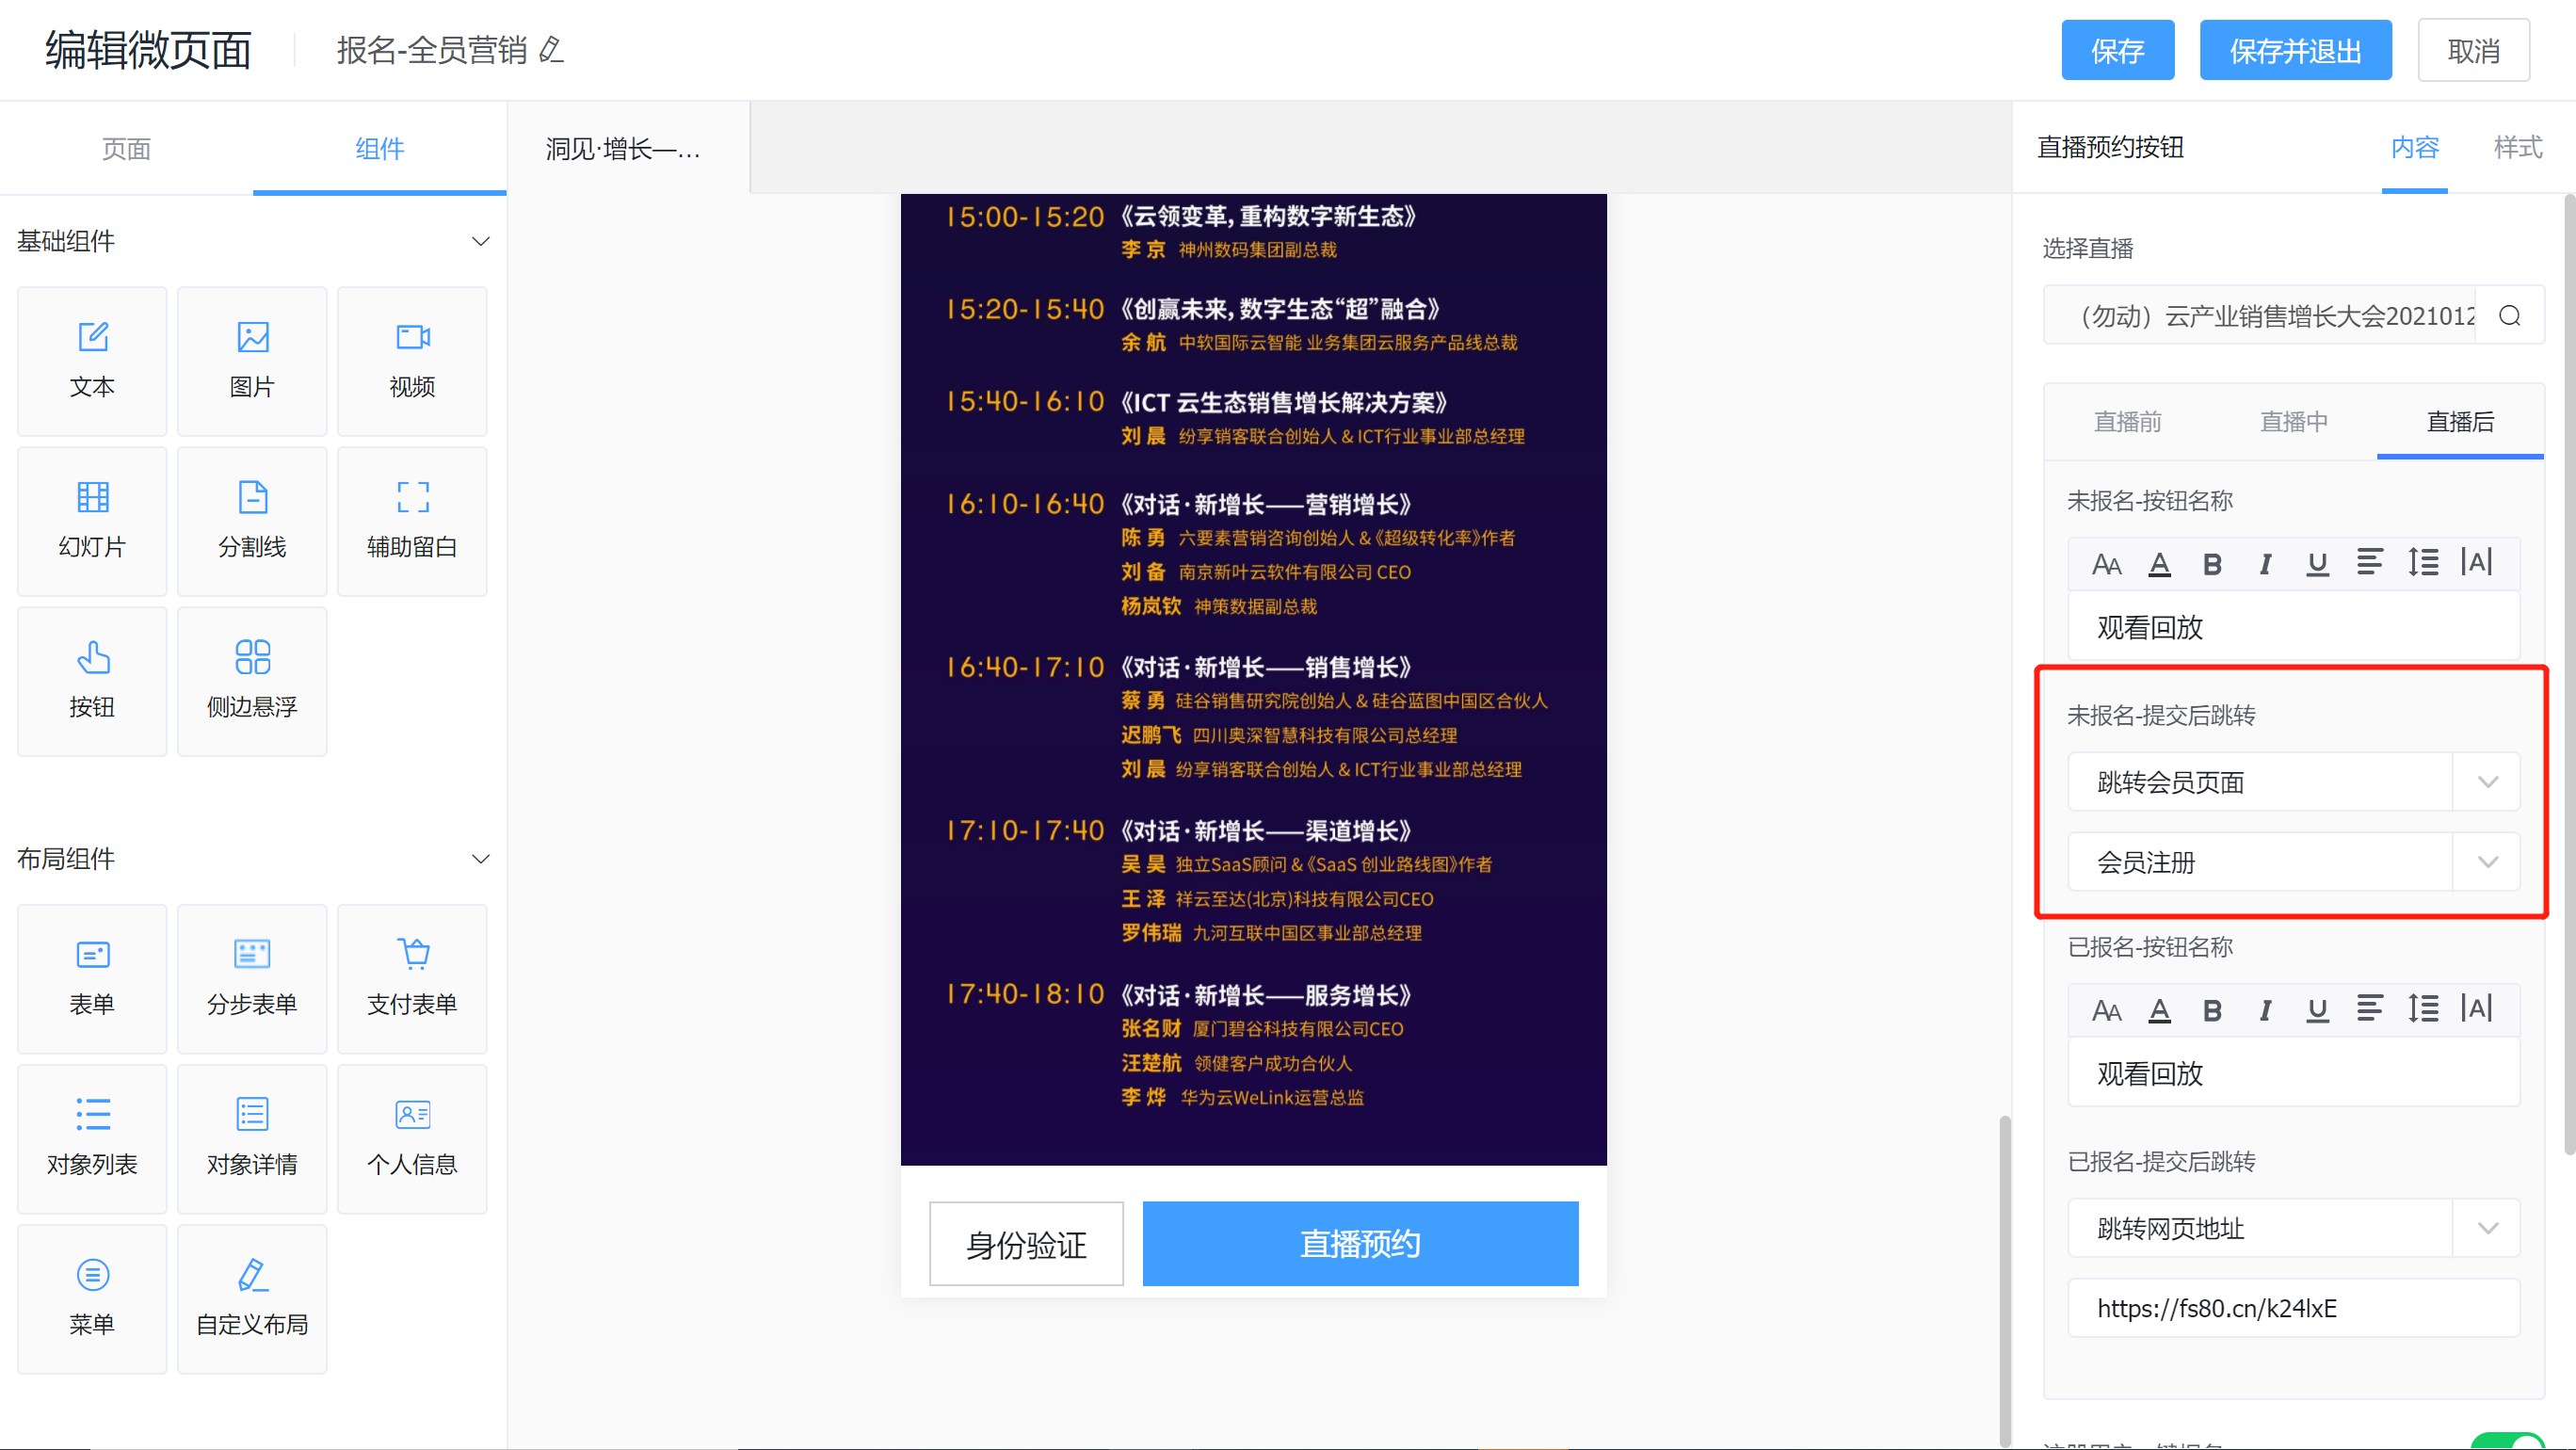
3.9 Jump to Member Page
When you click on the text, image or button, you can select to open: member registration page, login page, personal center page, personal information editing page;
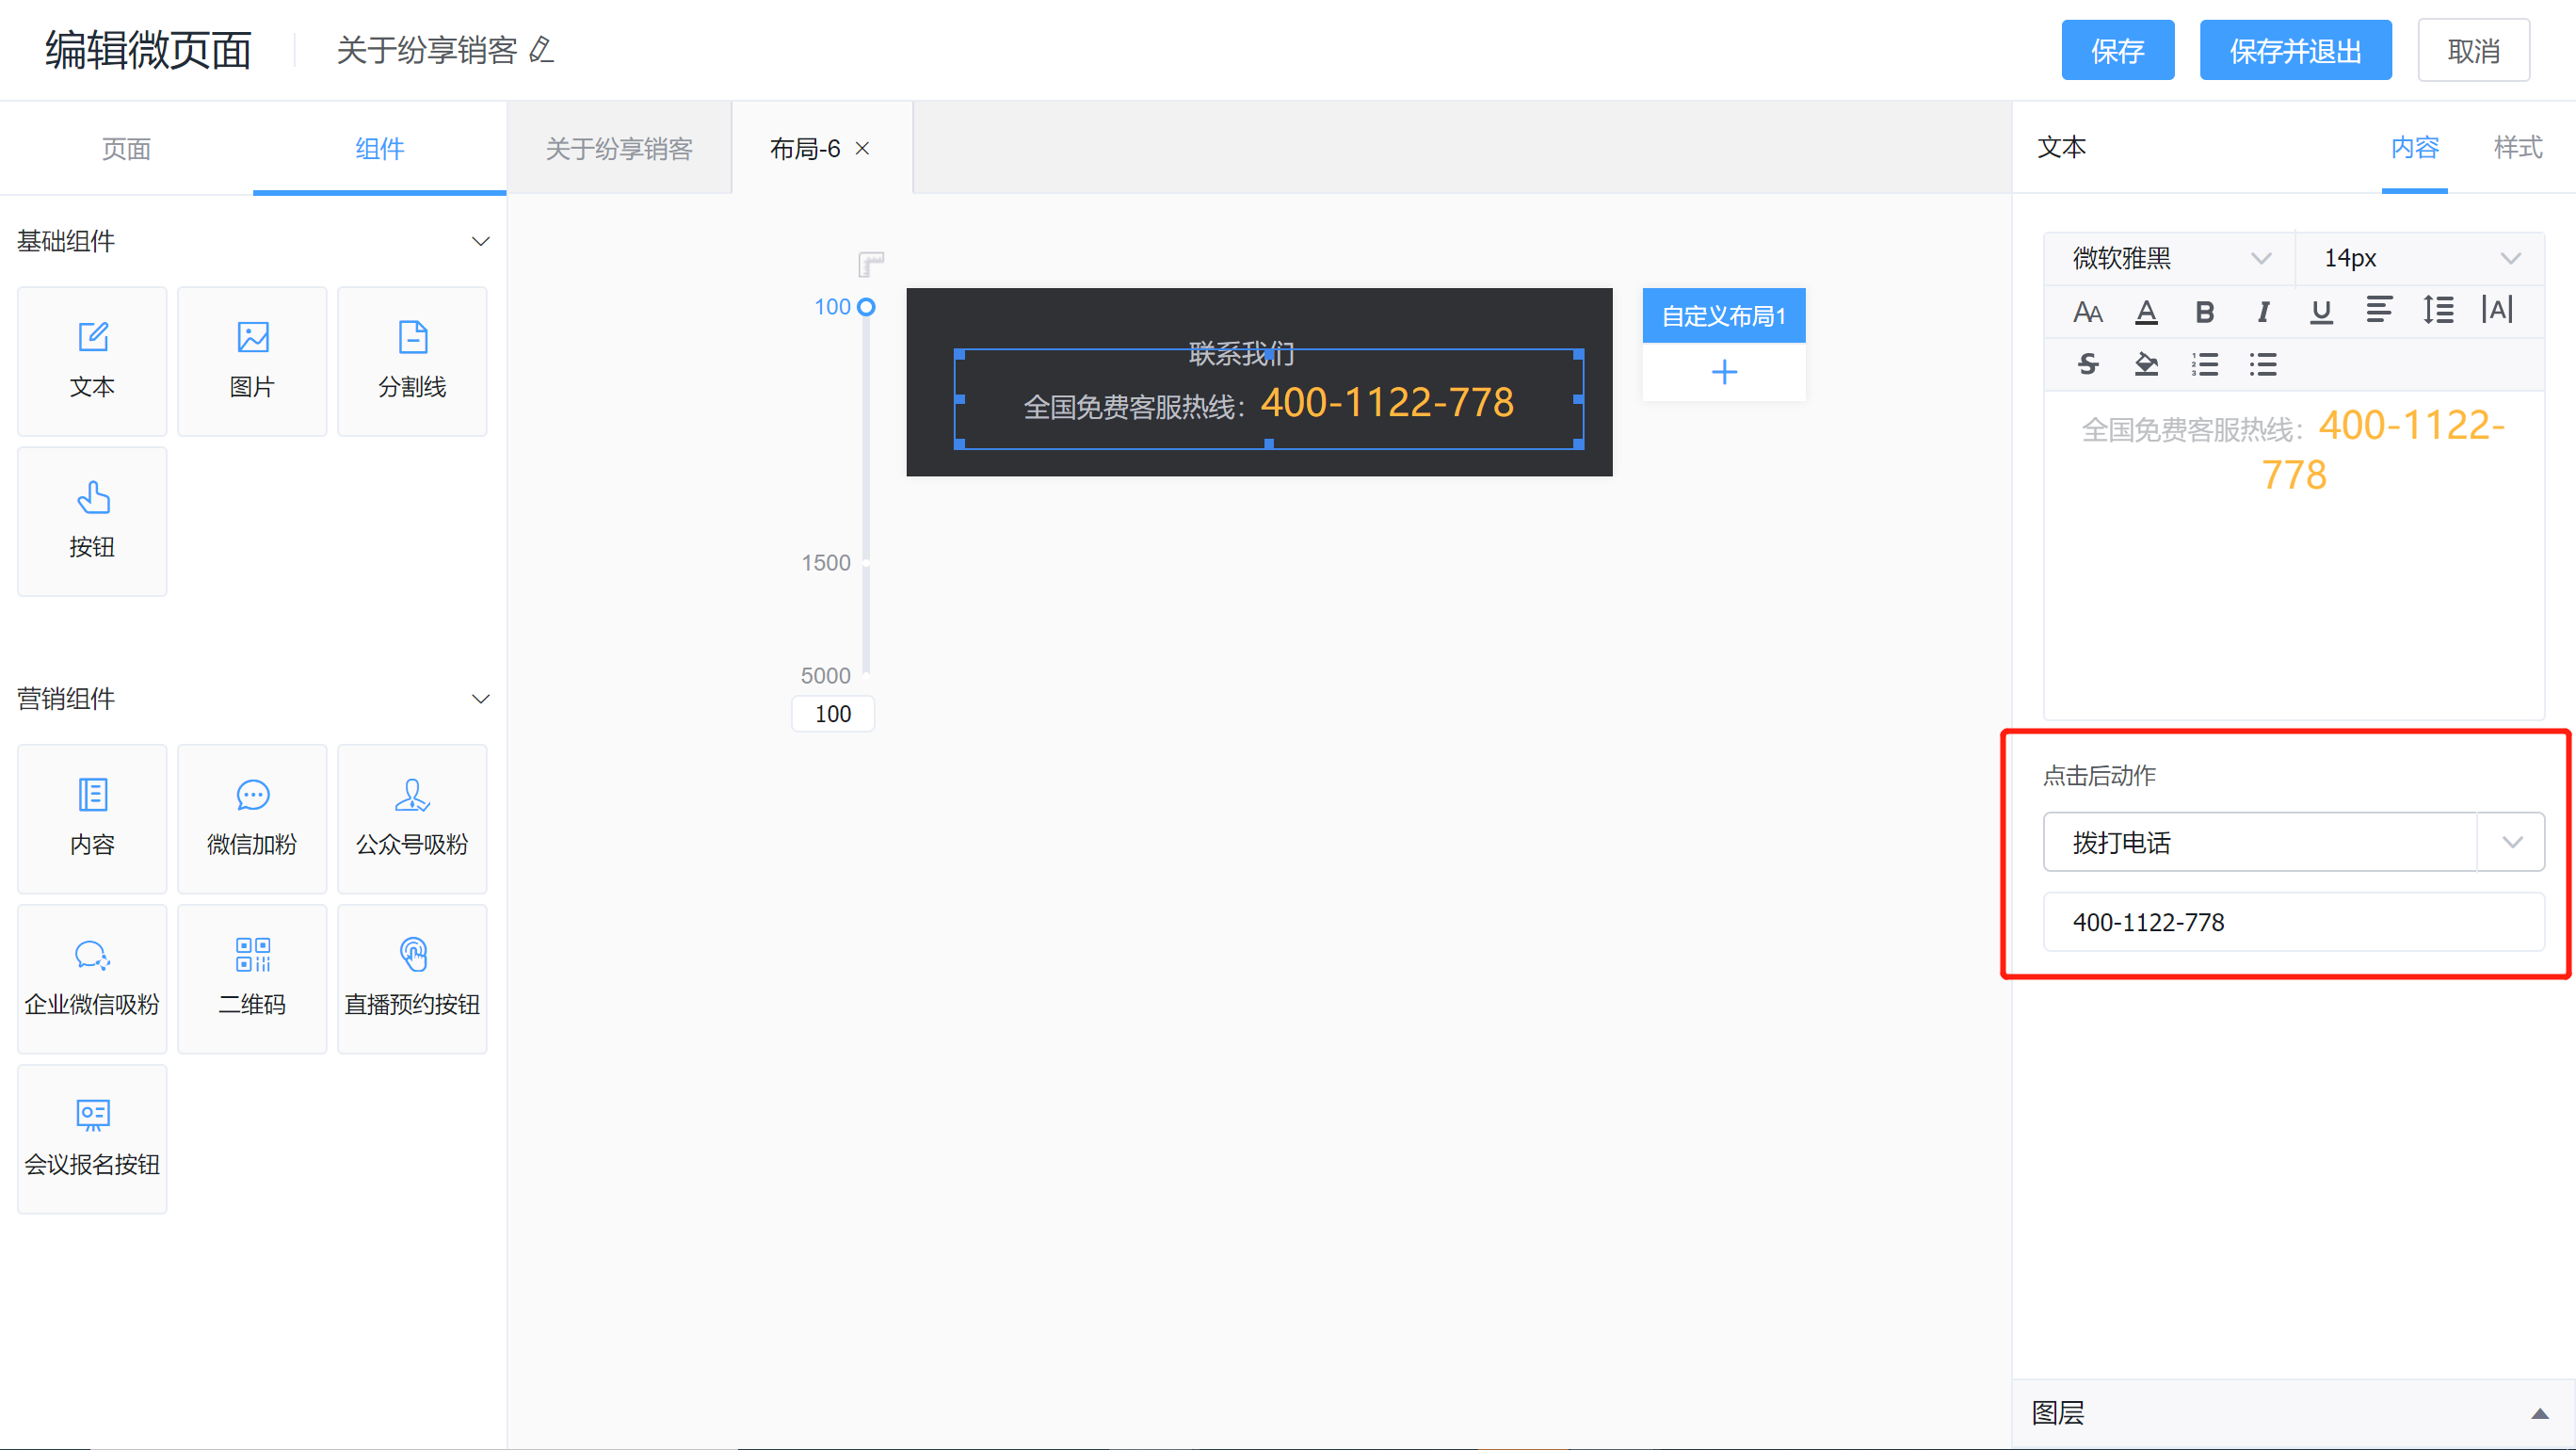
3.10 Make a Call
Click to call up the mobile phone to dial the phone component, you can quickly make a call;
3.11 Jump to My Registration
Click to enter the list of end user registration activities, applicable to the personal center;
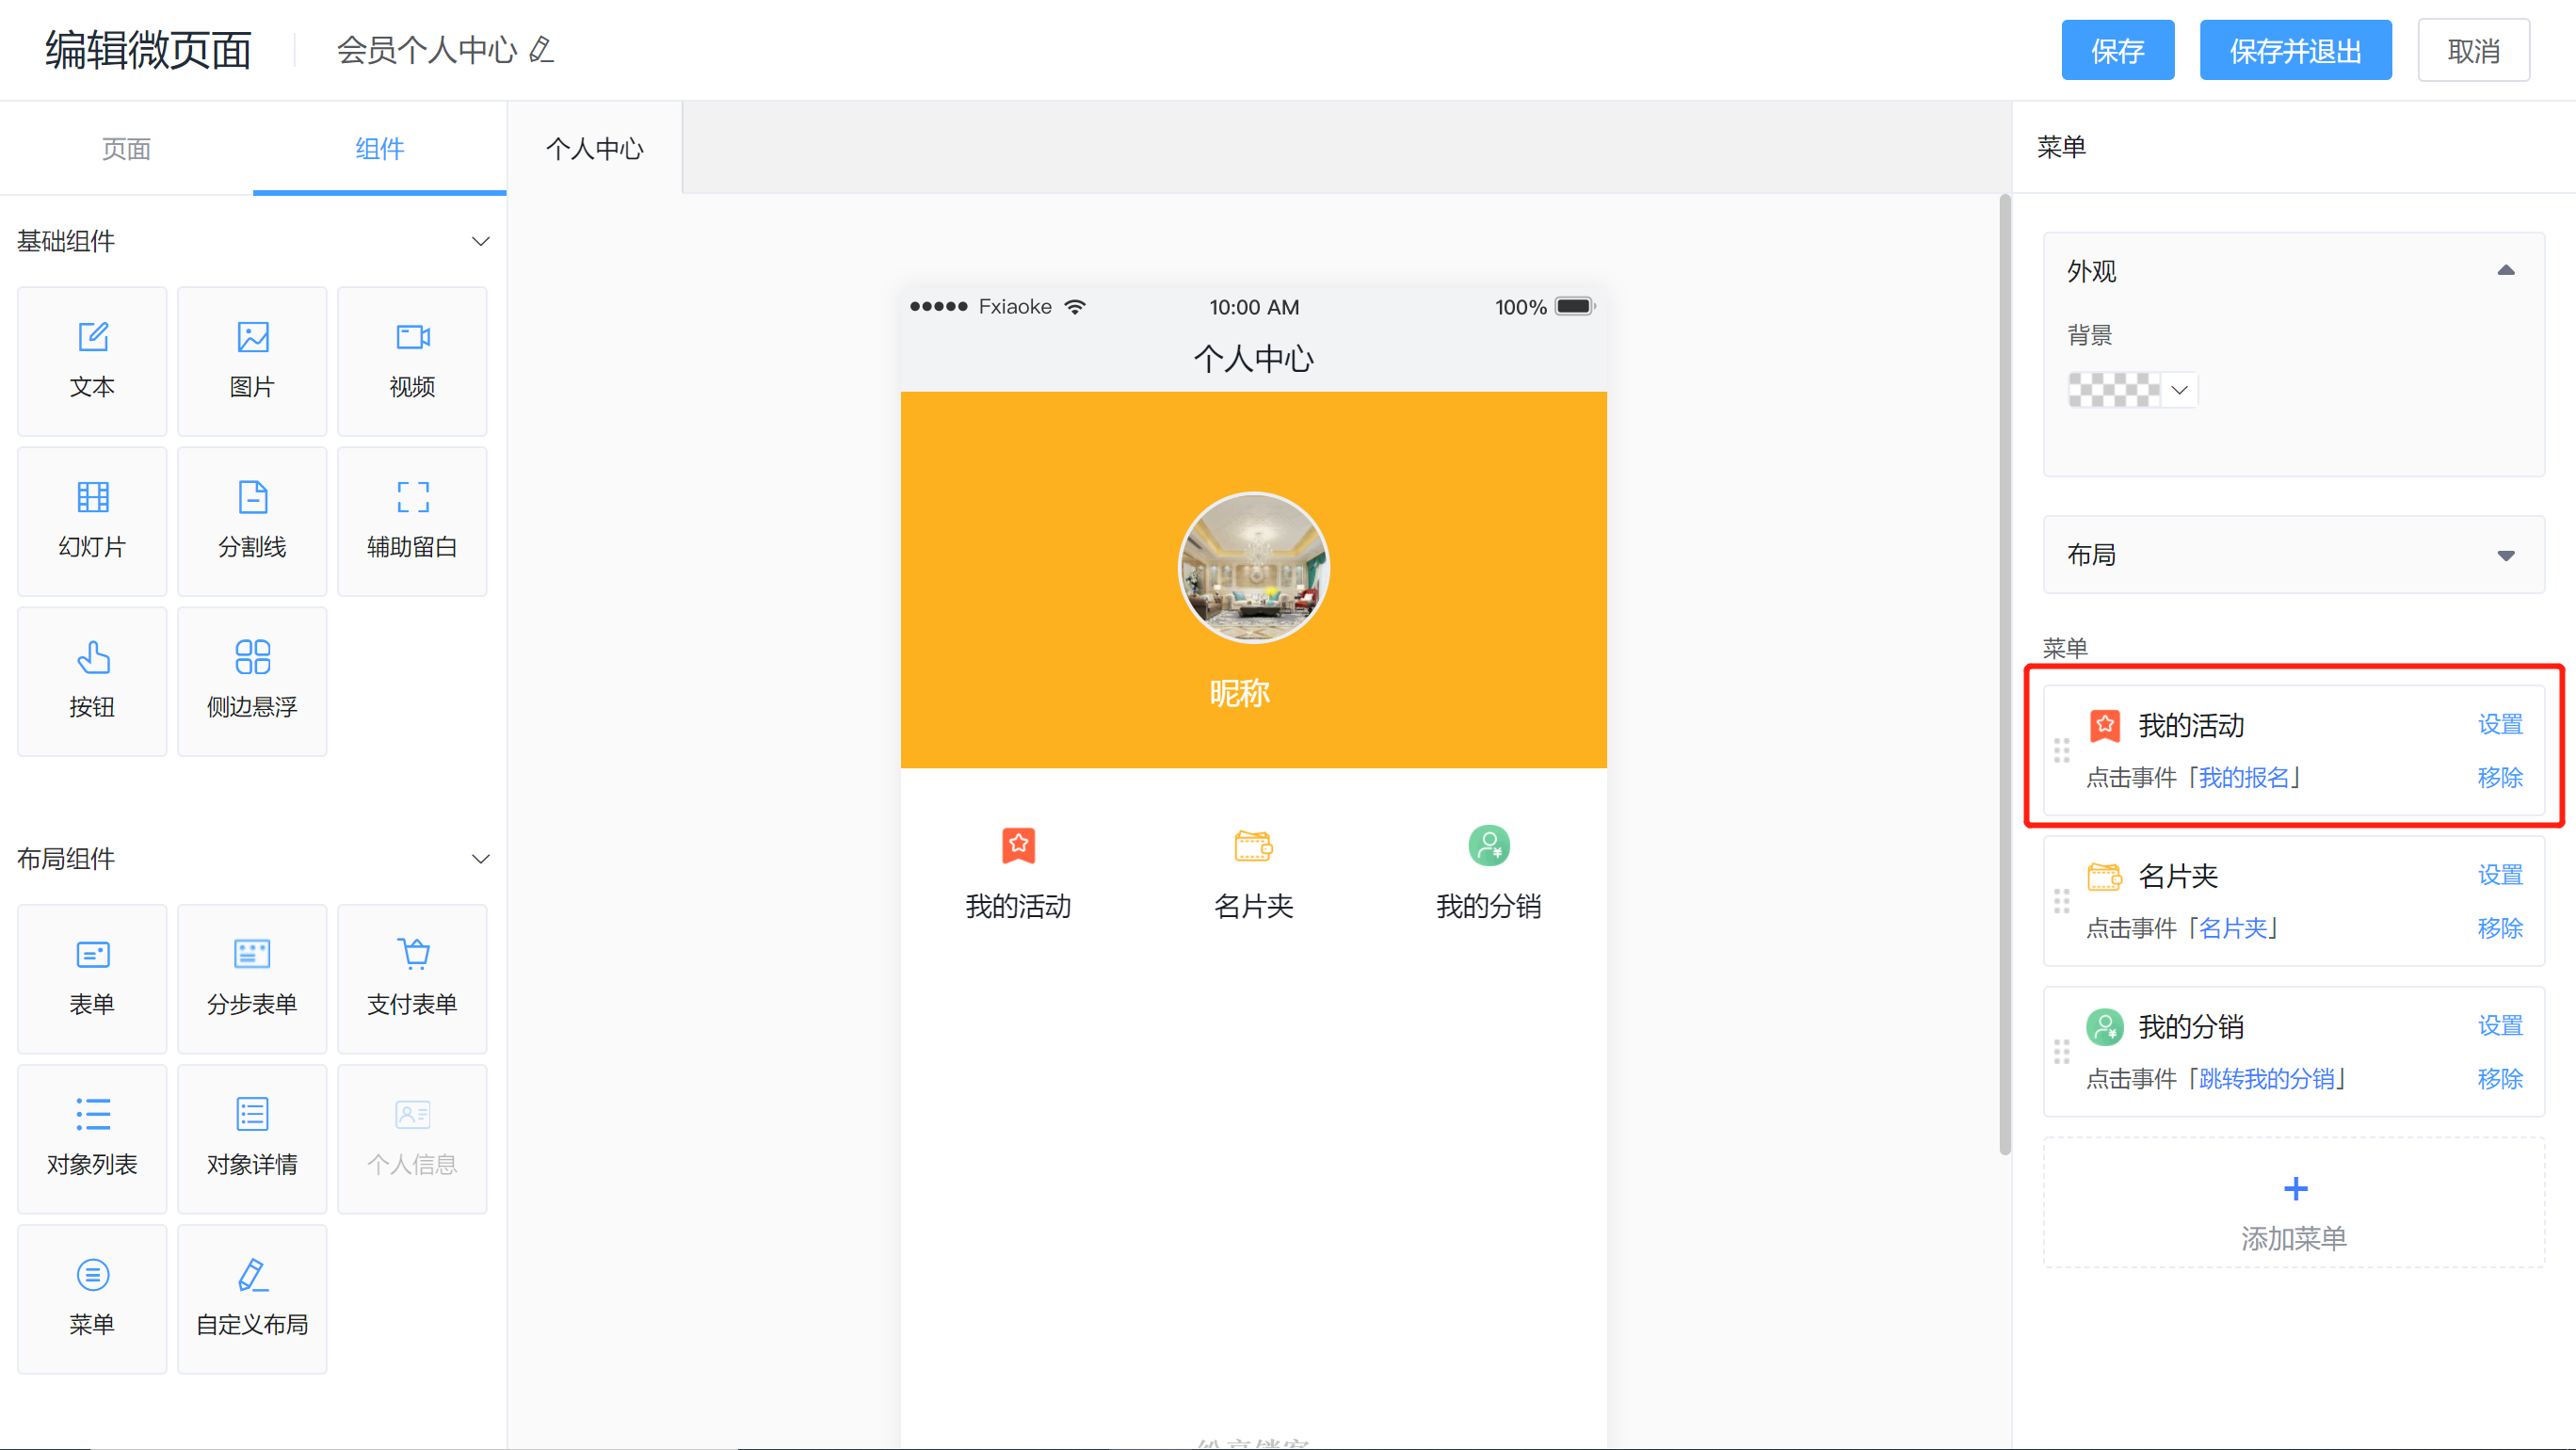
3.12 Jump to My Registration
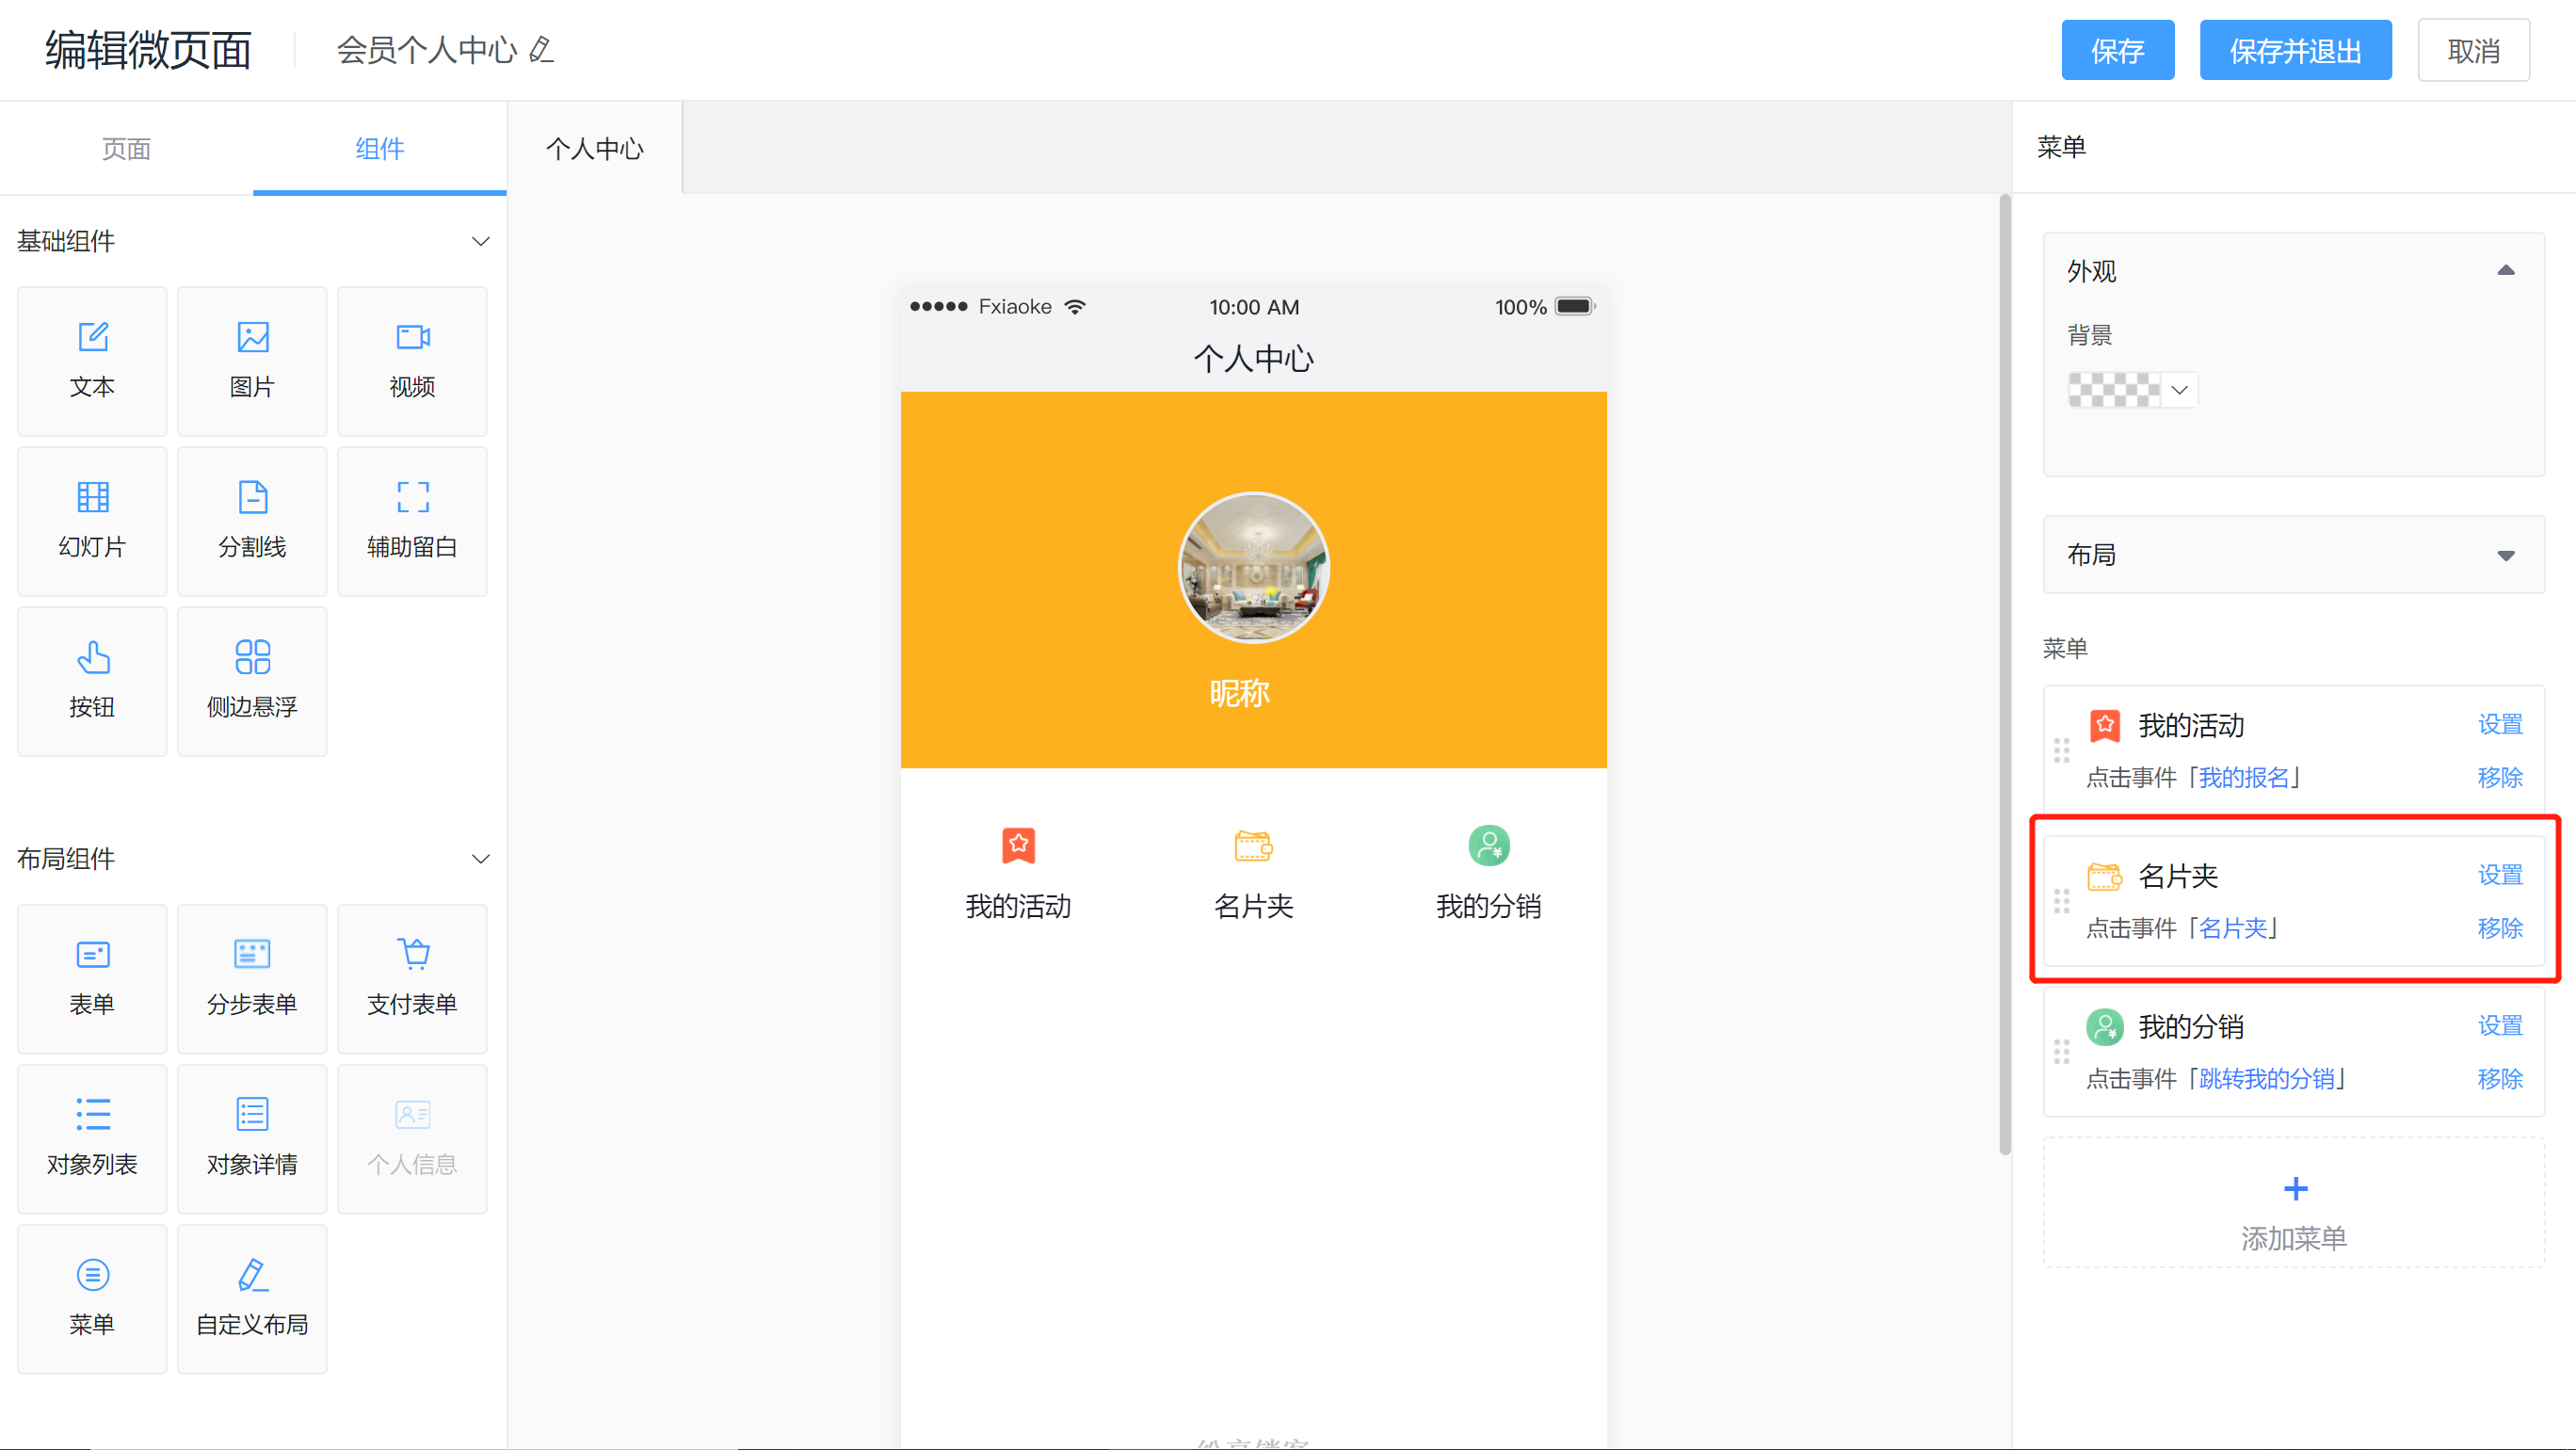
Click to enter the list of enterprise business cards visited by the end user, applicable to the personal center;
3.13 Jump to My Distribution
Click to enter the distributor's personal distribution center, applicable to the personal center;