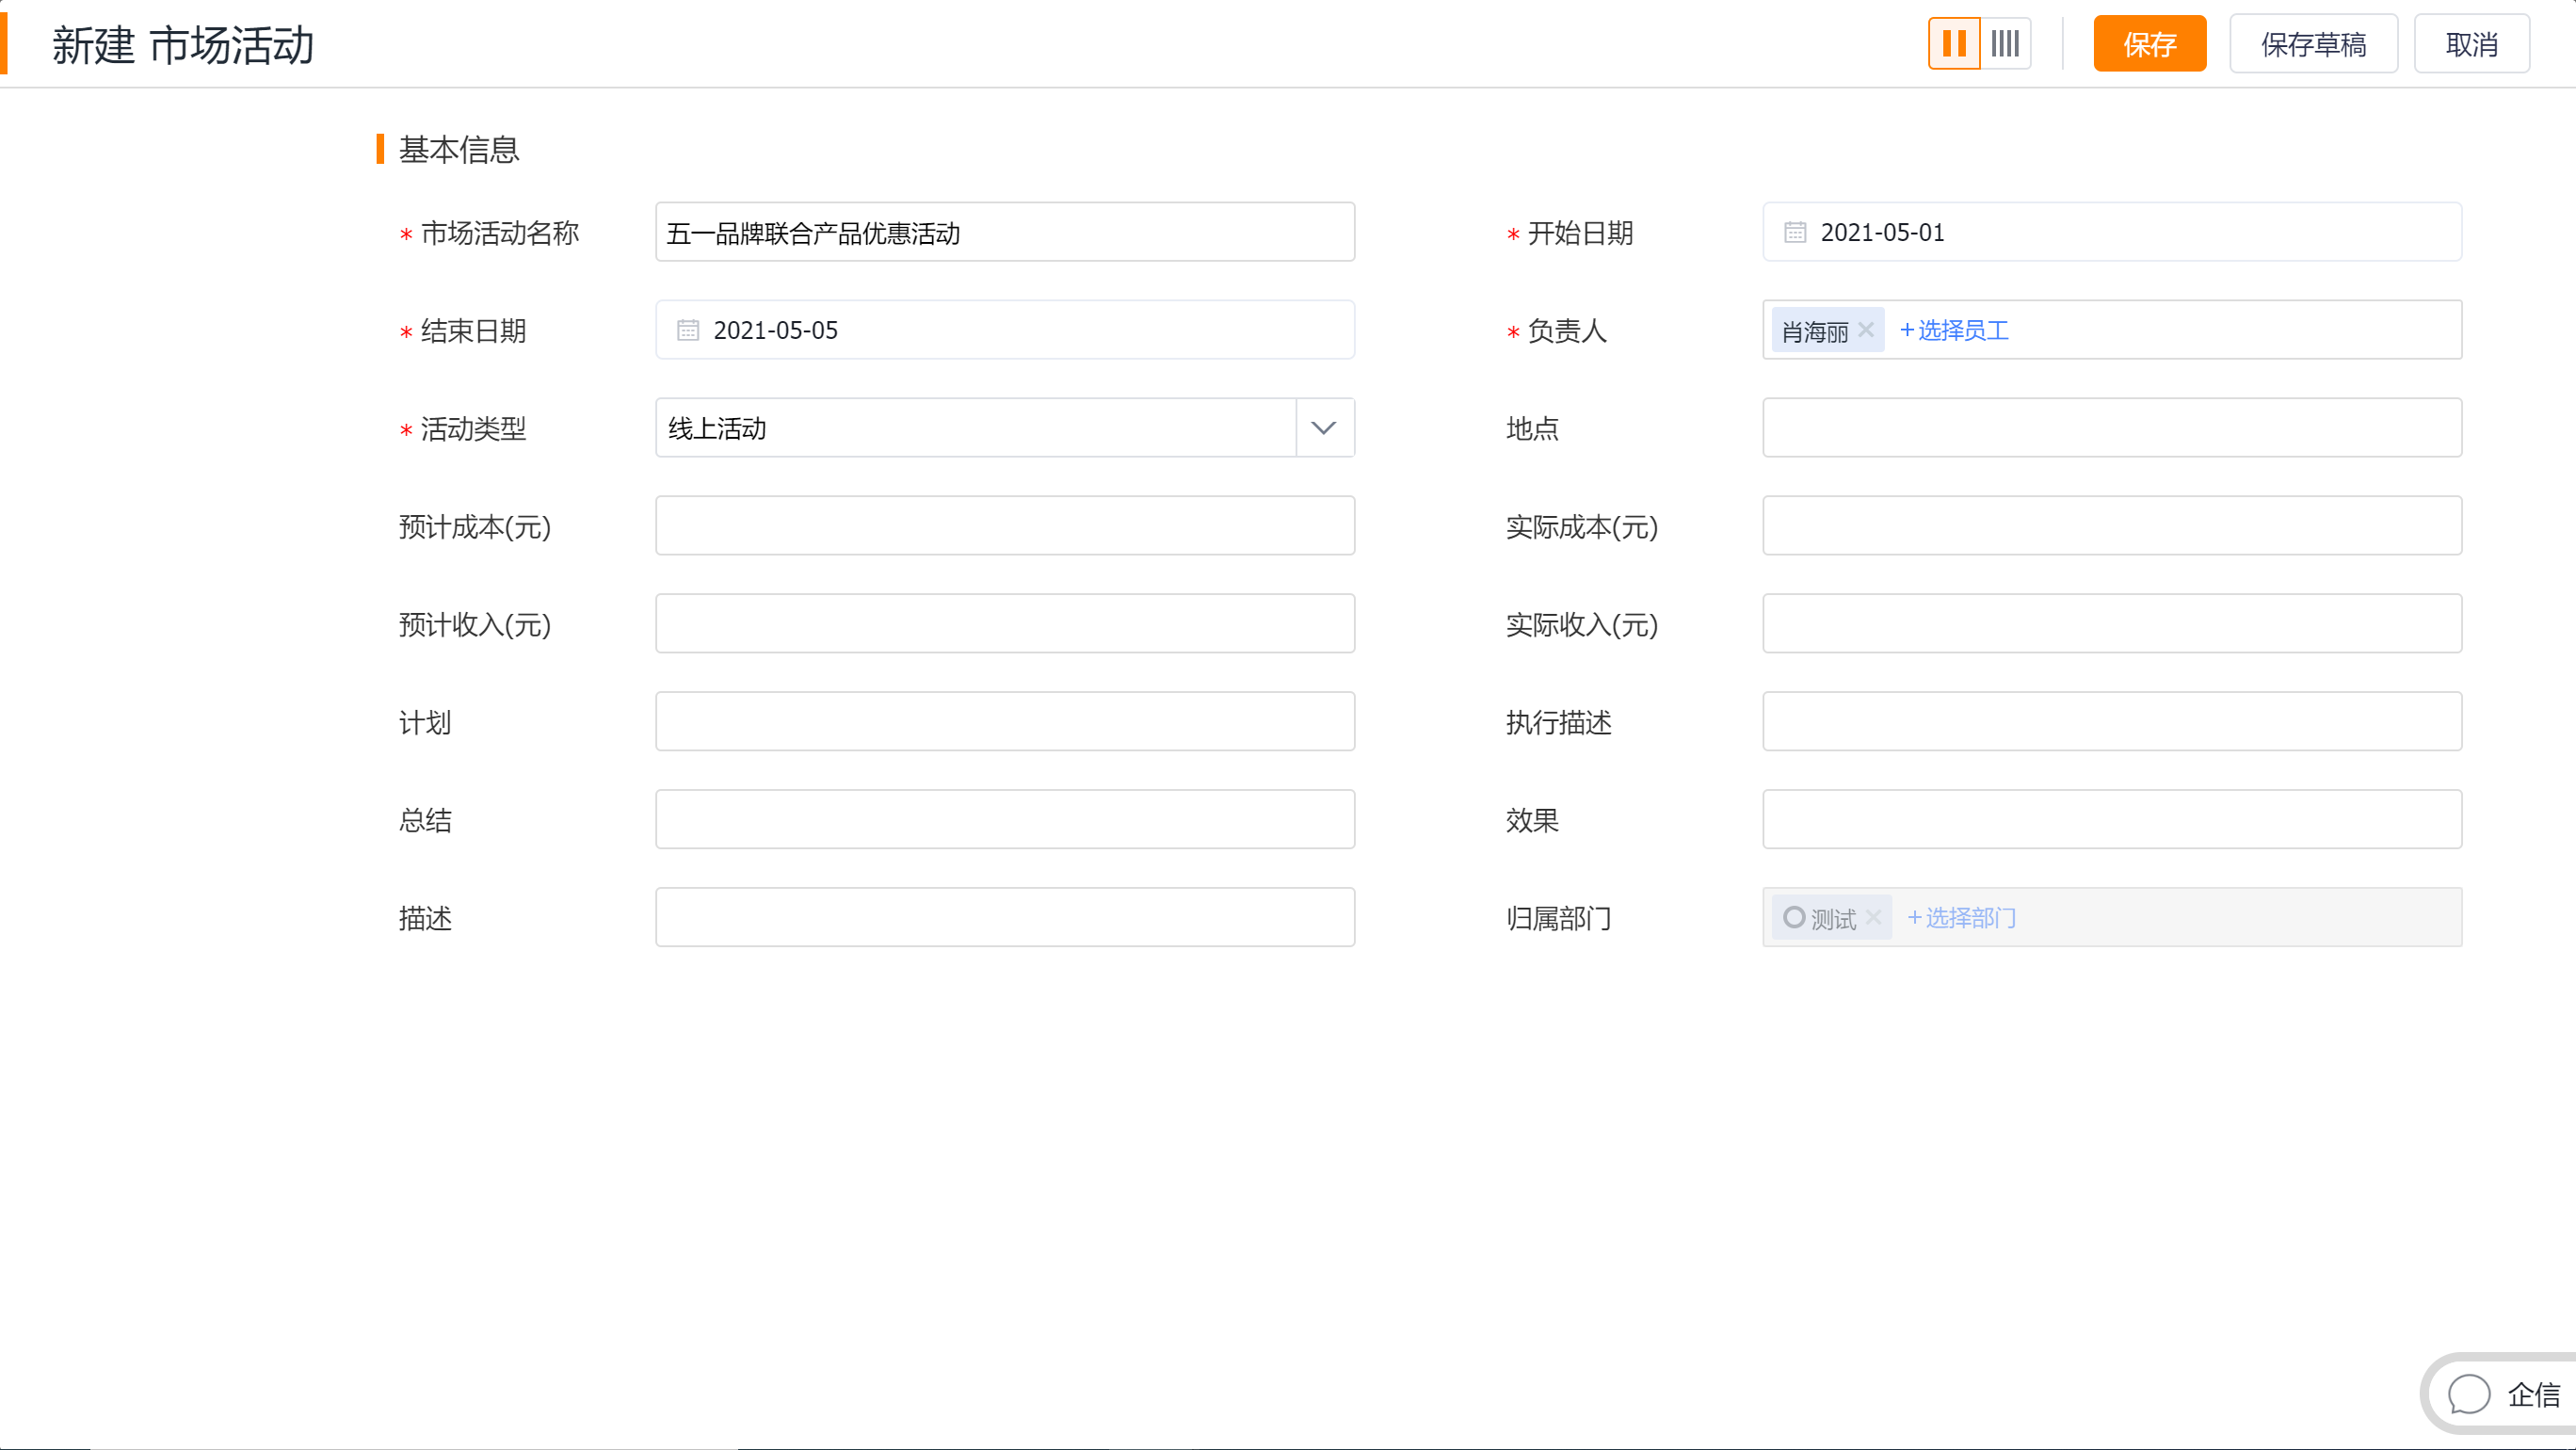
1. Create a Campaign
Marketing staff first need to create a marketing campaign, by accessing [Campaign Marketing], and clicking [+New Campagin] to enter the new marketing campaign-campaign marketing page.
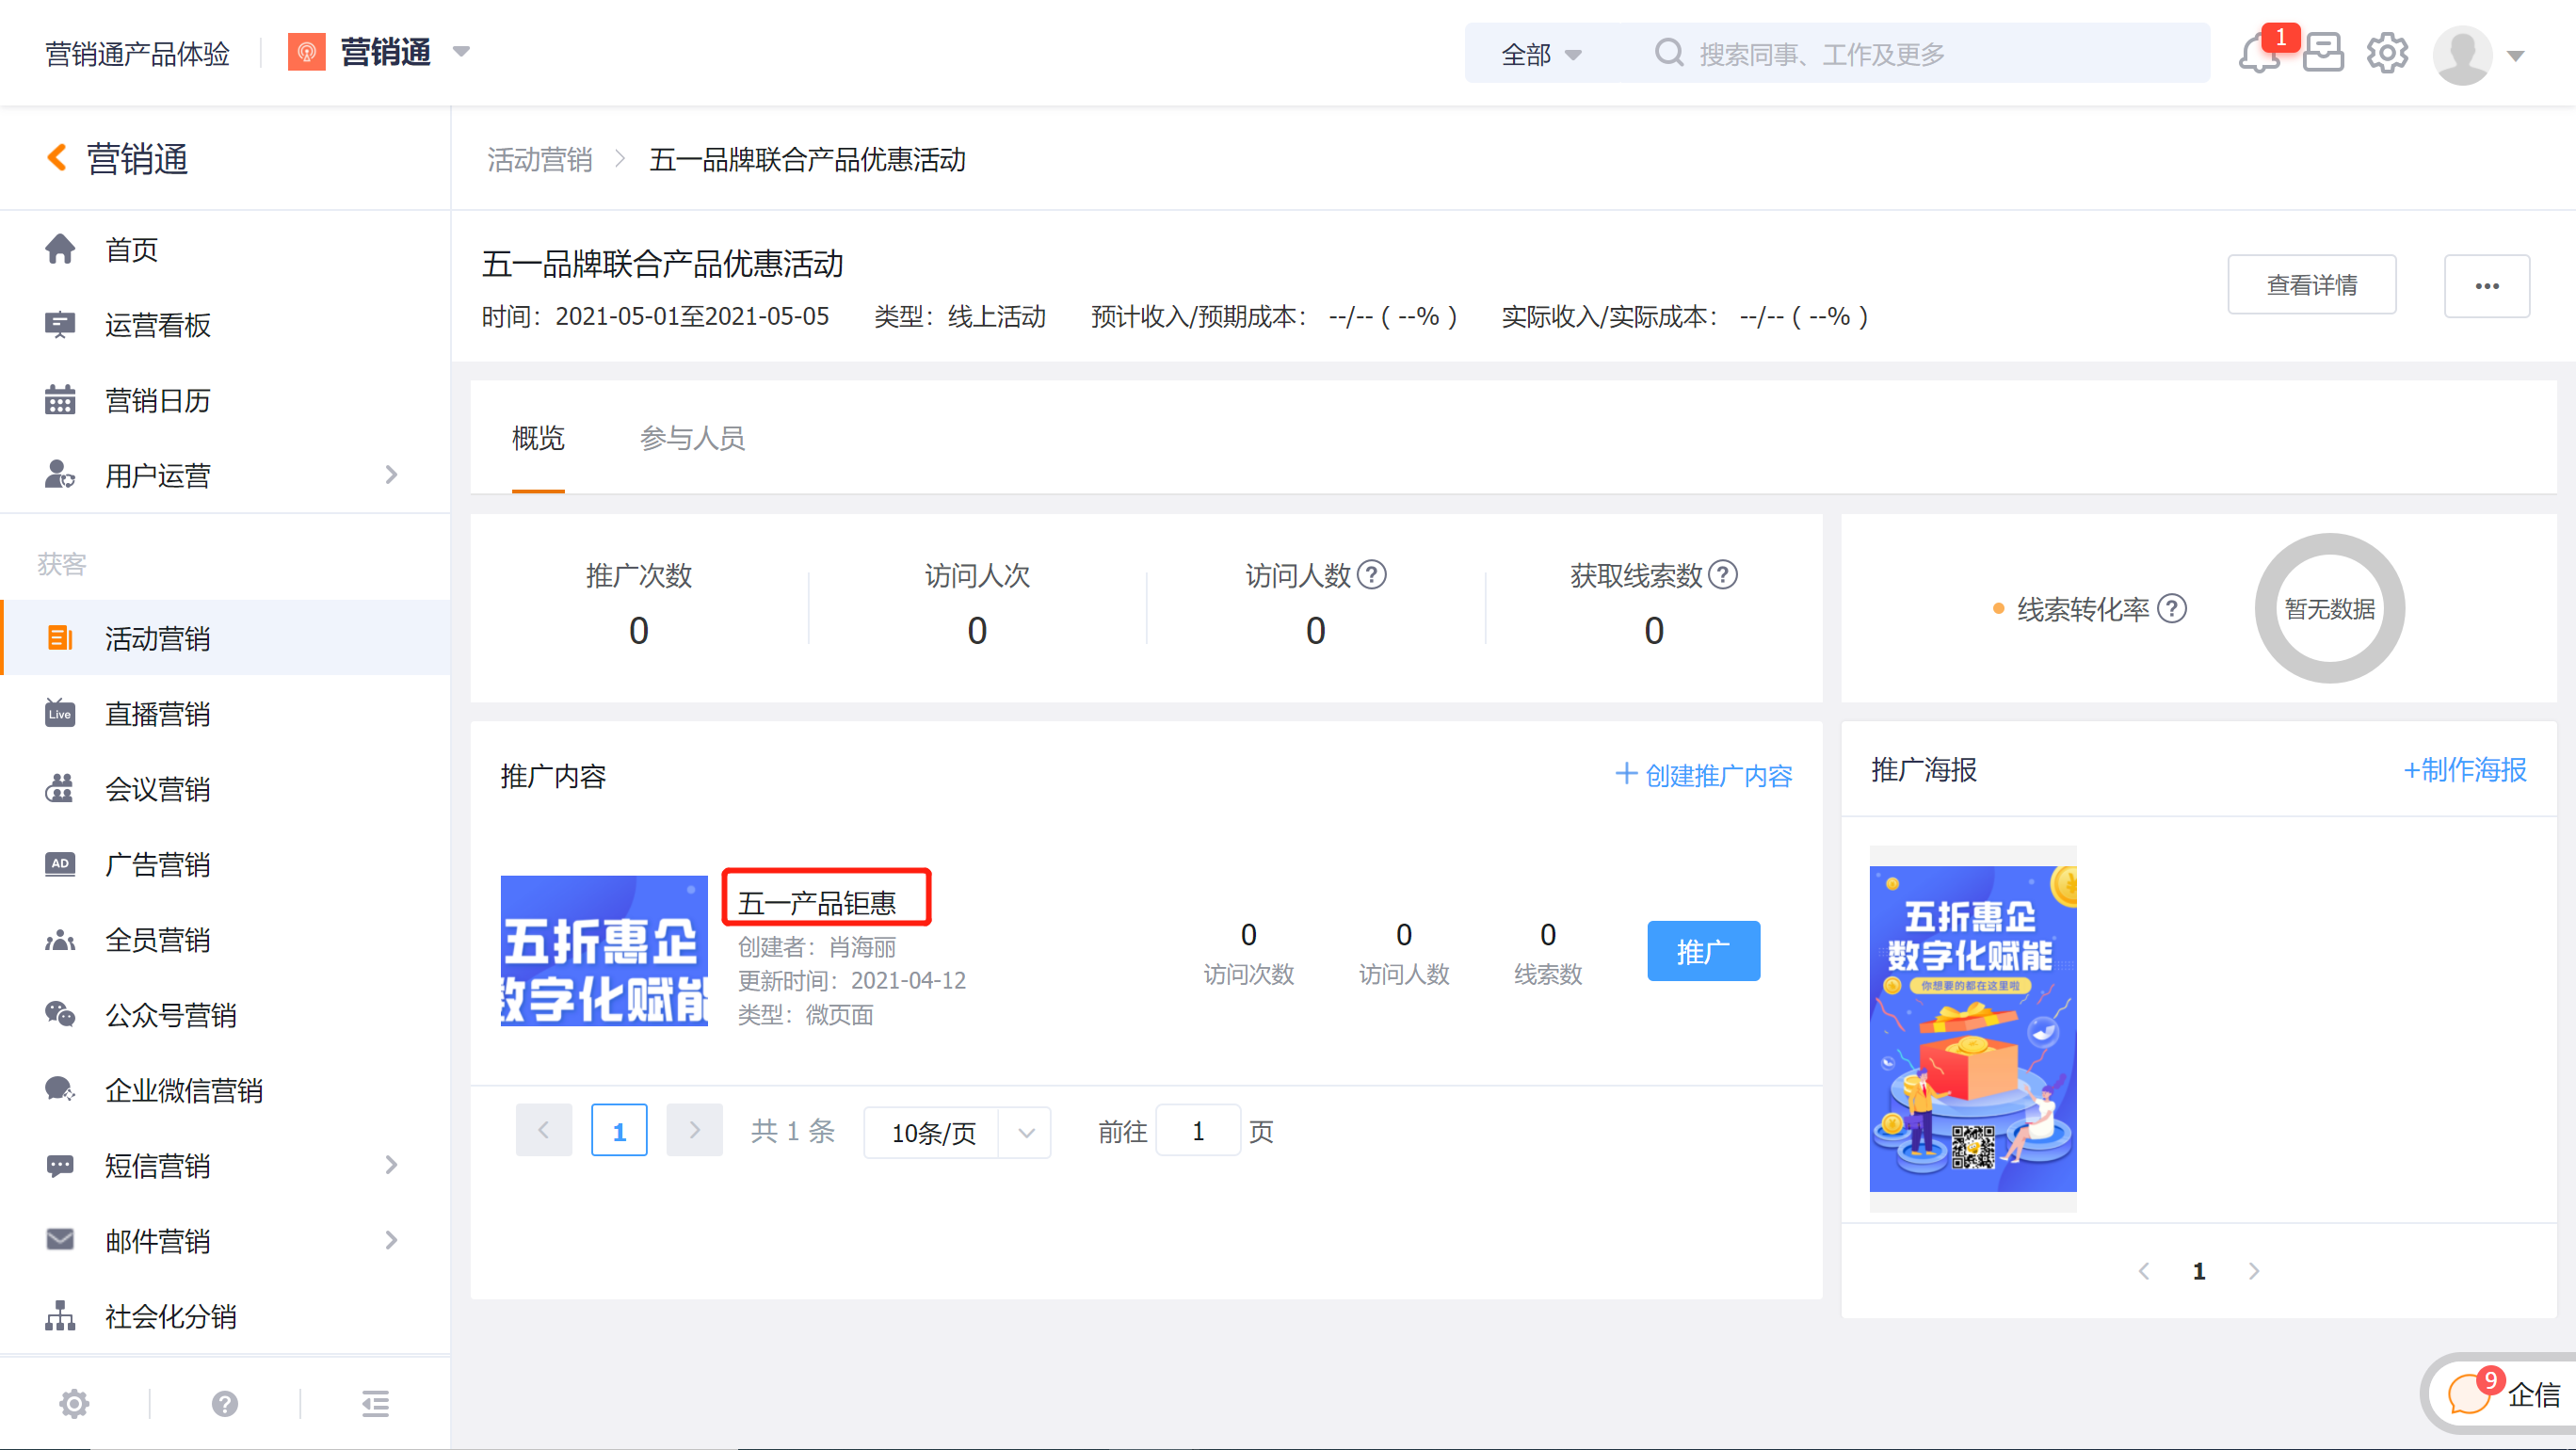
Fill in the campaign name, start time, end time, location, estimated cost and income, etc. on the new marketing campaign-campaign marketing page, save and enter the campaign overview to start preparing content for campaign promotion and collecting account information.
2. Create Campaign Content to Introduce Campaign to Outside and Collect Account Retention
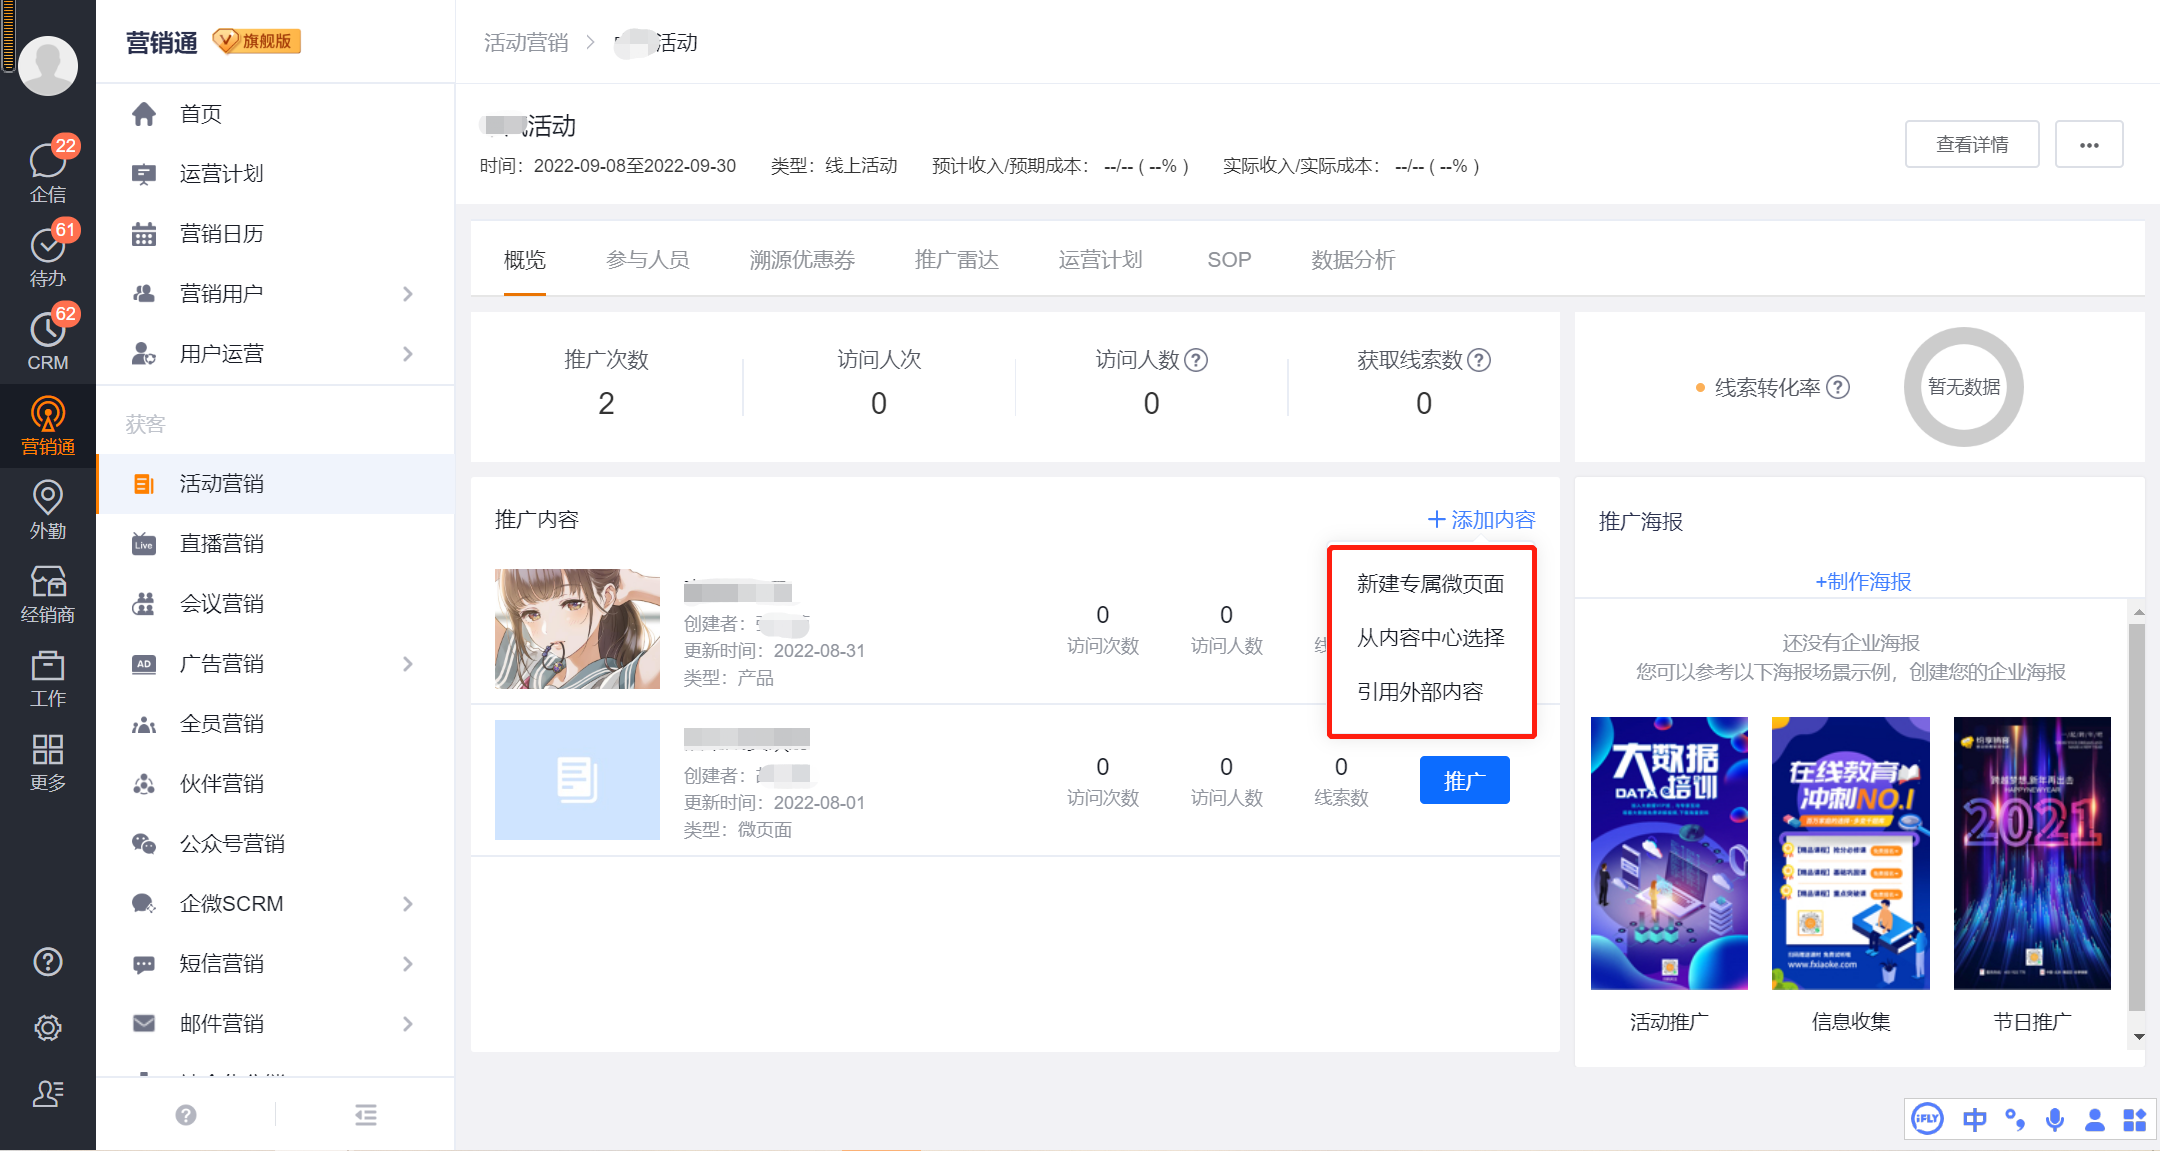
On the [Overview] page under the campaign, marketing staff can create a corresponding campaign promotion introduction page for this campaign through [+Add Content] in the promotion content area to introduce the campaign and collect account information; it is usually recommended to use micro-pages to create campaign promotion content and information retention form.
2.1 New Exclusive Micro-page
1) Click [New Exclusive Micro-page] to create an exclusive micro-page for this campaign. Create Micro-page
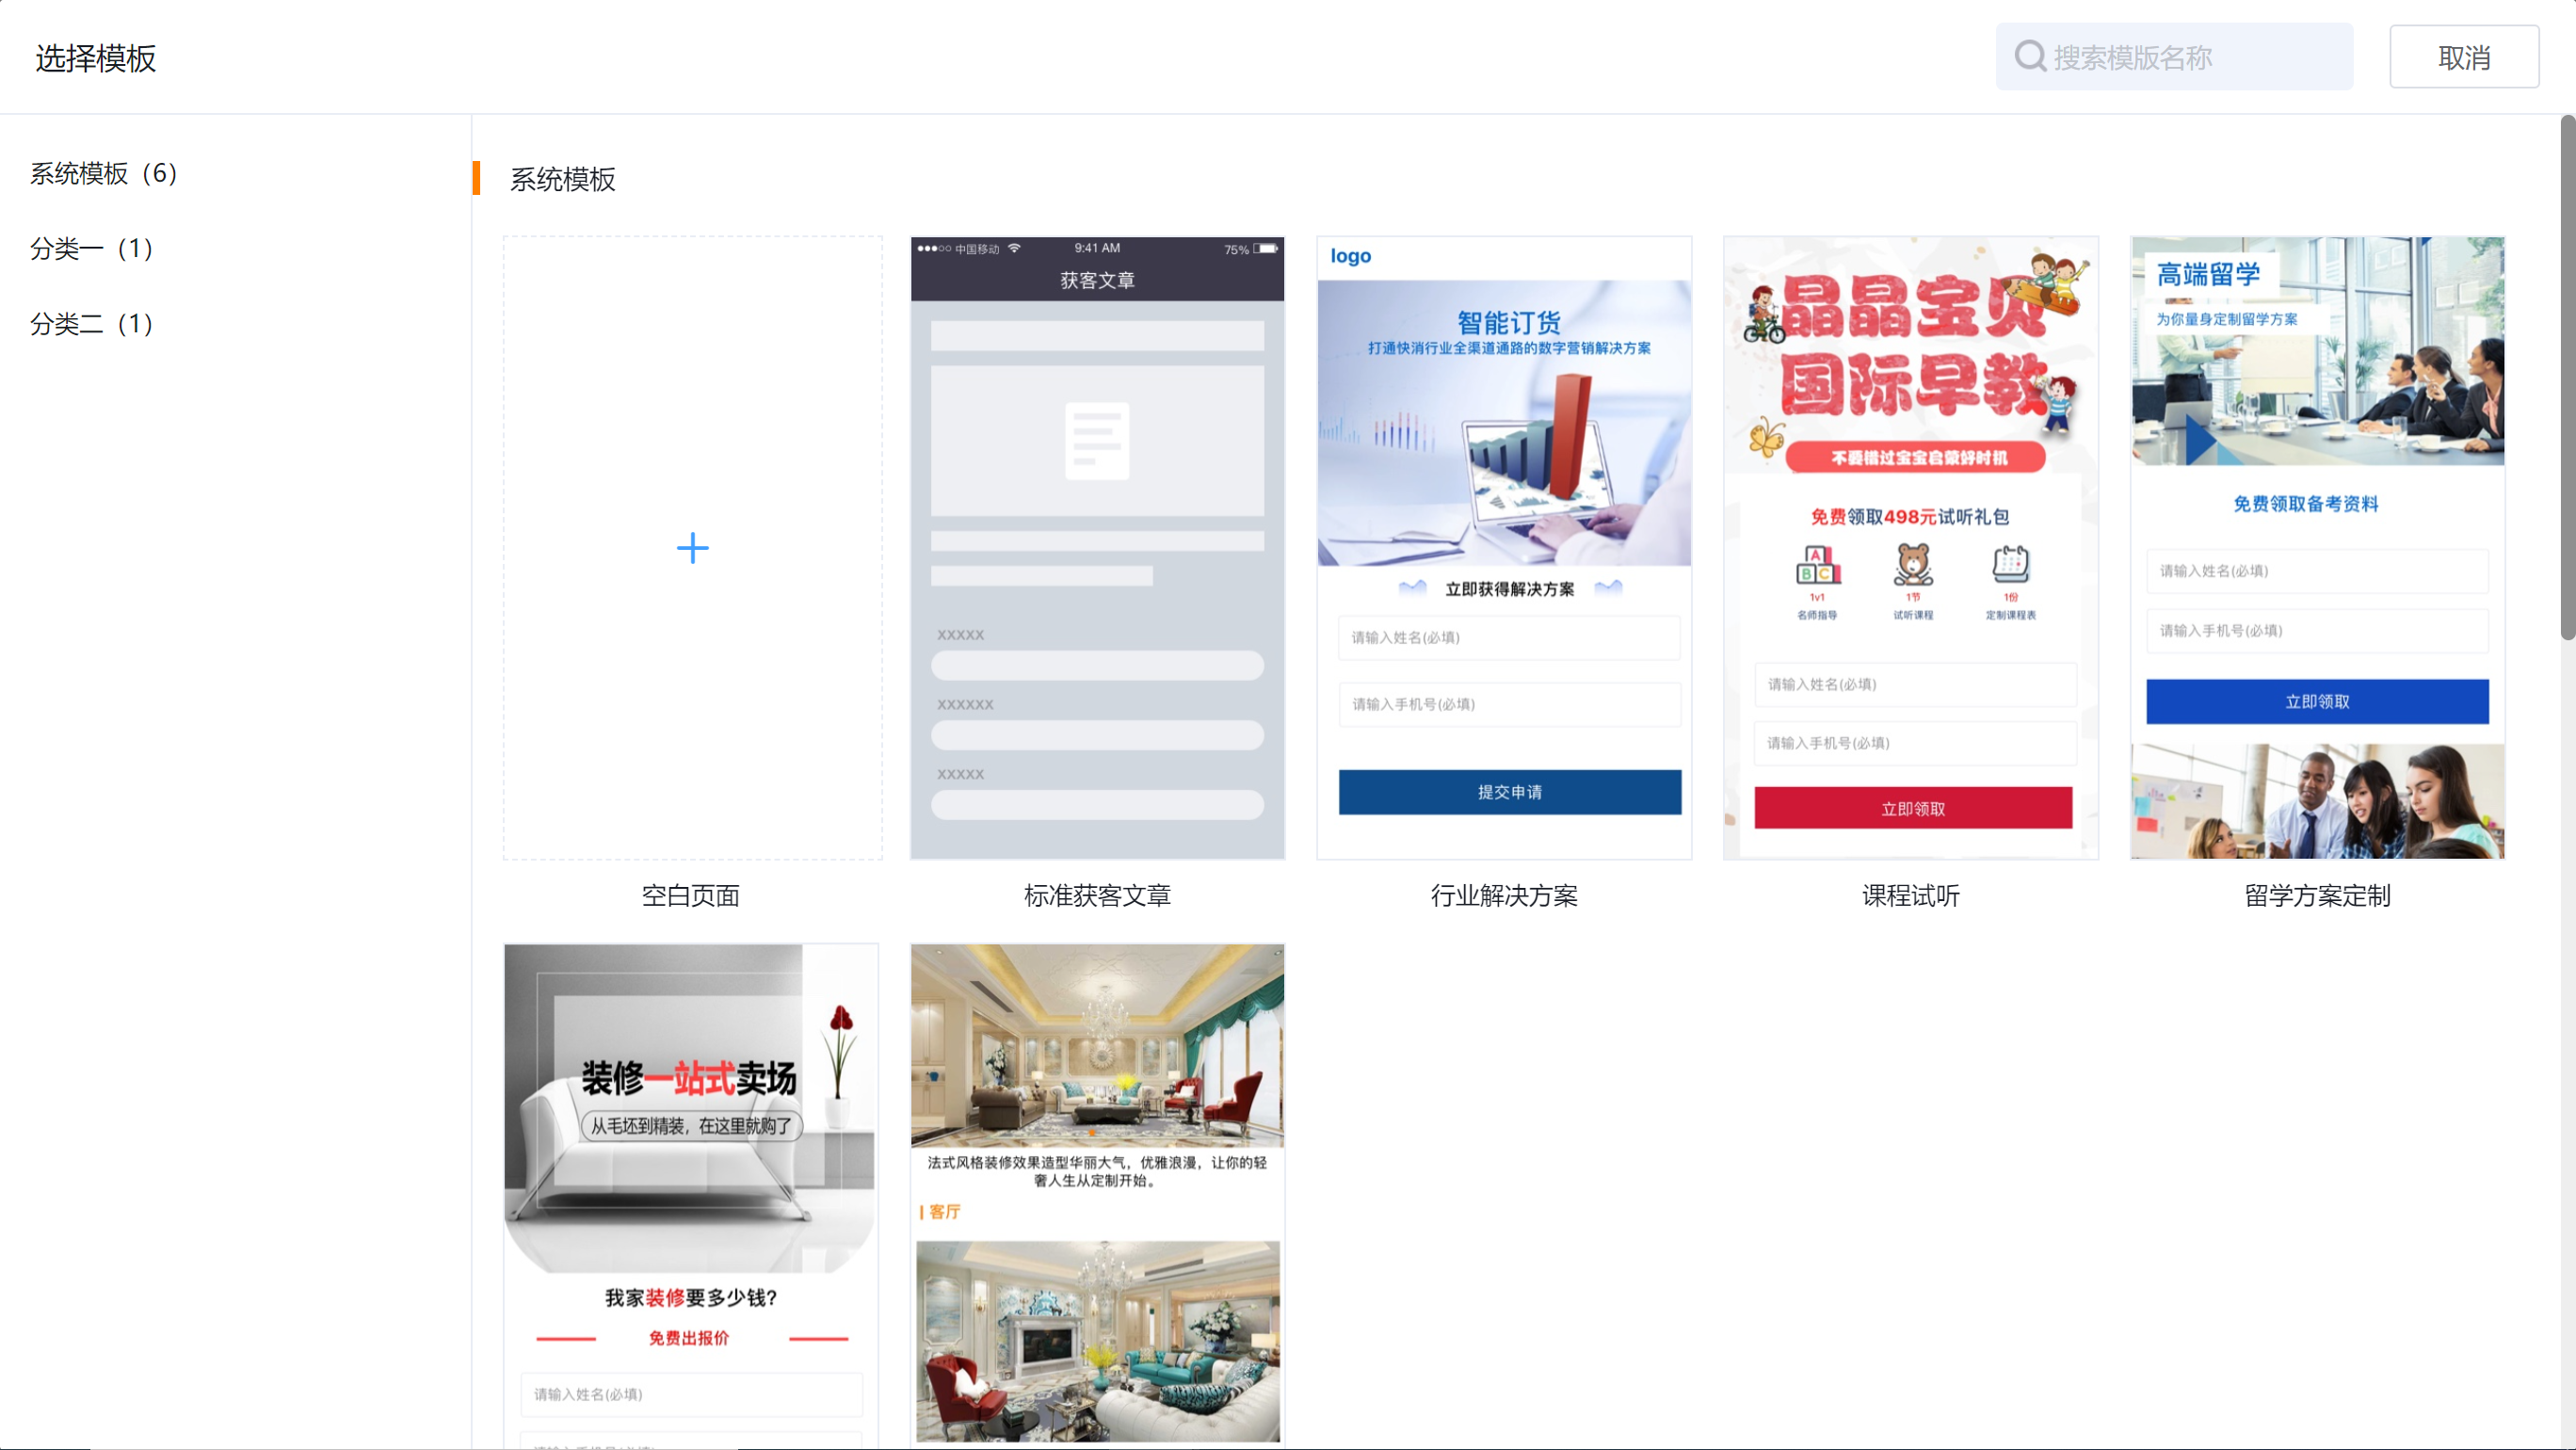
2) Select a micropage template to quickly create a new micropage or create a new micropage from a blank, here is to select to create from a blank.
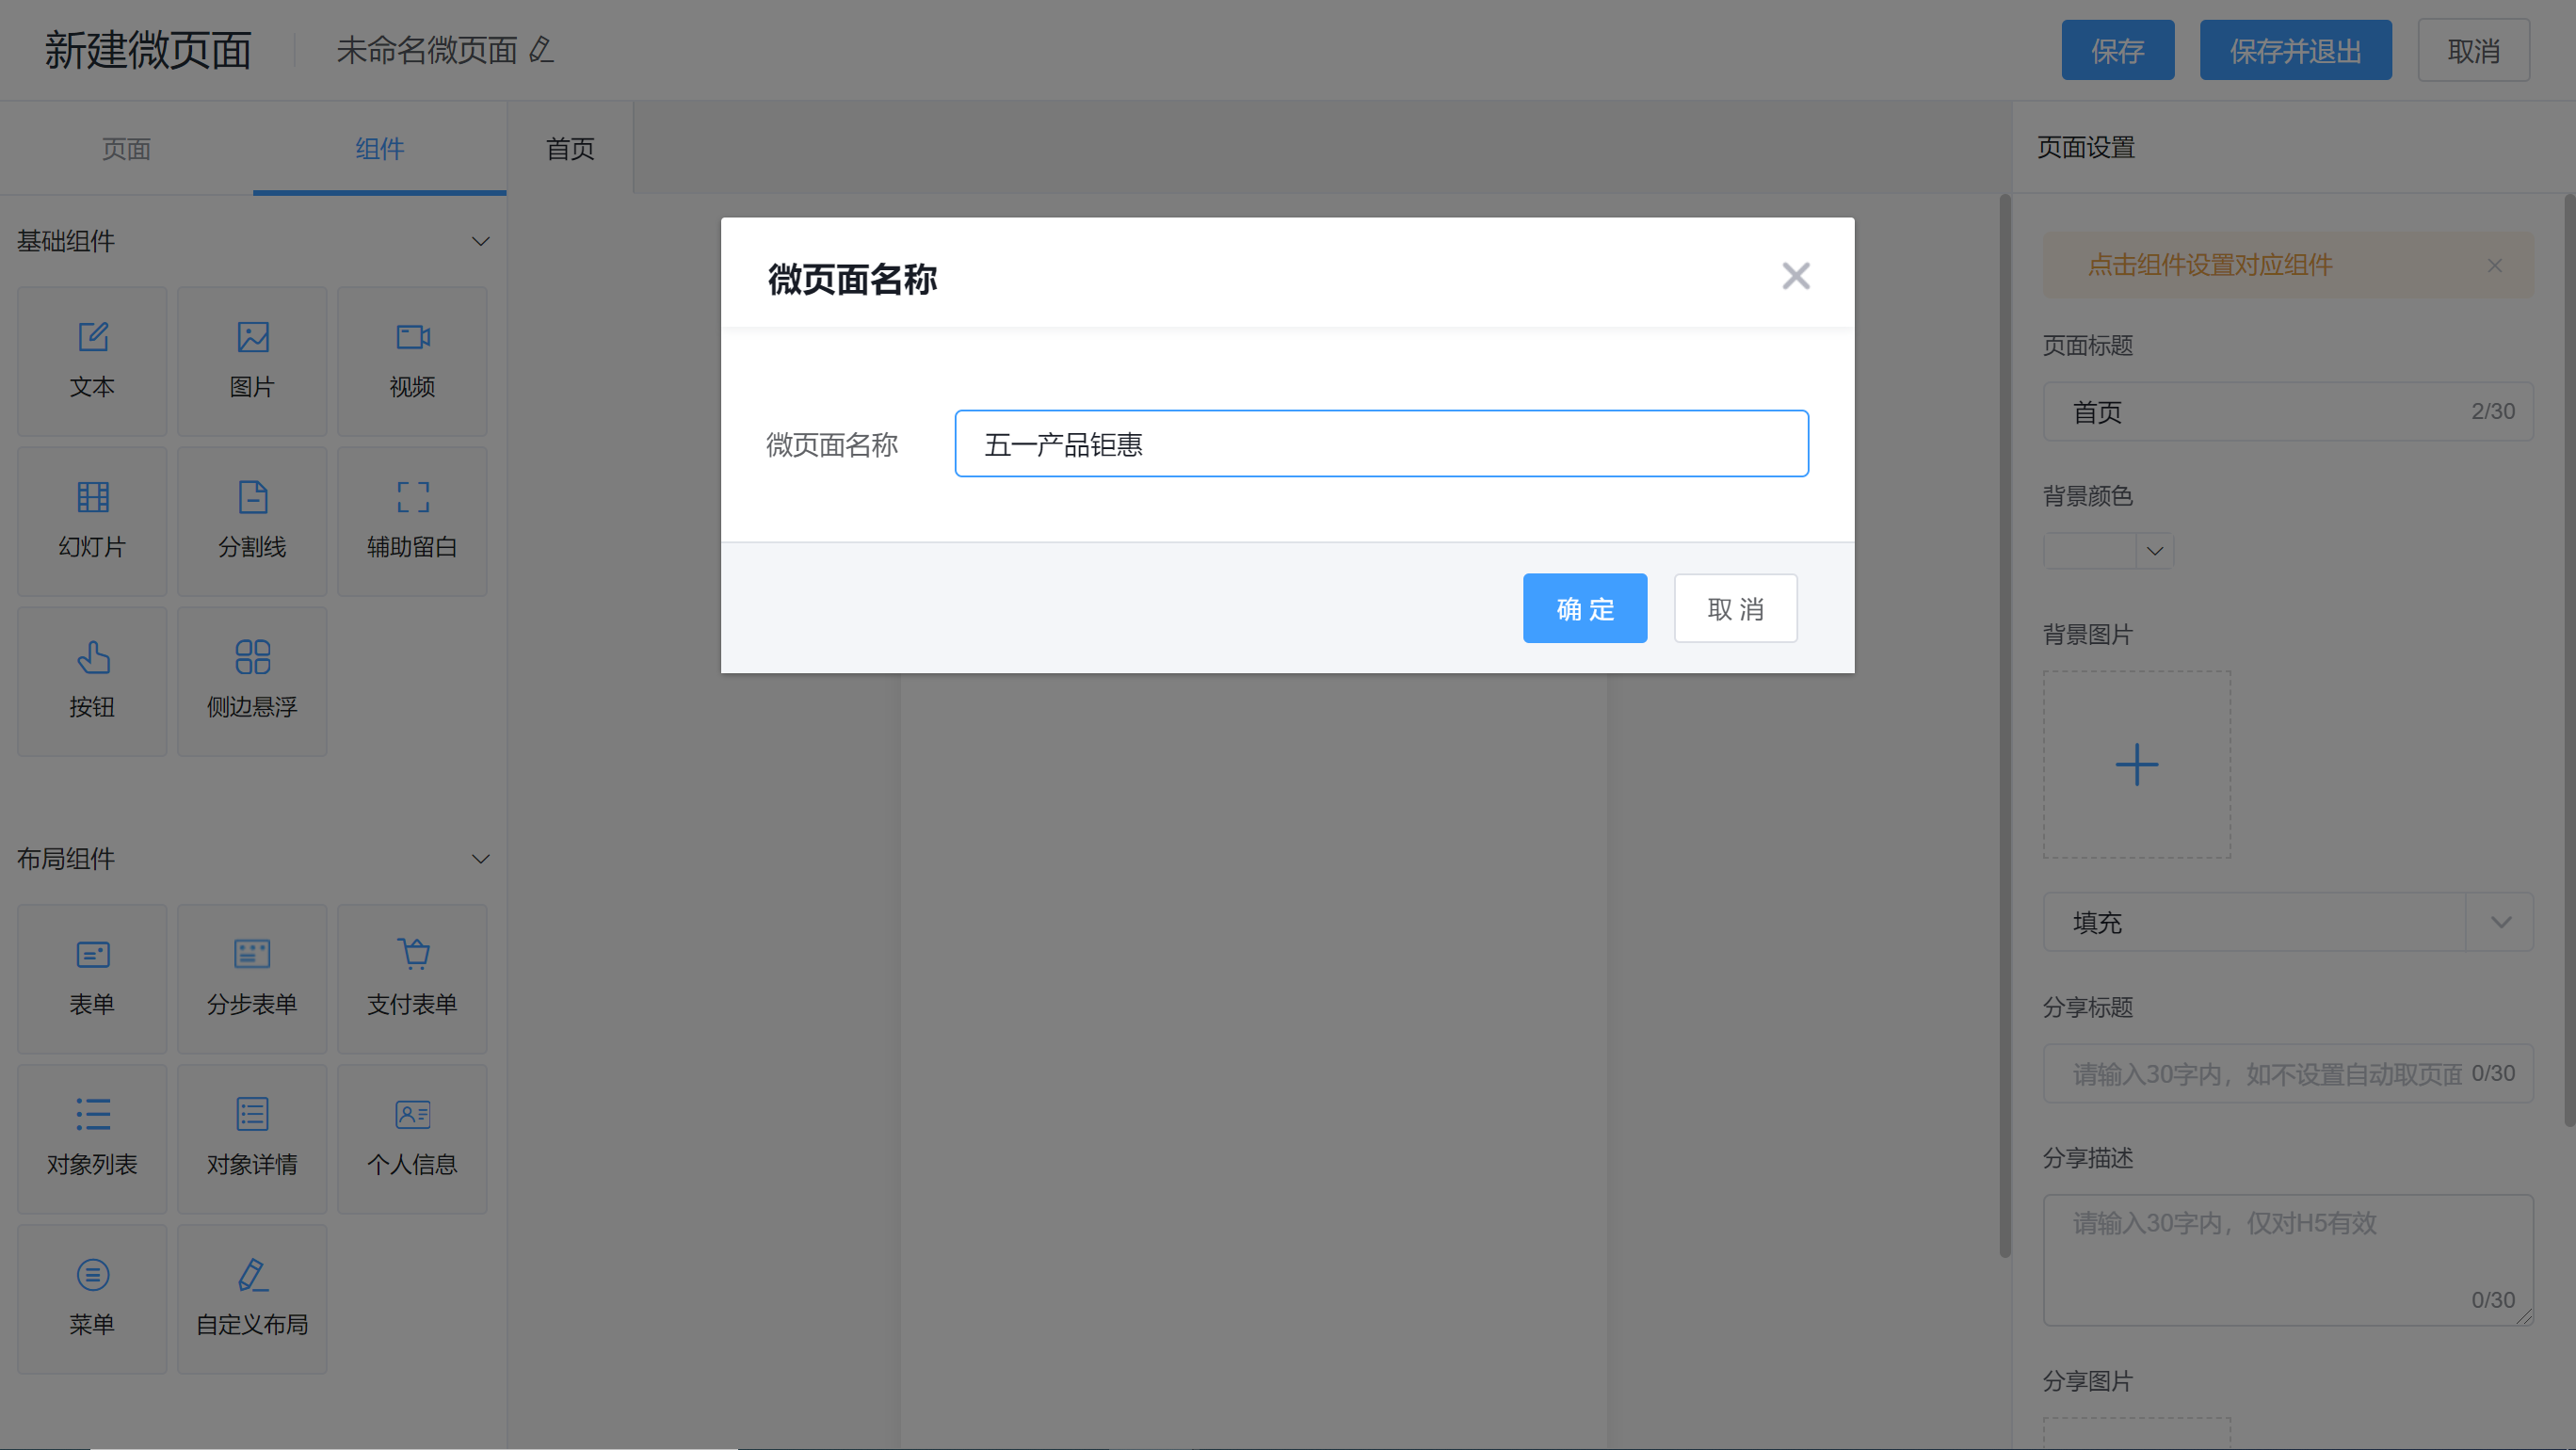
4) Edit the micro-page name.
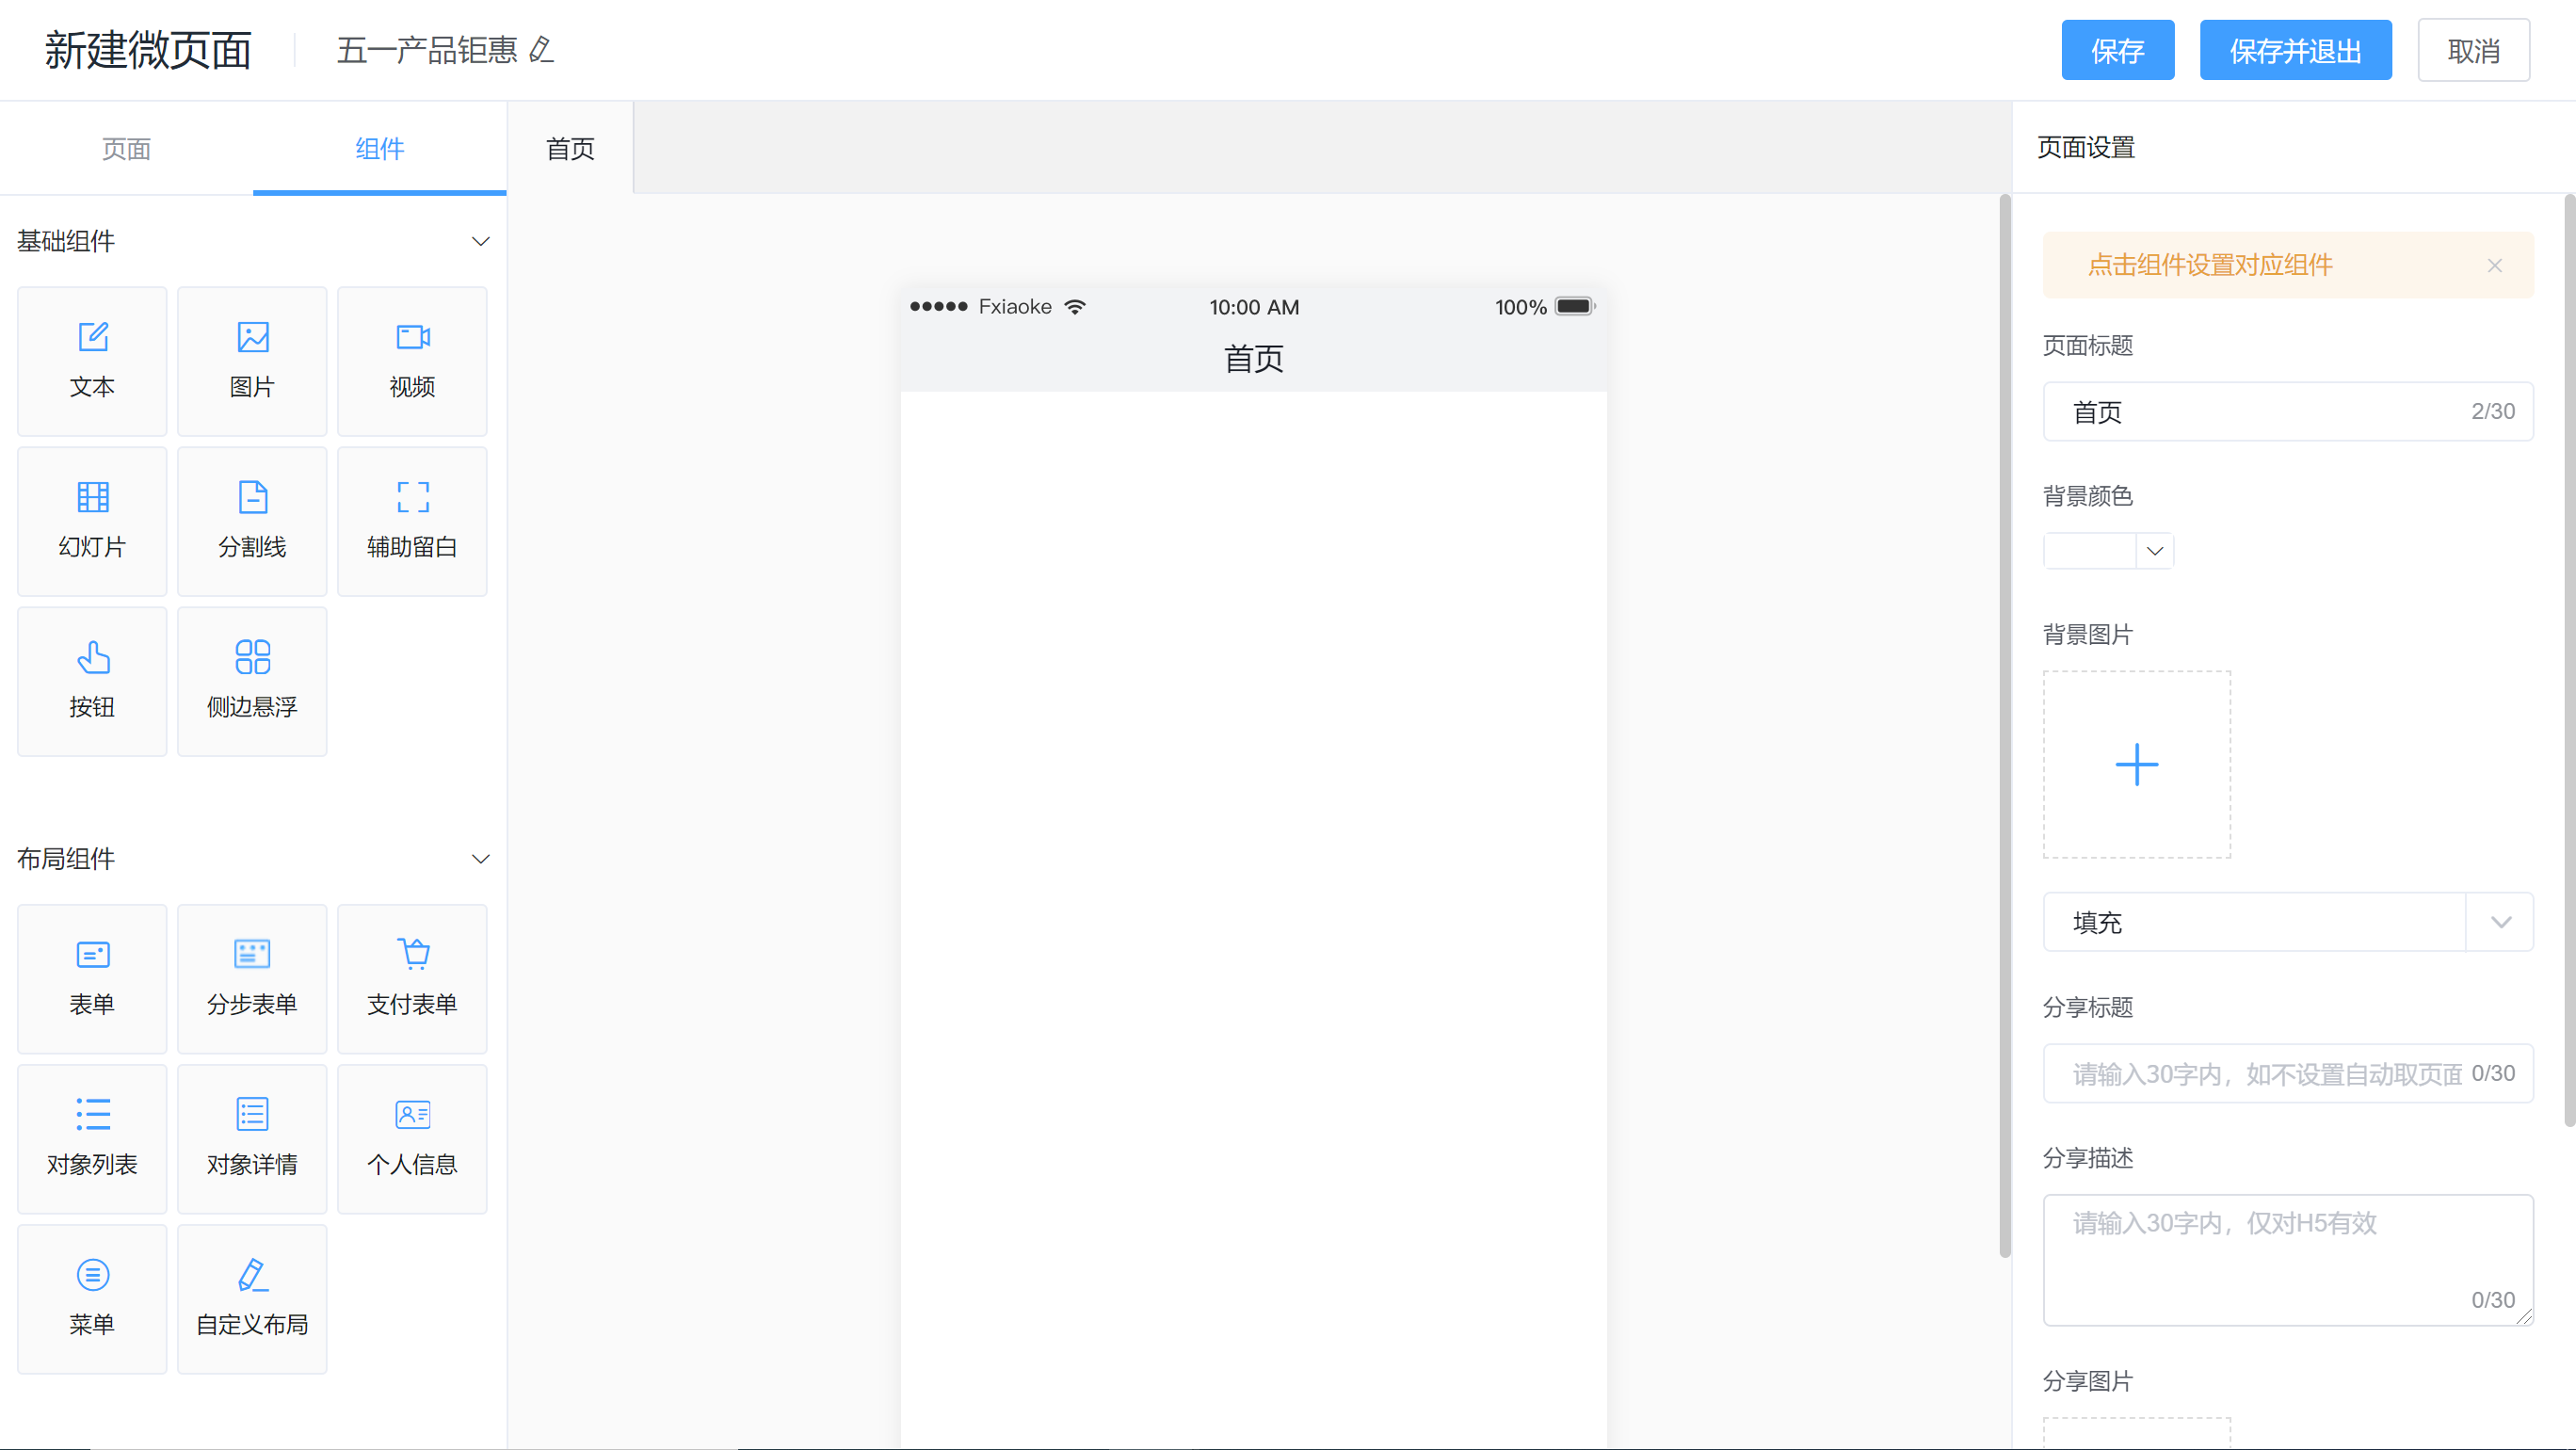
5) On the blank canvas, drag from the component area on the left side of the new micropage window to the canvas to design the campaign page.
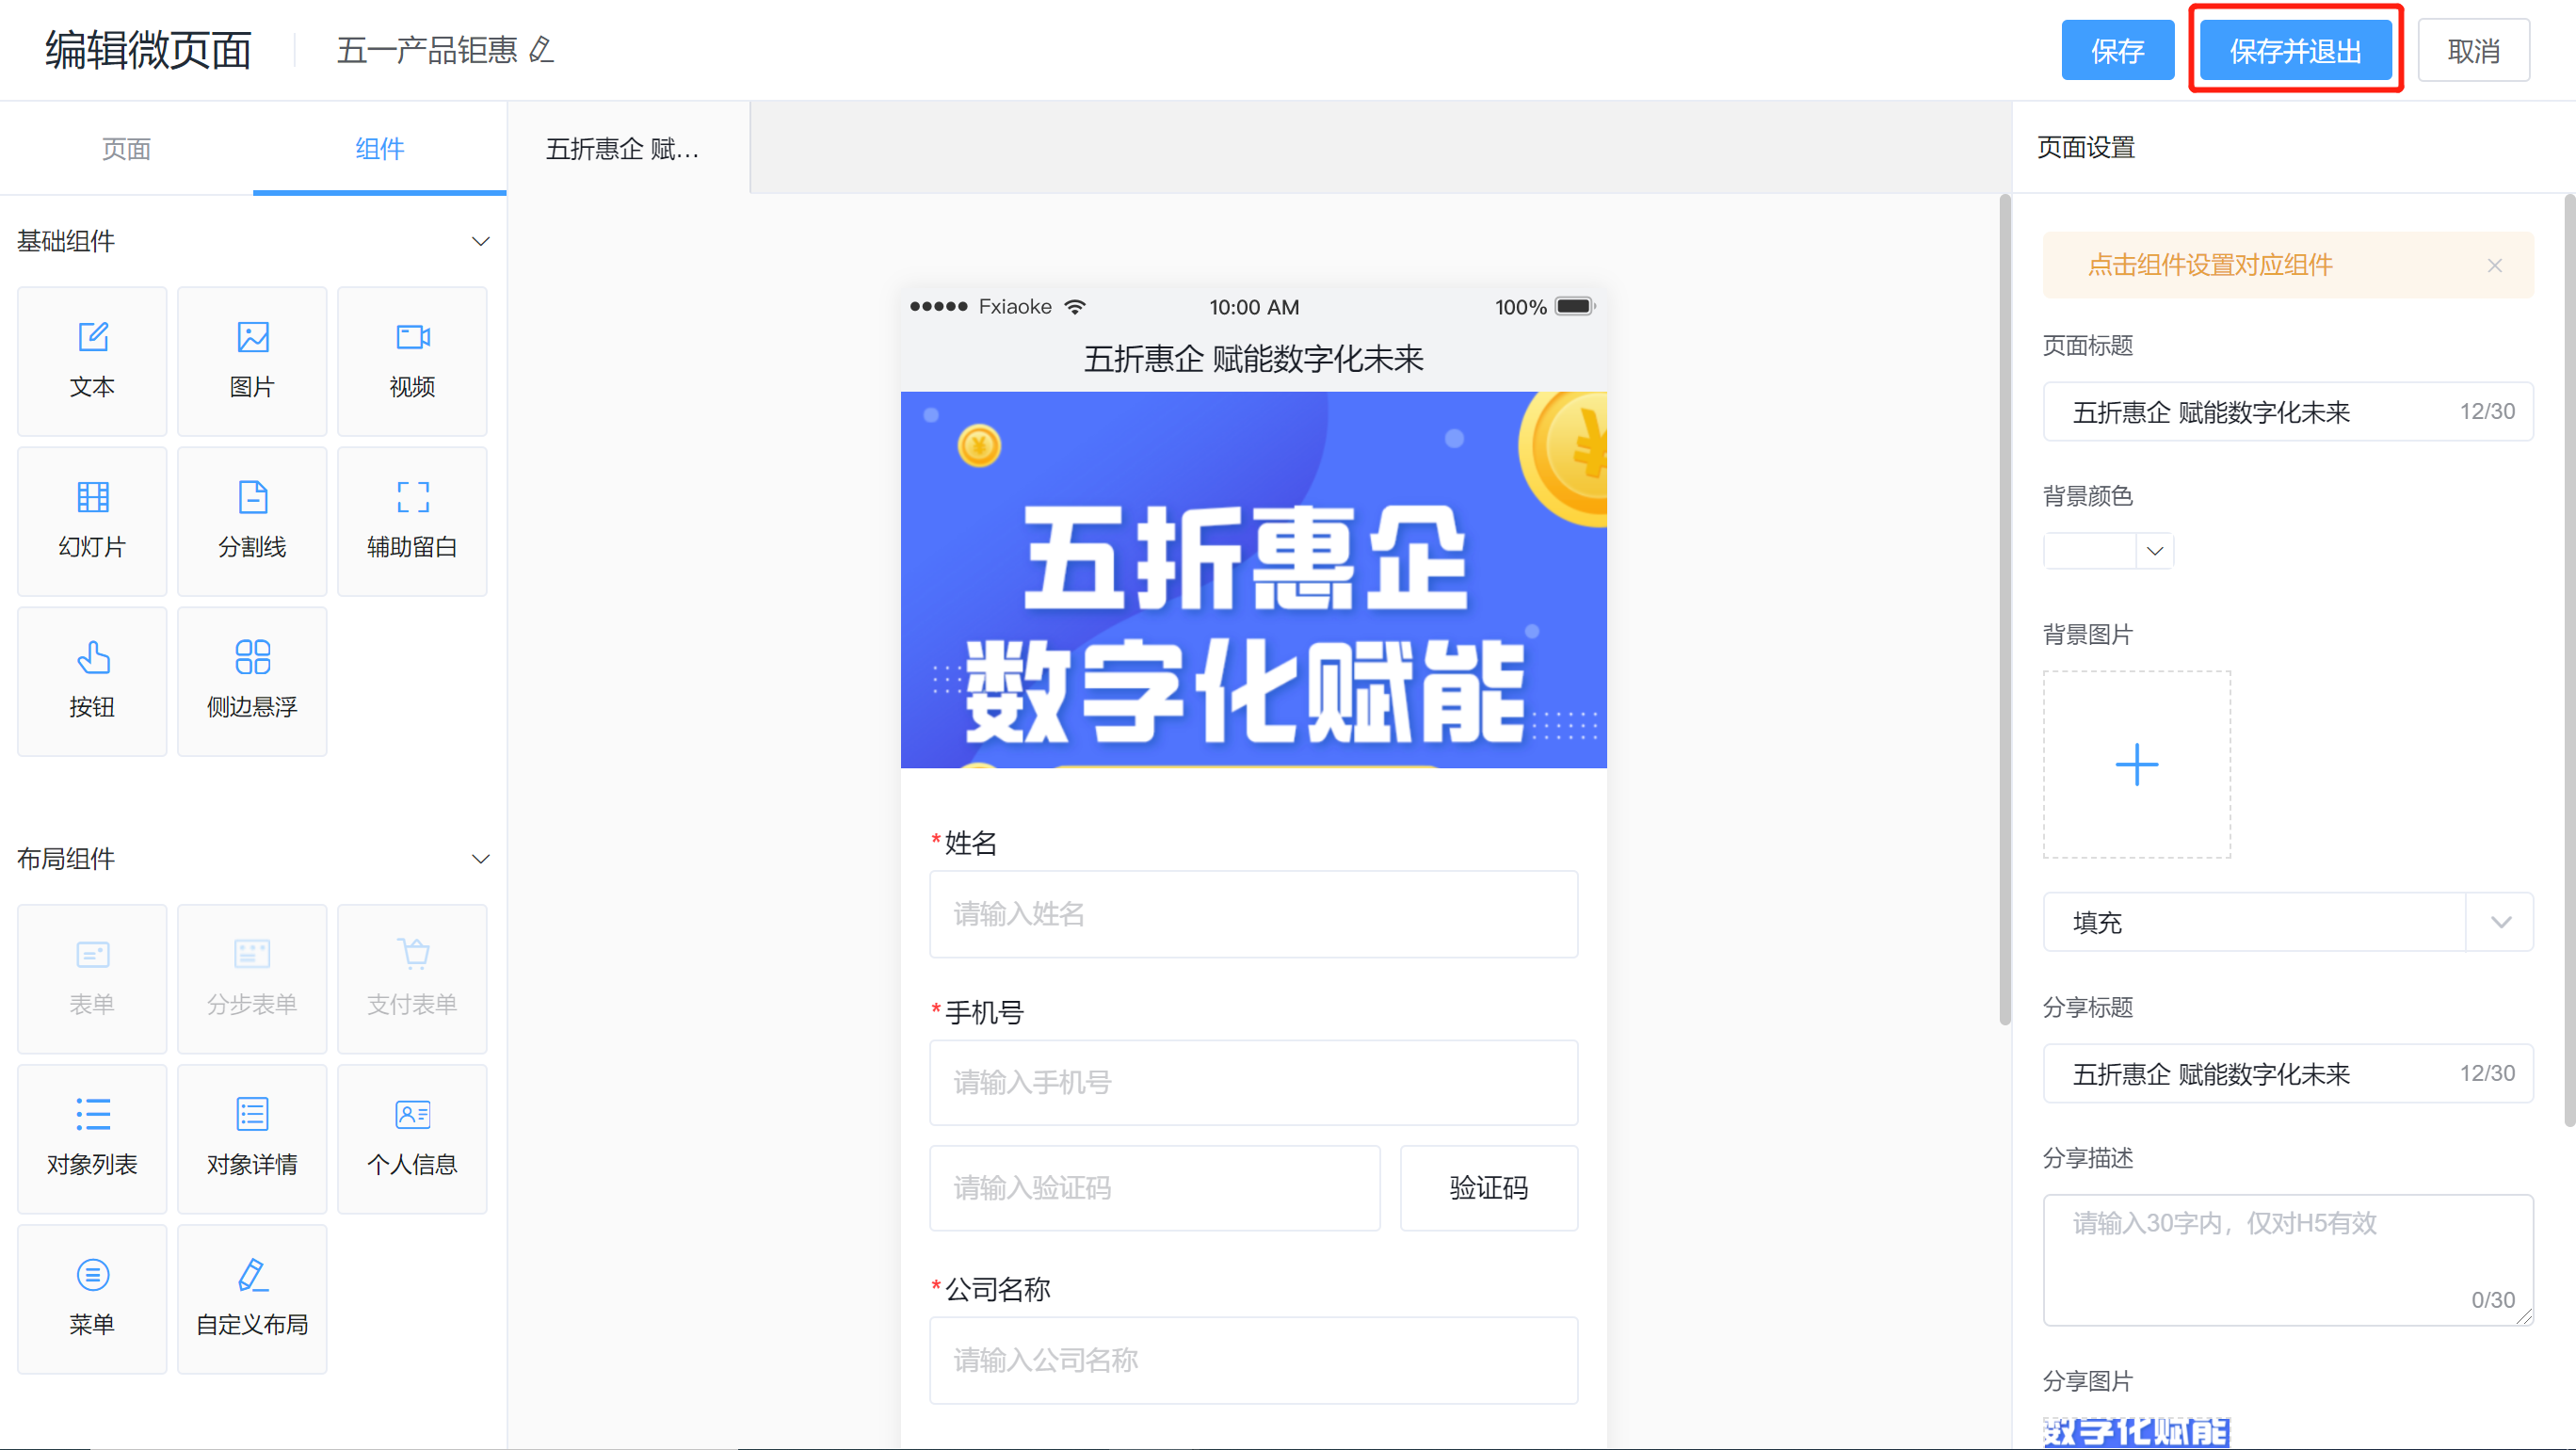
6) After completing the campaign page design, click [Save & Exit] to go back to the campaign overview-promotion content list.
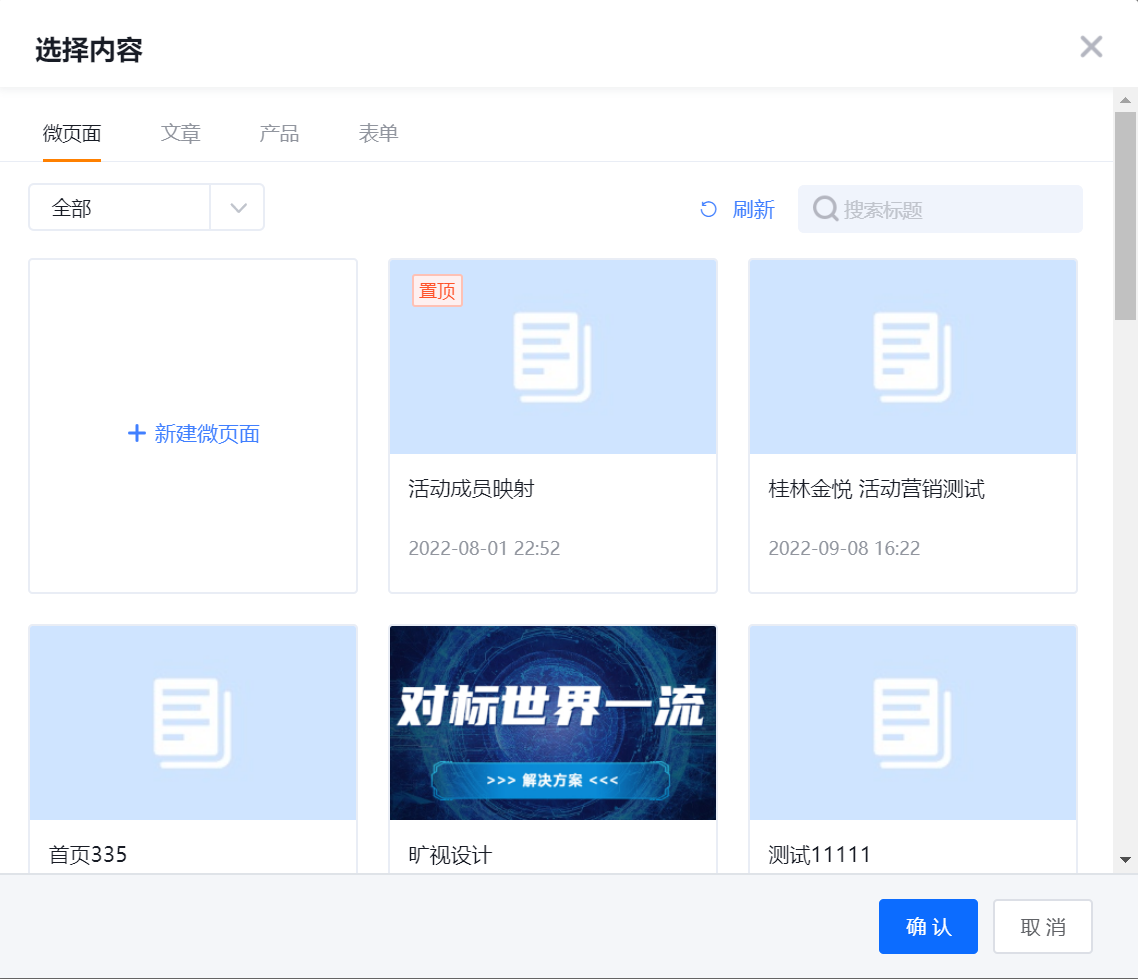
2.2 Select from Content Center
Click [Select from Content Center] to select existing content (micro-pages, articles, products, forms) to associate with this campaign for promotion.
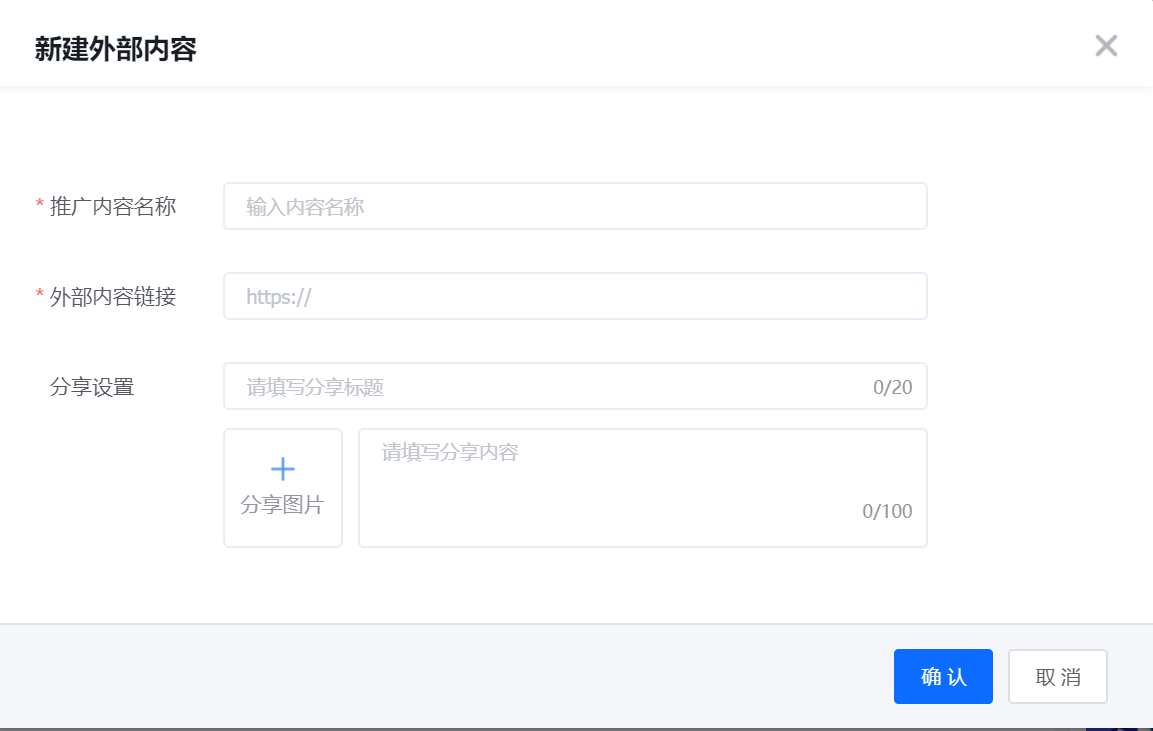
2.3 Reference External Content
1) Click [Reference External Content], you can share external content links to associate with this campaign for promotion, and you can also set the sharing image and text of the sharing link. If the E-Marketing micro page form is configured as a registration jump link in the third-party content, the registration data can be synchronized to the registration list of the E-Marketing.
3. Complete Campaign Settings & Synchronize Campaign Form Data to Leads pool of Corresponding Marketing Department
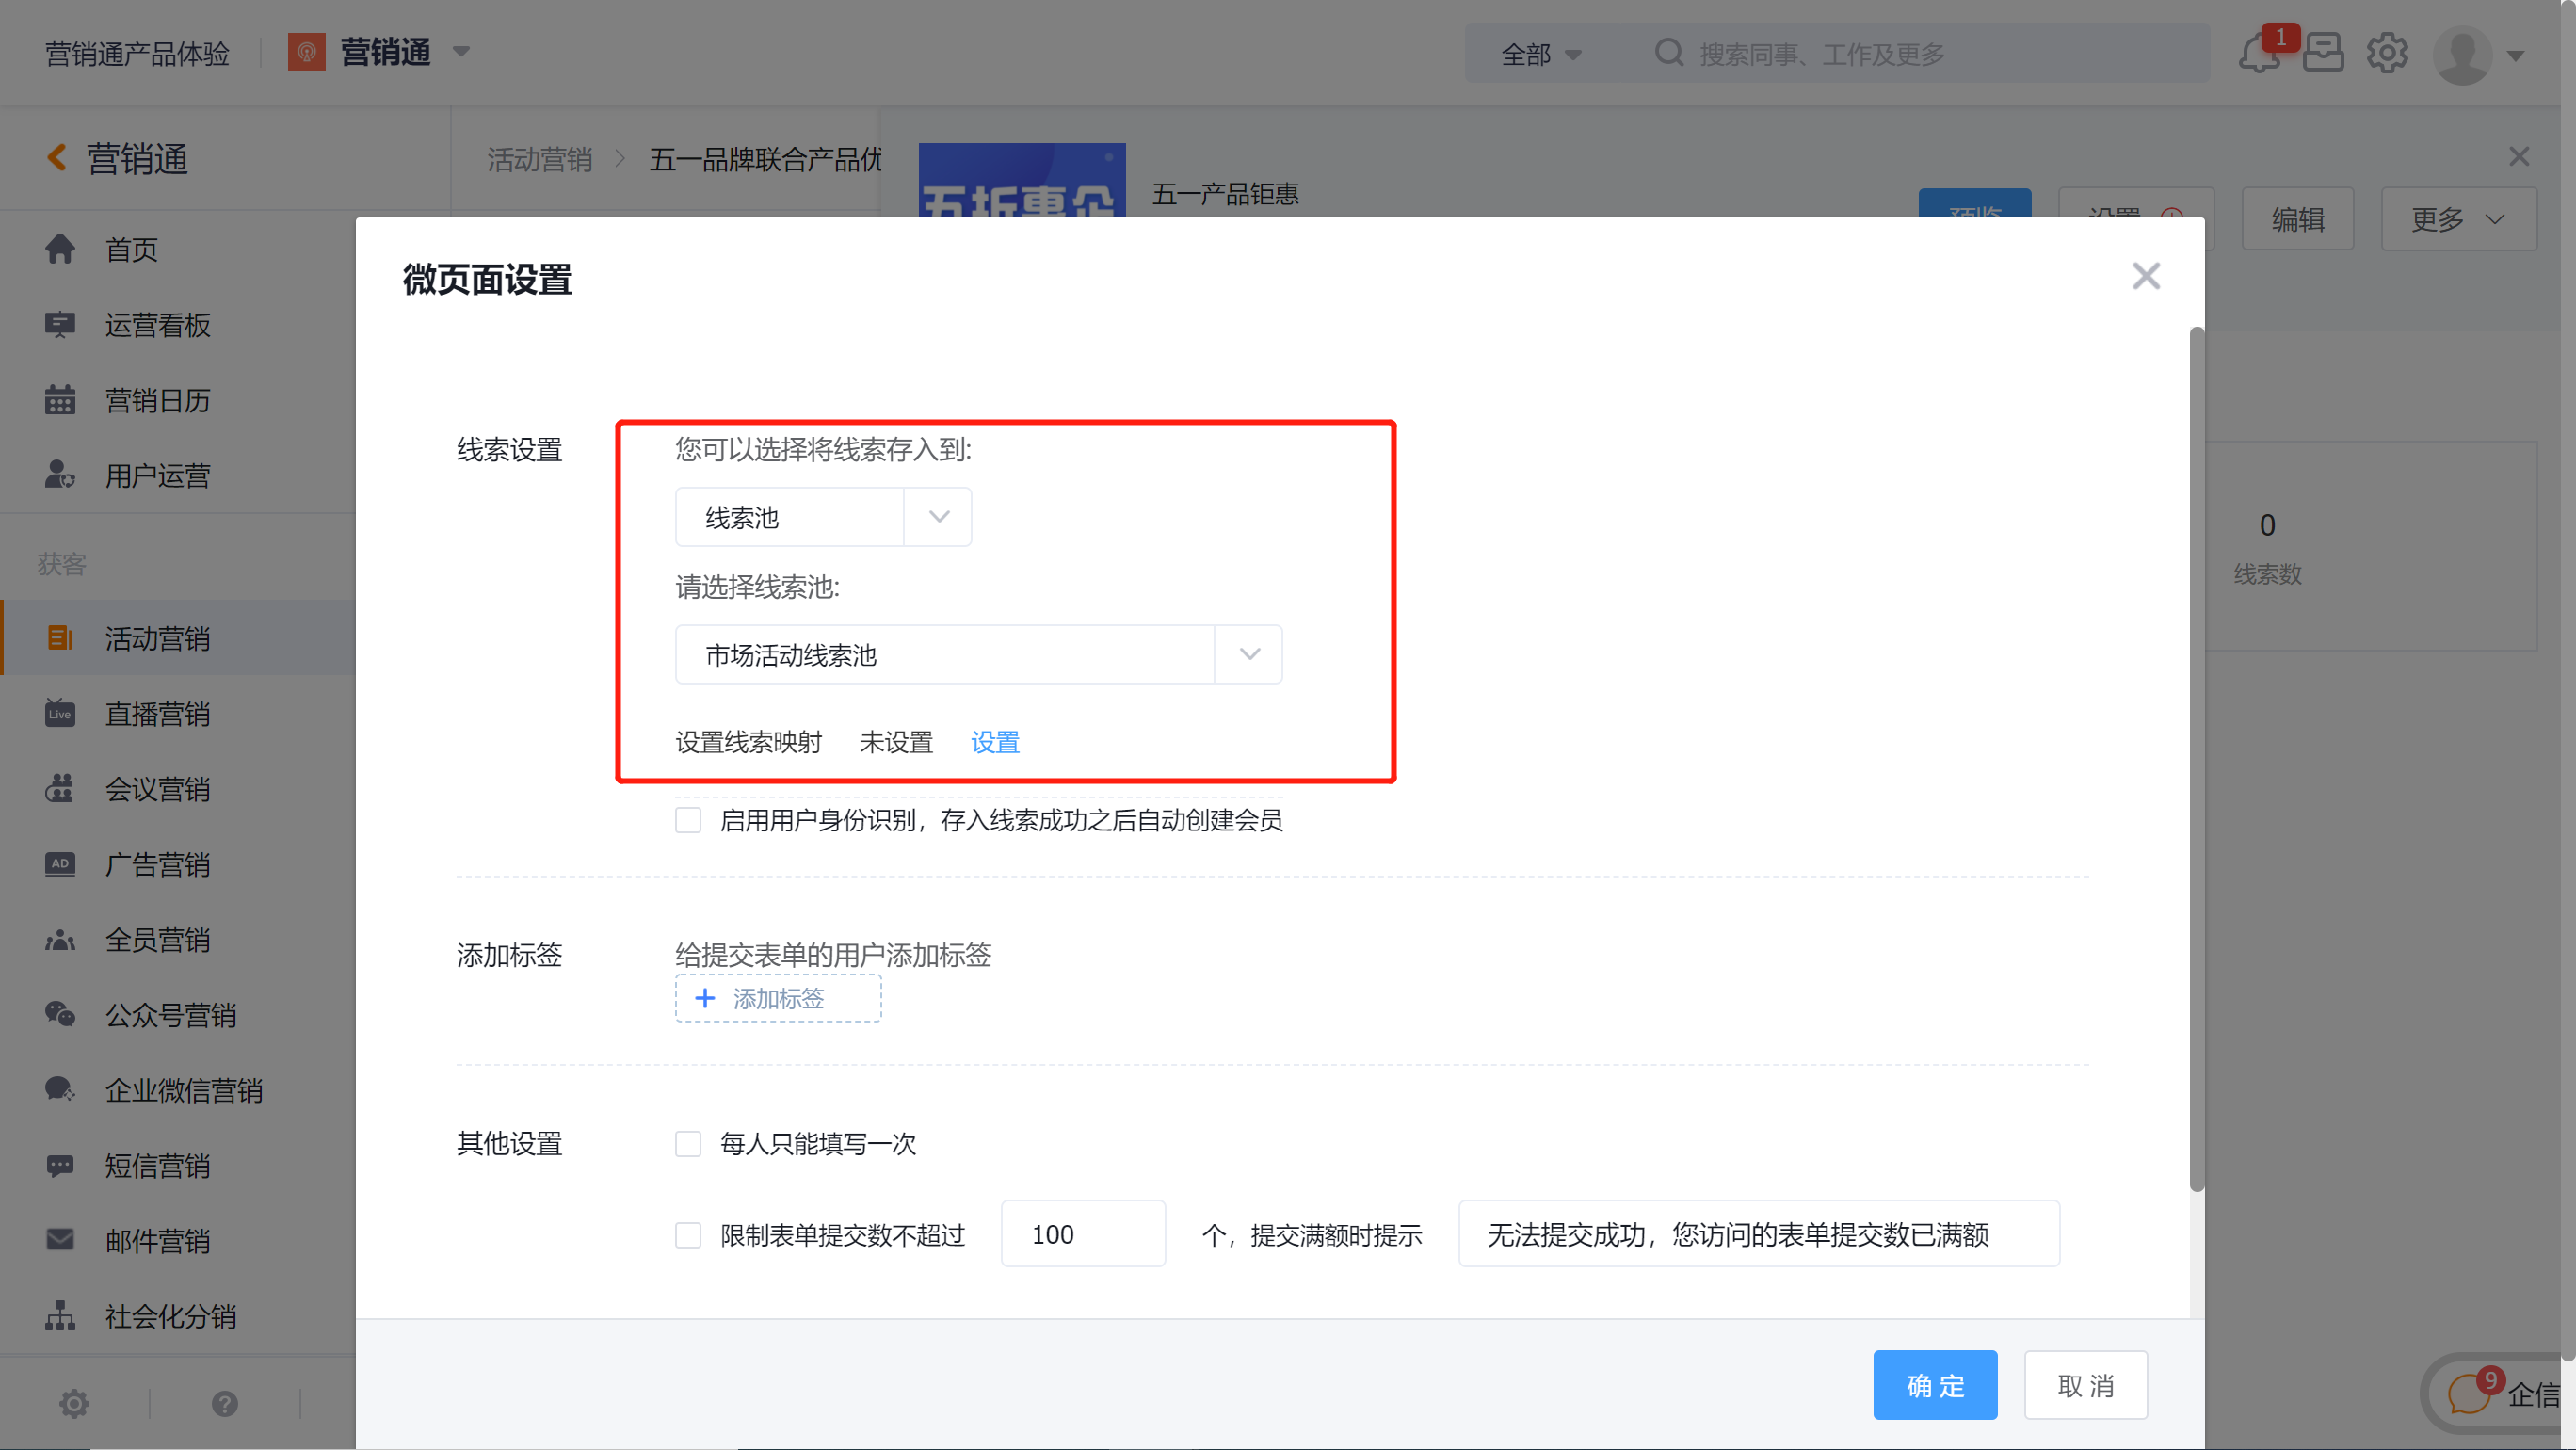
In the promotion content list, click the title of the corresponding content, and click [Settings] in the upper right corner of the content details page that slides out to set the micro-page.
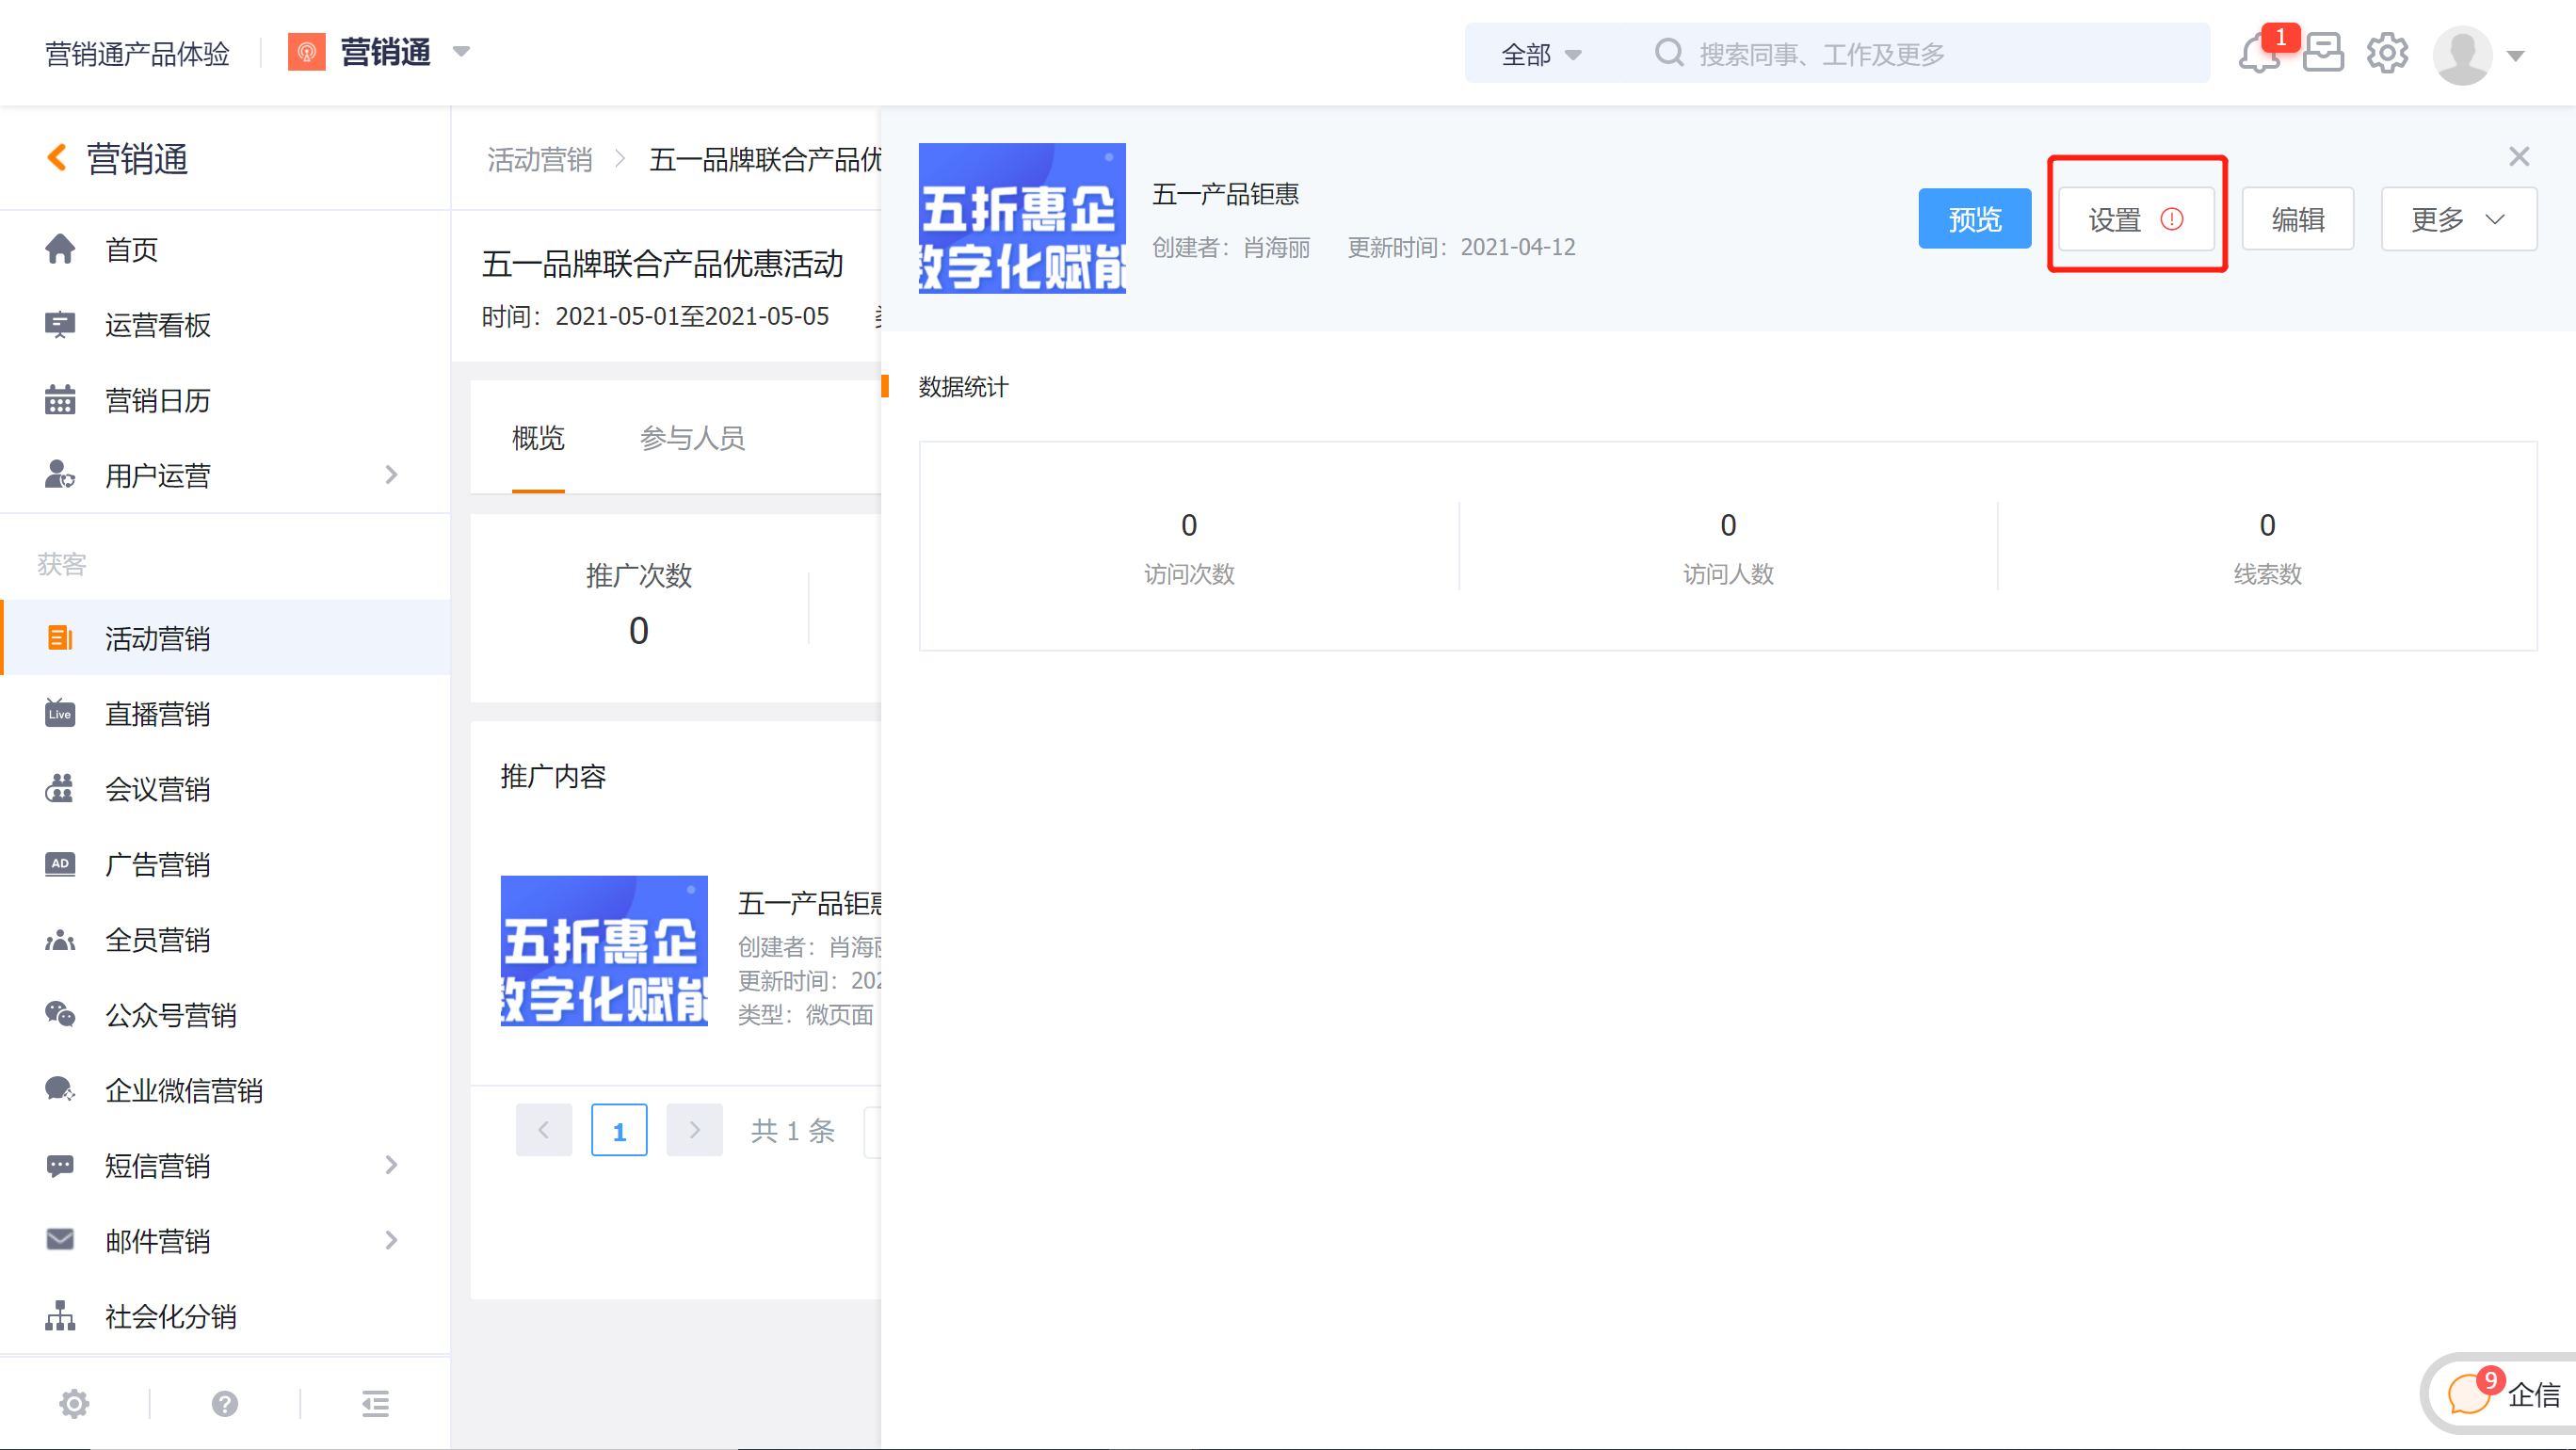
In the popped-up [Micro Page Settings] window, you need to complete the following settings:
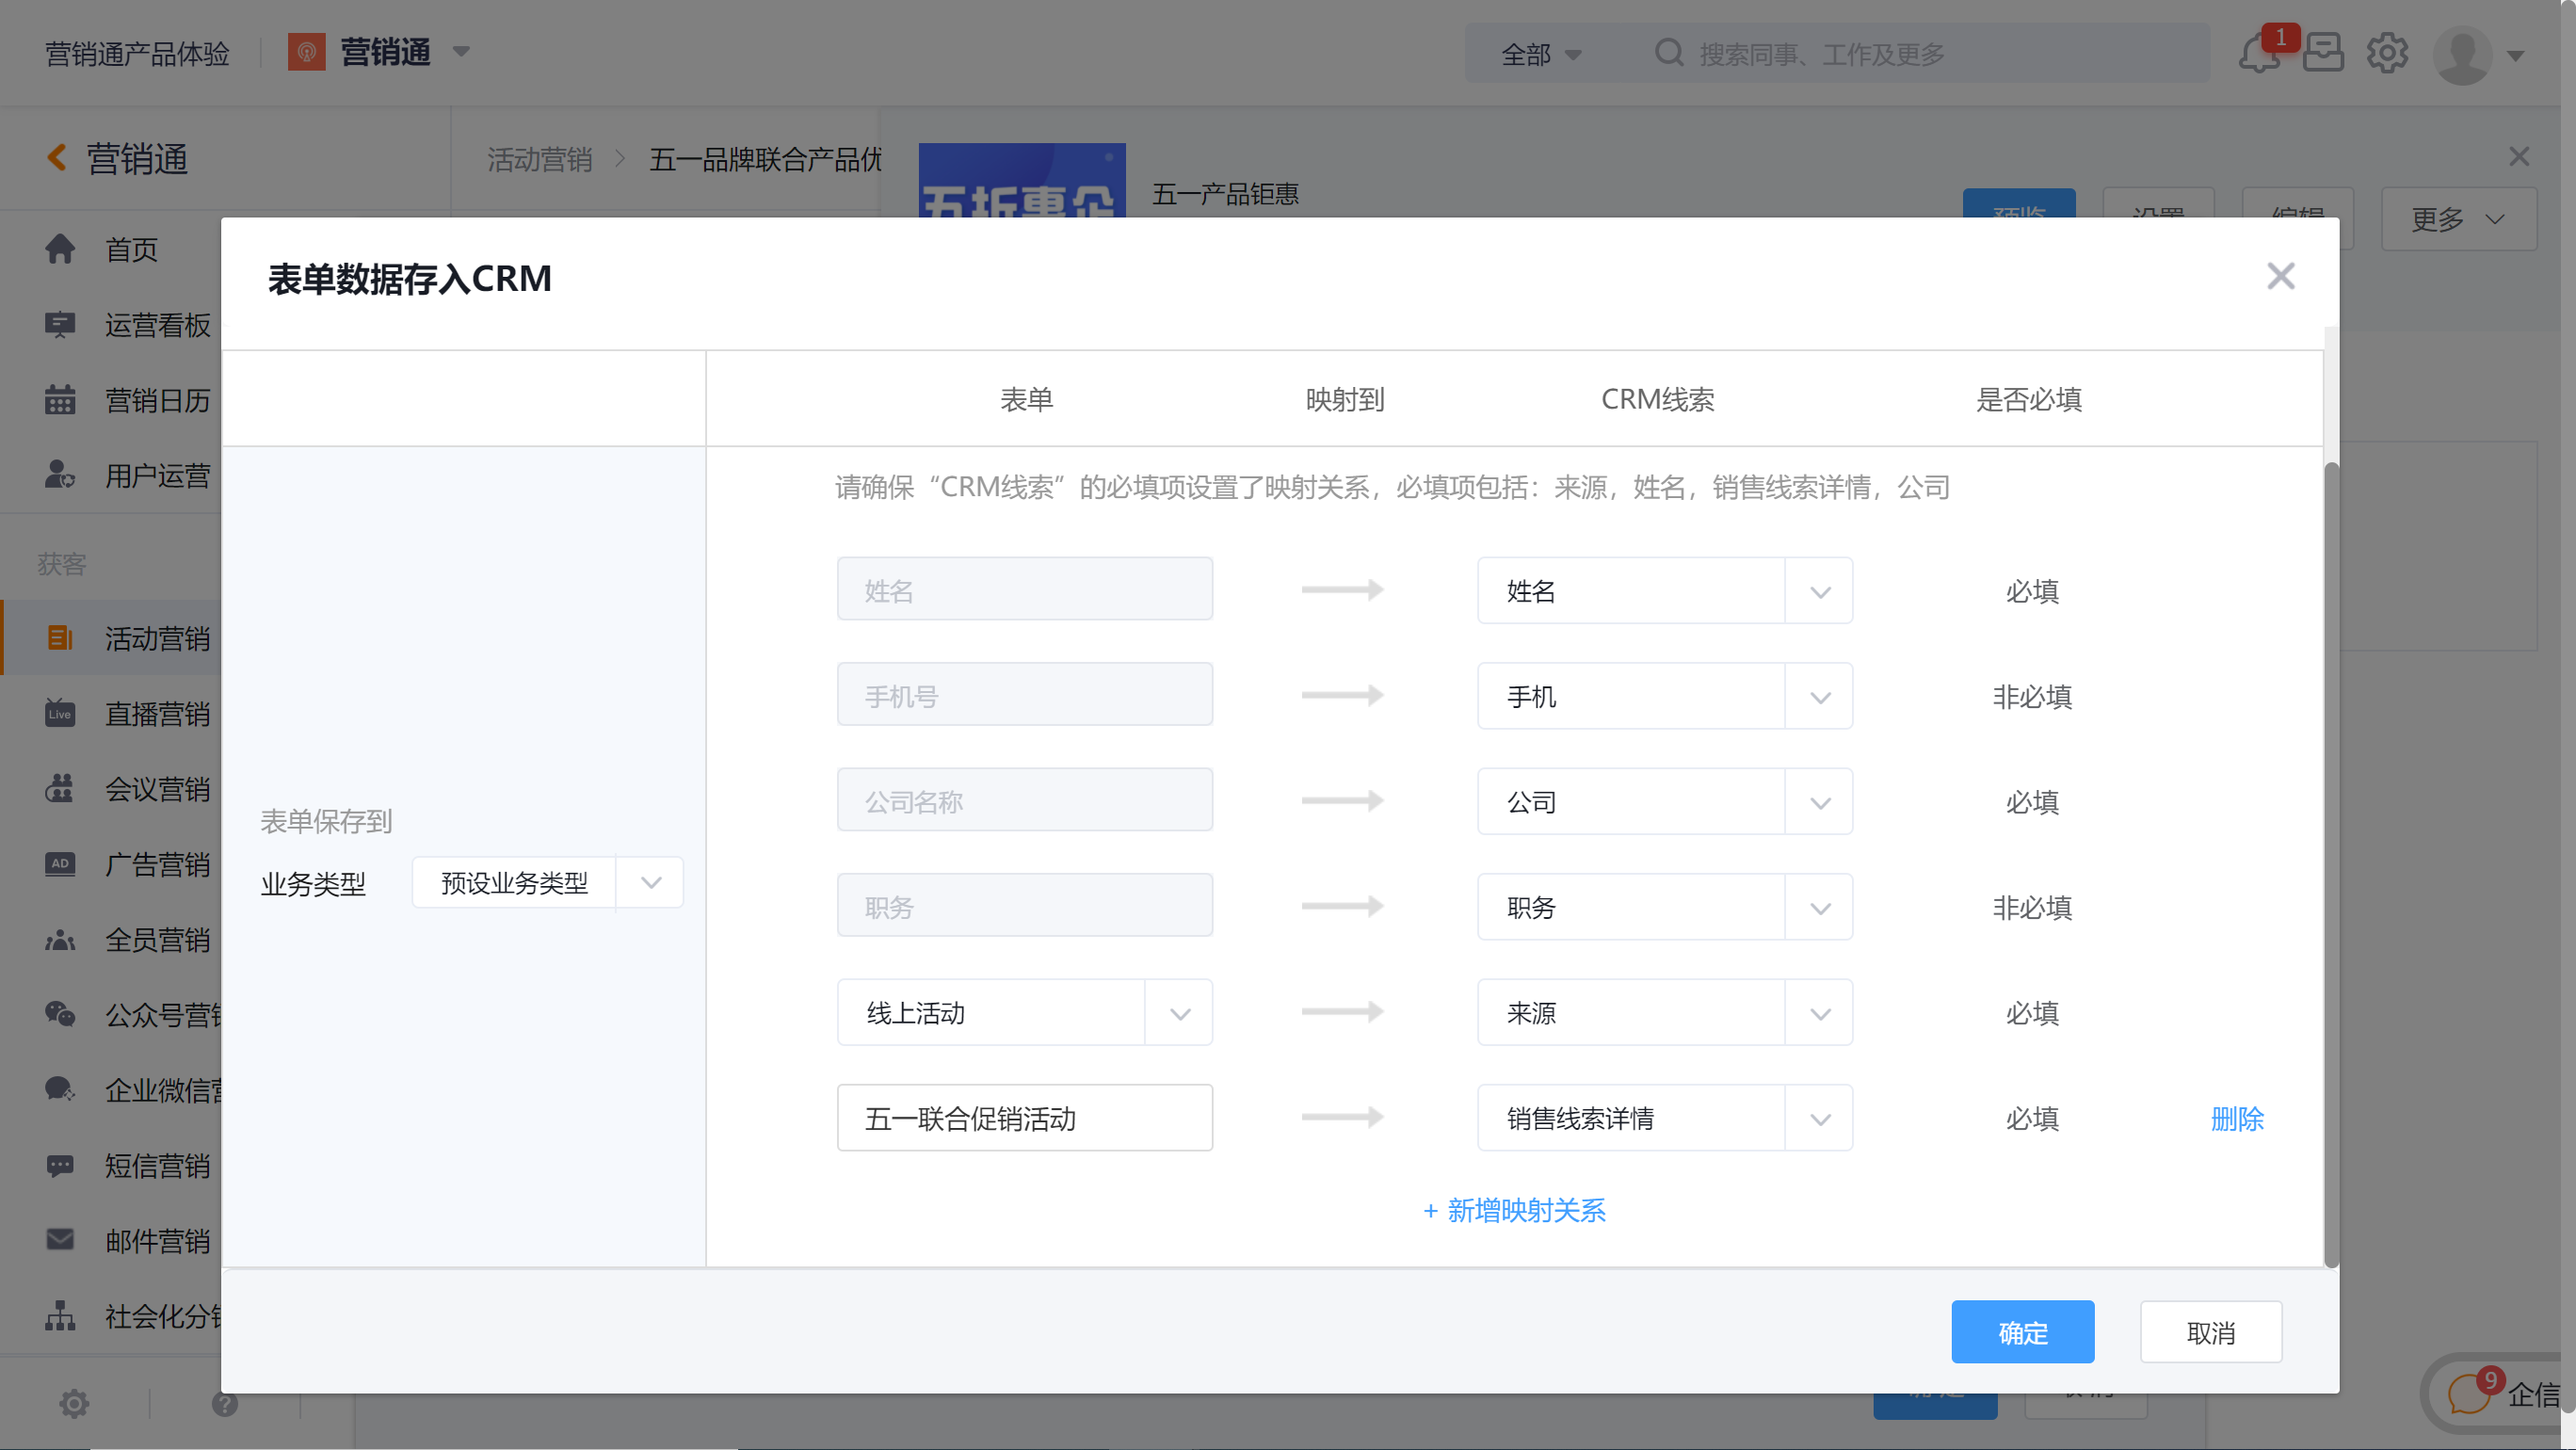
- Determine which campaign leads pool the form leads collected by the current content need to be stored in, and which leads field the form field values need to be stored on.
- Add tags (recommended setting items), and automatically add the set tags to users who submit the form, which is conducive to improving leads portraits, segmenting leads, and formulating automated cultivation and conversion strategies.
4. Carry out Campaign Promotion
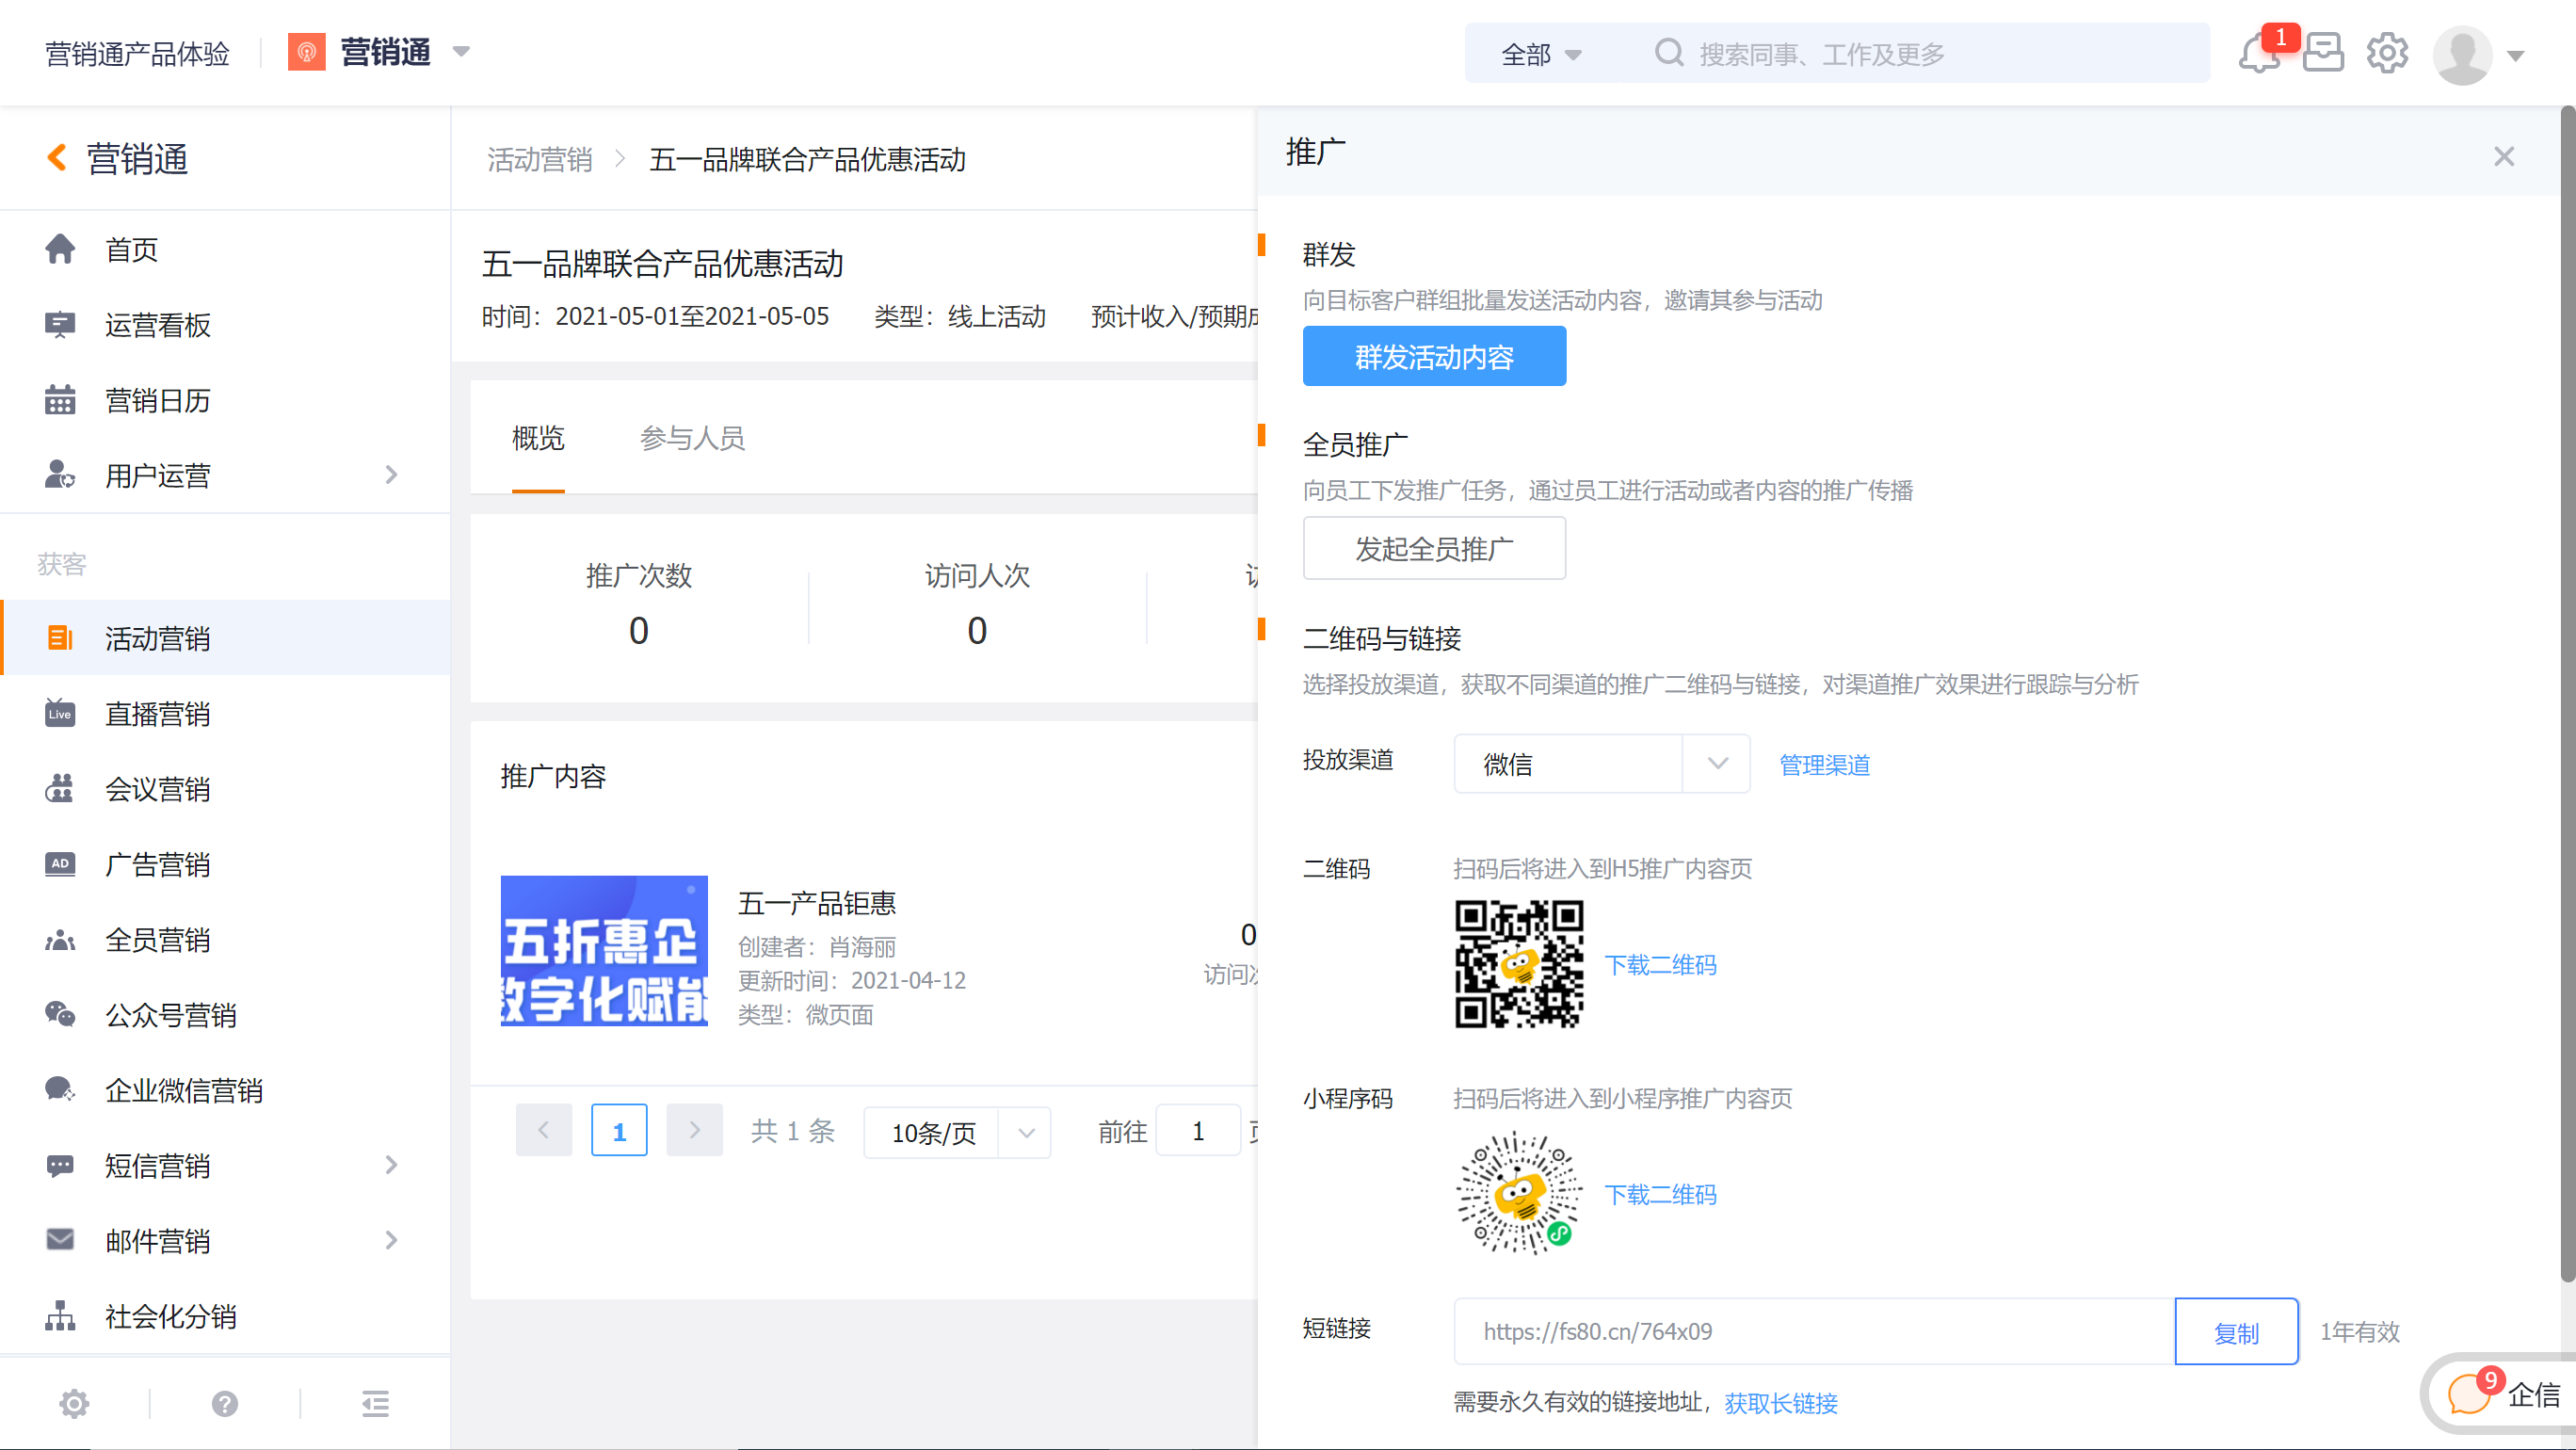
After completing the settings, in the promotion content list, click the [Promotion] button corresponding to the content to select the appropriate method to promote the campaign according to the needs:
- Mass Sending Campaign Content: It is mainly used to send campaign invitations to existing target accounts/potential accounts of CRM through email, SMS, official account or WeCom.
- Full Promotion: The content of the campaign can be distributed to internal employees in the form of promotion tasks, and employees can forward the promotion task notifications to WeChat or moments with one click.
- QR Codes & Links: You can obtain promotional QR codes and links from different channels, such as links to the original text of official account tweets, Mini Program cards for official account tweets, QR codes for official website Banner campaigns, etc., and post the campaign on other social media platform to promote and disseminate the campaigns and track the delivery effects of different channels.
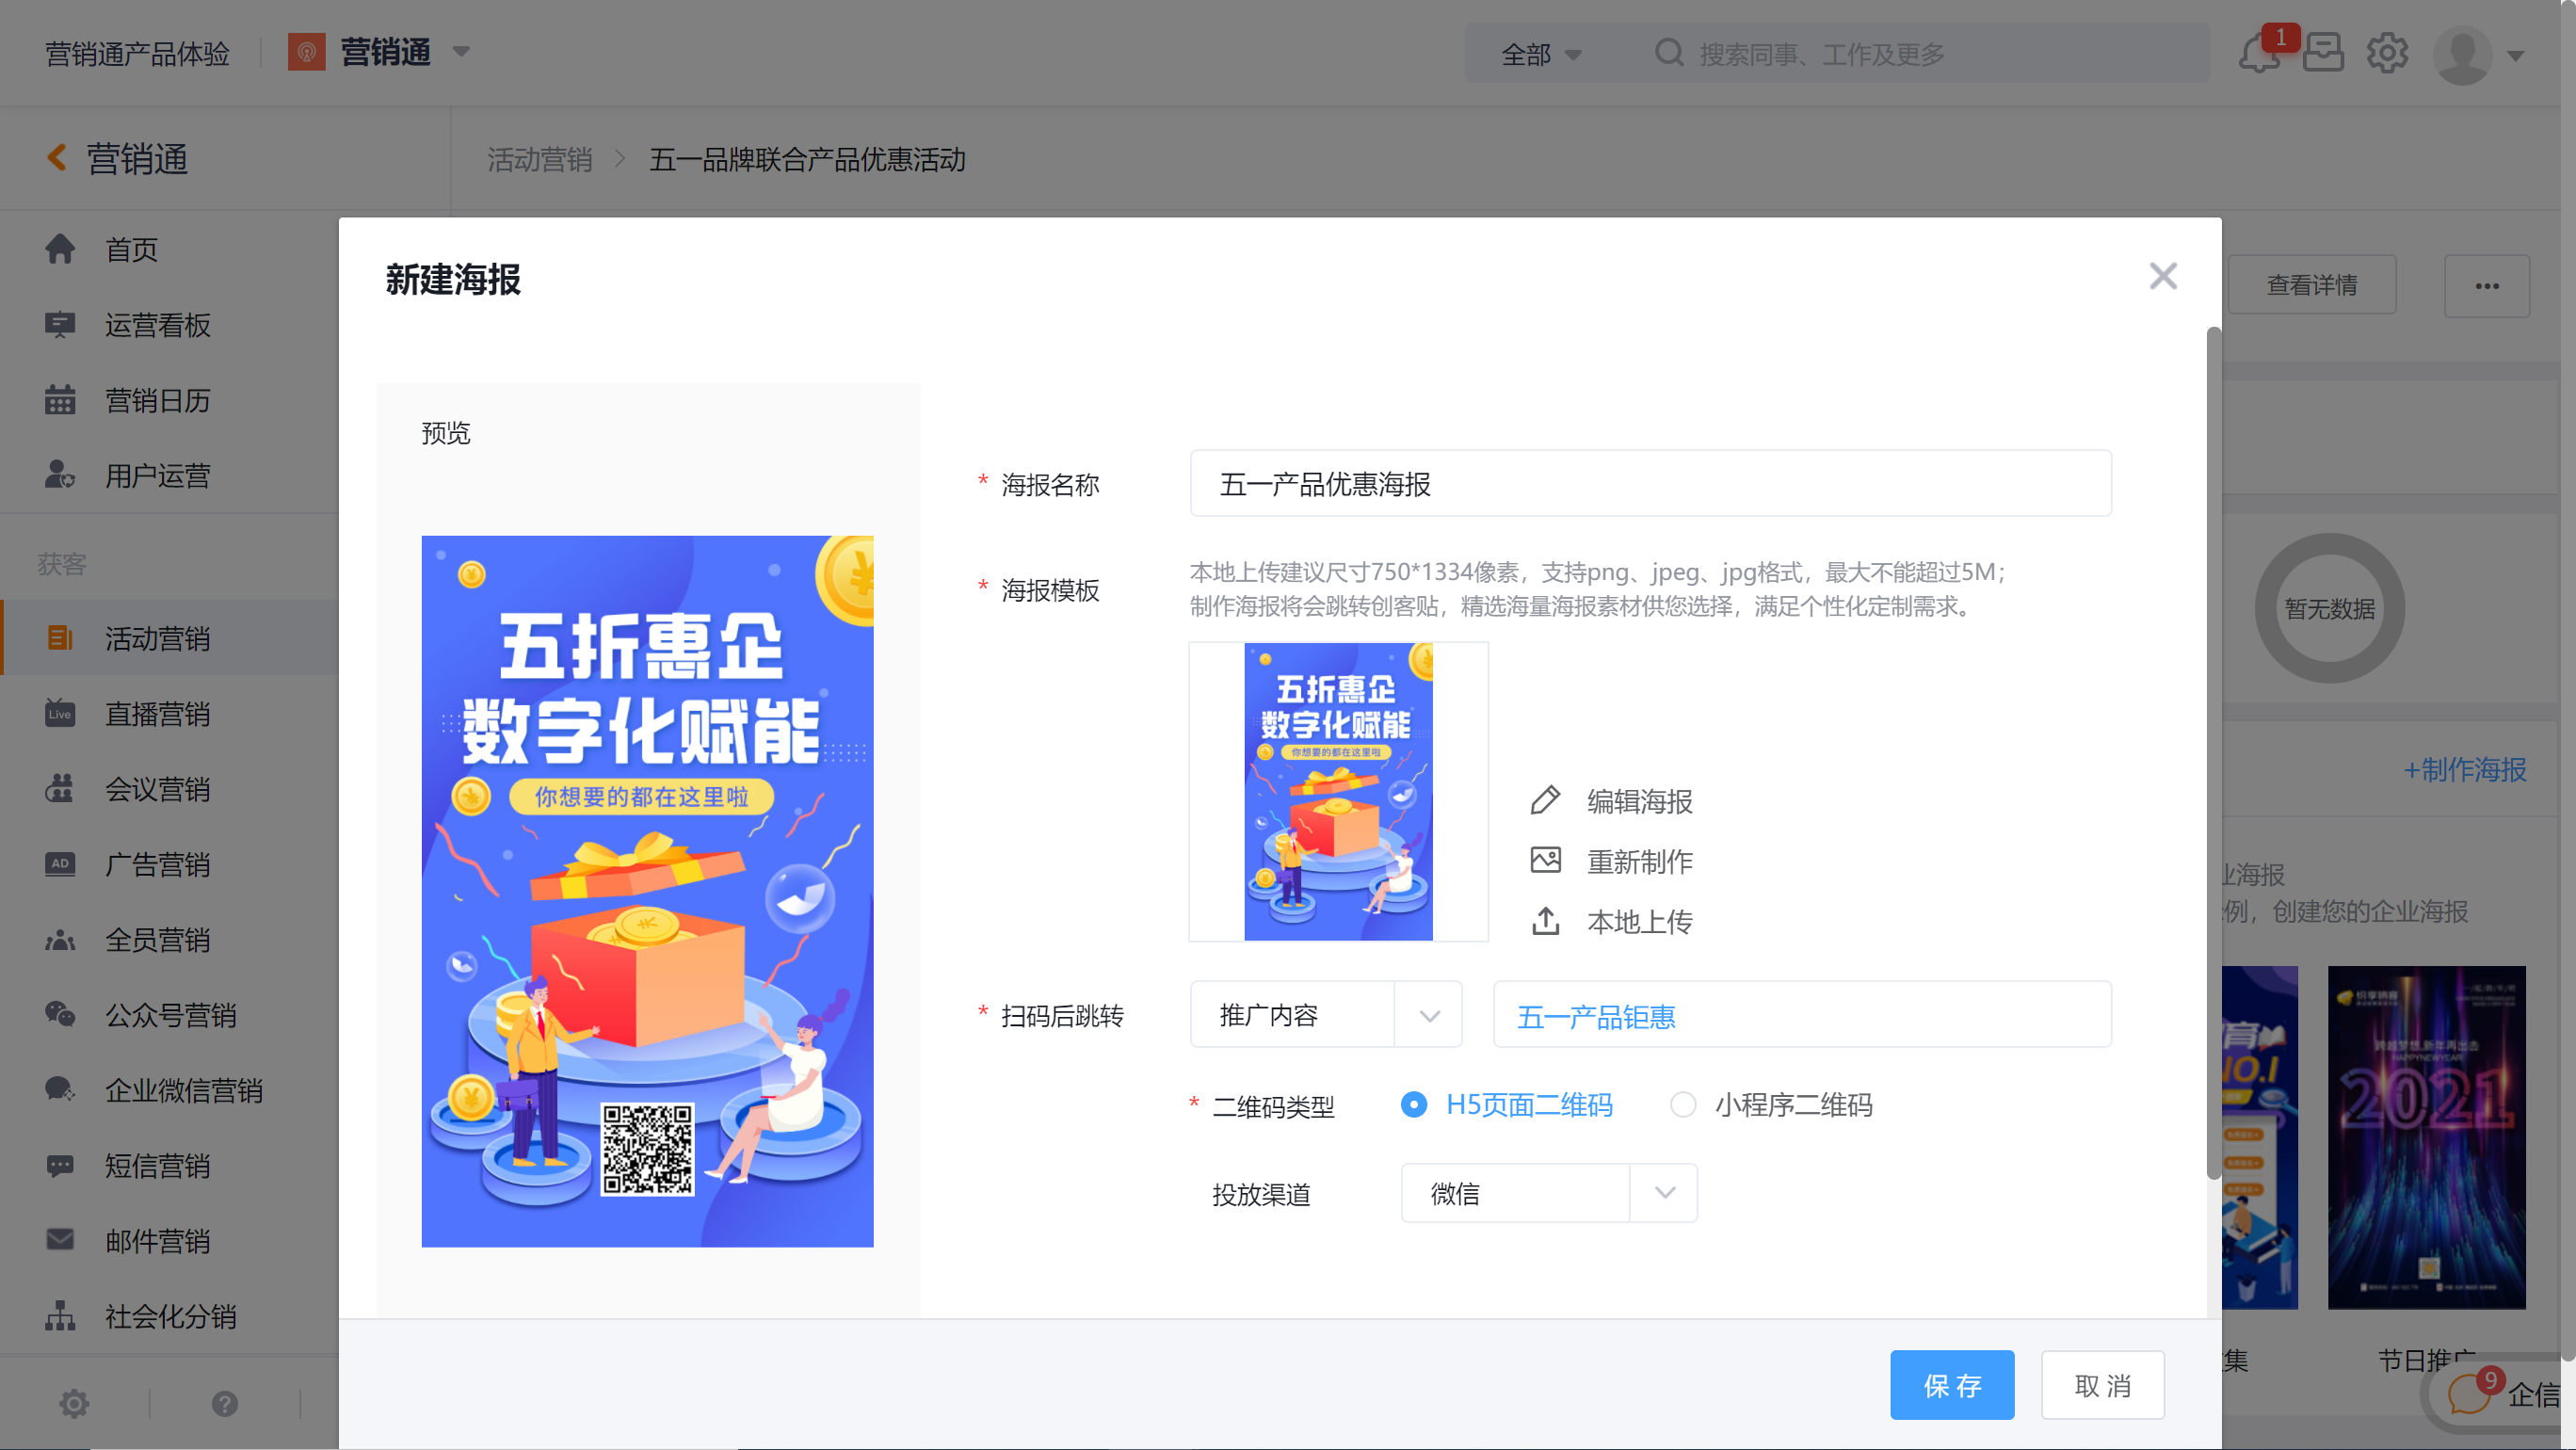
Marketing staff can also promote the campaign content through posters:
1) Click [+Make Poster] on the promotion poster, and you can select to make a poster online by uploading locally or using the Maker Poster poster design tool.
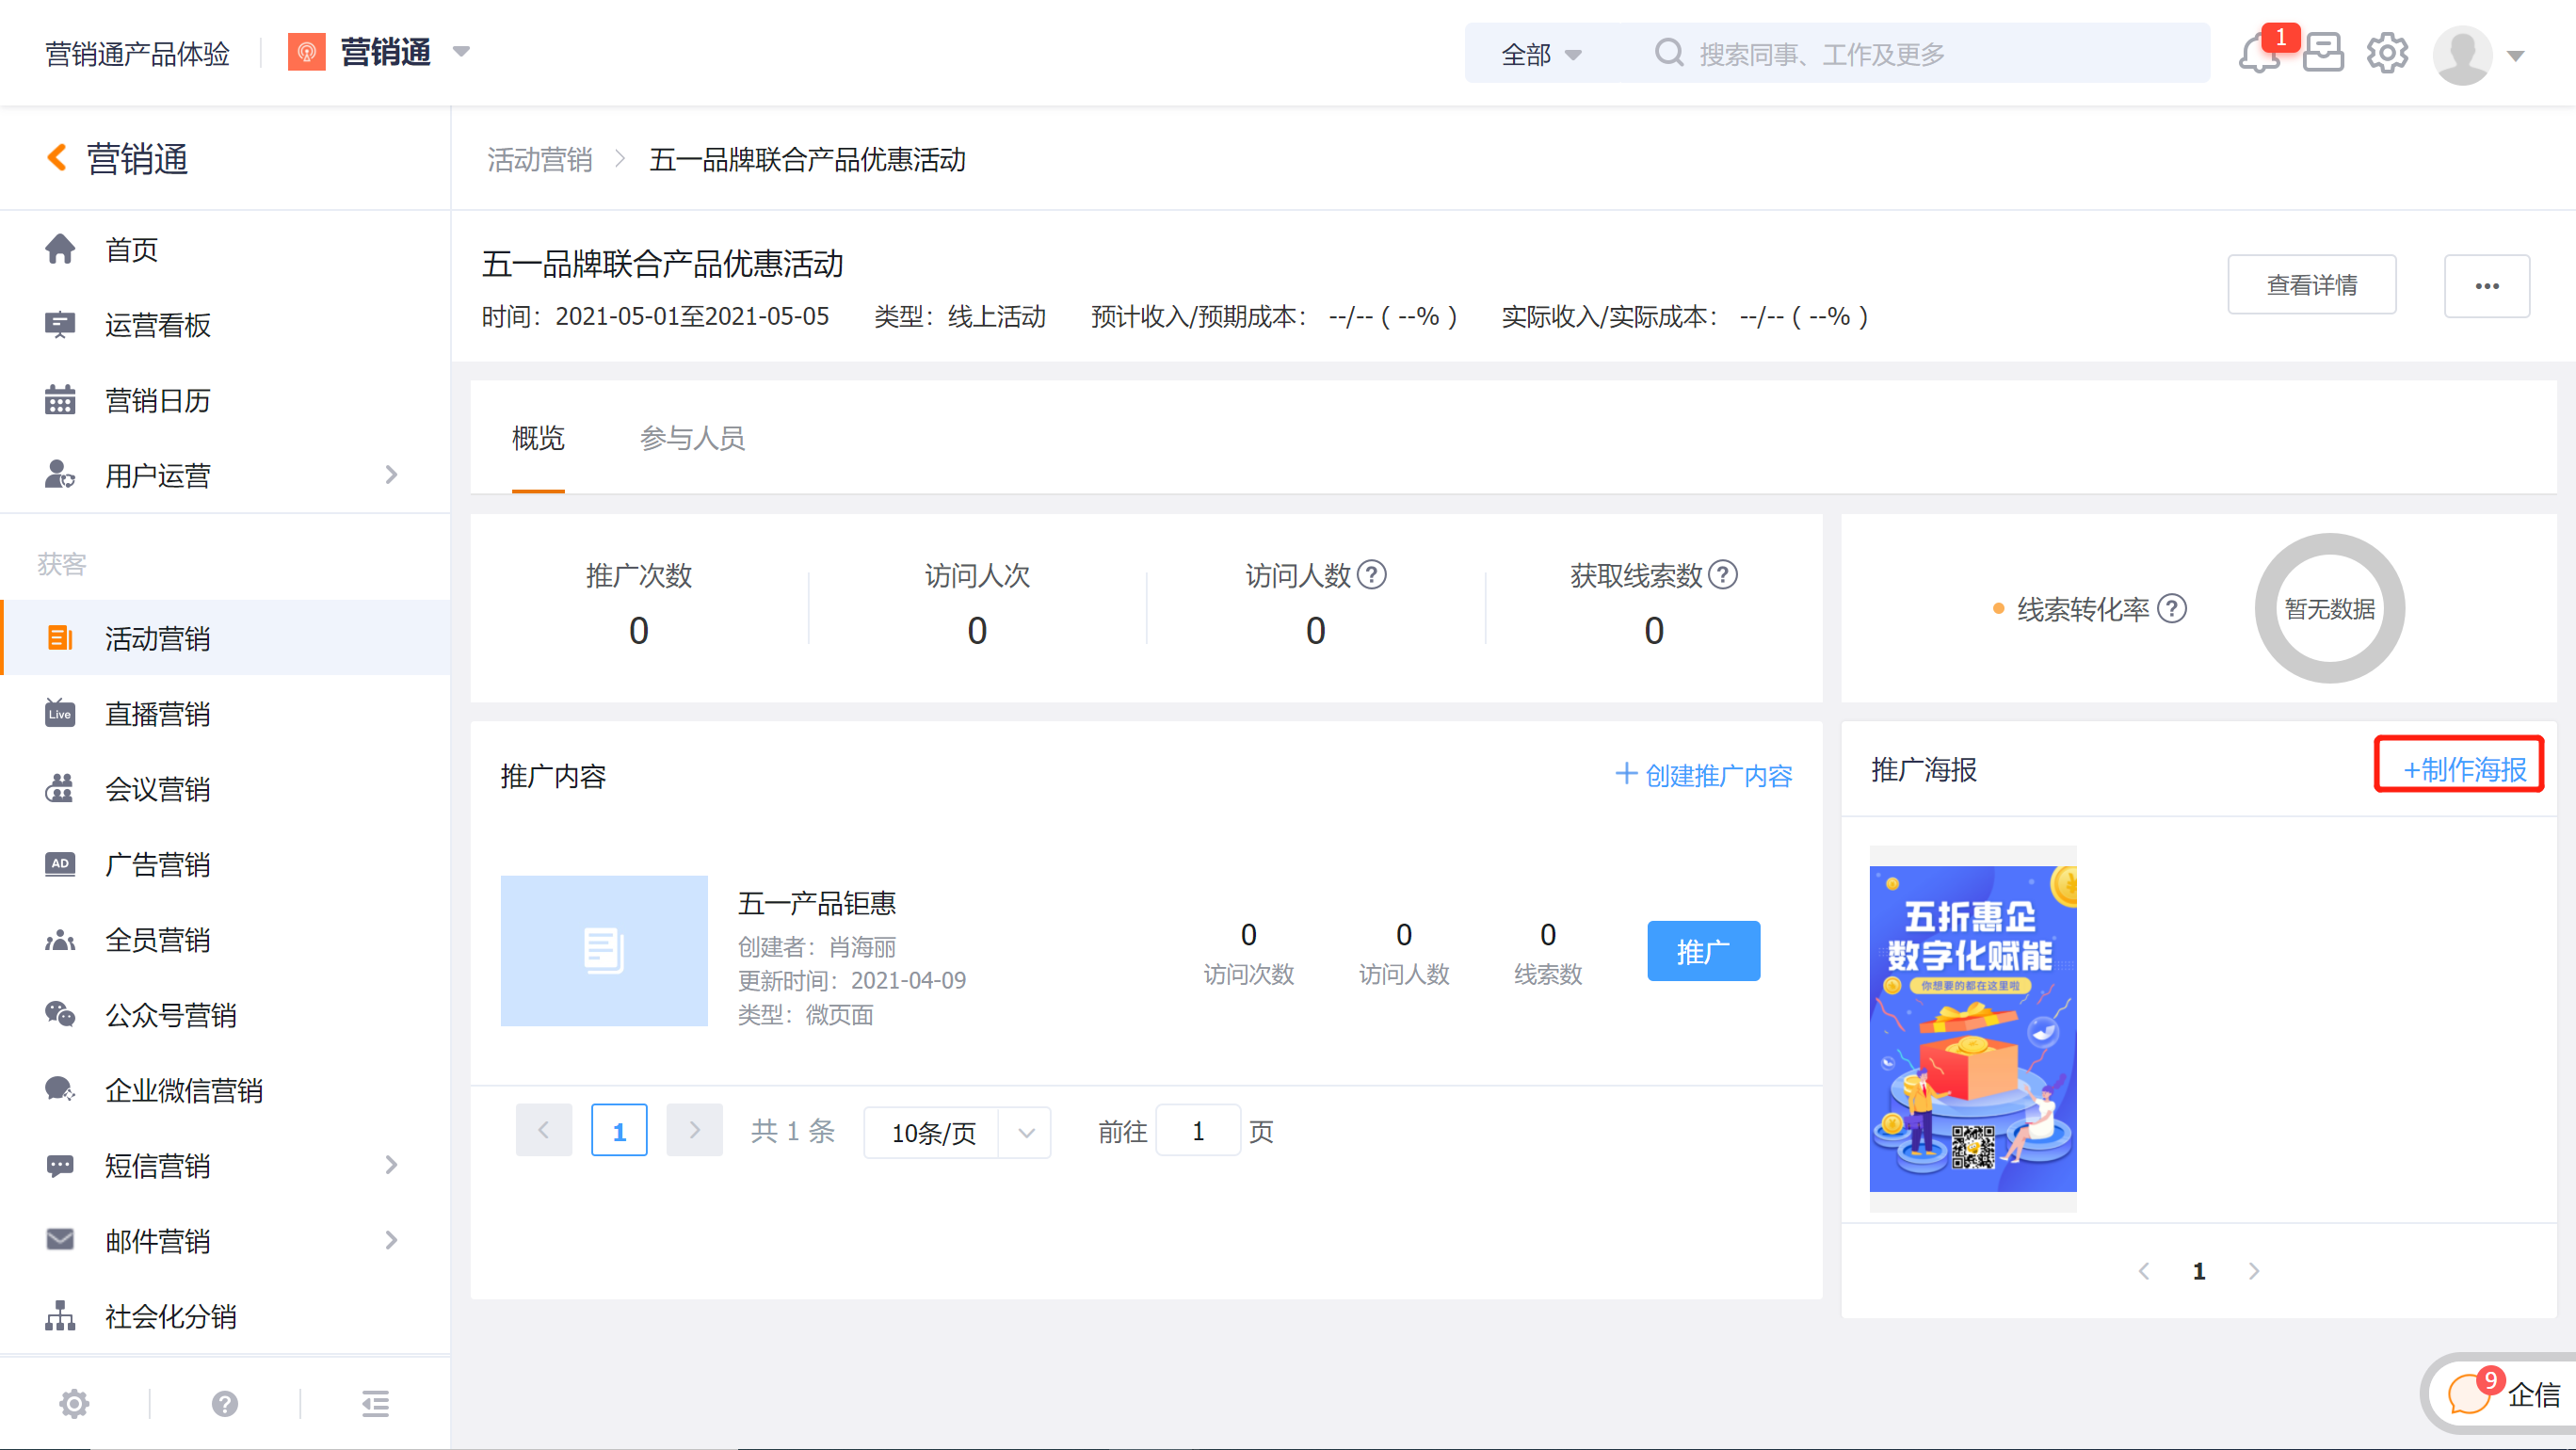
2) After uploading the local poster image or completing the poster making in the maker poster design tool, set the poster QR code to jump to the previously added campaign promotion content, and click [Save] to save the poster.
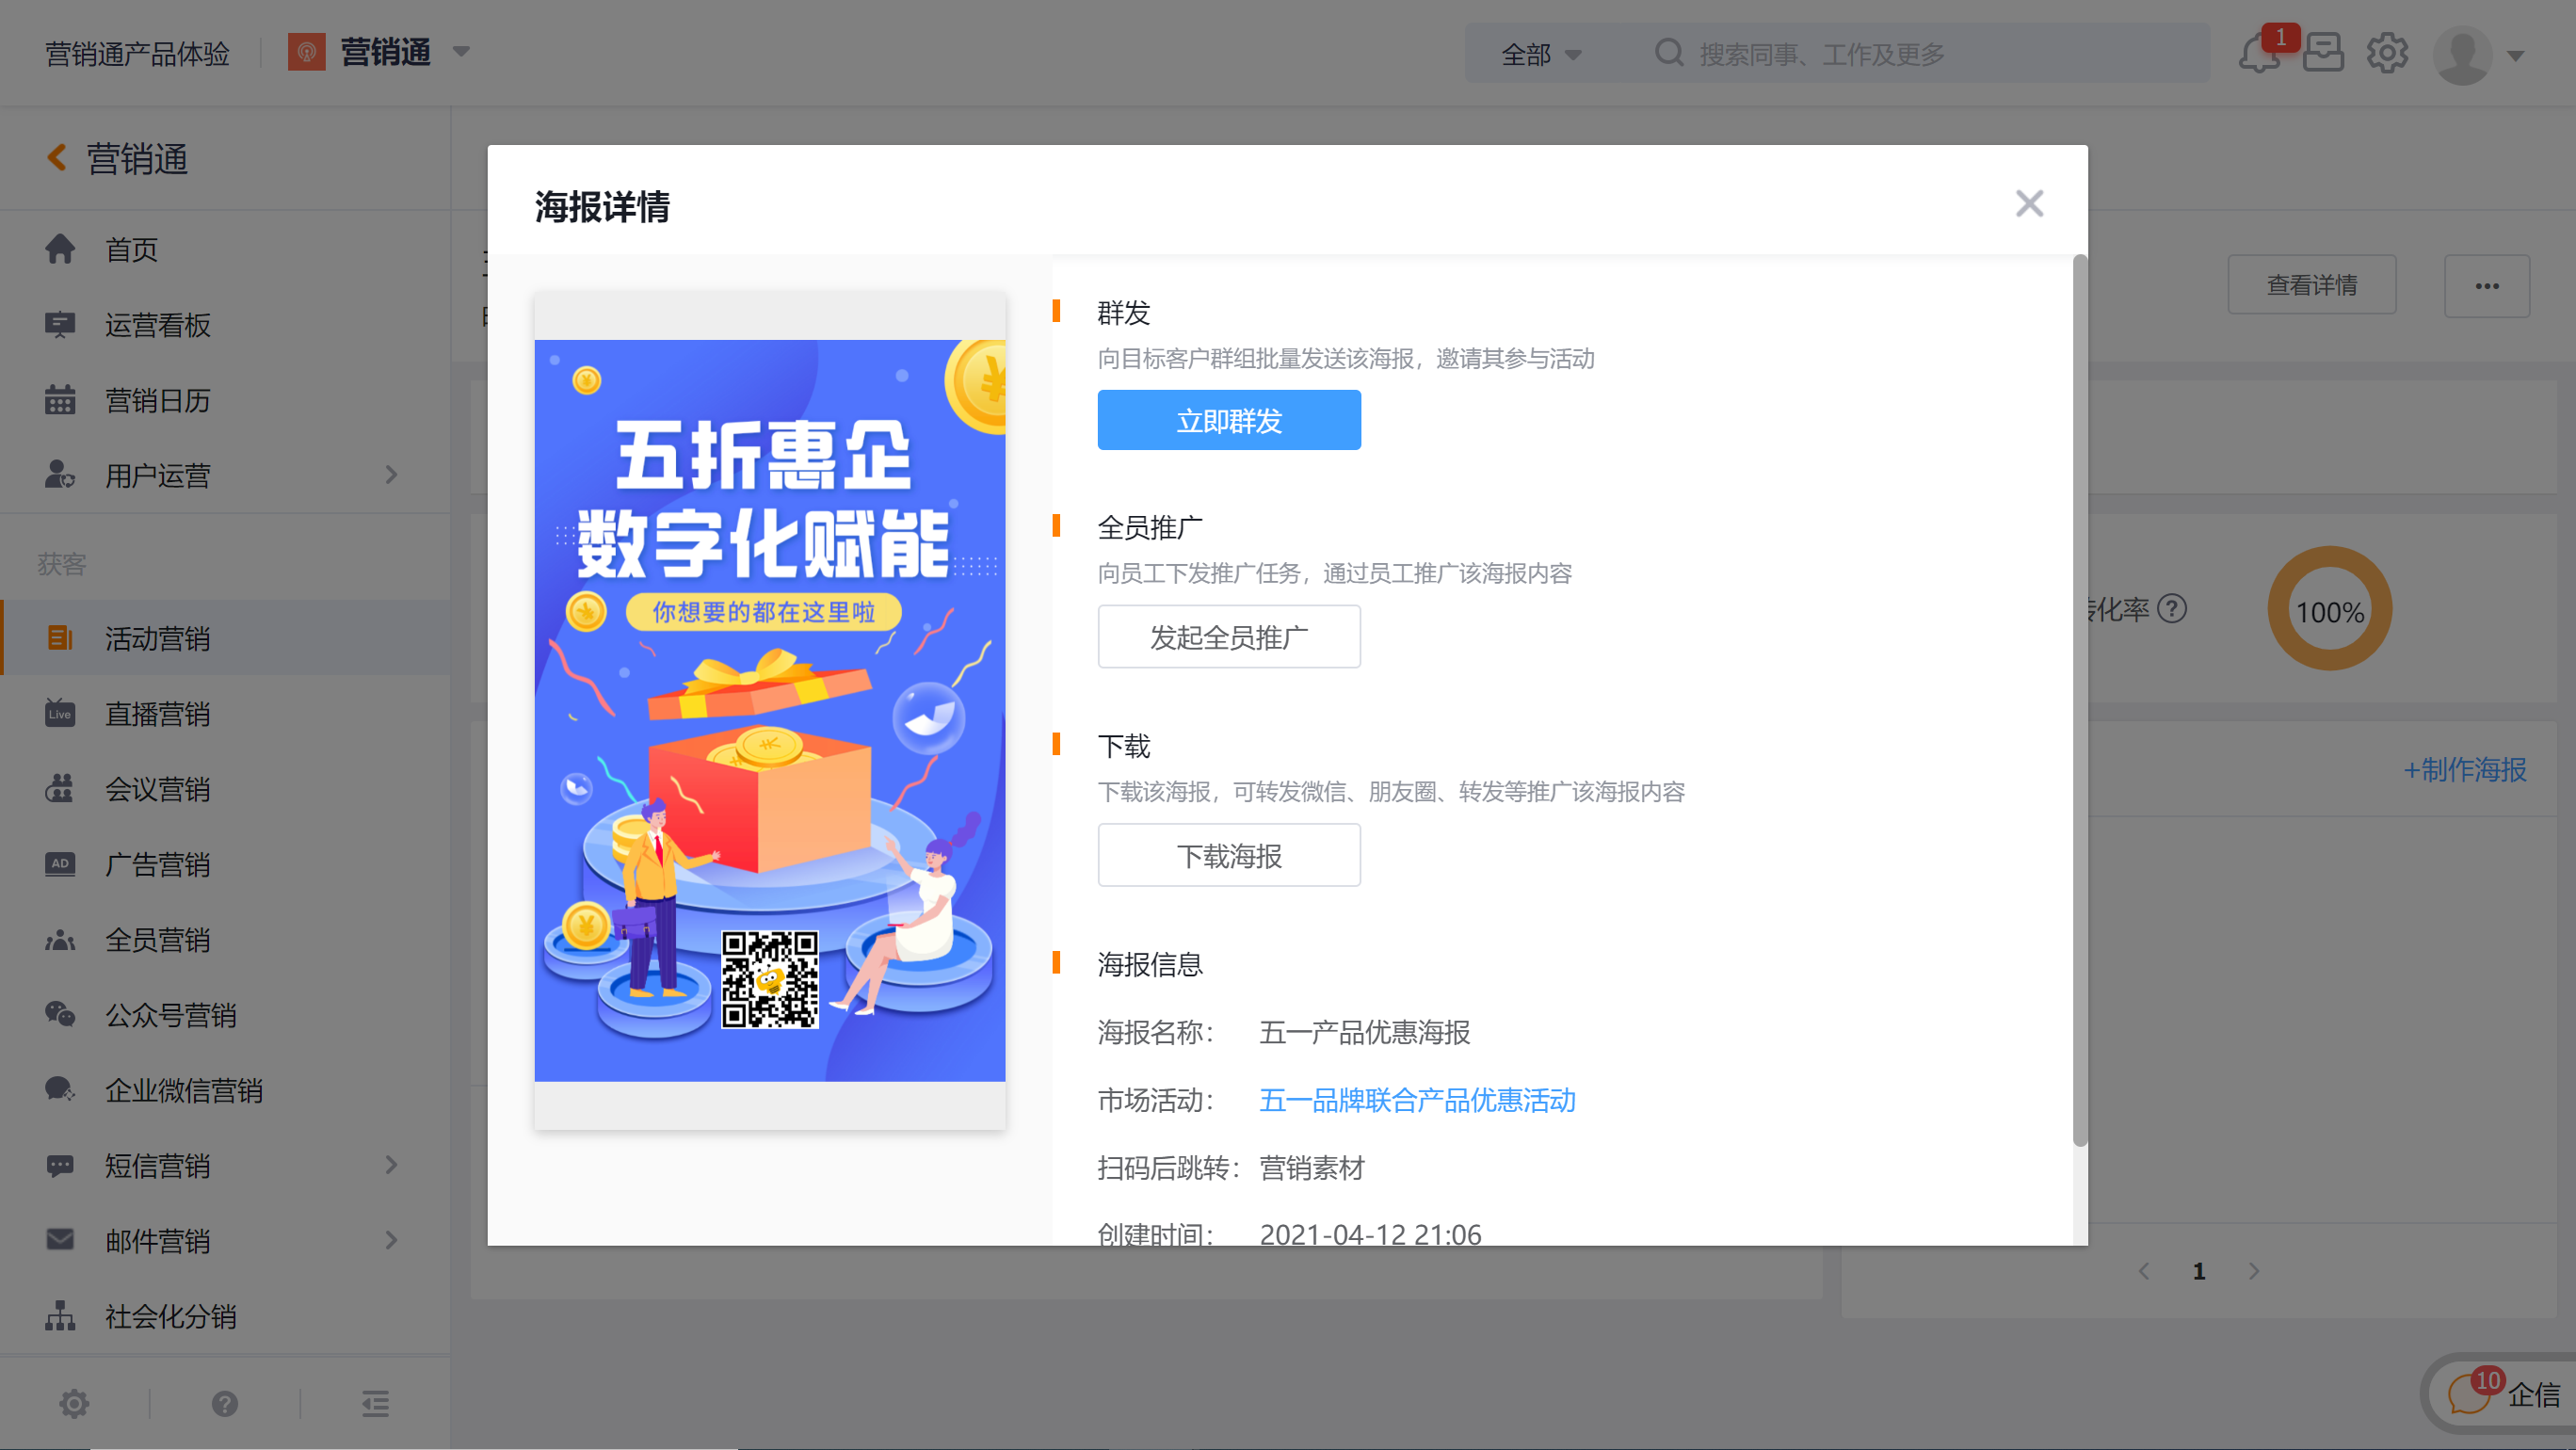
3) Move the mouse over the poster to see the [Promote] operation on the poster, and click [Promote] to promote the poster.
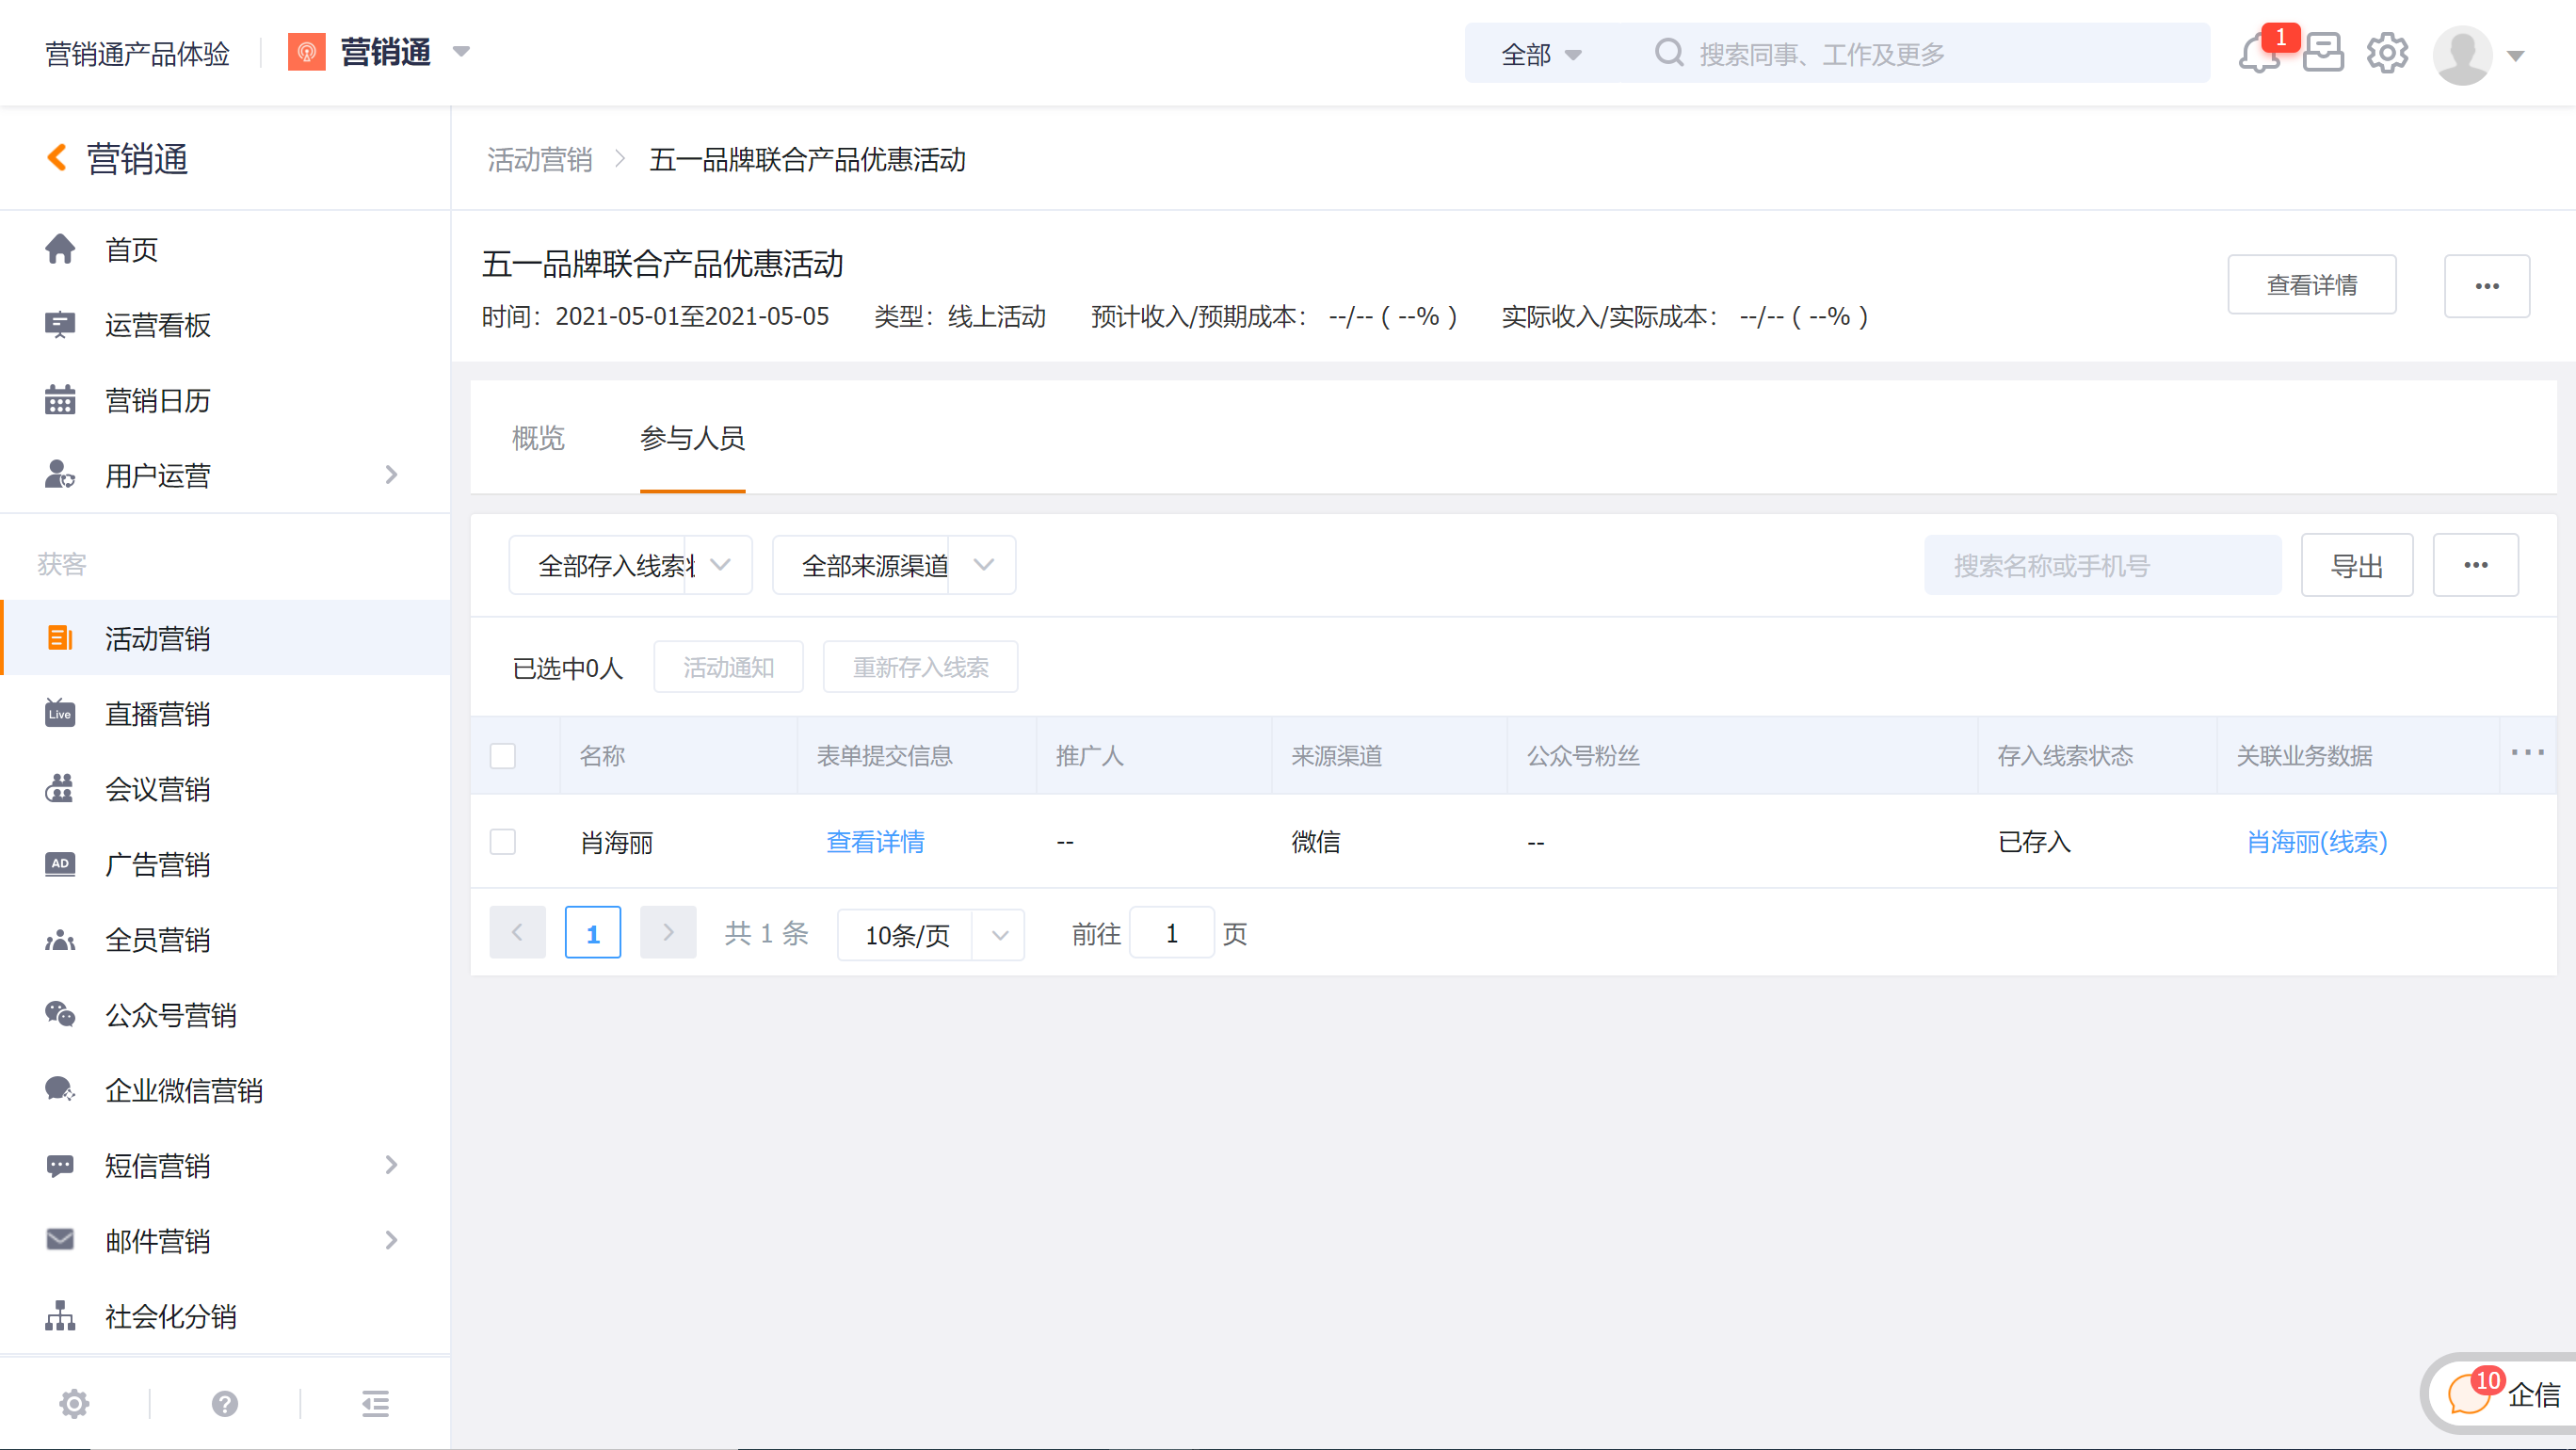
5. View Promotion Effect & Leads Collection of Campaign
Under the campaign, you can view the content dissemination effect and leads collection status of this campaign.
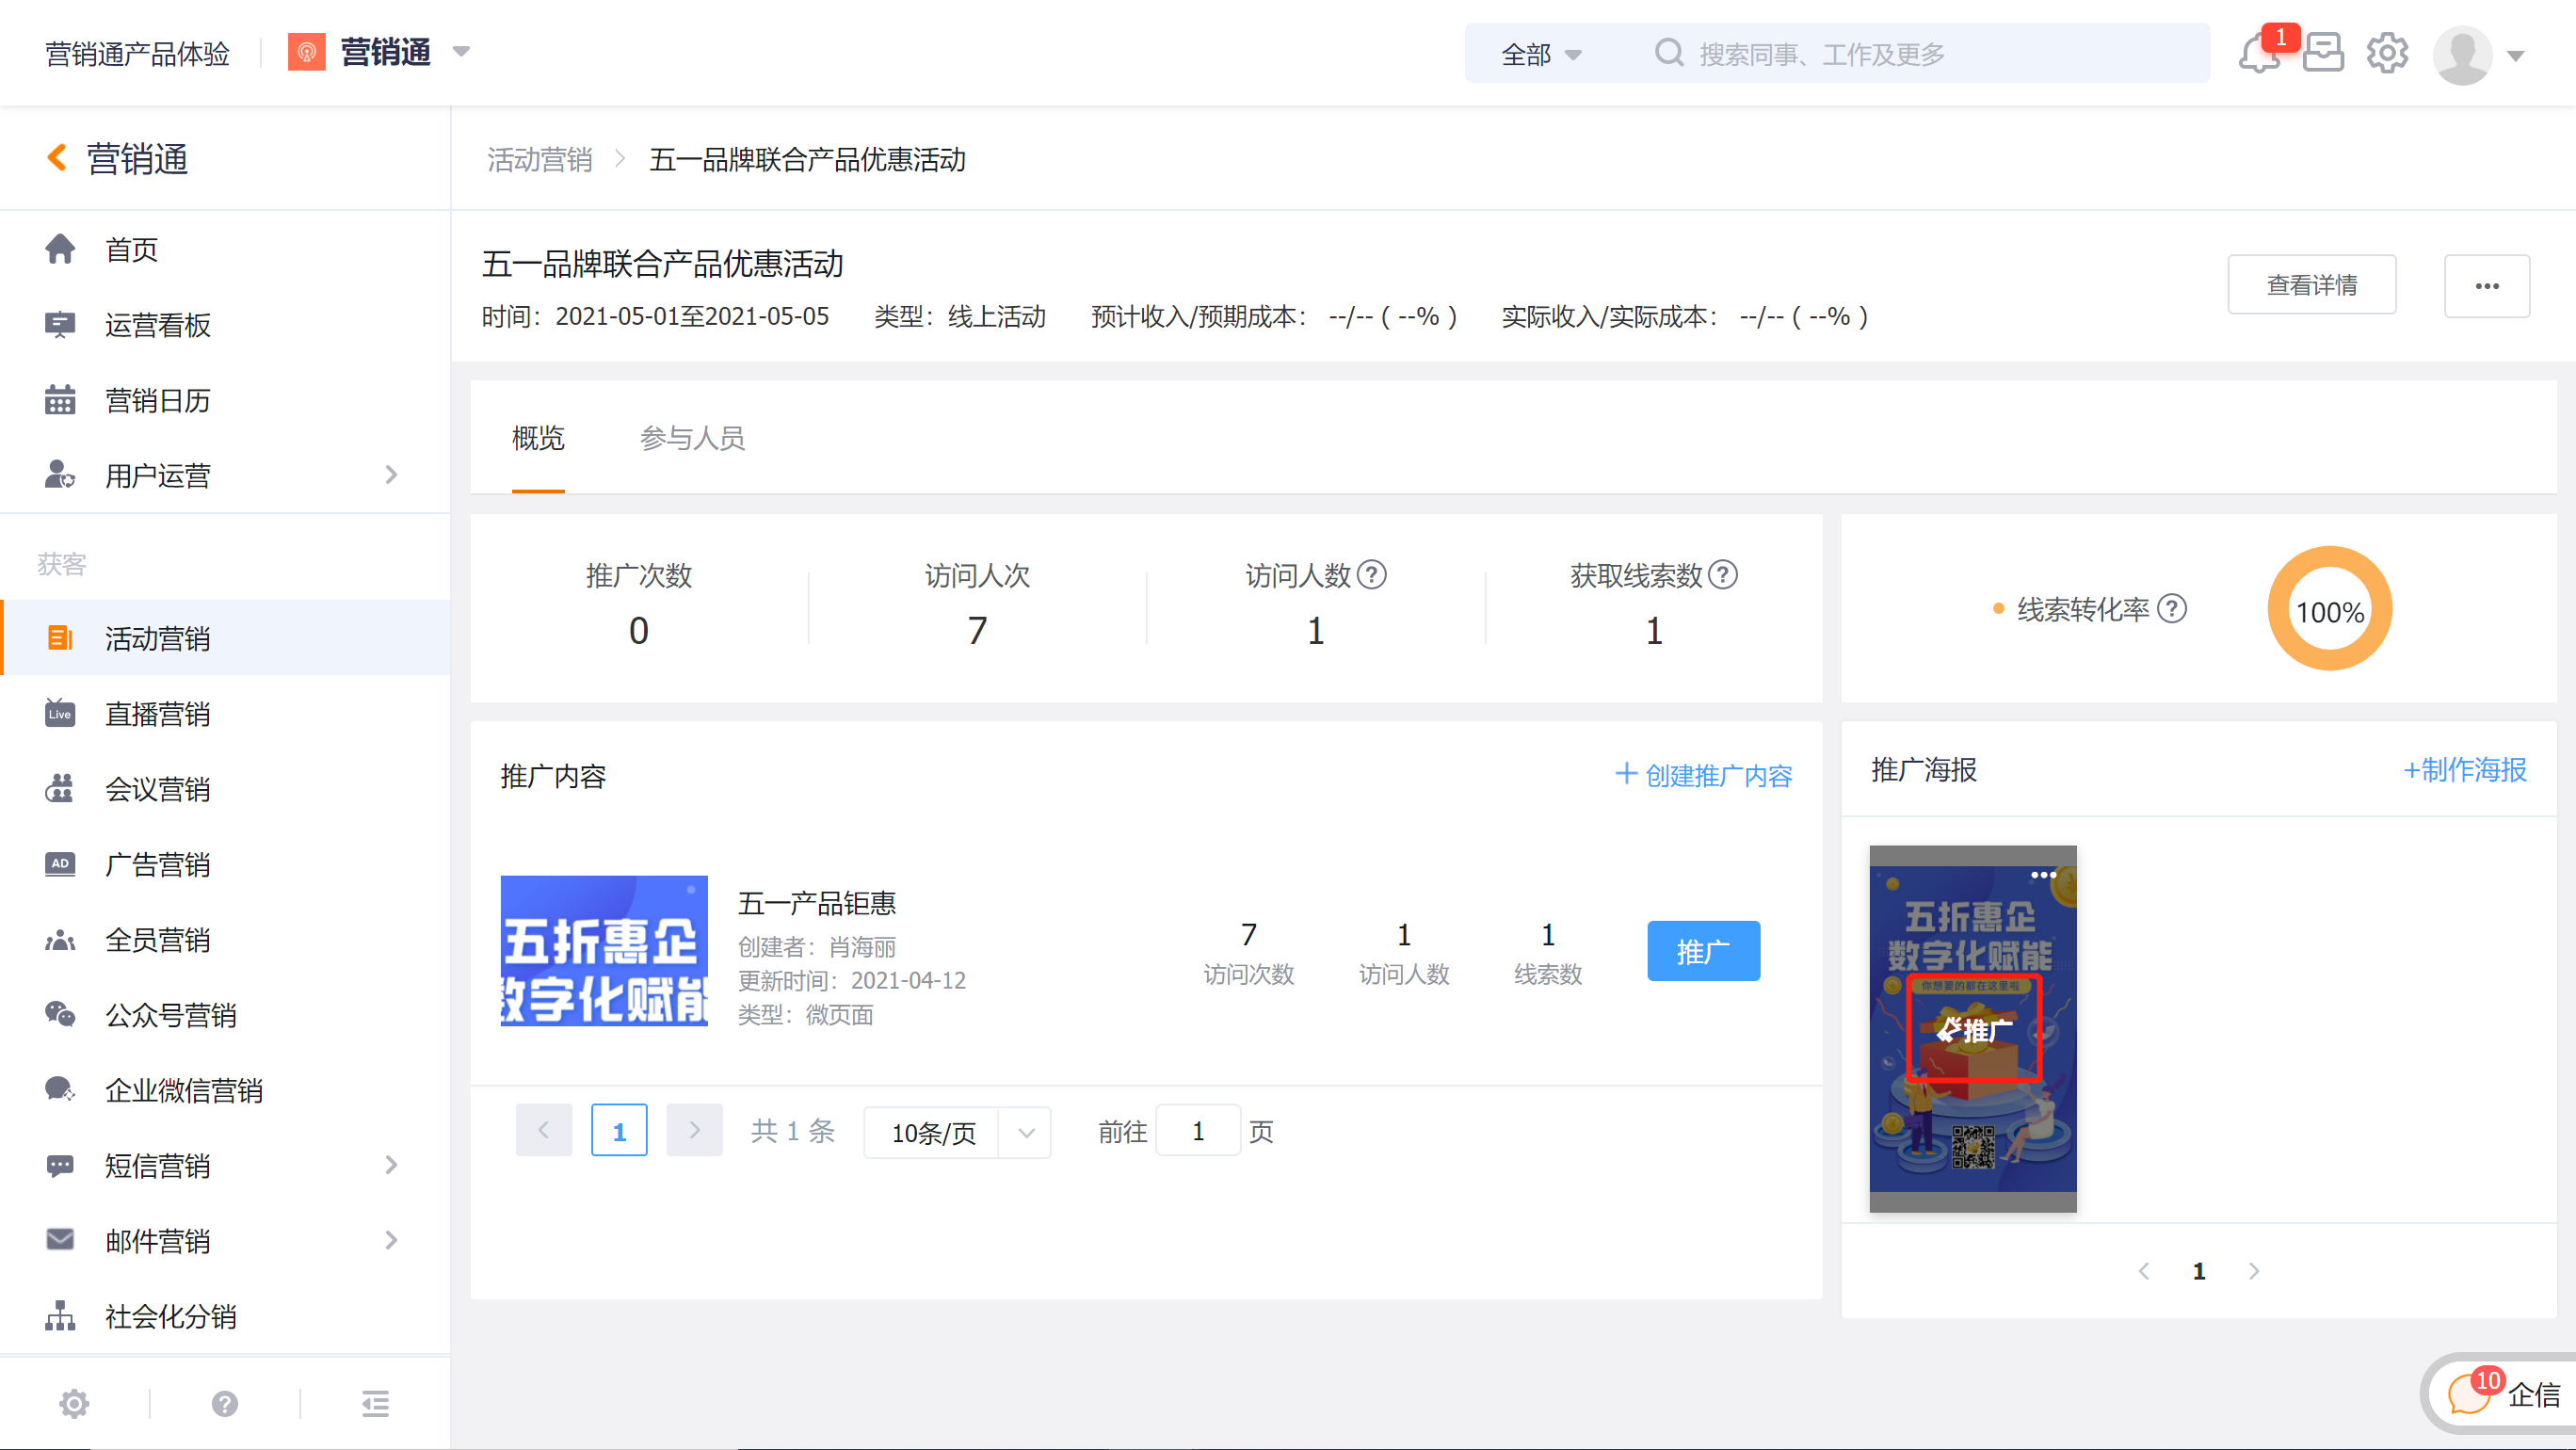
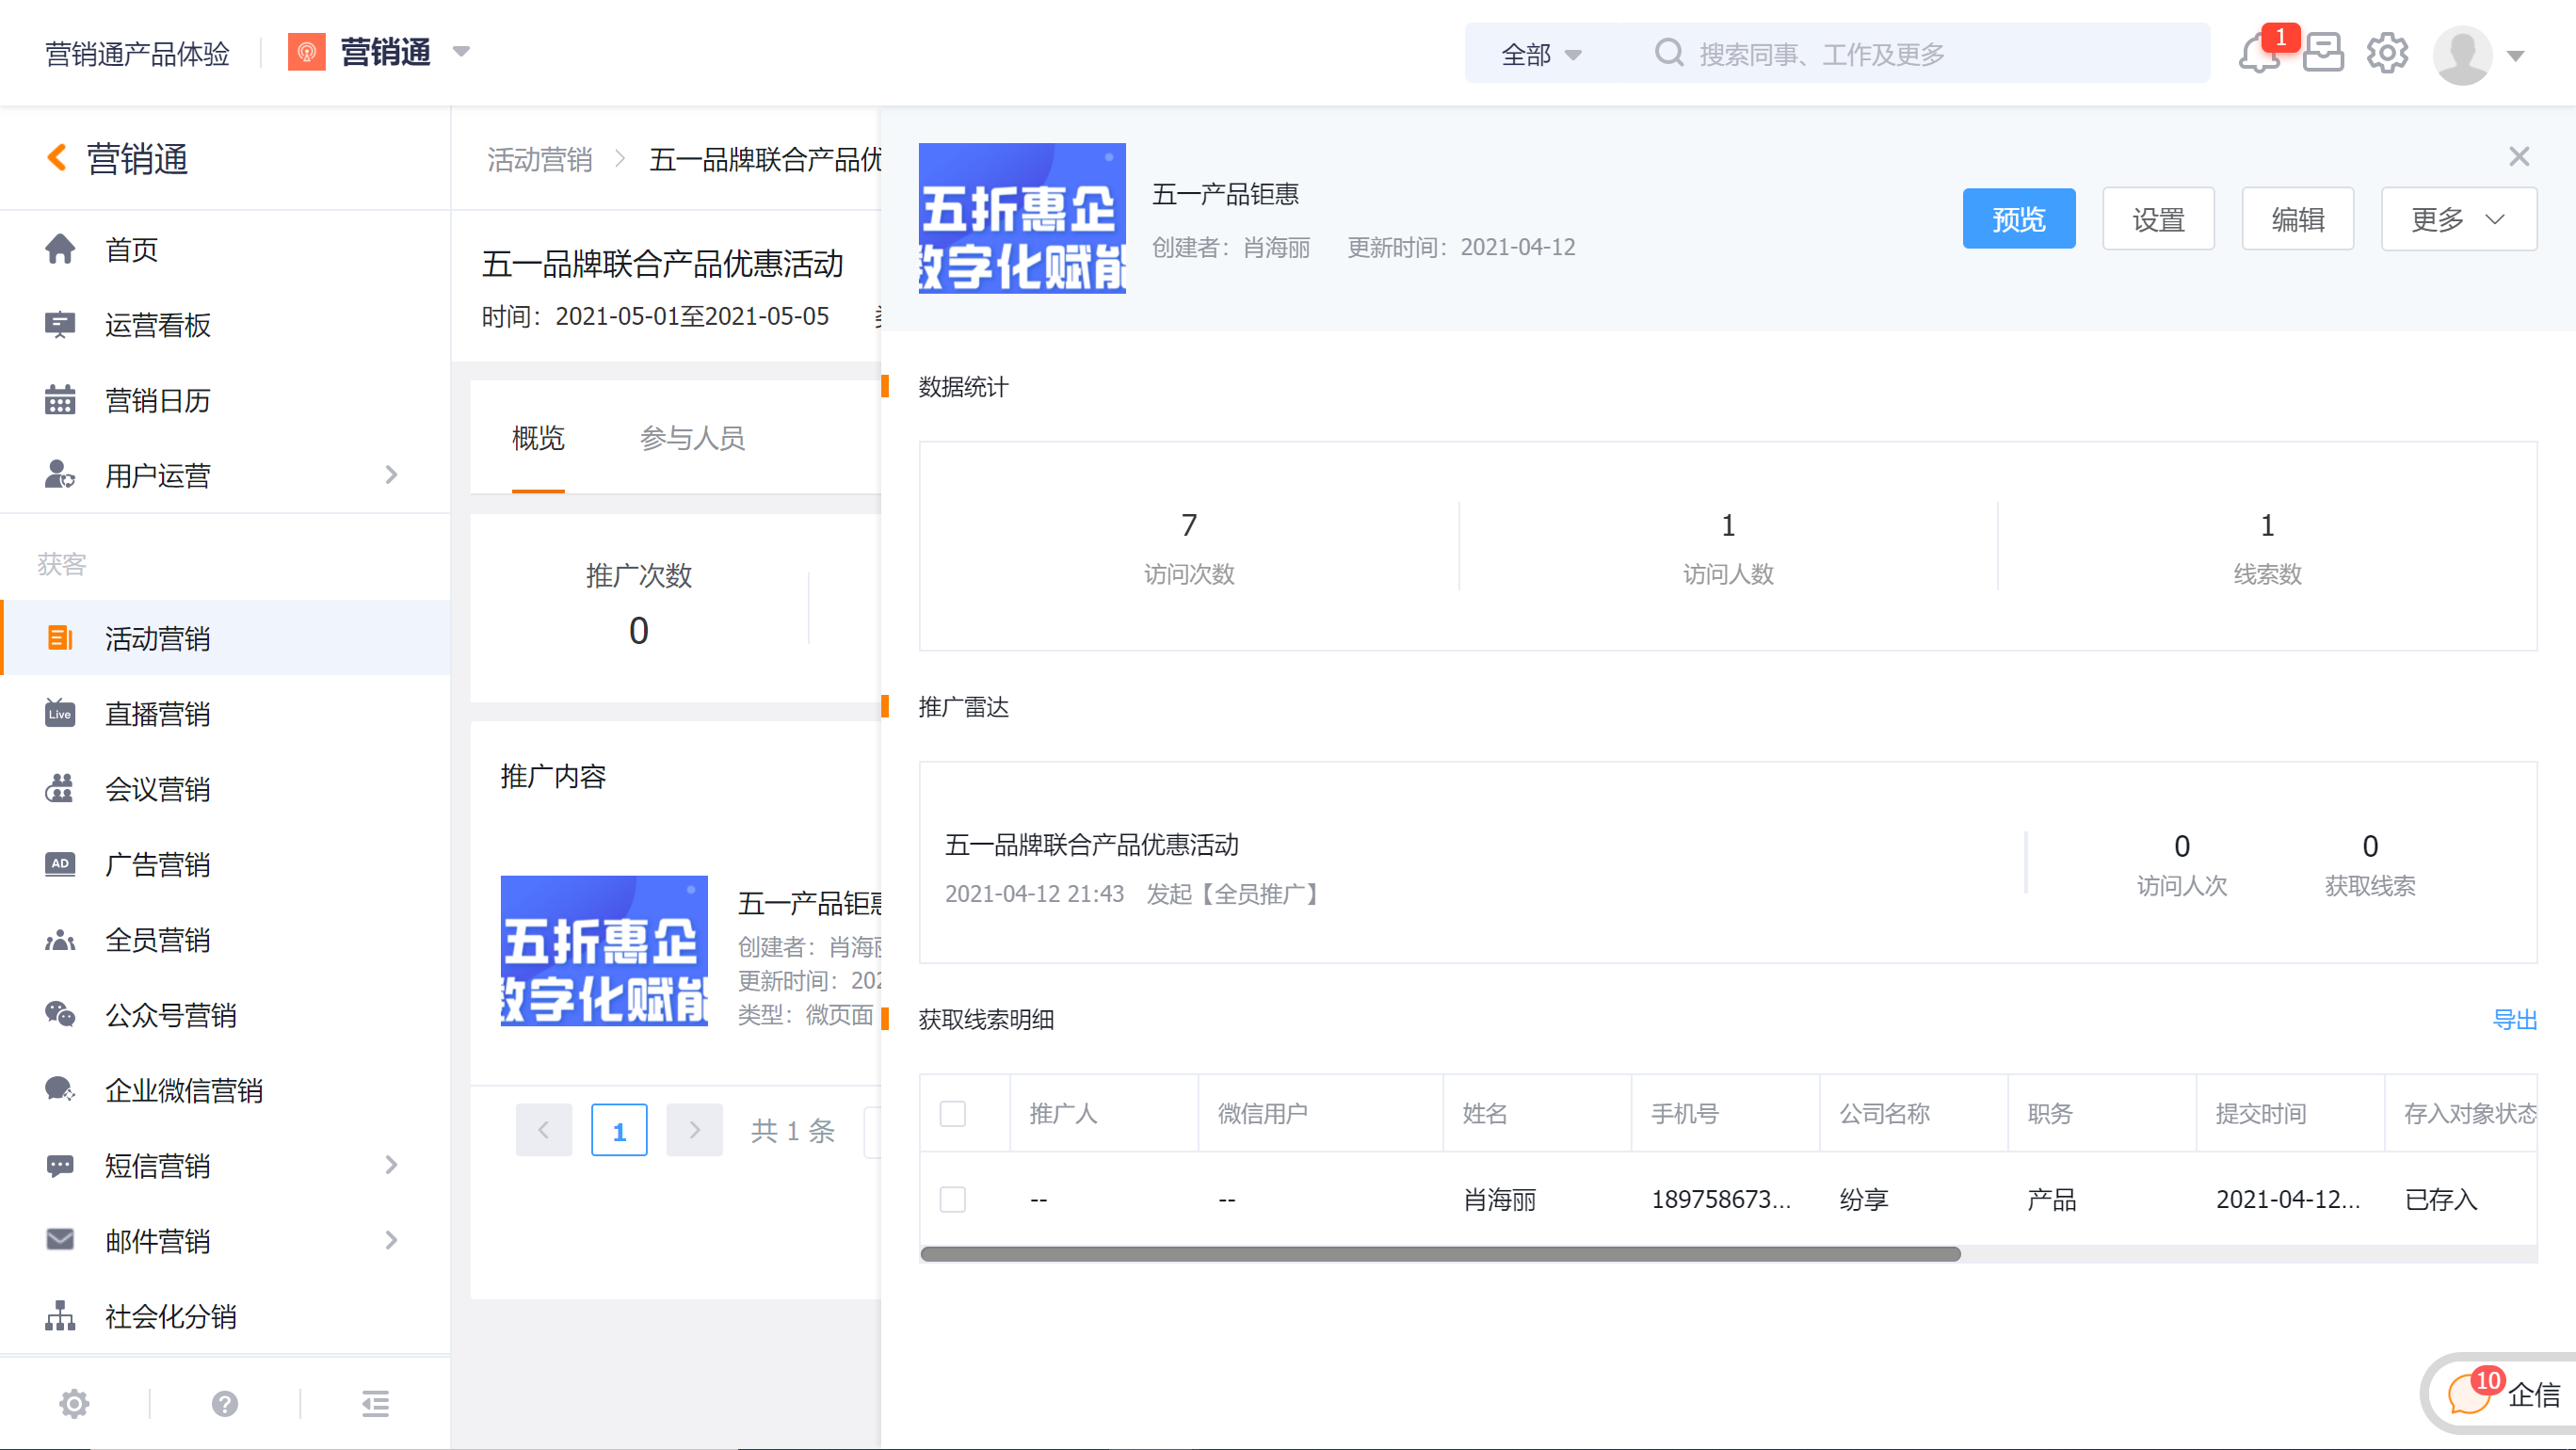
1) Click the title of the content in the promotion content to view the dissemination and retention status of a single campaign content.
2) In the list of participants, you can view the campaign participants after deduplication.
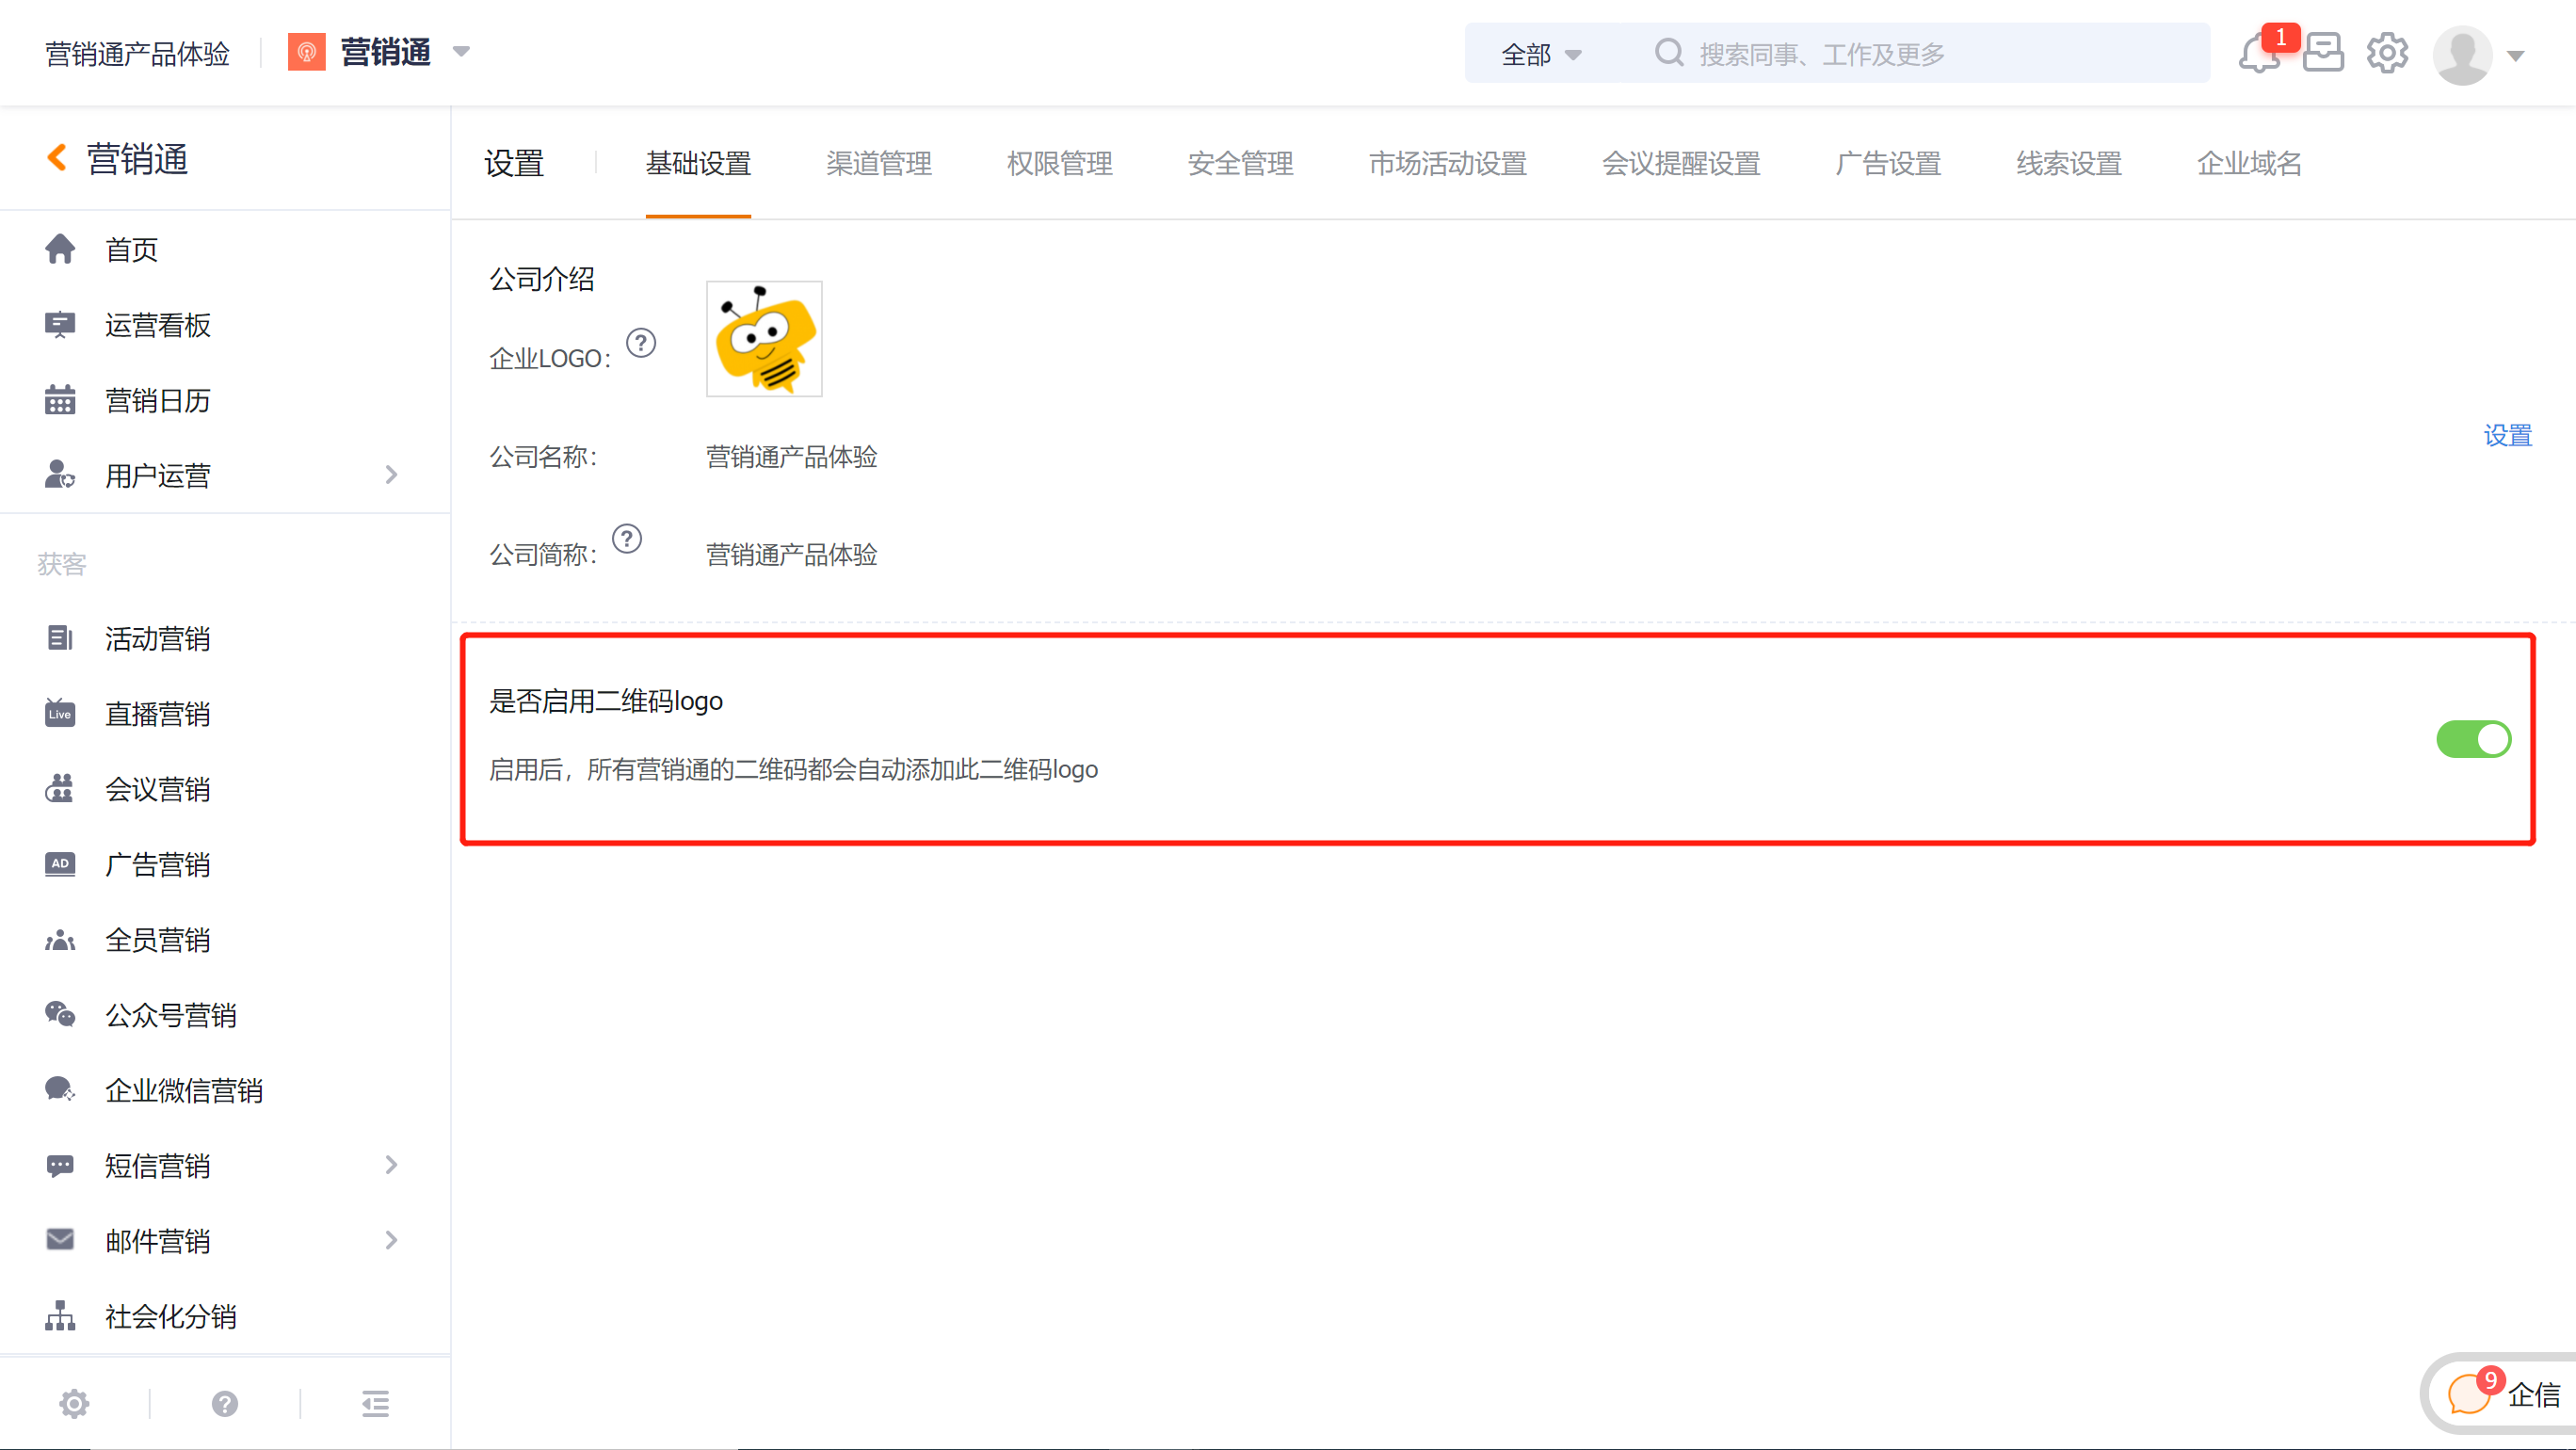
Tips
The content QR code and poster QR code can enable the logo. After enabling the QR code logo in [Settings], all the promotion QR codes in the E-Marketing will be added with the set logo.